

Around five years ago, our local organic stores began stocking black sesame paste, and it wasn’t long before I’d bought some and was brainstorming ways to use it. One of my most successful creations was a black sesame cake, which soon became so popular with my friends that I was making it all the time.
And at one point in the middle of my black sesame period, the workings of fate also brought a sweet little abandoned marble tabby kitten into my life. I didn’t name him for a while, preferring to watch his personality unfold and see what felt best, and in the meantime called him Baby (which I still often call him today). As he grew bigger I saw that the dark gray of his grownup fur was about the same color as a black sesame cake… and so his name was found! I decided to call him Sésame… pronounced say-zahm in the French way.


Today is his fifth birthday, so I thought I would share a recipe for the cake he was named for! And to pay further tribute to him I have prepared it using the zebra cake method, alternating between white sesame batter and black sesame batter. It takes a while to achieve this effect, but it’s very pretty I think. To save time, you can make larger stripes or just use one type of sesame paste for a solid color cake – gray if you use black sesame paste or tan/beige if you use white (plain) sesame paste.
This cake is very moist and has a unique flavor profile. The black sesame has fragrant nutty notes that are nicely complemented by the vanilla.
Striped sesame cake
Black sesame batter
- ¾ cup all-purpose flour
- ¼ cup granulated sugar
- ½ teaspoon baking soda
- ¼ teaspoon salt
- 1 heaping soup spoon black sesame paste
- 2 tablespoons neutral-flavored oil
- 2 teaspoons white vinegar or apple cider vinegar
- 1 teaspoon vanilla extract
- ½ cup cold water
White sesame batter
- ¾ cup all-purpose flour
- ¼ cup granulated sugar
- ½ teaspoon baking soda
- ¼ teaspoon salt
- 1 heaping soup spoon white (plain) sesame paste
- 2 tablespoons neutral-flavored oil
- 2 teaspoons white vinegar or apple cider vinegar
- 1 teaspoon vanilla extract
- ½ cup cold water
Equipment needed: one round cake pan (layer-cake type). Mine is 8 in. (200 mm) in diameter.


Begin by preparing your cake pan by oiling the bottom and sides or placing some baking paper in the bottom (as you can see in the photo, I like to leave a tab on one side to make it easier to pull the cake out). You’ll also need four small bowls – cereal or soup bowls are fine. Preheat your oven to 350°F/180°C.


Combine the dry ingredients (flour, sugar, baking soda and salt) for each of the batters in two separate bowls. Then do the same with the wet ingredients (sesame paste, oil, vinegar, vanilla and water). I used a heaping soup spoon of each sesame paste, as shown here. Be sure to mix the wet ingredients well so that the sesame paste is fully diluted.
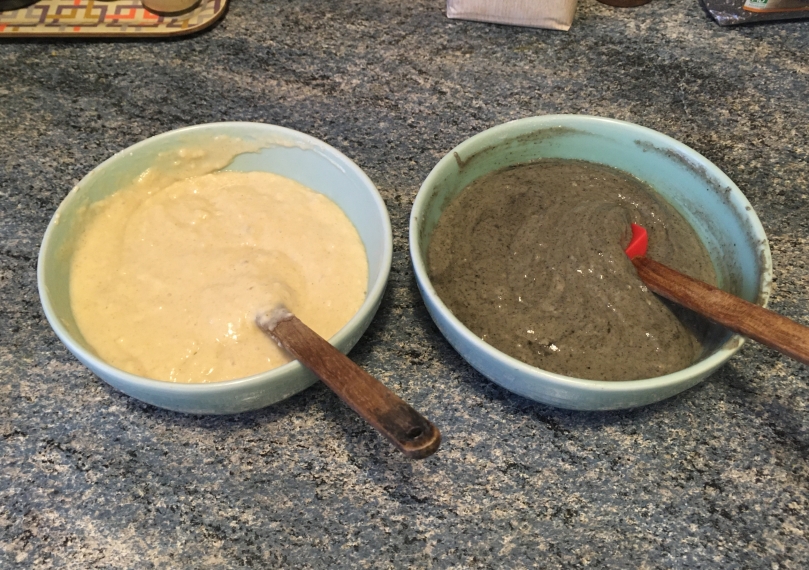
Add each wet mixture to a dry mixture and combine until you have a fairly smooth batter. Be careful not to overmix.

Now take your prepared baking dish and drop a spoonful of black sesame batter onto it, right in the center (if you want your stripes to be bigger, use a larger amount of batter than this).
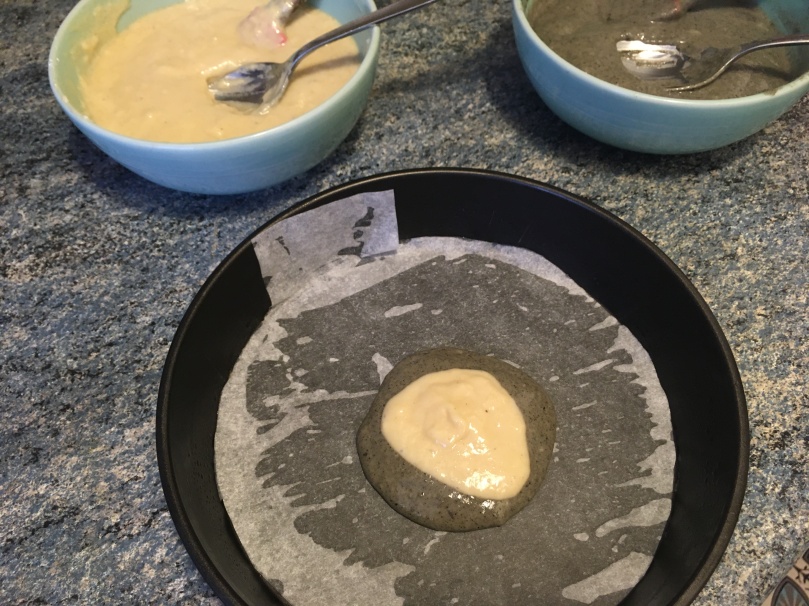
On top of it, place an equal amount of white sesame batter. As you’ll see, the bottom batter will spread out underneath it all on its own. Do not attempt to spread it yourself as this could damage the pattern.

Add another spoonful of the black sesame batter on top of that. Little by little, the batter will spread, forming stripes.
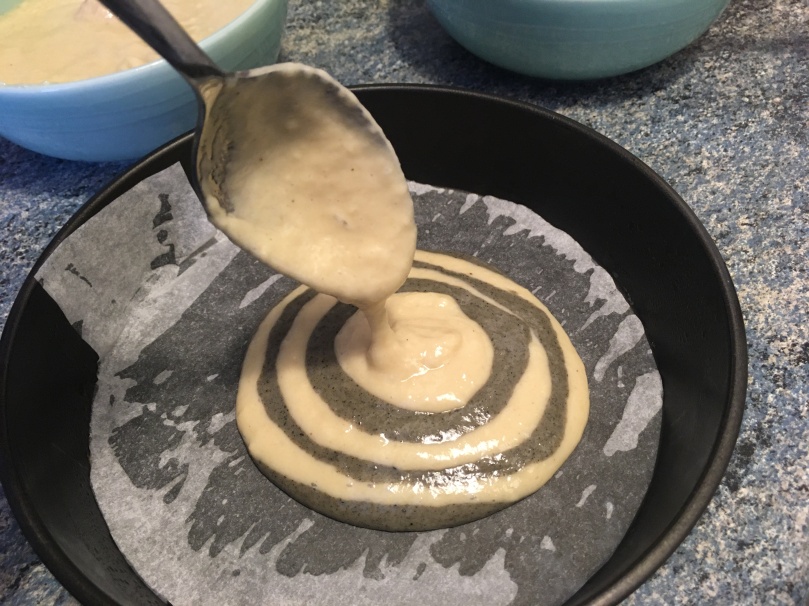
Keep going until you have used up all of both batters (note: it takes a while). At some point, the center of the design may shift over to one side of the pan, but this is fine. It happened to me twice with this cake, creating the design you can see in the photo below. The inside will still be full of stripes!

Place in the oven (preheated to 350°F/180°C) for 20-25 minutes.

Test for doneness by stabbing with a toothpick in various discreet spots (such as any naturally formed cracks). If the toothpick comes out with raw batter on it, put the cake back in the oven for another 5 minutes or more.

Allow the cake to fully cool before cutting into it. Since it’s quite moist due to the sesame paste, it needs to set a bit or the pattern could get smooshed.

As you can see, the inside is wonderfully striped and marbled!


The other side of that same piece looks like this – a bit more marbled than striped.

Enjoy!
Variations: if you don’t have sesame paste or can’t find the black kind, you can make this same zebra-patterned cake in a chocolate and vanilla (or matcha and vanilla, etc.) version.

The cake looks so beautiful and delicious!!
And happy birthday to Sesame! 🍰
LikeLiked by 1 person
Thank you! ❤
LikeLike
This looks beautiful. Is there a “print” button somewhere (that I obviously haven’t found) that will just print the text without photos?
LikeLike
Thanks so much! And sorry, no I don’t have that feature yet but I’ll look into installing it. In the meantime, I can send you a one-page PDF version of the ingredients and instructions if you like. 🙂
LikeLike
[…] sixth birthday, I’ve prepared another black sesame recipe for you! (Last year it was a striped sesame cake). But it’s actually two recipes in one – first, we’ll be making a Japanese sweet […]
LikeLike