Lemon cheesecake nice cream

Today I’m sharing one of my very favorite summertime recipes. With just two ingredients, it’s also one of the simplest I know. Meet nice cream, the banana-based alternative to ice cream.

Not only is it yummy, but since it’s nothing but fruit you can eat it anytime, any day, all day everyday if you want to. Well, within reason! My point is that it’s a lot better for you than most ice creams out there (even vegan ones), since it has no added sugar, oil or saturated fat and of course is dairy-free and gluten-free. It’s actually everything-free except banana and lemon. Because the banana is so sweet, you don’t need to add sweetener of any kind.

Why “nice” cream? I’m not the inventor of the term, but I would imagine it’s because compared to cows’ milk ice cream, it’s nicer to animals and also the planet. No cows get involved and the carbon footprint of bananas is lower than that of milk even when transportation is factored in. For each kg of cow’s milk produced, 2.4 kg of CO2 equivalent are generated, while for 1 kg of bananas it’s just 480 g (one-fifth the amount for milk). But nice cream also just tastes nice, so maybe that’s why?

I find it makes a great breakfast on a really hot day. In fact, it’s better as a breakfast or an afternoon treat than as a dessert because it’s much more filling than traditional ice cream or sorbet.

The possibilities for variations are vast – you can add just about anything to the banana base to flavor it. Try mixing in frozen berries, cocoa powder or even a touch of your favorite liqueur (Bailey’s Almande would be great!). See other suggestions at the end of this post.

The flavor I’m presenting today is one that I call “lemon cheesecake” because although it contains nothing but banana and lemon, something about these two things together reminds me of cheesecake. Try it for yourself and see if you agree.

Lemon cheesecake nice cream

Makes 2 servings (the equivalent of around 3 scoops each)

  • 3 medium to large ripe bananas (not overly ripe)
  • 1 medium to large lemon

Equipment needed: freezer, food processor with an “S” blade (a regular blender will probably not be enough), lemon juicer, freezer-safe tupperware container.

Slice 3 bananas into rounds and put them in a plastic tupperware container with a lid. Place in your freezer for several hours or, ideally, overnight.

When ready to make your nice cream (the same day it will be served), remove the bananas from the freezer, take off the tupperware lid and let the bananas thaw for at least 10 minutes (less time on a really hot day, more time on a cooler day). Do not skip this step – rock-solid frozen banana pieces can damage your food processor.

Once the bananas have thawed a bit, transfer them to your food processor. Juice your lemon until you have about 1/3 cup (79 ml) juice. You can also use a bit less or a bit more, depending how much you like lemon.

Pour the juice into the food processor and begin processing. At first it may seem like nothing is happening but the bananas will eventually all blend into a wonderfully smooth texture. If you’re using a small food processor like mine, you may need to stop once or twice and scrape down the sides to move the remaining whole pieces toward the blade.

You’ll end up with a perfect “soft serve” nice cream and can enjoy it as is. Simply transfer to a bowl and, if desired, garnish with (non-frozen) fruit. This is how I eat it most of the time, when not taking photos for a blog post that is. 😉

nice cream 17

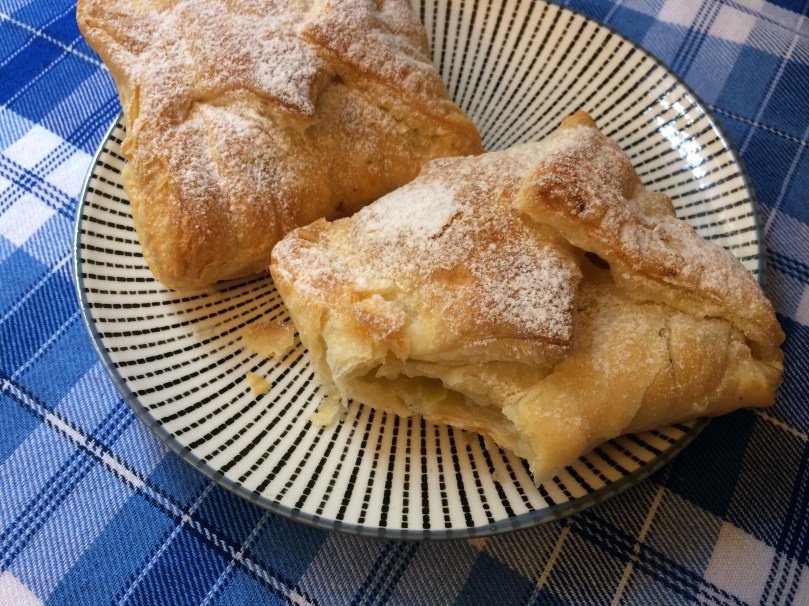
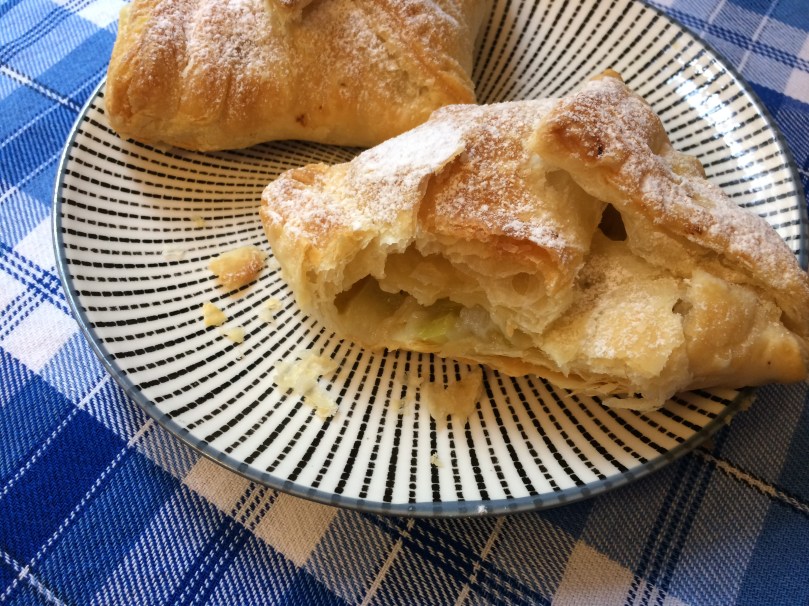
But if you want to impress a guest and present the nice cream in scoop form like in the photos below, transfer the blended nice cream back into your same tupperware container and freeze it again for an hour or so. It’s best to still serve the prepared nice cream the same day, without leaving it in the freezer for too long since it can become too solid and impossible to scoop.

When plating up the nice cream, either in soft serve or scooped form, keep in mind that it melts pretty fast! You may want to refrigerate the serving bowls ahead of time to slow down the melting process.

With any number of sweltering days ahead of us still this summer, this nice cream just might become your new best friend. Enjoy!

nice cream 20

nice cream 19

photo_2019-07-11_11-12-47

Variations:

  1. Freeze some berries along with the bananas for a “fruit cocktail” nice cream (you’ll still need bananas for a base).
  2. Process the bananas with lime juice, mint leaves and a touch of rum for a “tropical island drink” nice cream.
  3. Add peanut butter to the bananas while blending, and incorporate some chocolate chunks at the end. Serve with salted pecans.Lots of other flavors are possible! Let me know in the comments what you try and how it goes.

Apple-miso turnovers

In recent months, I’ve spent less and less time on Facebook, having noticed that I was lingering too long there, focusing on trivial or not-so-positive posts to the detriment of more productive activities. But I like to pop in every once in a while since there are also cool people to meet and useful discoveries to make. The other week, mindlessly trawling the site in spite of myself, I struck gold: Elizabeth Andoh had just posted her recipes for lemon and ginger flavored miso sauces designed to go with fruit. As a big fan of sweet and salty combinations—mango with lime juice and salt, chocolate with fleur de sel, popcorn tossed with both salt and sugar—I was immediately on board. I wasted no time in making these sauces and trying them paired with figs and nectarines, the fruit available at the time. Delicious.

Soon enough, my brain began trying to work out other ways to use these sauces, and I landed upon the idea of adding flavored miso to a fruit pastry! I tried it in apple turnovers, long a homemade breakfast mainstay for me, and loved the result. I understand if that sounds strange to you, but bear with me here. The miso adds a whole new dimension to the panorama of flavors, highlighting the delicate sweetness of the fruit with the contrast of its earthy, salty umami notes. The result is also vaguely reminiscent of a cheesy taste, so you could think of it as a Japanese cheese danish. Also, remember that French woman in Pulp Fiction who enjoys a slice of cheese on her pie?

I should note that I also tried using straight up white miso to see if it would be enough on its own, but it proved too salty and harsh. In the recipe below, the lemon and sugar tame it enough that it nicely complements the apple without overshadowing it.

I adapted Andoh’s recipe somewhat, using a little less miso and a bit more sugar, but feel free to try her exact version too. For the saké, I found a small “one cup” size at my local Asian grocery store for 2 euros (see photo below). If you can’t get saké, you can substitute dry white wine.

For the crust, I used a ready-made vegan puff pastry, or flaky pastry. This is known as pâte feuilletée here in France, and it’s easy to find in an accidentally vegan version even at mainstream stores like Franprix (Herta brand) or else at organic shops. Just check the ingredients as there’s also a version made with butter. In North America, you can look for this one by Pepperidge Farm. Or, if you’re inclined, you can make your own. If puff pastry is impossible to find or too daunting to make, you can use regular pie crust dough (pâte brisée in France). It just won’t be quite as light or flaky.

Note that puff pastry is not the same thing as filo/phyllo dough. You could try that too if you’re experienced at using this kind of dough, but the results may not be quite the same as what you see here.

There are two ways to shape the turnovers: cutting the pastry dough into four triangles and folding the corners inward to form a sort of square parcel (as I have done here), or cutting the pastry into circles and folding them in half to make the traditional turnover shape. For this, you can trace circles onto the dough with an overturned bowl or use a pastry mold. With this approach, some scraps of dough will be left over, but you can press them together for enough dough to make one more turnover.

For greatest efficiency, I recommend preparing the miso sauce the day before. Then all you’ll have to do in the morning is chop up an apple, take the dough out of the fridge and put everything together.

Sweet lemony miso sauce

Makes about ¼ cup sauce

¼ cup shiro miso (white miso) paste
1 tablespoon saké or dry white wine
3 teaspoons granulated sugar, or more to taste
1 tablespoon water
1 teaspoon freshly grated lemon zest

miso sake

The miso and saké that I used. When buying the miso, check the ingredients to be sure it isn’t the kind with added bonito (fish) flakes. That wouldn’t be the nicest thing in a sweet pastry!

IMG_2727 x

Combine the miso, saké and sugar in a small saucepan. Before placing over heat, stir the ingredients until thoroughly mixed. Incorporate the water and half of the lemon zest. Cook over low to medium heat for a few minutes, stirring constantly, until the mixture is glossy and you can see the bottom of the pan after scraping the spatula across it.

IMG_2729 x

Add the remaining lemon zest, stir to incorporate, and taste the mixture. Add more sugar if you like, but don’t worry too much about the saltiness because you’ll be using only a small amount of it, and when the flavors of the apple, lemon and pastry come together, everything gets balanced out. Also remember that you can always add more powdered sugar to the baked pastry at the end if need be.

If the sauce seems too thick, you can add another tiny bit of water. Ideally, you want it to have the consistency of ketchup.

Remove from heat and allow to cool. If not using right away in the turnovers, cover tightly and store in the refrigerator (will keep for 3-4 weeks).

Apple-miso turnovers

Makes 4 turnovers

1 puff pastry dough, 12 in. (32 cm) in diameter (purchased or homemade)
1 medium-sized tart apple (I used Granny Smith)
A few teaspoons all-purpose or whole-wheat flour
A few squeezes lemon juice
1 teaspoon granulated sugar
A few teaspoons powdered sugar (icing sugar)

Begin by preheating your oven to 350°F (180°C).

IMG_3342 xIMG_3344 x

Chop your apple into small cubes (cut into thin slices, then again crossways to dice).

IMG_3347 x

Transfer to a small bowl. Add a few teaspoons of flour and a teaspoon of granulated sugar to the mix until the apple is uniformly coated. The flour helps the apple stick together and become more of a substantial filling.

IMG_3348 x

Add a few squeezes of fresh lemon juice to the mixture (it adds tartness and keeps the apple from browning) and stir to combine.

IMG_3353 x.JPG

Cut your pastry into four equal parts by running a butter knife gently down and across it. Note: if you have made your own pastry, be sure to roll it out thin enough.

IMG_3354 xIMG_3355 x

Spread a teaspoon or so of the sweet lemony sauce across each section of pastry. The amount you use will depend on how adventurous you feel or how much you like miso. You can also experiment by using more sauce in some of the turnovers and less (or none) in others, to compare. If you do this, try to mark them in some way so you remember which ones are which after they come out of the oven.

If any of the miso sauce remains, use it as a dip for whatever fruit you happen to have on hand.

IMG_3356 x

Now deposit a few spoonfuls of the diced apple on the center of the prepared pastry section. Be careful not to use too much apple, as you might have to stretch the dough to cover it and this could cause the pastry to break.

IMG_3357 x

Fold the side points in toward the center.

IMG_3358 x

Fold the bottom edge upward.

IMG_3359 x

Fold the top point downward.

IMG_3360 x

Press down on all the edges to seal so the filling doesn’t escape as the turnover bakes. I usually use the tines of a fork for this. It also results in a nice pattern, although with flaky crust the pattern doesn’t always remain after baking.

IMG_3361 xIMG_3362 x

Cut a few slits somewhere on the top of the turnover to allow hot air to escape during the baking.

IMG_3365 x

Your turnovers are ready to go in the oven! Bake at 350°F (180°C) for about 20 minutes, until the tops are golden brown.

IMG_3371 x

They’ll look kind of like this when they’re done.

IMG_3374 x

I like to decorate the tops with a bit of powdered sugar (icing sugar) sifted over the top (do this while the turnovers are still warm).

IMG_3383 x.JPG

Allow to cool a bit, but not too long—they’re yummiest when warm! The ones you save for later can be popped into the oven for a few minutes at the same temperature (350°F/180°C) to warm them up before serving.

IMG_3390 x

Brew yourself some coffee or tea and enjoy!

IMG_3393 x

Yum!

I hope you love these turnovers as much as I did. Let me know in the comments if you try them!

Variations: Use any other fruit that happens to be in season and seems likely to go well with the miso sauce (pear or persimmon in the winter, peach or nectarine in the summer). Experiment with the gingery red miso sauce too. Decorate the tops of the pastries with slivered almonds (brush a bit of apricot jam on top first, then apply the almond slivers, all before baking).

French fruit cheesecake

Here’s a light dessert for the springtime—a vegan version of gâteau au fromage blanc, a traditional French recipe. Fromage blanc (literally “white cheese”) is a soft cheese that we don’t have in the US, so it’s hard to describe, but it’s said to be something between sour cream and cream cheese. The soft texture of silken tofu, with some structure from blended cashews, recreates this consistency for a 100% plant-based version. Lemon zest and juice add to the tartness of the fromage blanc, while the vanilla and almond extracts balance the overall flavor.

This crustless cheesecake is sometimes made with fruit (cherries, raspberries, apple, pear or stonefruit). Here, I have used canned apricots.

I used a springform cheesecake mold that measures 8 in. (20 cm) in diameter, and the cake was 1 in. (2.5 cm) high. A larger mold could be used, for a lower cake, or a smaller mold for a higher cake.

French fruit cheesecake

Ingredients

  • 14 oz (400 g) silken tofu
  • 1 cup (125 g) raw cashews, soaked for at least 2 hours
  • zest of one lemon (about 1 tablespoon, loosely filled)
  • juice of one lemon (about 3½ tablespoons)
  • 6 tablespoons (55 g) arrowroot powder or cornstarch
  • 6 tablespoons agave syrup, rice syrup or maple syrup
  • 3 teaspoons vanilla extract
  • ½ teaspoon almond extract
  • 14 oz (410 g) can apricots (8 oz/235 g after draining), or other fruit

Equipment needed: food processor or high-power blender, springform cake mold or pie dish

FullSizeRender

The first thing to do is begin soaking your cashews—at least two hours before you plan to start making the cake. If you have a high-power blender or food processor, the soaking time can be shorter.

IMG_8289

When the cashews have finished soaking, zest your lemon and then juice it. Be sure to zest it before cutting it open!

IMG_8304

Drain and rinse the cashews, then blend them in your food processor/blender together with the lemon zest and juice until smooth. Add the silken tofu and blend until it is fully incorporated.

IMG_8305

Add the remaining ingredients (arrowroot powder, agave syrup, vanilla and almond extracts) and combine well, either in the food processor/blender or whisking in a bowl.

IMG_8313

To keep the cake from sticking to the cake pan, cut a circle of baking paper to fit into the bottom.

IMG_8315

Spread a bit of vegetable oil on the bottom of the pan to get the baking paper to stick.

IMG_8317

Fill the pan with the batter.

IMG_8321IMG_8323

Add the apricot halves, cut side down, pressing down gently to partially submerge. Avoid getting batter onto the exposed part of the fruit.

IMG_8330

Bake at 347°F (175°C) for 40 minutes. It will look something something like this, with a solid, dry surface and a golden-brown color around the edges.

IMG_8331

if you’d like to brown the top a bit more, move the cake to the top-most oven rack and broil for about 3 minutes—but stay close to the oven and check every minute or so to avoid over-browning. Given my oven’s small size, I did not increase the temperature for the broiling step, but if you have a standard-size oven you might need to.

Allow the cake to cool fully before unmolding. You will notice that the height reduces as the cake settles. Gently slide a knife with a thin blade around the edges before releasing the spring mold. To remove the cake from the metal cake bottom, first gently slide a thin spatula around the edges between the cake bottom and the paper, then using another spatula, cake server or flat, wide knife (or similar—I used a long wooden crêpe flipper) on the other side, carefully lift the cake from the bottom and transfer to a serving plate.

IMG_8347IMG_8463

IMG_8506b

When slicing the cake, be sure to remove the paper from the bottom.

IMG_8522b

IMG_8524IMG_8578

new01b

If you have some powdered sugar, you can dust the top with it for a pretty effect. Do this just before serving as the sugar tends to melt into the top after a little while.

new05b

supervisor

Finally, please enjoy this behind-the-scenes shot of Sésame supervising the photo shoot. 🙂

Variations: Use a combination of fruits in different colors for a range of flavors and a more colorful appearance. Serve with a fruit sauce and/or whipped coconut cream.

Basic sweet crêpes

Every year on February 2nd, while people in the US and Canada are worrying about groundhogs, people in France celebrate Candlemas, mainly (these days) by eating crêpes. That sounds like a more worthwhile endeavor to me!

La Chandeleur, or la fête des chandelles is celebrated at church with special services, but in the family home, candles are lit and people determine the luck they will have over the coming year by attempting to flip a crêpe in a frying pan (without a spatula!) while holding a coin in their other hand. If it lands back in the pan correctly, good things will come their way over the next 12 months. I’m not sure, in reality, how many people still engage in this crêpe-flipping tradition, but the crêpe-eating part has been confirmed! Candlemas is also the last feast day of the Christmas cycle, and if you had a manger scene up as part of your decorations, Candlemas is when you’re supposed to finally put it away. I suspect this may also apply to my bouquet of pine branches, which may still (ahem) be in a vase on my table…

And so, in honor of La Chandeleur (coming up in just a few days!), I bring you an easy plant-based crêpe recipe, translated and adapted from this French one.

I happen to own an electric crêpe-maker, which is VERY useful anytime you want to make pancakes of any kind, as it automatically heats to the perfect temperature for that sort of thing, reducing the risk of burning (other electric crêpe-makers may have different settings, however). It came with two essential wooden utensils: a batter-spreader and a spatula or crêpe-flipper. If you’ve ever had a crêpe made at one of those street stands in France, you may have seen these utensils before. My crêpe-maker is second-hand, and judging from the harvest-gold color of its base, may have been made in the 70s or early 80s. If so, planned obsolescence was not factored into its design, as it’s still going strong. You can still get similar devices in France online or at department stores (ask to see the crêpières), and the wooden utensils can be purchased separately too.

My favorite way to eat crêpes is with a little lemon juice and sugar. Right now, bergamots (a citrus fruit similar to a lemon, but darker in color and sweeter) are in season—I picked some up today from my local farmers’ market, the Marché Bio des Batignolles. If you’ve never tried them before, bergamots are quite the experience. They have an indescribable scent that you will recognize immediately if you’re a fan of Earl Grey tea, which is made with essential oil of bergamot. For a touch of sweetness, I added a few sprinkles of coconut sugar, but you can use any sugar you like, or even a liquid sweetener such as maple syrup.

Crêpes are most often served as a dessert but also make for a nice breakfast item if you have servants and own a smoking jacket. Any extras should be packed away in an airtight container (rolled up or folded into fourths) or on a plate covered with plastic wrap.

Basic sweet crêpes

Makes 10-11 crêpes

Ingredients

  • 2 cups (250 g) flour (T65 type in France)
  • 3 tablespoons (30 g) cornstarch
  • 2 tablespoons raw sugar
  • pinch salt
  • 2 cups plus 2 tablespoons (500 ml) non-dairy milk
  • 2 teaspoons vanilla extract or a packet of vanilla sugar
  • 2 tablespoons neutral-tasting oil such as canola

Crêpe garnishes (see also the variations at the end of this post)

  • 1 or 2 lemons (bergamot or regular)
  • several tablespoons of sugar (coconut, raw or other)

Equipment needed: large bowl, whisk, ladle, spatula for flipping crêpes, electric crêpe-maker or wide and shallow frying pan

img_5504bimg_5508b

Combine all the dry ingredients and mix well with the whisk to incorporate.

img_5512b

Add the non-dairy milk, vanilla and oil and incorporate briefly with your whisk, stirring only long enough for it to reach a smooth consistency. Be careful not to overmix. Set the bowl aside and allow the batter to sit for 45-50 minutes, but (IMPORTANT) no longer than that or it will get too thick and you won’t be able to achieve the thin, somewhat elastic result you’re going for.

img_5523b

When the resting time is up and your crêpe-maker or frying pan is hot enough, pour one ladleful of batter onto the surface (if your frying pan doesn’t have a non-stick surface, you may need a splash of oil). Working quickly, spread the batter, either by hand with a wooden spreader on an electric crêpemaker or, if you’re using a frying pan, by rotating the pan evenly until the batter covers most of its bottom. I sadly could not get a photo of this step, since I was making these on my own, but it looks a bit like this, though on a smaller scale. Aim for the same thickness throughout the crêpe (avoid having thinner edges, which will become too brown and crisp).

img_5535b

Once the edges of the crêpe begin to look firm (about 60 seconds with my crêpe maker), gently slide your wooden crêpe turner or spatula underneath it. If the underside is slightly browned, flip it over. Otherwise, give it a bit more time and check again.

img_5536b

Allow the crêpe to cook for around 30 seconds on the other side (it will need less time than the first side). Slide the crêpe off the heating surface with your flipper or spatula and onto a plate, and repeat until the batter is gone. You will have 10 or 11 crêpes, depending on the size. Consider placing a wide saucepan lid on top of the stack to keep them warm as you work.

img_5562b

Squeeze some lemon juice on top of the crêpe (the less browned side) and then sprinkle some sugar over that. In the bottom left corner of this photo, you can see one regular lemon next to two bergamots, for comparison.

img_5586b

Next, either fold the crêpes into fourths as shown above, or roll them up into a long cigar shape. If you are adding ice cream or whipped cream, or other similarly voluminous toppings, you may wish to simply fold the left and right edges of the crêpe together (and eat it with a fork).

img_5590

Other yummy things that are nice on crêpes are chestnut spread (called “cream” on this label, but it is always dairy-free) and chocolate spreads (dark chocolate in the center and a chocolate-hazelnut version on the right). The chestnut and dark chocolate spreads are accidentally-vegan items and come from Franprix, while the Nuté+ is a vegan version of Nutella and can be found at most organic shops in France. Try chestnut and chocolate together on the same crêpe—it’s a great combination!

More variations: The possibilities are endless. Consider banana slices (might as well, if you’re already using chocolate!), applesauce, vegan apple honey, cubed fresh mango or pear, berries, white almond butter, jam, poppyseed paste, fresh fig with toasted walnuts. Top with some coconut whipped cream if you want to be fancy.