Sauerbraten meatballs

Earlier this month, I discovered there’s a National German-American Day (October 6th) in my home country. It seems it was created in 1883 but got put on the shelf during World War I, when German descendants wanted to keep their roots on the down-low. Then in 1983, sensing an auspicious anniversary, Ronald Reagan brought it back. I’ve never known this particular day to be celebrated in Wisconsin, which is home to countless people of German ancestry. But it may just be that it doesn’t stand a chance against Oktoberfest, a much bigger deal for the gentle folk of this state.

As my own family is mostly German on both sides, and almost everyone I knew growing up had this same background, Germany never seemed very exotic or interesting to me when I was younger. I half-heartedly studied the language for a semester as an undergrad, but then when a scheduling conflict made the second semester inaccessible, I enrolled in an Arabic class instead. I’ve taken more of an interest in my heritage in recent years though, so when I heard about this little holiday I decided to pay homage to it with this vegan version of a favorite family dish.

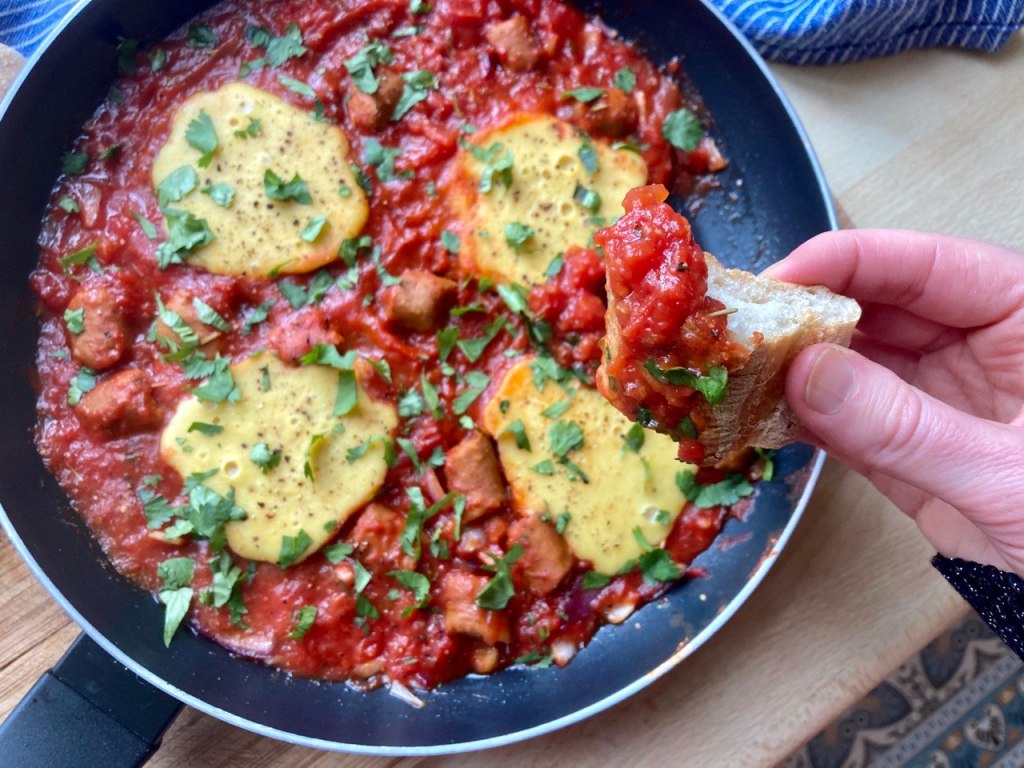
It’s a shortcut version of sauerbraten, a beef pot roast that’s marinated in vinegar over days and days (the name means “sour roast”), although I liked the meatball alternative better in any case. My mom always served the meatballs over a fettucine-type pasta, but they could also be paired with rice or presented on a plate skewered with toothpicks for a buffet dinner.

What sets this recipe apart is its special ingredient. The sauce is made with – hold onto your hats – gingersnap cookies! My mom makes her own gingersnaps, but I used Lotus brand speculoos, which have a similar enough taste. The cookie element makes this dish a bit sweet (there’s some brown sugar in there too!), so to balance out the flavors, consider serving it with a neutral-tasting side dish like green beans, or even something bitter such as arugula/rocket or endives.

Sauerbraten meatballs and sauce

Makes about 23 meatballs (two or three servings)

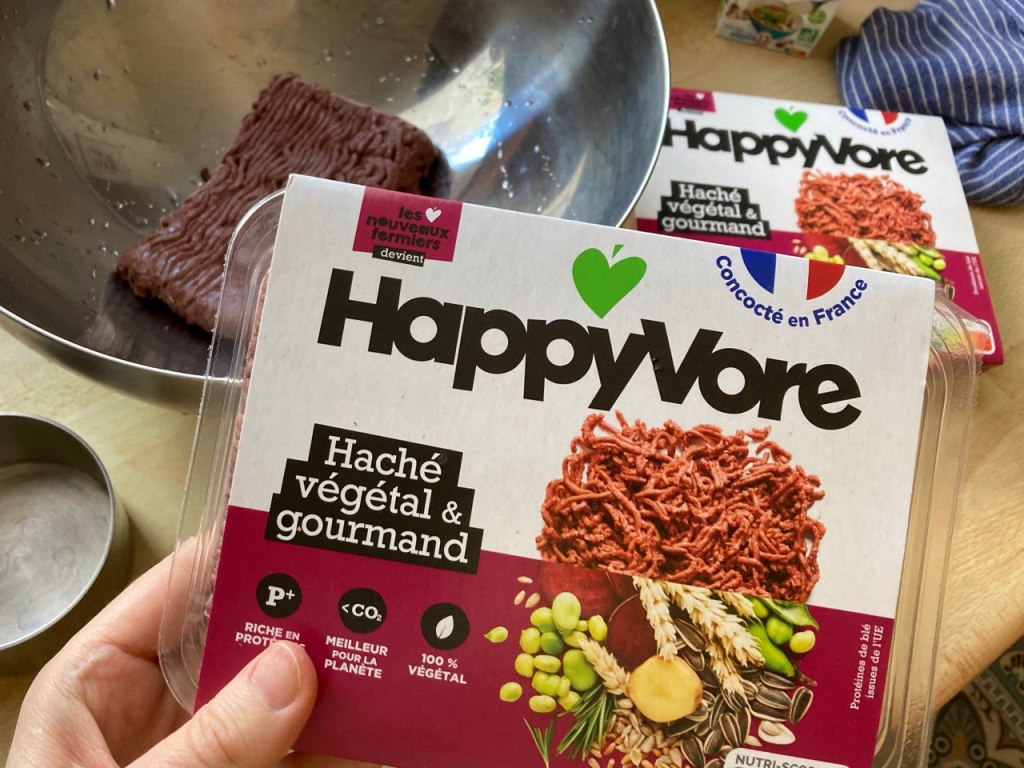
  • 14 oz (400 g) vegan ground “beef” (look for brands like HappyVore, Herta or Beyond Meat)
  • 1 small onion, grated
  • 1 cup breadcrumbs (1 piece of pre-sliced bread)
  • 1/4 cup (60 ml) unsweetened plant-based cream
  • 1/2 teaspoon salt
  • 1/4 teaspoon black pepper
  • About 6 tablespoons flour, for coating
  • A few tablespoons vegan butter or margarine, for the frying pan
  • Fettuccine or similar pasta, prepared according to package instructions

For the sauce:

  • 1 cup (236 ml) vegetable broth
  • 1/3 cup crushed gingersnaps or speculoos/biscoff cookies
  • 3 tablespoons brown sugar
  • 3 tablespoons vinegar (any kind, but I used red wine vinegar)
  • 1/3 cup (80 ml) water

Equipment needed: vegetable grater, large frying pan with cover.

Begin placing the meatball ingredients in a medium mixing bowl.

Using a vegetable grater, grate the onion (alternatively, dice it very, very finely).

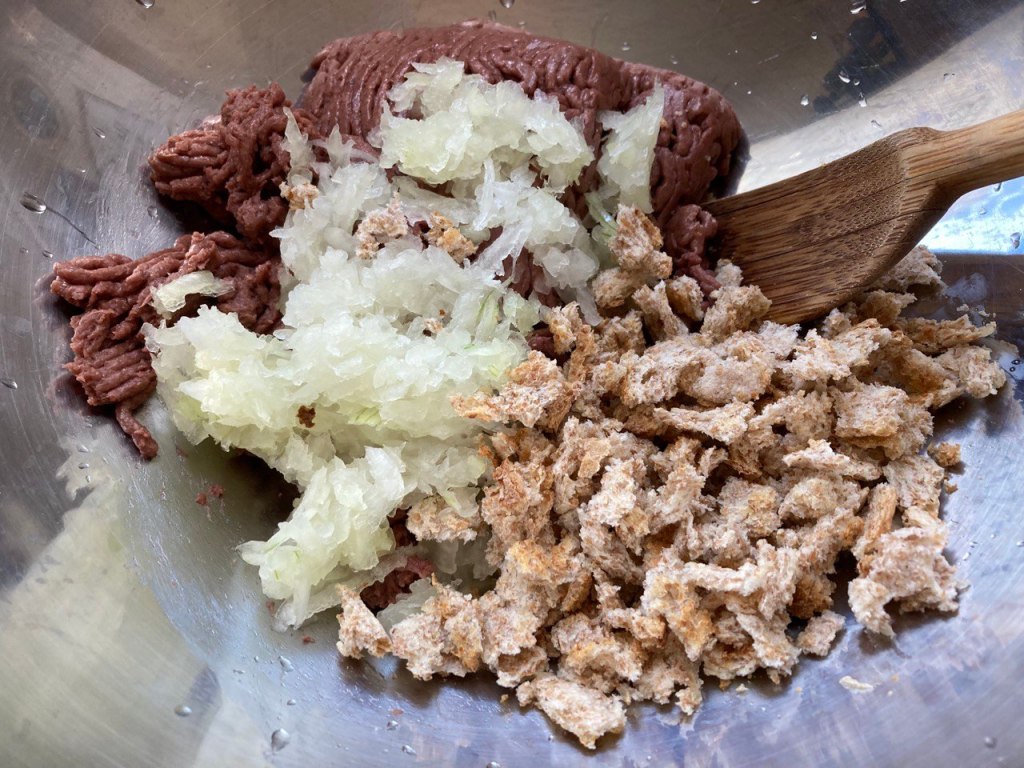
Add the breadcrumbs. I just tore up a slice of bread with my fingers, but you could use store-bought fine breadcrumbs and it would also work well.

Add the salt, pepper and cream and stir thoroughly until you have a homogeneous texture. Then get a small bowl and add the flour to this. Roll the meatballs in your hands, making them each about the size of a walnut. Lightly coat them with the flour.

Place the rolled meatballs on a plate as you go along.

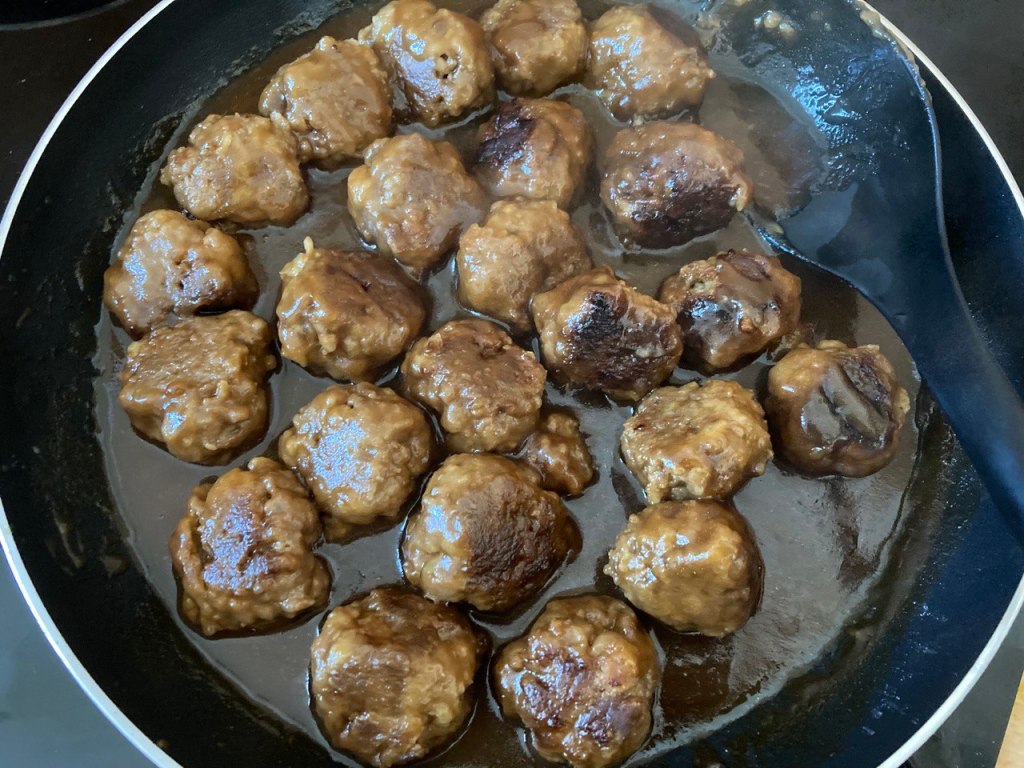
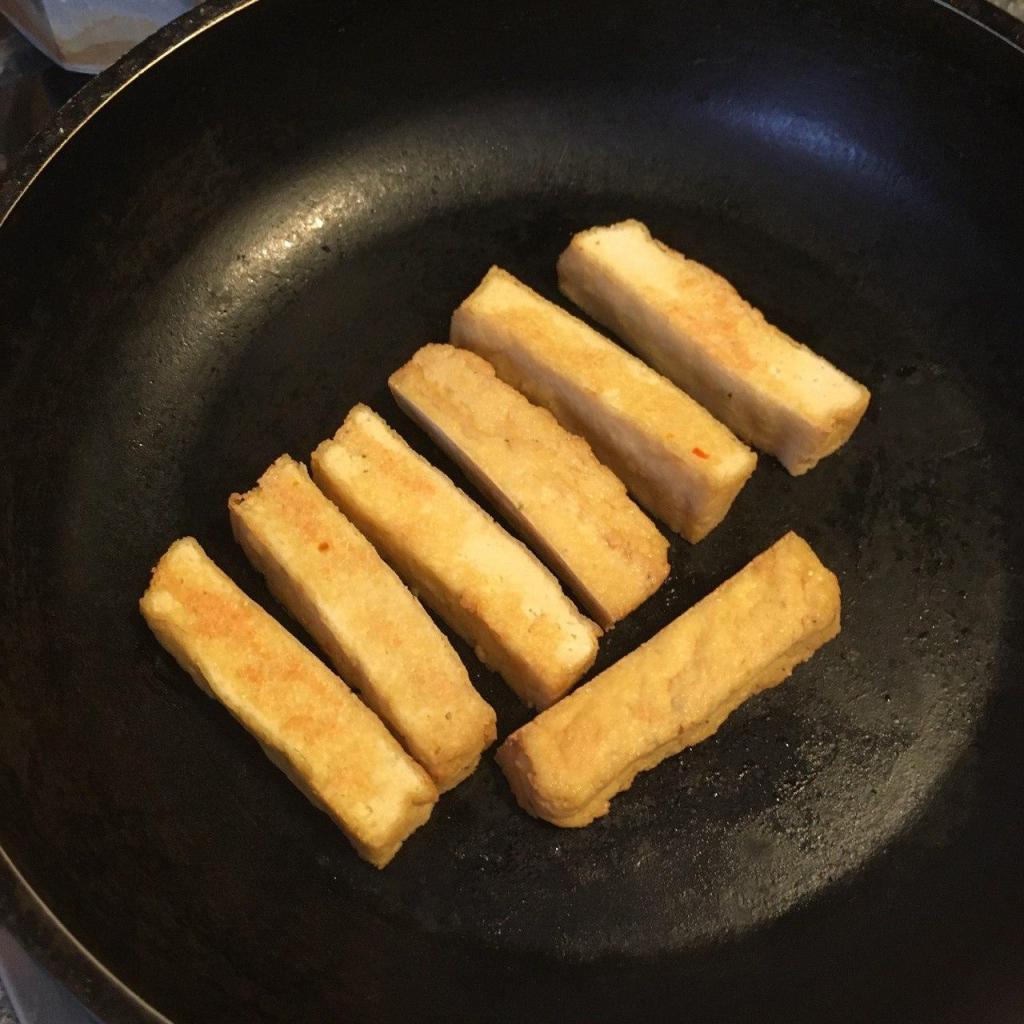
Warm some vegan butter or margarine in a large frying pan over medium heat. Add the meatballs.

Cover (not shown, oops!) and cook the meatballs for several minutes on each side. Keep a close eye on them to be sure they aren’t burning or getting too brown.

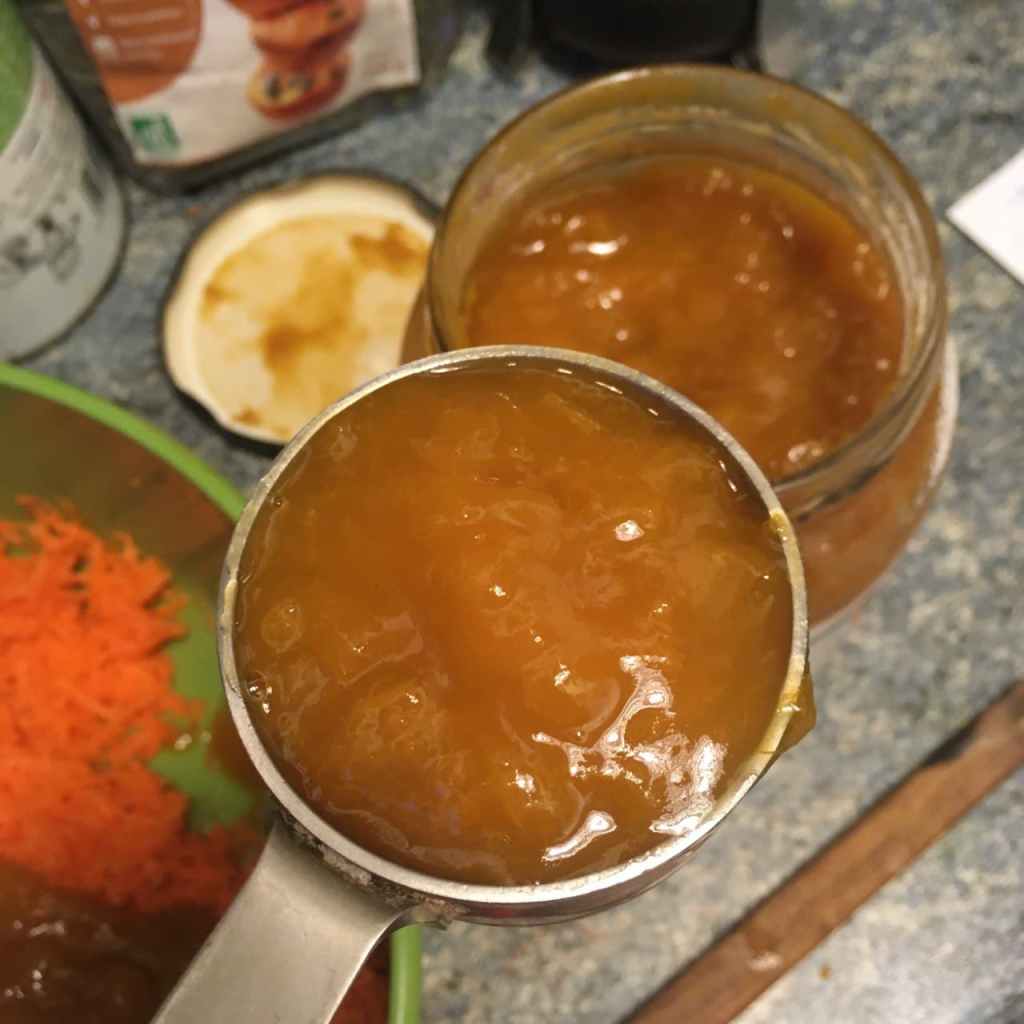
While the meatballs are cooking, start making the sauce. Roughly crush the gingersnap or speculoos cookies into a 1/3 measuring cup (the crumb size doesn’t matter since the crumbs will quickly dissolve).

Heat the broth, add the crushed cookies, brown sugar and vinegar. Once the cookie crumbs have dissolved and the mixture is drawing close to a boil, remove from heat.

Immediately pour the sauce over the meatballs, cover the pan again and let simmer for 20 minutes. The flour coating from the meatballs will thicken the sauce. Stir occasionally, turning the meatballs over to ensure they’re all evenly coated with the sauce.

While the meatballs are simmering, prepare your pasta or rice. Use whatever amount you’ll need to serve the number of people who will be sharing this meal.

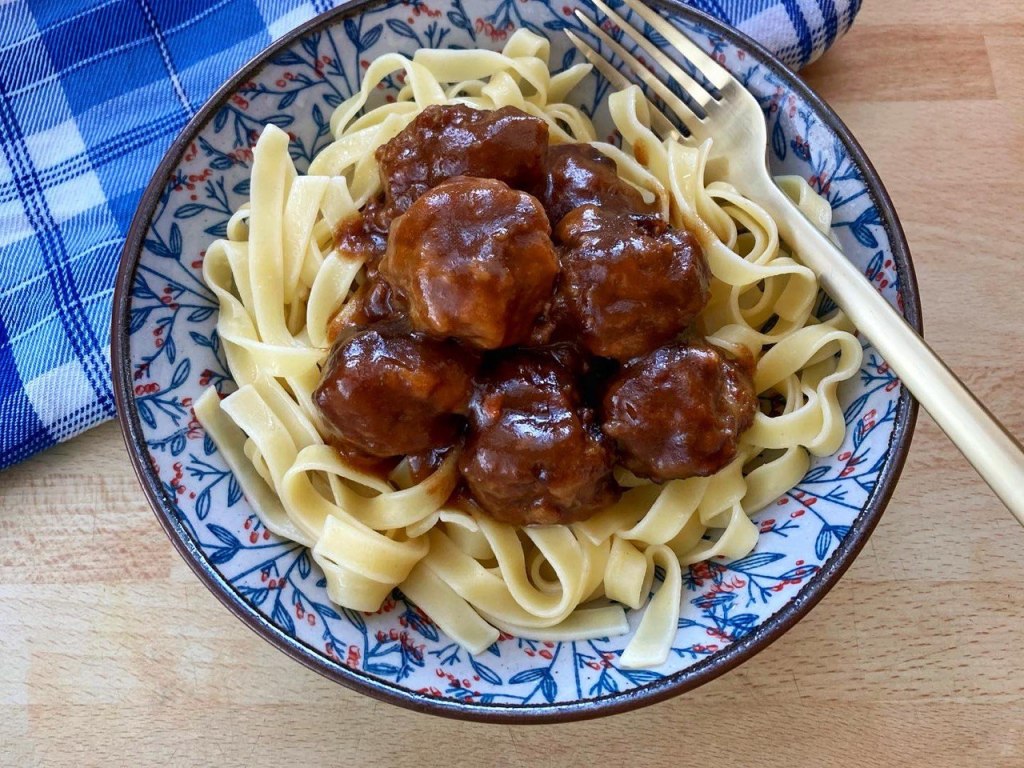
And there you have it! As a side note, I’m happy to report that my mom now makes this dish in a meat-free version herself even when I’m not there. With Beyond Meat or similar products, the taste is so close to the original, but the impact in terms of health, biodiversity and the planet is much, much better. Not to mention nicer for the animals!

As always, if you try this, let me know how it turned out!

And if you’re a fan of meatballs, be sure to check out my favorite holiday recipe, Scandinavian juleboller with spiced blackcurrant sauce.

Breakfast on the Orient Express

Much nicer than murder, no?

The other day, a YouTube algorithm served me up a fascinating video documenting a trip from Northern France to Venice on board the luxury sleeper train the Orient Express. Yes, the same one Agatha Christie wrote about in 1934, on which detective Hercule Poirot must solve a murder that occurs during the night.

In this YouTube video, not only are no crimes committed, but the host also enjoys a very pleasant surprise. He and his traveling companion have booked a twin cabin ($5,000 double occupancy) but are for some reason upgraded to the Istanbul Grand Suite ($23,000 double occupancy), which features a bedroom with a double bed and a living space with a table to dine at plus an Italian marble en-suite bathroom with gold fixtures and a shower. The room’s 1930s-era interior décor includes polished inlaid woodwork, a hand-carved headboard and a button you can press to summon a butler any time of the day or night.

The train fare includes all meals, in which caviar, lobster and truffle make frequent appearances, plus bottomless champagne. Shortly after boarding the train, the host changes into a jacket and heads to the dining car for his evening repast.

By this point in the video I’d already begun daydreaming, wondering if one day I too could save up and indulge in this unforgettable once-in-a-lifetime experience (the twin cabin version, that is). But when the meals were shown I realized that on this hypothetical journey I’d undoubtedly be surviving on PB&J in my room, since the train menu is unlikely to have vegan options. Although I suspect that if Joaquin Phoenix or Woody Harrelson were to book the train, some nice vegan dishes would magically appear! As a non-celebrity, I may wait another decade or two for plant-based dining to become more universal first.

In the meantime, there’s no reason we can’t have fun reproducing these dishes at home with vegan ingredients and at far lower cost!

This breakfast dish composed of toast topped with a poached egg and caviar caught my eye as something quite opulent and aesthetically pleasing too. It may seem like something hard to veganize, what with the egg and caviar, but in today’s world just about anything is possible.

My version of the dish is so simple, it’s not so much a recipe as a set of assembly instructions, much like the kind that come with an IKEA bookshelf. Speaking of IKEA, it’ll be handy if you have one nearby.

I opted to use a vegan scrambled egg mix to make a egg-like base for the flavor, plus some very thick vegan skyr or Greek-style yogurt to reproduce the appearance of the poached egg. For the caviar, I used a very inexpensive kind made from seaweed that you can find in the food section of the nearest Swedish furniture store (look for Sjörapport Black Seaweed Pearls). It’s salty and briny, probably doesn’t taste very different from traditional caviar, is way less expensive and is definitely more pleasant for the fish!

Edible flowers add an especially high-end touch but can be difficult to find. Full disclosure: I didn’t go to the bother of looking for any but just pulled some blossoms off a tree on my street! I assumed they weren’t edible so simply took them off before sampling my creation. Alternatively, a lacy green herb such as chervil would also look nice.

Vegan poached egg on toast with caviar

Makes two toasts.

  • 2 slices of firm whole-grain bread
  • 1/4 cup (35 g) Orgran Vegan Easy Egg powder + 1/2 cup (120 ml) water or other scrambled-egg replacer
  • Kala namak Indian “black” salt for the egg flavor
  • 2 heaping tablespoons unsweetened plain vegan skyr or Greek-style thick yogurt
  • 2 teaspoons IKEA Sjörapport Black Seaweed Pearls or other brand seaweed caviar
  • Edible flowers or leafy herbs, for garnish
Start by cooking two small “pancakes” of the egg mixture (with a tiny pinch of kala namak incorporated into the mixture or sprinkled on top) in a frying pan. Once they’re done on both sides, cut them into perfect circles using a cookie cutter or an upturned glass.
Toast two slices of bread and cut circles out of them using the same cookie cutter or glass.

Transfer to a small serving dish and assemble: place the circle of egg on top of the circle of toast, then carefully top with a generous rounded tablespoon of the thick yogurt. Top this in turn with a bit of the caviar (use a plastic or wooden spoon as metal is said to alter the flavor) and then add your garnish.

Don’t forget to remove the flower if you used one that isn’t confirmed to be edible!

Ah, the taste of luxury! I can almost see those mountains rolling past me now . . .

If you try this, let me know how it turned out, and what you think of the seaweed caviar!

Also don’t miss the 2017 film adaptation of Murder on the Orient Express, directed by Kenneth Branagh and starring himself as Poirot, plus Penélope Cruz, Michelle Pfeiffer, Johnny Depp, Willem Dafoe, Olivia Colman and the incomparable Judi Dench.

For more train travel fun, don’t miss the post about my sleeper-car Amtrak trip from Milwaukee to New York City. It was much less extravagant, but nobody was murdered on that trip either and I had a great time.

Ojja shakshouka

The first time I visited France, at age 21, I stayed with a Moroccan-French family in the suburbs of Paris. Growing up in small-town America, learning French but surrounded by people without passports, I viewed going to France even once in my life as something almost too much to hope for. So imagine my excitement when my French penpal, a girl my age who was learning English, invited me to visit her! I’d been taking French classes for almost 10 years by that point – albeit at a snail’s pace and taught exclusively by Americans – and had never yet used it for true communication in a real-life situation. As the trip approached, I worried about whether I’d really be able to speak to and understand my hosts.

To my surprise and relief, all the French I’d learned over the years fell into place and was usable as needed. The penpal turned out not to want to speak any English, which was just as well for me as it meant speaking lots and lots of French over the two weeks of my stay. My untested French was shaky at first and I probably said many hilariously incorrect things, but I managed to get through it and returned home full of confidence and enthusiasm for continuing in the language.

These are the memories that are always summoned by shakshouka, a delicious tomato and poached egg dish that my hosts made for dinner my first evening in France. I’d never heard of it before – North African cuisine, or anything North African, being unknown where I was from – and it helped make the beginning of my stay especially exotic and magical.

I’ve been told that this recipe was originally Tunisian but became associated with North Africa as a whole. It seems that a simple version with tomato, egg and optional merguez (spicy sausage) is called ojja and that the name is shakshouka when more vegetables and potato are added. In France, the dish is most often called shakshouka no matter what the exact ingredients are, so I’ve used both names here. Whatever you opt to call it, it’s an easy meal to make and promotes a feeling of community as everyone eats it from the same plate, or just the pan it was cooked in, scooping it up with pieces of bread.

And after my recent discovery of a really nice egg replacer, Orgran Vegan Easy Egg, I realized I could make this dish in a vegan version (in North America, you can use Just Egg). In France you can now even get a vegan version of merguez, from HappyVore, which helps make this creation extra authentic. You’ll also need some kala namak salt. In Paris, the egg, merguez and salt can all be found at Vegami (or order from their online shop for delivery across France).

Ojja shakshouka

Serves two.

  • 14 oz. (400 g) can stewed tomato
  • 1 small onion, diced
  • 2 cloves garlic or more to taste, finely chopped
  • 1/3 cup (40 g) Orgran Vegan Easy Egg + 2/3 cup (160 ml) water or other scrambled-egg replacer
  • 1/4 teaspoon kala namak salt
  • 2 vegan merguez sausages or other spicy sausages, chopped
  • 1 teaspoon ground coriander
  • 1/2 teaspoon dried thyme
  • 1/2 teaspoon dried rosemary
  • 1/4 teaspoon ground black pepper
  • Fresh cilantro or parsley to garnish
  • 1 baguette or other bread

Equipment needed: large frying pan with cover.

Scroll down for the directions!

Directions:

  1. Heat up a small amount of olive oil in a frying pan over medium-low heat.
  2. Sautée the diced onion until soft and a bit translucent.
  3. Add the finely chopped garlic and chopped sausage and let cook for a minute or two, stirring often to prevent burning.
  4. Add the can of stewed tomatoes and the coriander, rosemary, thyme and pepper, stir and cover until it reaches a simmer. If the tomatoes are unsalted, you may wish to add a pinch of kala namak salt or a splash of soy sauce to the mixture.
  5. While heating the tomato mixture, prepare your egg mixture. If using Orgran Vegan Easy Egg, combine 1/3 cup (40 g) powder with 2/3 cup (160 ml) water and 1/4 teaspoon kala namak salt.
  6. Once the tomato sauce is simmering, pour regularly spaced egg-sized circles of the egg mixture into the sauce. Cover the saucepan to allow the “eggs” to “poach” all the way through. This will take just a couple of minutes.
  7. Once the “eggs” are firm, transfer the frying pan to your table, garnish with chopped fresh cilantro or parsley, and serve with slices of baguette. You may like to add freshly ground black pepper and more kala namak salt on top of the “eggs” (I like having kala namak crystals in a grinder for this purpose) for extra egg flavor.

You may wish to listen to some Rachid Taha or Cheb Mami while enjoying this meal, and to finish it off with some sugary mint tea. For a North African literary immersion, try The Sand Child by Tahar Ben Jelloun.

After my first visit to France and inadvertant discovery of North African culture, which is as much a part of the cultural landscape as Latin American culture is in the United States, I developed an interest in Arabic as well. It’s a difficult but beautiful language. I enrolled in an introductory course in standard written Arabic at my university that next year, went on to complete all four semesters that were offered, and visited Morocco with my brother. Later, through friends and other connections, I learned a bit of Tunisian Arabic too.

Incidentally, how astonished would 21-year-old me have been if a time traveler or clairvoyant had told her she would eventually move to France and become French herself?

Anyway, if you try this recipe, let us know in the comments how it was!

To explore more North African cuisine, take a look at my Tunisian sorghum pudding recipe. And if you like vegan egg dishes, give my Moonstruck egg toast a try.

Italian egg toast

My mom’s birthday is in March, and her favorite film is Moonstruck (1987), starring Cher and Nicolas Cage as Loretta and Ronnie, Italian-Americans in Brooklyn who meet and, against all odds, rather abruptly fall in love. The charming story, set in and around neighborhood shops and Loretta’s beautiful family home, features a close-knit clan whose members nevertheless have their secrets. One of the most endearing characters, who doesn’t come into the plot nearly enough for my taste, is the old Italian grandpa who seems to always be walking his five or six dogs, or preparing to walk them, or coming back from walking them.

Memorable moments in this film include Ronnie meeting Loretta, his future sister-in-law, at his bakery, immediately launching into a long melodramatic rant about how his brother ruined his life, asking for a knife so he can kill himself, and then – about an hour after meeting her – knocking over his kitchen table, scooping her up and taking her to his bed.

The next night, they go to see La Bohème at the beautiful Metropolitan Opera, which I visited two years ago to take some photos for my mom.

Moonstruck is a favorite of mine too, so we tend to rewatch it every time I’m back home. The last occasion was this January, during my extended Christmas visit in Wisconsin. For some reason I noticed the breakfast that Loretta’s mother makes for her one morning while questioning her about her life: slices of bread with an egg cooked in the center of each one and topped with sautéed red pepper. It’s apparently a traditional breakfast dish in Italy (but also in other places), and is sometimes called egg-in-a-hole.

It looked fun. Could it be made vegan, I wondered? Challenge accepted!

I experimented once I got back to Paris, and as the results were quite successful, decided to share the recipe here this month in honor of both my mom’s birthday and nice mother-daughter moments.

The key ingredient in my version is a vegan scrambled-egg/omelet mix (I used Orgran Vegan Easy Egg, which you can find at Vegami in Paris, but in North America you could try Just Egg). And I added shallot and garlic to the red peppers for an extra dimension. Note that the kala namak salt is a must in this recipe, to get that sulfury egg flavor, if your egg mix doesn’t already contain it. It’s called “black” salt but once ground, it’s actually pink in color. I have this salt in ground form, which is good for incorporating it into a recipe, and also as crystals in a grinder, which is a nice way to season a dish that’s already made but just needs a bit more salt – both are available at Vegami, but you can also find the ground form at most Indian grocery stores.

Italian egg toast with red pepper

Serves two (four pieces of egg toast).

4 pieces of bread
1/4 cup (30 g) Orgran Vegan Easy Egg mix or similar
1/4 teaspoon kala namak (sulfury Indian “black” salt)
Several whole or sliced roasted (canned) red bell peppers
2 shallots
2 cloves garlic
Olive oil
Margarine
Freshly cracked black pepper
Fresh parsley or other herbs, to garnish

Combine the 1/4 cup (30 g) egg mix with 1/2 cup + 2 tablespoons (150 ml) water, and whisk until smooth. Add the kala namak salt and stir to combine. Set aside.

Begin warming some olive oil in a small frying pan over medium heat, and chop up your shallots and garlic.

Now take out the roasted red pepper (estimate how much you want based on visual quantity – you can’t go too far wrong) and slice into strips.

Sauté the shallot, garlic and red pepper in the olive oil, stirring occasionally, until the shallot and garlic is soft. Don’t add any salt at this point because the egg mixture will probably be salty enough for the whole dish.

Now get out your bread. This is the kind I like to use, a type of bread that’s solid enough not to get mushy and fall apart. I recommend bread that’s sliced with a machine (rather than you slicing it) so that the sides of each slice are nice and even and will heat uniformly in the frying pan.

Find a glass, teacup or cookie cutter to cut out a circle from the middle of each slice of bread. Be sure that enough bread is remains between the hole and the crust so that it won’t fall apart. Tip: save the cut-out parts to mop up the last delectable bits of sauce from the frying pan at the end!

Spread both sides of each slice of bread with margarine.

Grill the bread on each side until lightly golden brown, then fill the holes with the egg mixture.

Cook for a minute or two on the first side (you may wish to cover the frying pan to speed this along), and once this first side seems done (test by jiggling it with the spatula), flip it over and repeat on the other side.

Transfer to a plate and top with the pepper, shallot and garlic mixture.

Garnish with freshly ground black pepper (I couldn’t find my pepper mill so used a mortar and pestle), fresh parsley or other herb, and have some extra kala namak handy in case you want to add more salt.

Serve and enjoy! It might taste best in the company of your mother or another trusted person you can share your troubles with.

So delicious!

Rumor has it that eating this egg toast for breakfast will help you untangle any complicated messes you may have gotten yourself into the night before. But never underestimate the potential for lasting love with your fiancé’s unstable estranged brother! Basically, if you can suspend your disbelief and forget the laws of cold hard reality long enough, you too many enjoy Moonstruck.

Black sesame turnovers

Today, in honor of little Sésame’s sixth birthday, I’ve prepared another black sesame recipe for you! (Last year it was a striped sesame cake). But it’s actually two recipes in one – first, we’ll be making a Japanese sweet white bean paste (shiro an) that can be used in many ways, and then adding some black sesame paste to it (making kuro goma an) and using it as a turnover filling.

Both parts of this recipe are fairly straightforward and easy, but as making the sweet white bean paste takes quite a while, I’m not putting it in the “easy recipes” category. You need to start soaking the beans the day before making the paste, and then the beans need to cook for two hours. But once you have the paste ready, the rest goes pretty fast.

Sweet white bean paste (shiro an)

Makes about 2 cups of sweet white bean paste.

  • 1 cup (175 g) dry white beans
  • 3/4 cup + 2 Tbsp white sugar
  • 1/2 teaspoon salt

Equipment needed: large heavy stockpot, food processor or high-power blender.

Place the dry beans in a bowl and cover with water. Let soak for 12 hours, refilling the water if needed. The photo above shows the beans at the end of the soaking period.

Transfer the beans to your stockpot, add enough water to cover them, and bring to a boil over medium-low heat. Once the water comes to a boil, reduce the heat to low. Cover the stockpot and simmer the beans for 1.5 to 2 hours (set a timer so you don’t forget about them!), checking occasionally to make sure the water level is still high enough that the beans cannot burn, and adding more water if necessary. Once the beans are tender enough to squash between your thumb and pinky finger, they’re ready.

Drain the beans, reserving the cooking liquid.

Transfer to a food processor and purée, adding a bit of the cooking liquid if it’s too dry. At the end it’ll look kind of like this.

Transfer back to the stockpot over low heat and add the sugar and salt, stirring constantly. The sugar will begin dissolving immediately.

After the sugar has dissolved, the mixture will be a bit more liquidy and look glossy. Continue to heat, stirring constantly, until the mixture has become dry enough that you can draw a line down the center of the stockpot bottom with a spatula and it doesn’t fill in.

Black sesame sweet bean paste (kuro goma an)

Makes 1 cup of black sesame sweet bean paste.

Now you can take your white bean paste and flavor it with black sesame. I chose to keep half of the paste unflavored, and make half of it into a black sesame version. The amounts below are therefore for half of the above mixture (1 cup).

  • 1 cup sweet white bean paste
  • 3 heaping tablespoons black sesame paste
  • 1/4 teaspoon vanilla extract (optional, but nice)

In a food processor, combine the prepared sweet white bean paste, the black sesame paste and (if desired) the vanilla extract. Vanilla is not included in the traditional Japanese preparation, but I find it goes so well with sesame!

If you’re opening your jar of black sesame paste for the first time and there’s a layer of oil on top as you can see in this photo, stir it with a butter knife to incorporate the oil and achieve a more homogenous texture before you add any to the white bean paste.

Mix everything up and it will look something like this. If it seems too liquidy, you can put it back in the stockpot and heat it over medium-low, stirring constantly, until it’s a bit drier.

At this point, you can just transfer the paste to a covered container (a jar or tupperware container) and store in the fridge to use later as a spread, or to add to yogurt (see photo at the end of this post). It can also make a nice filling/frosting for a layer cake. If you’d like to use it as a turnover filling, follow the instructions below.

Black sesame turnovers

Makes 4 turnovers.

  • 1 prepared flaky pastry crust
  • 1 cup black sesame sweet bean paste (some may be left over)

First, preheat your oven to 350°F (180°C).

Cut out circle shapes from the flaky pastry crust (in these photos I’m making just two turnovers, but the ingredient quantities listed above will make four). Place about two heaping tablespoons of the black sesame sweet bean paste on half of each circle, spreading it out to near the edges but leaving a margin.

Fold each circle over once to create a crescent shape.

Press down firmly on the edges to seal the dough.

Score the tops of the turnovers with a sharp knife to allow air to escape during the baking process. Place in the oven for about 15 minutes. As the filling is already rather dry, the baking tends to go faster than with fruit-filled turnovers.

If you like, you can dust the tops of the turnovers with a bit of powdered sugar.

Mine got quite puffy and lost their seal, but once they cooled a bit they de-puffed.

So yummy! They’re great with green tea.

Enjoy!

Another way to enjoy the sweet bean paste is in a dish with some plain or vanilla yogurt, fruit and a sprinkling of gomasio.

It’s really nice on bread, too!

Variations: try flavoring the sweet white bean paste with other things: matcha, lemon (zest and a bit of juice) or pumpkin purée.

The plate used in the turnover photos is the “Chysanthemum” in unglazed white/gray by 1616 Arita in Aritayaki, Japan, via Brutal Ceramics.

Brazilian carrot cake

In all my years eating (American) carrot cake, it somehow never once occurred to me to put chocolate on it. But when I discovered that such a thing existed in Brazil (bolo de cenoura com calda de chocolate in Portuguese), it made nothing less than perfect sense to me. Here’s my vegan version of this tasty treat – try it for yourself and see what you think!

Traditionally, Brazilian carrot cake doesn’t contain raisins or walnuts, but I couldn’t resist adding them for nostalgia reasons (they’re totally optional though and can be omitted without the need to change the other ingredients). For the chocolate topping, I made a simple glaze from cocoa powder, maple syrup and a bit of salt. I recommend mixing up the glaze and applying it to the individual slices just before serving them, so the amounts given for the glaze are for two pieces of cake. You can double or triple this as needed however, if you’re making this after the Great Pandemic of 2020-2021 is over (fingers crossed it doesn’t last longer) and you actually have nine people eating this together in one place.

Carrot cake

Makes one 8 x 8 in. (20 x 20 cm) cake

  • 1 packed cup (150 g) grated carrot
  • 1/2 cup (118 ml) applesauce or other fruit compote
  • 1/4 cup (59 ml) neutral-flavored oil
  • 2 teaspoons apple-cider or white vinegar
  • 2 teaspoons vanilla extract
  • 1/4 teaspoon lemon zest
  • 1 & 1/2 teaspoon cinnamon
  • 3/4 teaspoon salt
  • 1/2 teaspoon baking soda
  • 1/2 cup sugar
  • 1 & 1/2 cups flour
  • 1/4 cup golden raisins (optional)
  • 1/4 cup walnuts, roughly chopped (optional)

Begin by grating up your carrot into a medium or large mixing bowl. If it’s organic, you can just scrub it with a vegetable brush rather than peeling it. Preheat your oven to 350°F (180°C).

Next, add your applesauce or other fruit compote to the bowl. I actually used apricot sauce (compote) as that’s what I had on hand, without it changing the flavor of the cake in particular.

Grate a bit of lemon zest to add some brightness to the cake. I used 1/4 teaspoon, but you could add a bit more if you’re partial to a lemony flavor.

Now add all the other ingredients apart from the flour, and stir thoroughly to combine.

Finally, add the flour and stir gently until just combined (be careful not to overstir).

Transfer the batter to an 8 x 8 inch (20 x 20 cm) baking dish lined with baking paper or oiled. Place in the preheated oven and bake for 25 to 30 minutes. Check for doneness by inserting a toothpick into various parts of the cake. If it comes out clean, it’s ready but if there’s some batter sticking to it, give it another 5 minutes and then test it again.

The nice thing about baking paper is you can just lift the entire cake out of the baking dish and put it on your countertop for easier cutting. Allow the cake to cool for 15 minutes or so before cutting or you might not be able to make clean cuts through it.

I cut mine into nine pieces, each measuring about 2.5 inches (6 cm) square. Now you’re ready to mix up some chocolate glaze!

Chocolate glaze

Makes enough glaze for two pieces of the carrot cake.

  • 2 teaspoons unsweetened cocoa powder
  • 2 teaspoons pure maple syrup (add more for a thinner glaze)
  • tiny pinch salt

You can hardly find a simpler recipe… just put these three things together and stir! At first the maple syrup will not seem to mix into the cocoa powder, but keep persisting and it will suddenly become a frosting/glaze. If you want it to be thinner and more drippy, add a bit more maple syrup.

Apply the glaze in whatever amount you like.

And there you have it!

Time to take a bite…

Looks moist and yummy. But how will it taste?

Two thumbs up!

And as you may be aware, Valentine’s Day is just around the corner! This dessert may not seem very Valentine-y at first glance, but stick a heart on it and it suddenly is. 🙂

Tikka masala tacos

In the years since my move to France, I’ve often missed the contact with Mexican culture that you get living in the United States. While attending university, in both Wisconsin and California, I supported myself working as a restaurant server, and in our downtime would often chat with the cooks. No matter what type of restaurant it was, in the Midwest and on the West Coast alike, the kitchen staff was invariably 95% Mexican, and I ended up learning not only lots of things about these immigrants’ lives and experiences but also a good deal of Spanish too (pretty easy, since I already knew French).

I recently happened upon a Netflix show that brought up lots of nostalgia for me: Gentefied, which tells the story of urban displacement, or gentrification, and the ways it affects the lives of a fictional Mexican-American family living in Los Angeles.

The comedy-drama, which debuted in 2020 and is supposed to have a second season at some point, follows the adventures of Casimiro Morales, who runs a taqueria, and three of his grandchildren: Erik, who helps out at the shop, budding artist Ana, and Chris, who works in the kitchen of a swanky restaurant and dreams of earning a culinary degree in Paris.

When gentrification begins to push the rents in the neighborhood upward, Casimiro realizes that the future of his taco shop may be in jeopardy. Chris tries to help with ideas to attract more customers, one of them being to begin offering exotic new tacos of the day. As you may have guessed, his first one is an Indian-Mexican fusion creation, a chicken tikka masala taco. He makes one for his skeptical grandpa to try, but while Casimiro ends up loving it, the unconventional taco doesn’t appeal to his regular customers.

It sure appealed to me though, and it wasn’t long before I assembled my own version of a tikka masala taco, using vegan “chicken” (once with aiguillettes from Les Nouveaux Fermiers and another time with émincés from Herta) and a tikka masala curry paste I found at Mon Epicerie Paris here in the City of Light. But you can use any kind of vegan chicken, or even tofu, tempeh or seitan, etc. and substitute another red curry paste if you don’t happen to find a tikka masala one.

Vegan “chicken” tikka masala tacos

Makes around 6 large tacos or 12 smaller ones, depending on tortilla size

  • 17 oz (500 g) tomato purée or stewed tomatoes
  • 6.5 oz (180 g) tikka masala curry paste or other red curry paste
  • 10.5 oz (300 g) vegan “chicken” or other vegan protein (tofu, seitan etc.)
  • 6 large or 12 smaller Mexican-style wheat or corn tortillas
  • 1 large red onion
  • 1 small head lettuce
  • 2 avocados
  • a few limes
  • fresh cilantro
  • optional: hot sauce, plain vegan sour cream or yogurt

Start by prepping the taco garnishes, dicing the onion, chopping the lettuce and cutting up the avocados (or make a guacamole out of them) and the limes. Set them all out in small bowls so you can put your tacos together quickly once the tikka masala “chicken” is ready.

I used a little more than half this can of stewed tomatoes, and the whole jar of curry paste, but you can experiment with larger or smaller amounts of curry paste depending on how spicy your paste is and how spicy you want to make your sauce.

Break up the whole tomatoes, if using whole stewed tomatoes, and stir in the curry paste until it’s fully incorporated.

These are the vegan “chicken” products I used, for different batches. They’re quite similar to each other, but the Nouveaux Fermiers one is probably nicer (and more expensive). To make the amount specified in this recipe, you’ll need two packages of whichever one you opt for.

Place the “chicken” in a frying pan with a little vegetable or olive oil (shown here is the Nouveaux Fermiers “chicken”). Since the product is already cooked, you basically just need to heat it up and maybe get it a little bit browned.

Now add some of the tikka masala sauce and heat it together with the “chicken” until the sauce has the thickness you like. You might have some sauce left over. Shown here is a portion of just 5 oz (150 g) of the “chicken”, so not all the sauce has been added.

If you’d like to have a creamy tikka masala sauce, mix in a bit of unsweetened soy cream or yogurt at the very end, after you turn off the heat. I didn’t do that here, but will try it another time.

Open the tortilla package at the last moment to prevent them from drying out (shown is the tortilla size I am referring to as “large”). If you want to heat the tortillas before making your tacos, try to do it in a steamer and then immediately transfer them to a plastic or ceramic airtight tortilla keeper like the ones they use at Mexican restaurants. I don’t recommend heating them in the oven or on the stovetop, since they’ll become dry and rigid and will no longer fold properly. You’ll find some more tortilla reheating tips here.

Place a serving of the tikka masala “chicken” along the center of a tortilla and then add your garnishes. Squeeze some lime juice over top and finish with some cilantro leaves. The lime and cilantro make a big difference to the overall flavor of the taco, so don’t leave them out!

If you like, you can also add some vegan crema (sour cream or plain soy yogurt with a bit of tamari mixed in).

I garnished this taco with some spicy green olives too. You may want to drizzle some Tabasco or other hot sauce over the top as well.

Fold up the taco and it’s ready to eat! To keep to the Indian-Mexican fusion theme, play some Bollywood music while you eat. Afterwards, have some chai tea while checking Gentefied out.

And for those of you in Paris, I have some good news! Vegan Mexican chefs @veganomexa have been holding pop-up events here and there around the city! I was recently lucky enough to get in on one and enjoy some authentic Mexican tacos and tamales with fillings like jackfruit mole and soyrizo with a green tomatillo sauce. I was in heaven! Follow their Instagram to find out about upcoming events.

The Irish Portuguese sandwich

The other day I was thinking about beautiful sunny Lisbon (one of my favorite cities) and that brought back memories of a strange but delicious sandwich I once ate there.

It was 2011 and over the past year I’d been transitioning to a vegan diet. At that point I was already about 99% vegan, with occasional small exceptions for things like chaussons aux pommes (which we happily can now get in an excellent vegan version in Paris at Maison Landemaine).

Anyway, in those days, when I traveled I never knew if, where or when I would find vegan food, but I was determined to try all the same. There were a couple of vegetarian restaurants in Lisbon already, but they were a certain distance from my hostel and on my first day I couldn’t stray far from it due to a work project I had to finish up on the hostel computer (yes, I had to work during part of my vacation… that’s the freelance life).

It was lunch time when I first arrived in the city, and I strolled through the streets in search of food, feeling not especially hopeful. I had passed by a number of clearly meat-centric places and was realizing I would probably have to go to a grocery store for some hummus and crudités when I spotted an Irish pub. Experience had already taught me that no matter where in the world they are, English, Irish, Scottish and Australian pubs tend to always have at least one vegetarian/vegan food option on their menu, in keeping with the customs of their country of origin.

The Irish waitress at this Irish pub told me they had something like a BLT (bacon, lettuce and tomato) but with peanut butter instead of the B. I must have made a face or furrowed my brow because she quickly added, “It sounds strange but it’s actually really good!” I decided to be open-minded and give it a try.

Sure enough, it was surprisingly yummy. The crunch of the lettuce and freshness of the tomato went quite well with the peanut butter, which is not really that different from bacon when you consider its rich flavor and saltiness. There was also raw onion and something that elevated it to a whole other level of yumminess – capers!

I recreated the sandwich back home in Paris after this trip, eventually perfecting it with the addition of tofu. Although it’s not at all Irish or Portuguese, it has stayed “the Irish Portuguese sandwich” in my mind, although I suppose it could also be called a PBLT. Perhaps you’d like to give it a try?

By the way, as someone with a fiery passion in her soul for beautiful tiles, I’ve been in love with Portugal since my first visit there in 2008. Even many house façades are tiled! If you too love tiles and patterns, I highly recommend a visit to this lovely Iberian nation (don’t miss the Museu Nacional do Azulejo or National Tile Museum).

Anyway, back to our recipe…

The Irish Portuguese sandwich

Makes 1 sandwich

  • 2 slices of bread
  • 3 to 4 ounces (80 to 100 g) firm, pre-baked tofu, plain or smoked
  • Peanut butter
  • Vegan mayonnaise
  • 1 medium tomato
  • Half a small onion (yellow, white or red)
  • Capers
  • Lettuce

First of all, to more effectively get into the spirit of this post, fire up some fado music. Next, slice up the tofu and place in a frying pan over medium heat to brown on both sides.

While you wait for the tofu to be ready, spread one piece of bread with mayonnaise and the other with peanut butter. When the tofu is browned, place it on the peanut butter side. This will make the peanut butter get warm and melty, part of what makes this sandwich so good.

Top the peanut butter and tofu with slices of tomato and onion, then add as many capers as you like. Now place the chopped lettuce on the slice of bread with the mayonnaise and put your sandwich together!

Serve with some salad, chips or fries depending on your mood.

So good!

Is your tummy rumbling yet?

It’s delicious whether you happen to be in Lisbon or your own city! If you’ve finished listening to the other link above, try some Madredeus and Lisbon Story by Wim Wenders.

Variations: Try with smoked tofu! And experiment with sundried tomatoes in place of fresh ones, if you’re making this outside of tomato season.

Icelandic “plokkfiskur” and “geothermal” rye bread

Let’s take a break from current events and go on a little trip to Iceland! One that takes place mainly in our kitchens.

ThingvellirI had the good fortune to visit this fascinating and beautiful country back in 2011, spending a week in Reykjavík with a side trip to see the attractions of the Golden Circle. I loved my time there, and although I haven’t had the chance to go back yet, Iceland has continued to have a special place in my heart. Below are a few more of my photos from that trip (click on any photo to open a slideshow view).

One of the things this tiny island nation is known for is its literary output, with one of the world’s highest numbers of authors per capita (one in 10 Icelanders will publish a book). In the years just after my visit I read a couple of novels by Halldór Laxness (Iceland’s Bell) and Sjón (From the Mouth of the Whale), but I didn’t get to any further Icelandic literature until this past December.

In France, a major general strike began early in December 2019 and lasted nearly until the end of January. This meant very few metros and buses were running, and even when they were, the prospect of squeezing into one and possibly getting crushed by the other sardines did not appeal. So I decided just to lay low and not really go anywhere (except by foot) until it was over. As an introvert, I didn’t see that as much of a sacrifice, especially since it was also pretty cold and miserable outside. Of course, if I’d only known what was to happen just a couple months later, I would have gone out more…

296982_10150310075560690_2070109529_n

With my extra free time I began reading even more than usual. I delved into an Icelandic novel I’d found in the street, Heaven and Hell by Jón Kalman Stefánsson, which turned out to be the first in a trilogy. Many parts of this story fit in perfectly with my situation, following solitary characters who had to trudge across hostile frozen landscapes (not totally unlike my 35-minute trudges through December rains and heavy air pollution to reach my Japanese class). But the story drew me totally and completely into Iceland and reawakened my passion for the country. See my review of the book here.

As you know, one of the things I often do when I’m enthusiastic about a book or film is to make a recipe inspired by it! And this was no exception.

I looked online for an interesting Icelandic recipe and found something called plokkfiskur, which is a blend of mashed potatoes, onion and mashed fish mixed with a creamy béchamel type sauce. The dish originally hails from Norway, as do the people of Iceland themselves, if you go back far enough in history. To veganize it, I replaced the fish with artichoke hearts (a very good suggestion by my mom) and wakame seaweed. And if I do say so myself, the result is really delicious! It’s like a very gourmet twist on mashed potatoes, and could be served as a side dish or a main dish, depending on the portion.

IMG_0537A side note about the name… plokkfiskur, I read, means “mashed fish” and since there isn’t any fish in my dish I should really call it… plokkþistilhjörtur? (as þistilhjörtu is the word for artichoke). That seems kind of fun to pronounce! But I’m unsure of how the case ending should be handled, and there could be other details I’m unaware of, so for now am just using the original term in those handy quotation marks. So if you’re an Icelander yourself, or just know the language well, please feel free to suggest an alternate name for this dish!

Icelanders commonly eat plokkfiskur with rugbrauð (rye bread), which in some parts of the island is actually baked right in the ground using geothermal heat! You can see how it’s done here:

After some Googling, I learned it was possible to replicate this baking method with hot water in a slow-cooker, or even in a conventional oven inside a large pan of water (much like Boston brown bread). I followed a vegan recipe for it that I found on a blog that has since unfortunately disappeared and made some adaptations of my own. My first attempt at it was quite successful and I was absolutely delighted with the bread, which I have now remade several times. One of the interesting things about it is that it contains absolutely no oil, but due to the cooking method comes out very moist. And although it contains molasses and a bit of sugar, it isn’t a sweet bread. It goes well paired with either savory or sweet things.

I realize you may not happen to have a slow-cooker, or it might not be the right size or shape for a loaf pan (although you can get creative here and use a container of a different shape), so feel free to bake it in a conventional oven or simply use store-bought rye bread. But I wanted to include the recipe here for anyone who wants to attempt this culinary adventure. It follows the main recipe below.

Vegan plokkfiskur

Serves 2

  • 10.5 oz (300 g) firm potatoes, peeled
  • 9 oz (250 g) canned artichoke hearts (weight after draining)
  • 3.5 oz (100 g) white or yellow onion, diced (1 medium onion)
  • 1 heaping teaspoon dried wakame seaweed
  • 1 cup (236 ml) soy milk plus more if needed
  • ½ bouillon cube
  • 3 tablespoons flour
  • ¼ teaspoon ground white pepper
  • small bunch chives

Serve with rye bread (store bought or homemade with the recipe farther below).

Start by peeling and chopping the potatoes. Boil for 20 minutes or until tender.

IMG_0515

IMG_0524
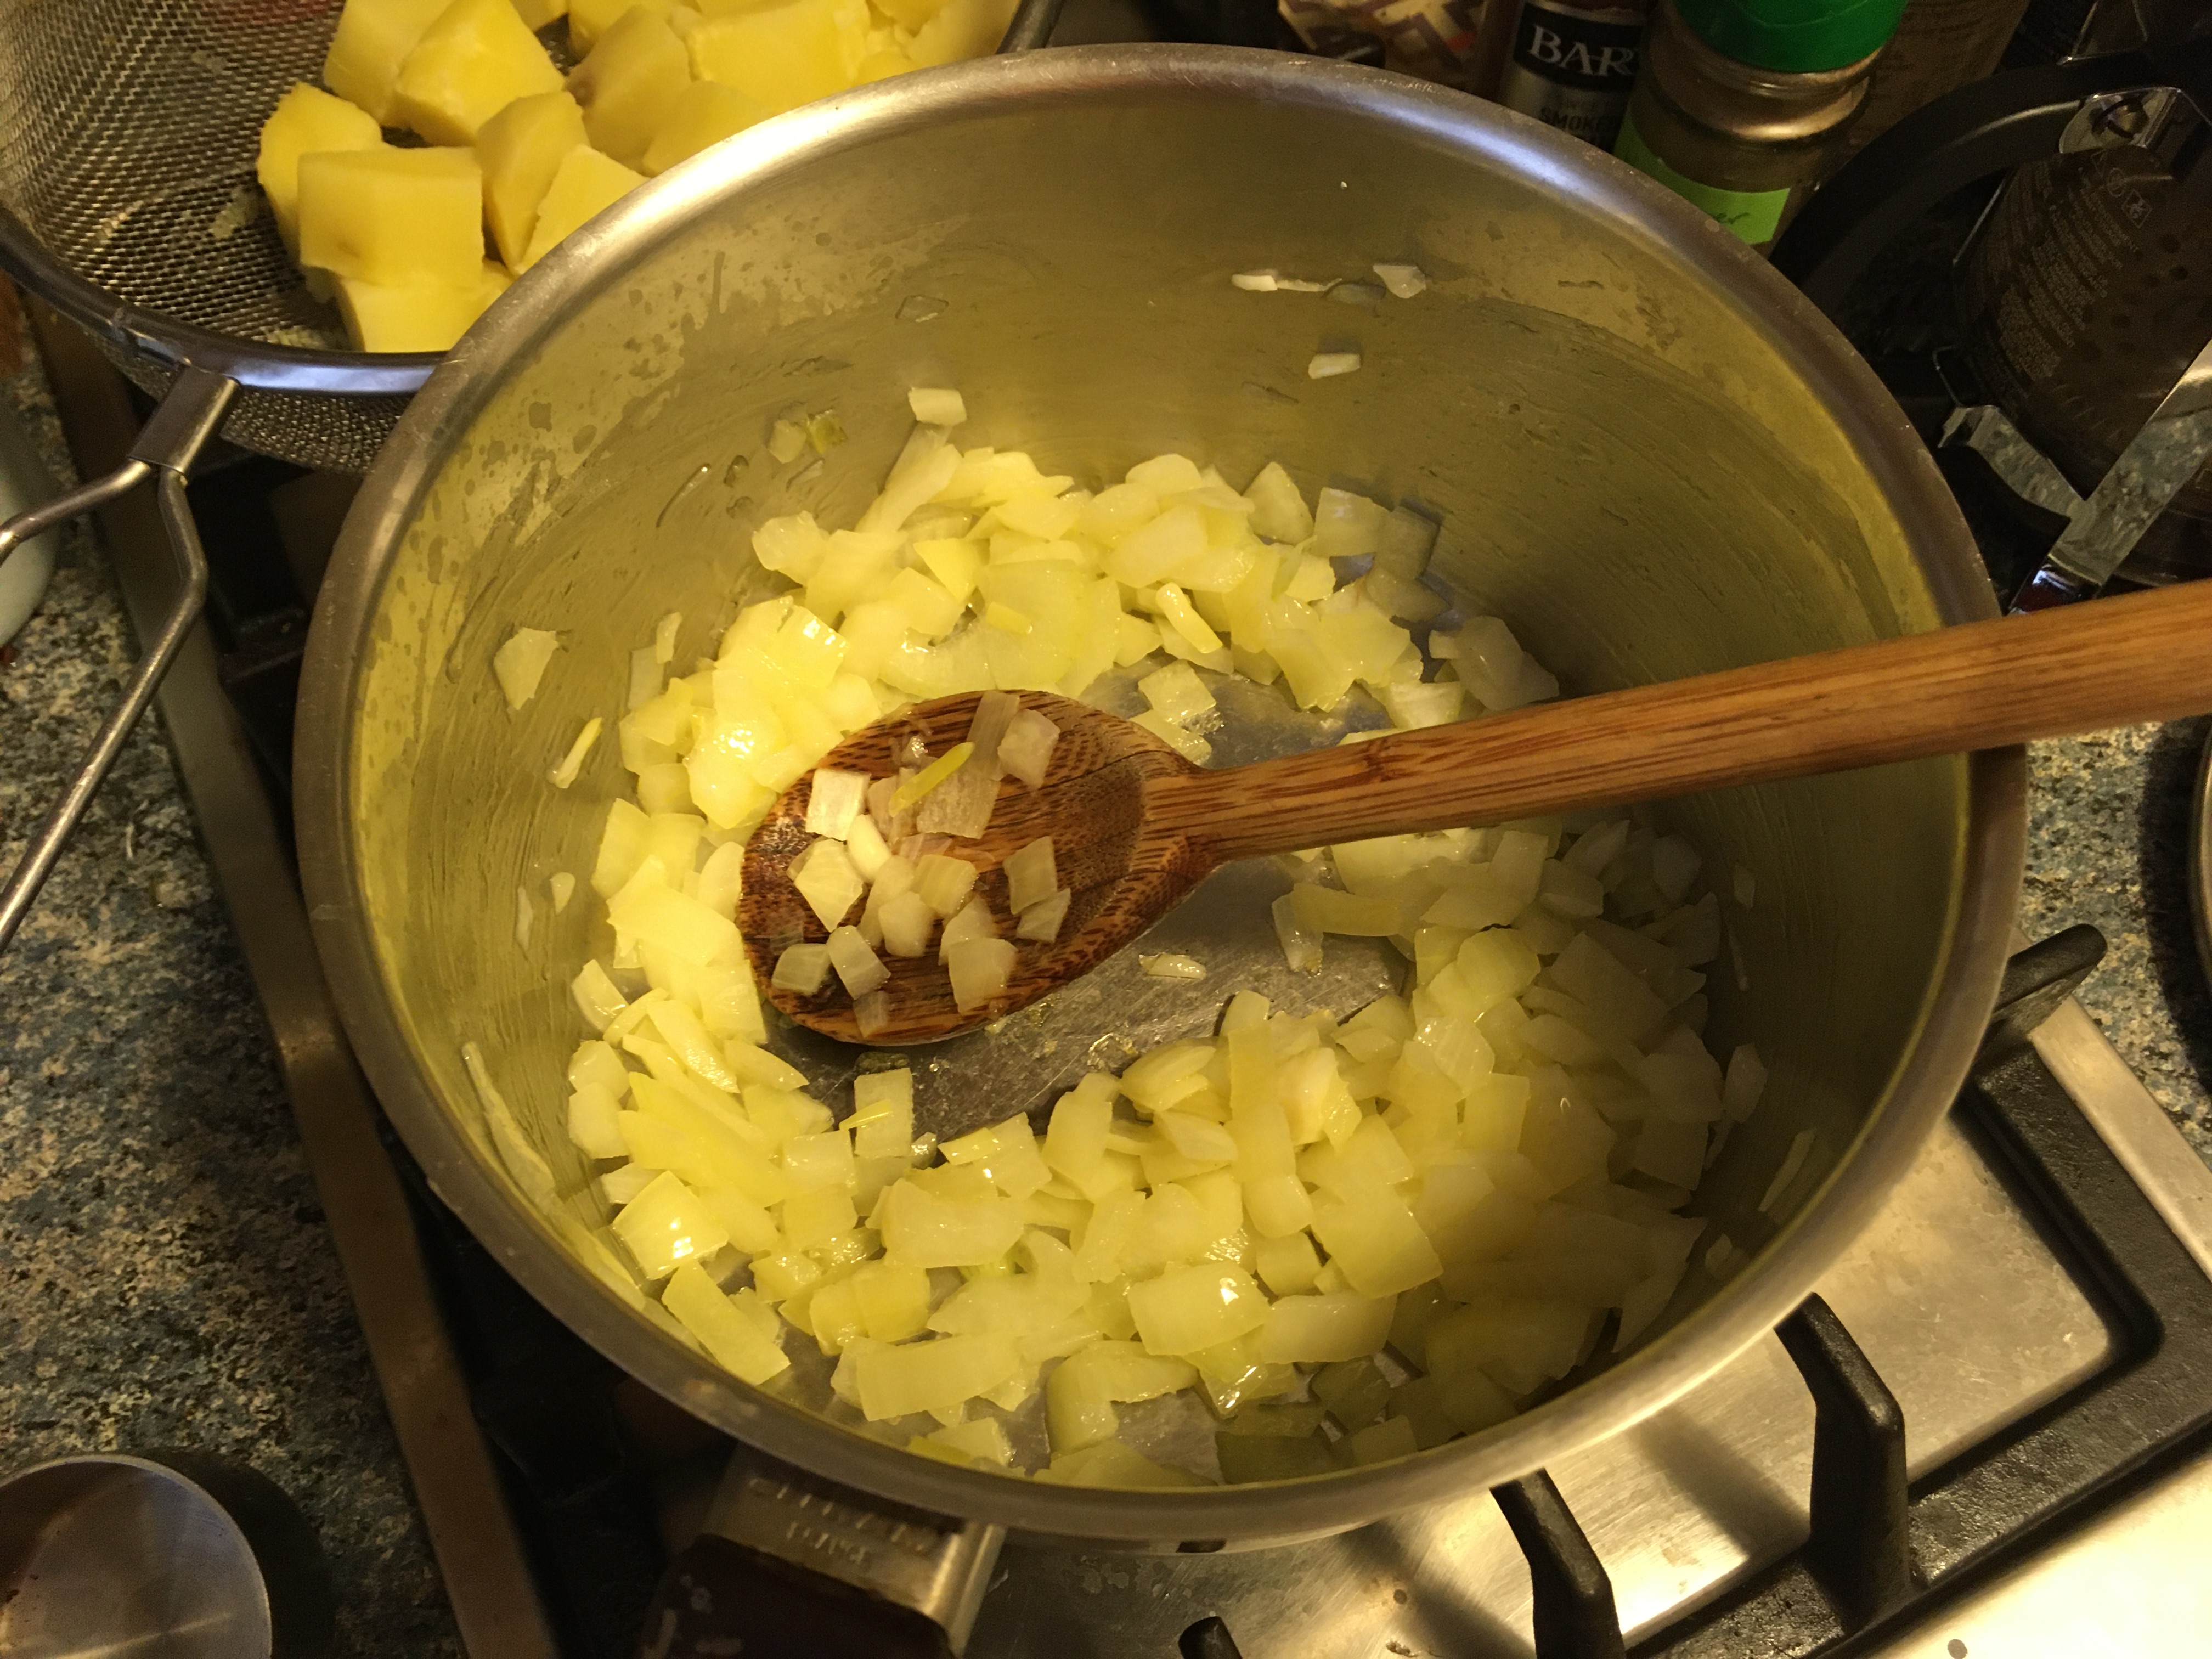
While the potatoes are cooking, continue preparing the rest of the ingredients. Dice the onion and sauté them in a little olive oil until translucent (do not allow to brown).

IMG_0526Incorporate the flour, stirring well to coat all the onions.

IMG_0529Add the soy milk, stirring well. Crumble the bouillon into the milk once it heats up, and add the white pepper. In combination with the flour, the milk will form a kind of béchamel sauce. You may need to add a bit more milk than the one cup, if the result is too dry.

Combine the seaweed with a bit of cool water (it will plump up and double in size in a few minutes).

Add the potatoes and then the seaweed to the pot.

IMG_0545Slice the artichoke hearts into quarters and gently incorporate into the mixture.

IMG_0548
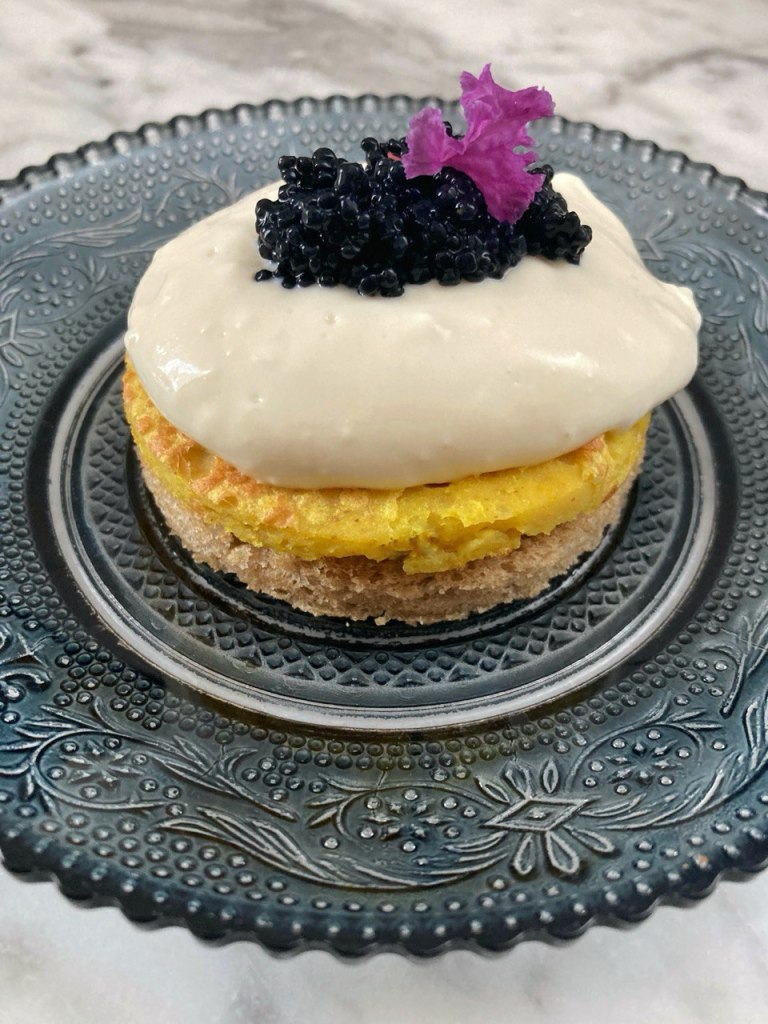
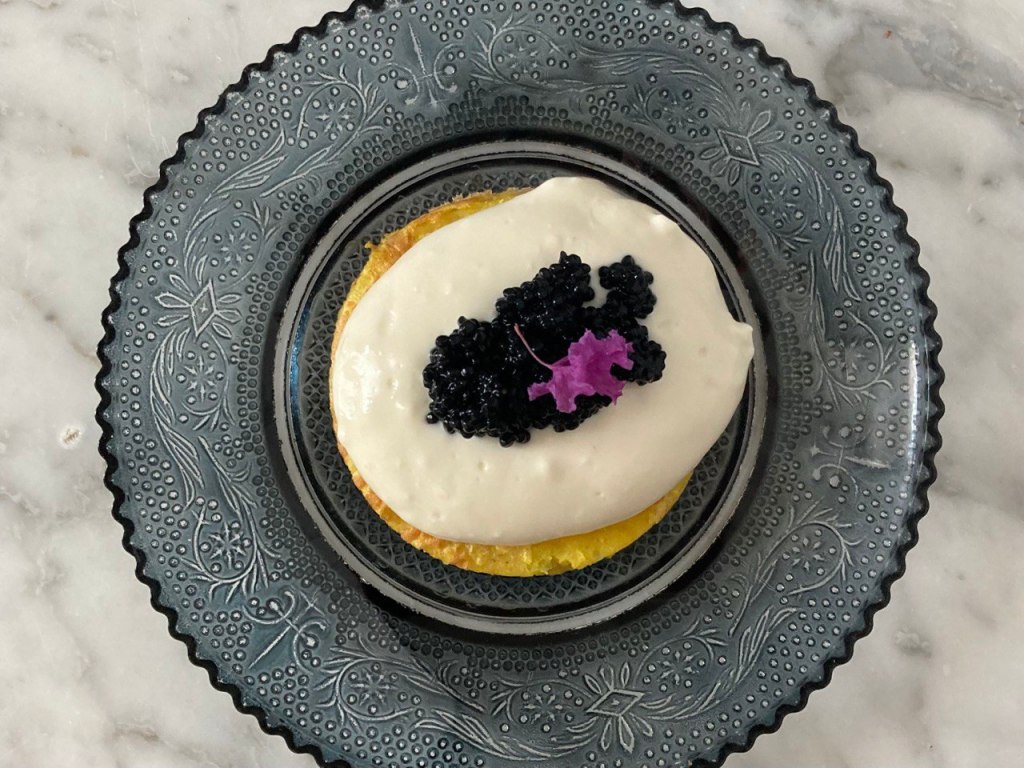
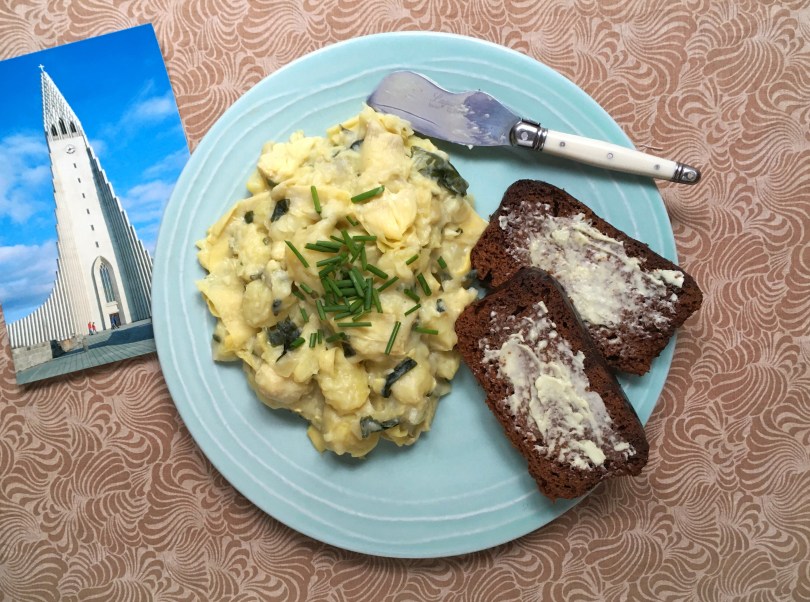
You now have a delightful gourmet and slightly oceany tasting mashed potato dish! Top with fresh chives after serving.

IMG_0738IMG_0747IMG_0770
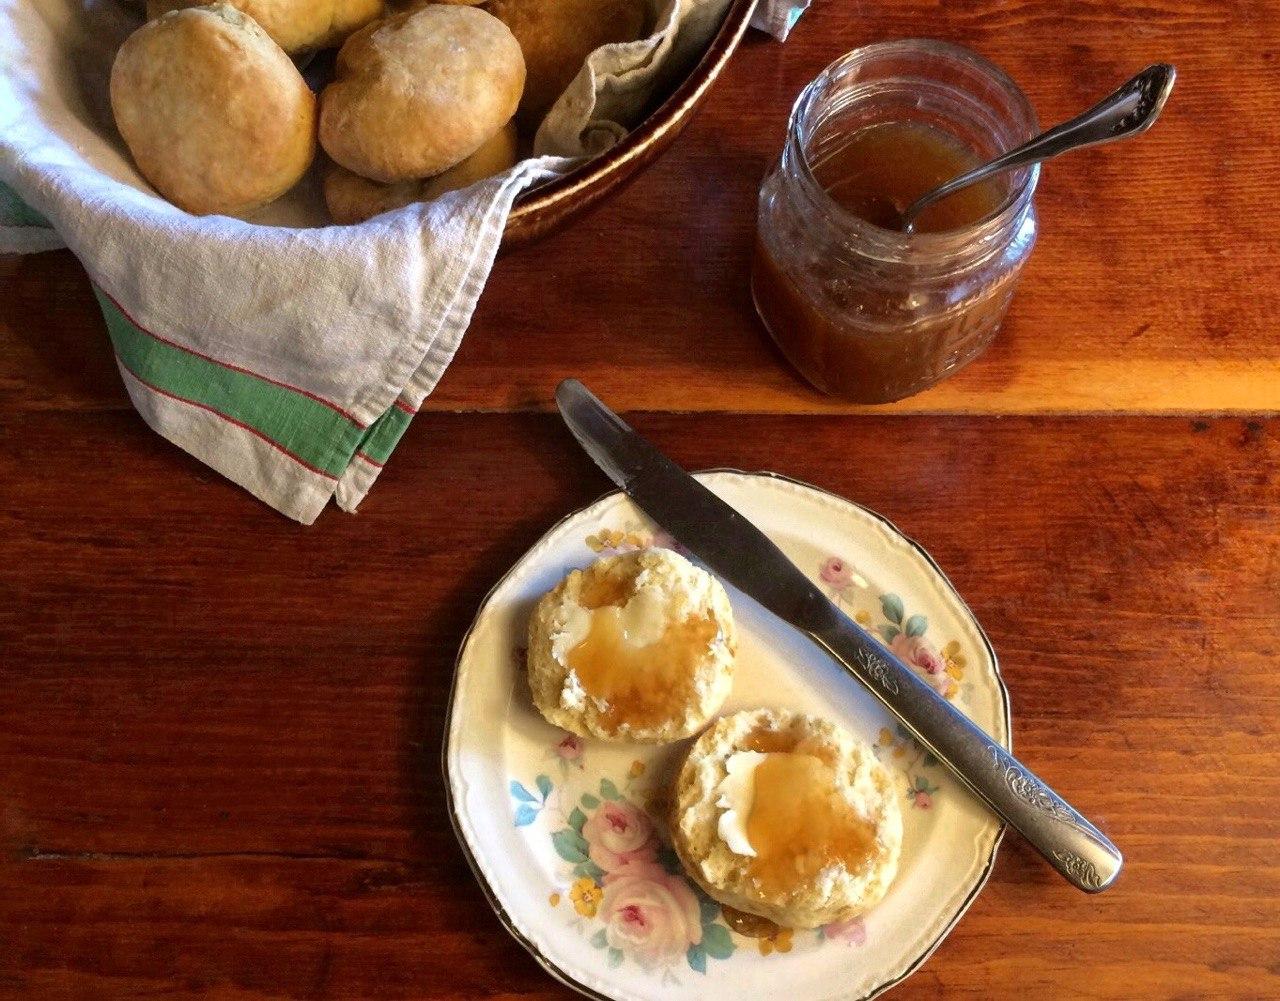
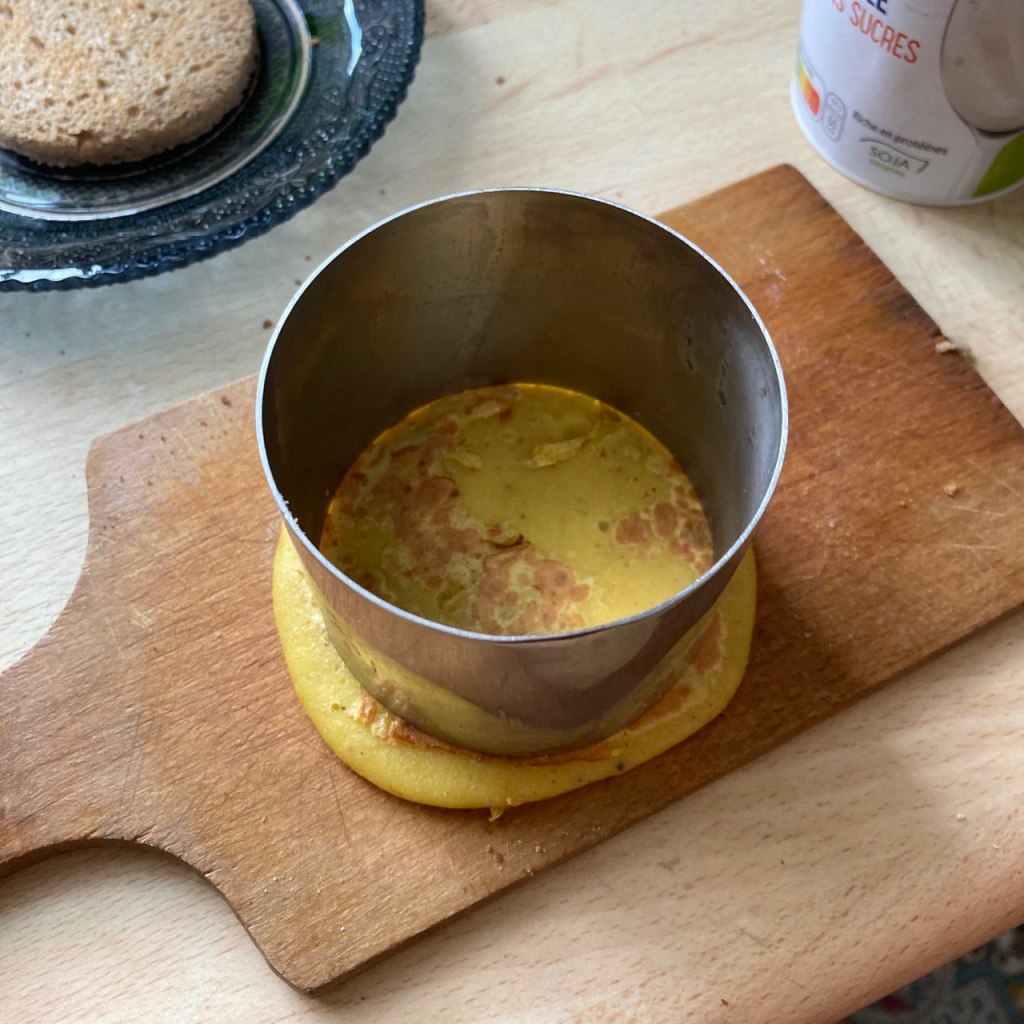
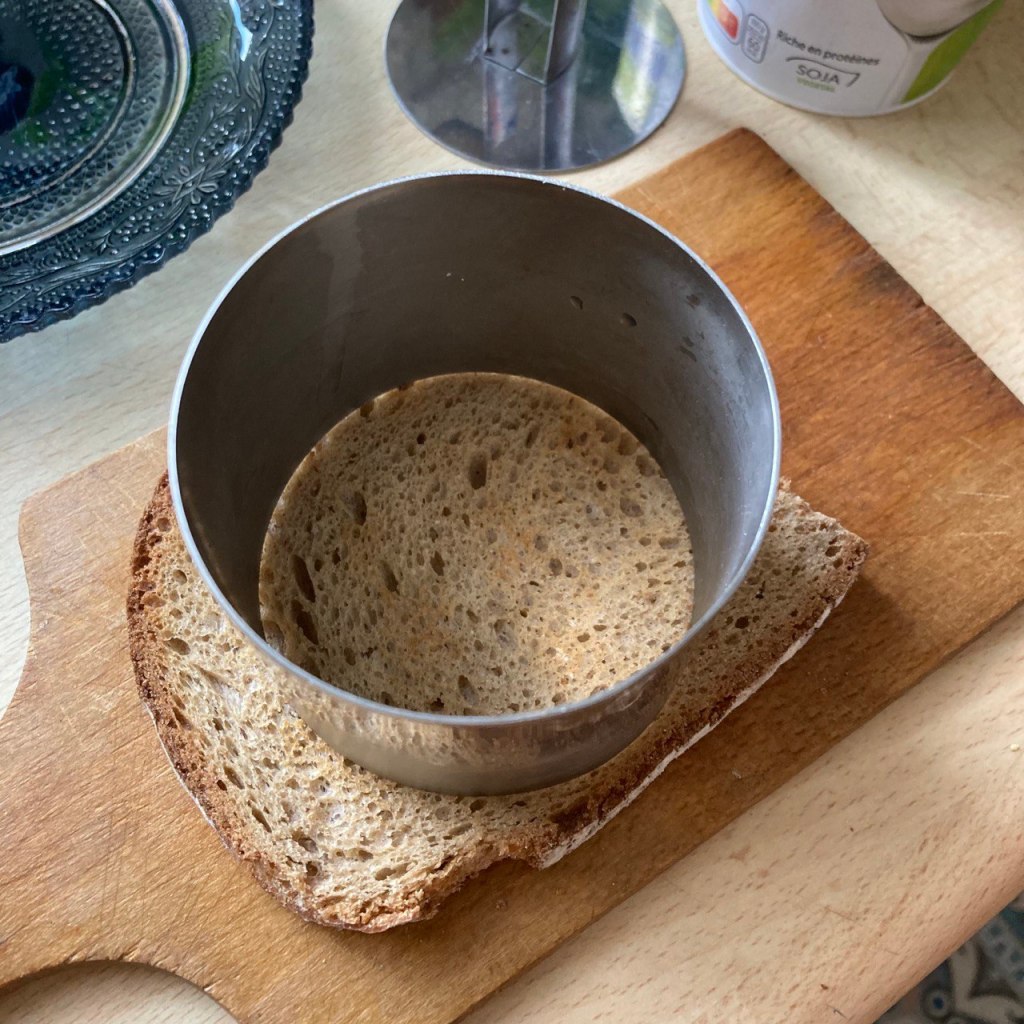
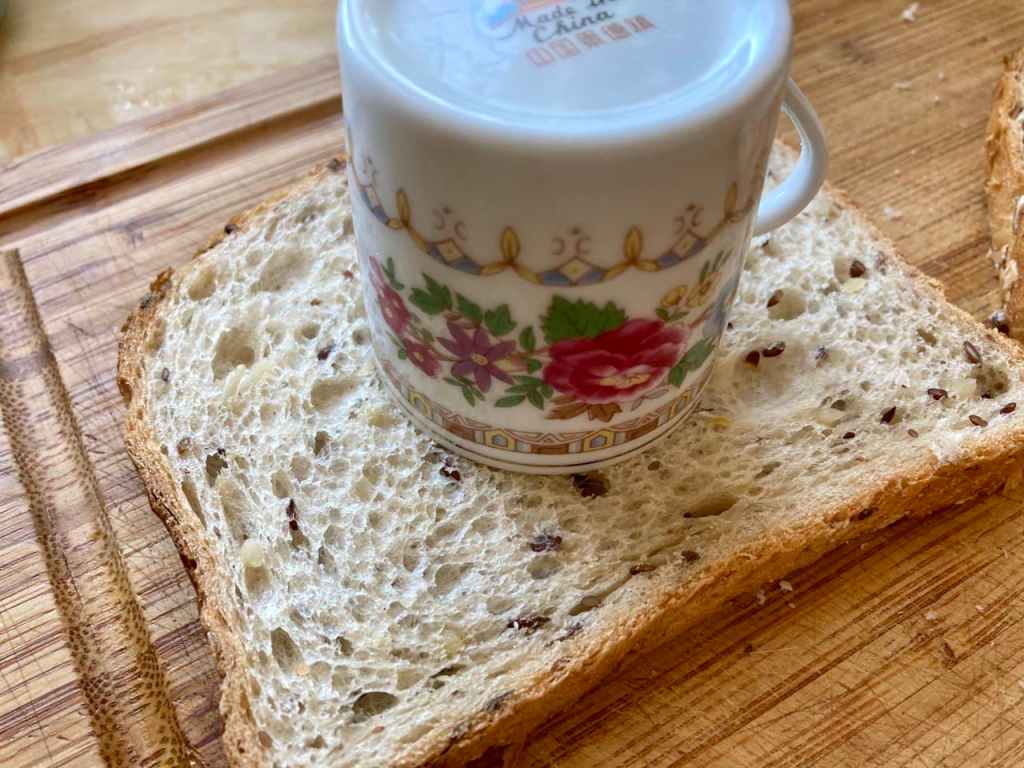
Icelanders often scoop some of the plokkfiskur onto their rye bread to eat them together.

Geothermal rye bread

Makes 1 loaf

  • 1½ cup (150 g) rye flour
  • ¾ cup (94 g) all-purpose wheat flour
  • 2 teaspoons baking powder
  • 1½ teaspoon salt
  • ½ teaspoon baking soda
  • 1 cup (236 ml) soy milk
  • 3 tablespoons molasses
  • 2 tablespoons sugar

Equipment needed: electric slow-cooker large enough to fit loaf pan (or a large stovetop stockpot and a container that can fit inside it).

photo_2020-04-06_11-21-08 (2)This bread may just change your life!

Start by sifting all the dry ingredients into a bowl.

Add the molasses to the soy milk and whisk to incorporate it fully. Be sure to do this as a separate step rather than mixing the molasses straight into the batter.

Prepare your loaf pan with a piece of baking paper (or oil the inside well). Fold the molasses and soy milk mixture into the dry ingredients and stir only until you have achieved a homogeneous consistency. Be careful not to overstir.

Transfer the batter to the prepared loaf pan, and spread it around to an even level. Cover the top with a piece of aluminum foil.

photo_2020-04-06_11-19-36
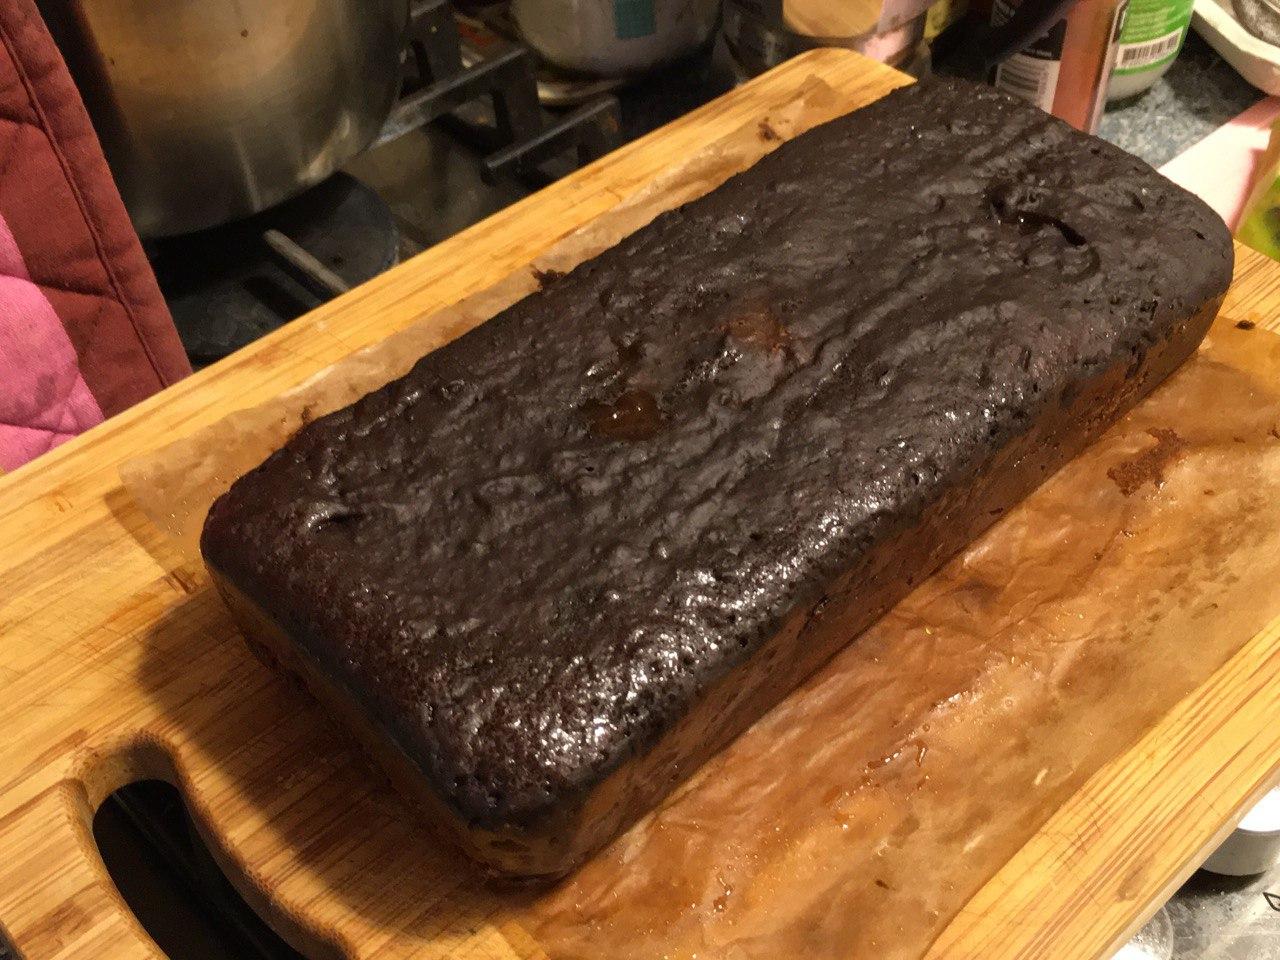
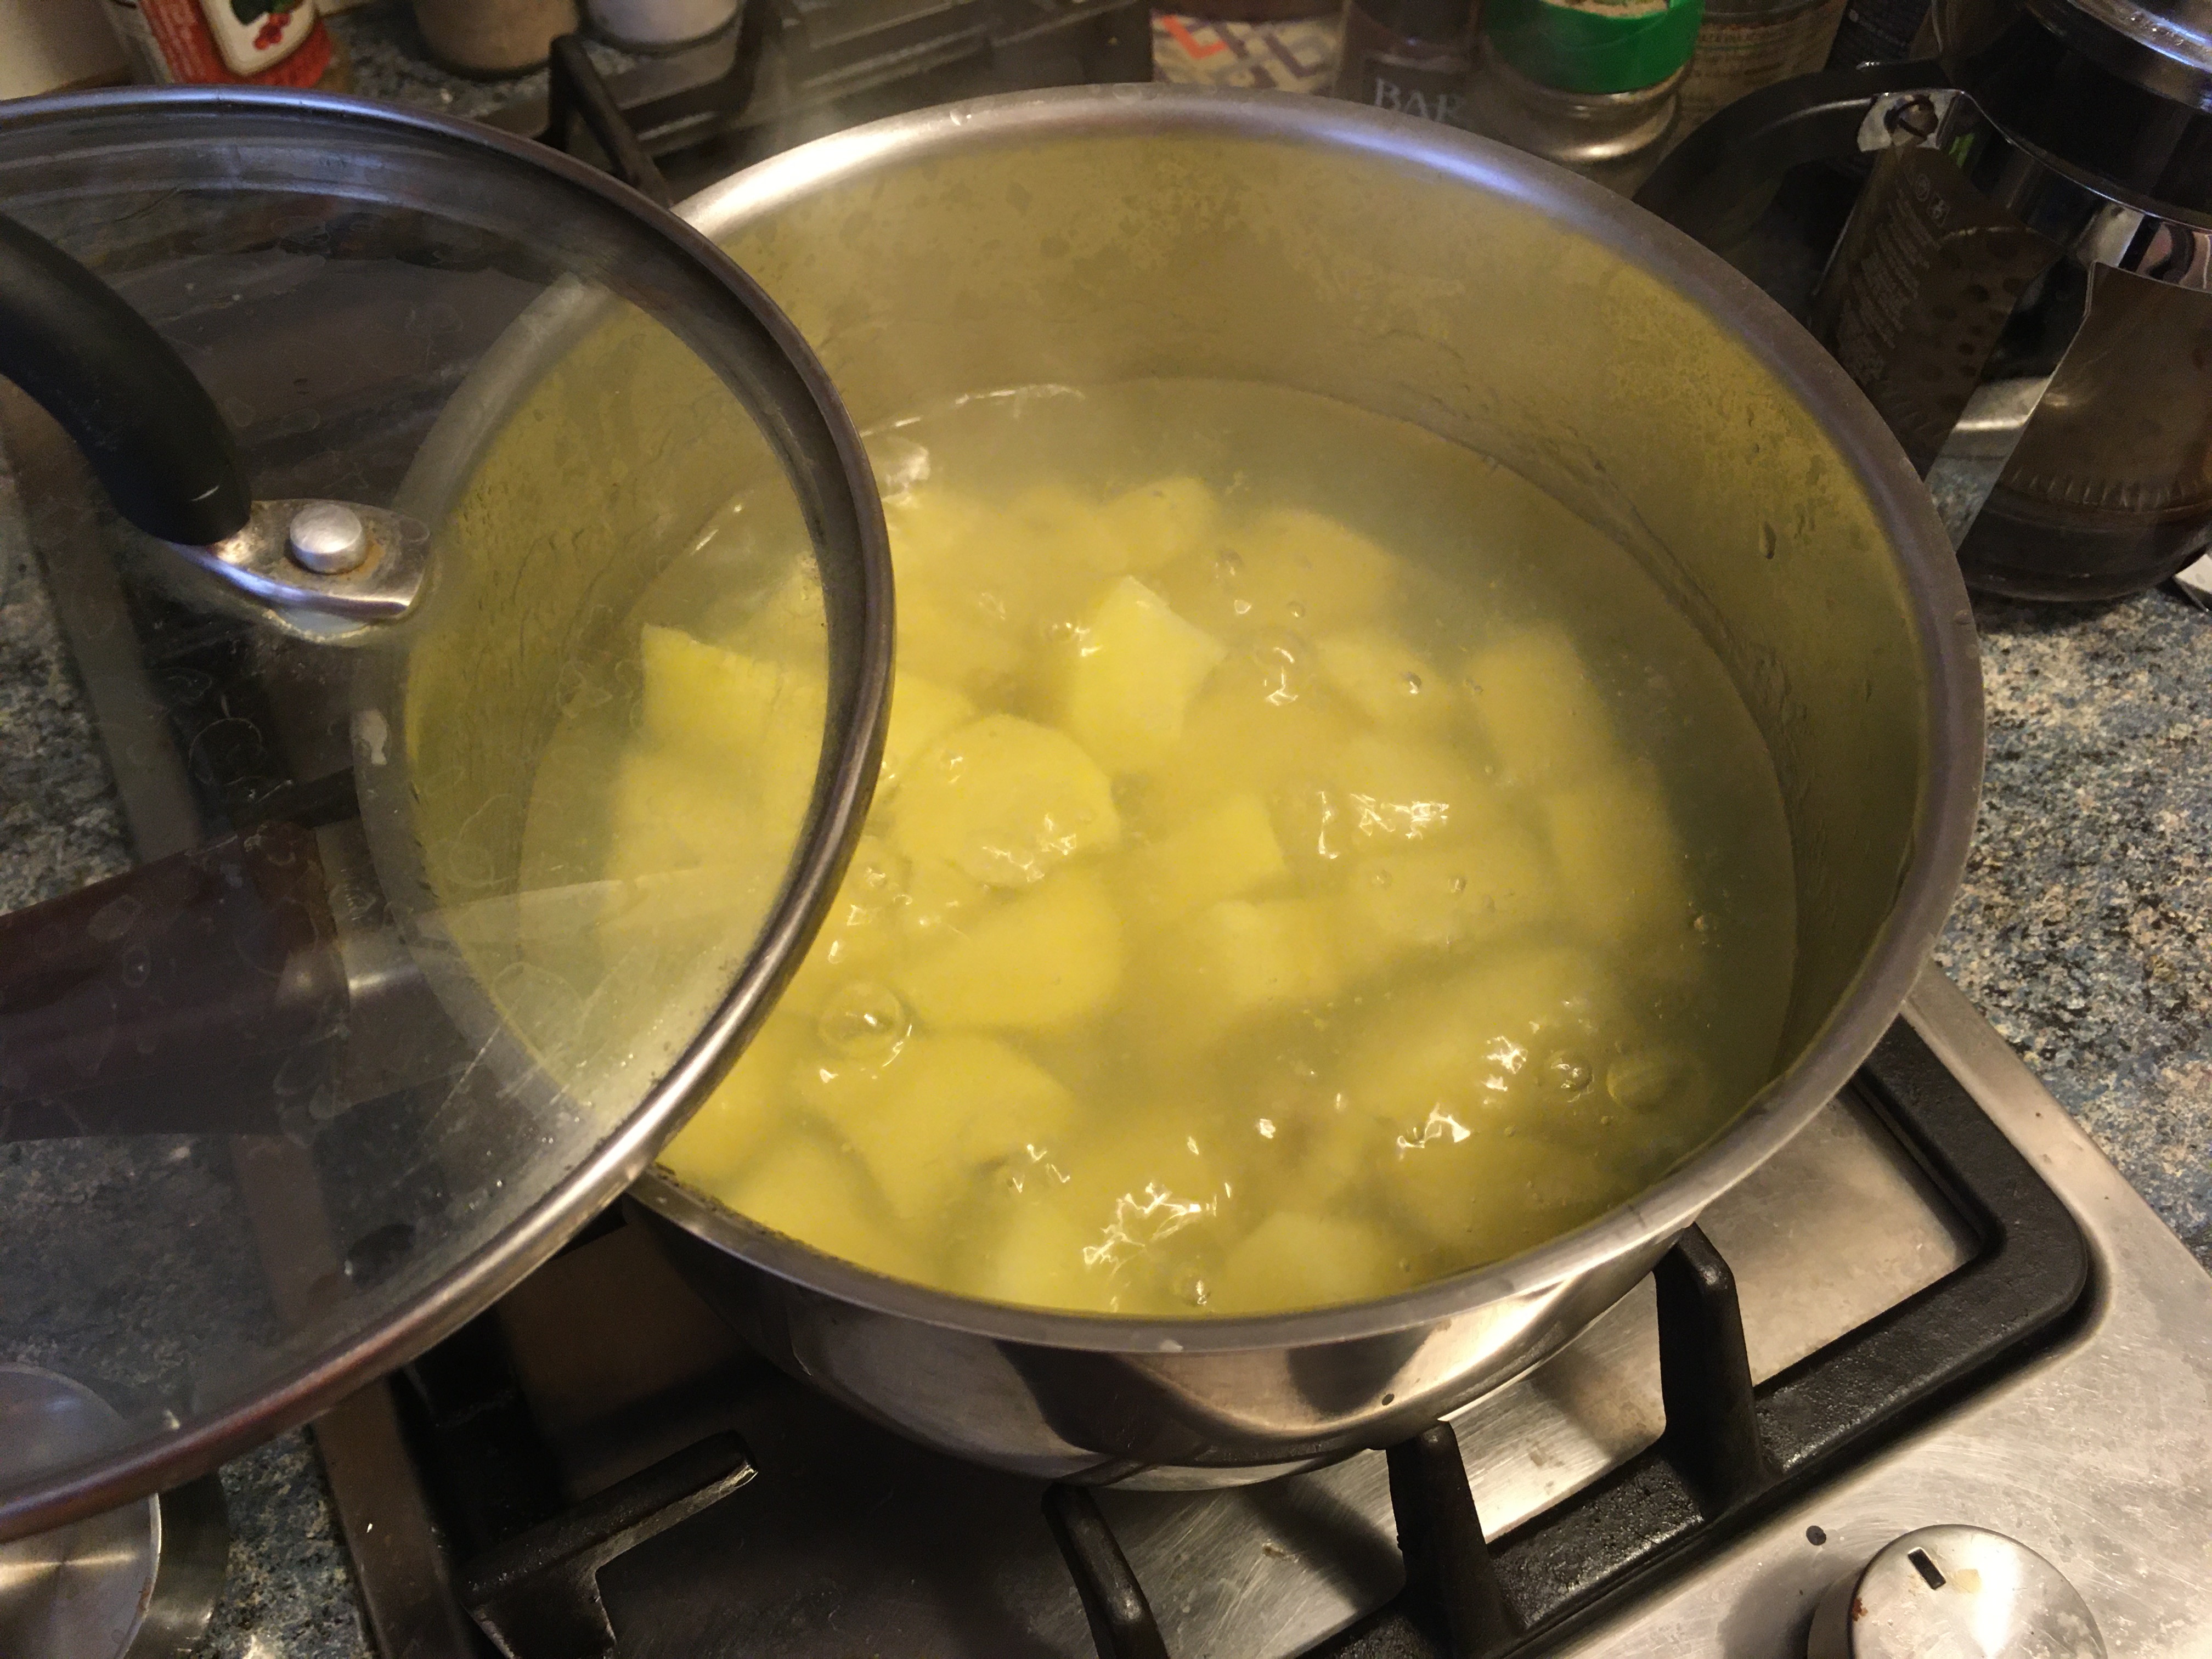
Fill the slow-cooker with boiling water (this one takes 3 liters), or else fill it with water and allow enough time for it to preheat. It is very important for the water to be around 90°C before you add the loaf pan. If the dough is heated too slowly, the baking powder and soda will not be activated and the bread won’t rise. My slow-cooker heats to around 90° to 95° on the high setting, but yours may be different. You can check the exact temperature using a candy thermometer.

photo_2020-04-06_11-19-36 (2)In my slow-cooker, the baking process takes about 18 hours. Since the lid does not form a complete seal, the water evaporates down after a few hours, so I try to time the baking so that I can check it every few hours and refill with hot water as necessary. To check if the bread is done, stick a toothpick in it, both in the middle and the sides. With this method, unlike in an oven, the bread begins baking from the center outwards so the sides and ends are the parts that will not be done if the bread is not yet ready.

photo_2020-04-06_11-06-43photo_2020-04-06_11-06-43 (2)

When you have confirmed that the bread is indeed baked all the way through, remove it from the slow-cooker and allow it to cool. Unmold it onto a cutting board and you’re ready to slice and serve it! It can be used with either savory or sweet things – serve it with the plokkfiskur above or with vegan butter and jam.

To learn more about Iceland, I recommend checking out the All Things Iceland podcast, created by American expat Jewells, who also happens to be vegan! She can also be found on YouTube and Instagram. I also enjoy the Stories of Iceland podcast by native Icelander Óli Gneisti Sóleyjarson. And I of course highly recommend reading the authors I mentioned earlier, as well as (one day, when it’s possible) visiting Iceland yourself.

Bannocks and apple honey

If you’re an Outlander fan, this recipe is for you!

Haven’t seen the show? If you enjoy history, adventure and romance with a side of time travel, there’s a good chance you’d like it. It’s an adaptation of Diana Gabaldon’s series of books following Claire, a married former army nurse who in 1945 accidentally slips through a time portal into 1743 Scotland, where she meets a dashing Higherlander and becomes embroiled in the Jacobite risings.

Like the books, the show has become enormously popular and continues to get renewed season after season. In just a few short days, “droughtlander” will finally be over as season 5 begins! Here are a few photos from seasons 1 and 2, which I have carefully chosen to be not-too-spoilery for anyone who’s completely new to the show.

I won’t reveal any more plot points, but as time goes by Claire and her companions sometimes venture out of Scotland to other lands. Season 4 finds them in a beautiful virgin forest where, in “The Birds & the Bees” (episode 9), as fans will fondly recall, some of the characters take a break from their thrilling adventures to go “hunting” for bees, following them back to their hive to nab some honey.

Outlander vegan bannocks 15

And they find it!

So to pay homage to Outlander, I thought it would be fun to post a recipe for apple honey – yes, honey you can make yourself! – adapted from Mary’s Test Kitchen, and also for bannocks, a type of Scottish biscuit often mentioned on the show. They’re the perfect thing to spread honey on when you get back to your cabin after a long day in the woods. Or to make for an Outlander watch party!

My idea for this post came to me just before a vacation with my family in the northwoods of Wisconsin, where my grandmother owns a beautiful log cabin built in the 1920s (its furniture, tableware and linens are all early 20th century). I really couldn’t have asked for a better place to make an Outlander season 4 tribute recipe.

As I’m not from Scotland and haven’t yet found a time portal to the 18th century, I can’t guarantee that these bannocks are super similar to the ones Claire and friends would have enjoyed. But bannock recipes seem to vary anyway, so I think these will do. They were quite the hit with my family at least.

Freshly baked biscuits are popular with most people, so that was no shocker. But I was surprised by how much they all loved the apple honey! Although most of them do consume traditional bee honey, they really appreciated the unique flavor profile of this one – it’s honey-esque but lighter, with subtle fruity notes. My mom and sister even said they now prefer it to regular honey, which they often find too sweet. I agree, and have never really cared it for that reason.

I recommend making the honey first and the bannocks second so you can enjoy them when they’re fresh out of the oven.

If you prefer to make just the bannocks but are still curious to try vegan honey, a bunch of brands offer it now. See the very end of this post for more details!

vegan bannocks

Apple honey

Makes about 1 cup (236 ml) of honey

  • 2 cups (475 ml) 100% pure pressed apple juice (with no additives)
  • 1 cup (200 g) granulated sugar
  • 1 teaspoon freshly squeezed lemon juice

Equipment needed: saucepan, lemon juicer, glass jar, bee costume (optional)

Combine the pure pressed apple juice, lemon juice and sugar in a medium-sized saucepan and bring to a boil on high heat (be careful not to let it boil over). Once it reaches a rolling boil, turn the heat down to medium-low.

Let it simmer, stirring occasionally, until the liquid is reduced by about half or has reached the desired thickness (this may take 20 to 30 minutes). Note that you won’t be able to see the final thickness until it cools, so to test it, chill a spoon in the freezer briefly and dip it in the simmering honey. Once the honey on the spoon has cooled, you can assess its consistency. Note that if you end up simmering the juice too long, you’ll have thicker honey (more like honey jam) but it will still taste nice.

When the honey is done, remove it from the heat and allow it to cool for a few minutes before transferring it to a glass jar. Let it cool completely before putting on the lid.

Bannocks (Scottish biscuits)

Makes around 15 bannocks

  • 2¼ cups (280 g) all-purpose flour + extra for dusting
  • 4 teaspoons baking powder
  • ¼ teaspoon baking soda
  • ¾ teaspoon salt
  • 3 tablespoons margarine or vegan butter
  • 2 tablespoons shortening, or substitute more of the above
  • 1 cup (236 ml) soy milk (no substitutions)
  • 1 teaspoon apple cider vinegar or white vinegar

Equipment needed: baking sheet, biscuit cutter or drinking glass, rolling pin

IMG_7946

Preheat your oven to 475°F (250°C), then whisk the soy milk and vinegar in a small bowl and set aside (the milk will thicken after a few minutes). Sift the flour, baking powder, baking soda and salt into a large mixing bowl and whisk to combine. Prepare the margarine and shortening.

Transfer the margarine and shortening into the bowl with the dry ingredients. With a sturdy fork or pastry blender, mash these ingredients into the flour mixture until crumbly. Add the soy milk mixture and stir until just combined (be careful not to stir too much as it can make the biscuits tough).

Dust some flour on a clean countertop or cutting board and roll out the dough with a rolling pin until it’s about 1 inch (2.5 cm) thick. With a biscuit cutter or drinking glass, cut out rounds. Transfer these, placed close together, to a greased or parchment-lined baking sheet. Piece or mash the leftover dough together to make a few last bannocks (which may look a little wonky, but will still taste good). Bake in the preheated oven until golden brown, about 10 to 15 minutes. Keep an eye on them while they’re baking to make sure they don’t overbake.

photo_2020-02-11_03-38-57

Remove from oven and immediately transfer to a cooling rack or other suitable surface. Now get out your apple honey and (optionally) some margarine or vegan butter, and you’re ready for a picnic or a fireside snack!

photo_2020-02-09_21-45-49

vegan bannocksOutlander vegan bannocks 19

As Claire Fraser and I can both confirm, bannocks and honey taste best when enjoyed with your family!

If you make these recipes, please leave a comment and let us know how they were, and tag @rd.violet on Instagram.


Where to find ingredients…

Shortening: widely available in North America but not, for some reason, in France (I don’t know about the rest of Europe). Substitute more margarine/vegan butter for it.

Vegan honey: In the US, check organic shops for brands like Bee Free Honee. In Europe, English brand Plantbased Artisan honea is a good option (available at Aujourd’hui Demain in Paris) and I have recently spotted a new brand, Vegablum, at Naturalia Vegan in Paris. I actually brought some Plantbased Artisan honea (original flavor) with me to the northwoods just in case my apple honey recipe tanked, and we all ended up liking the homemade one better. But I like their lavender flavor a lot.

Why do some people avoid honey from bees? You’ll find an explanation here.