Nutty doughnut holes

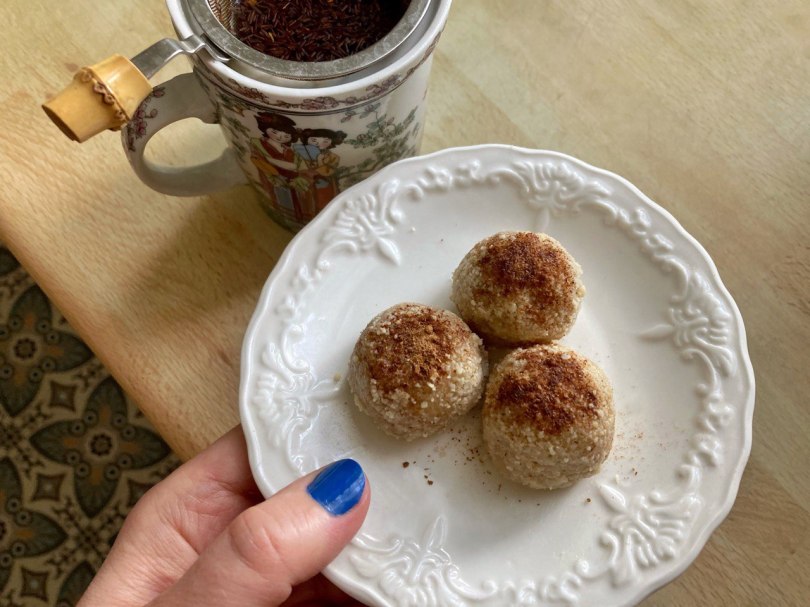
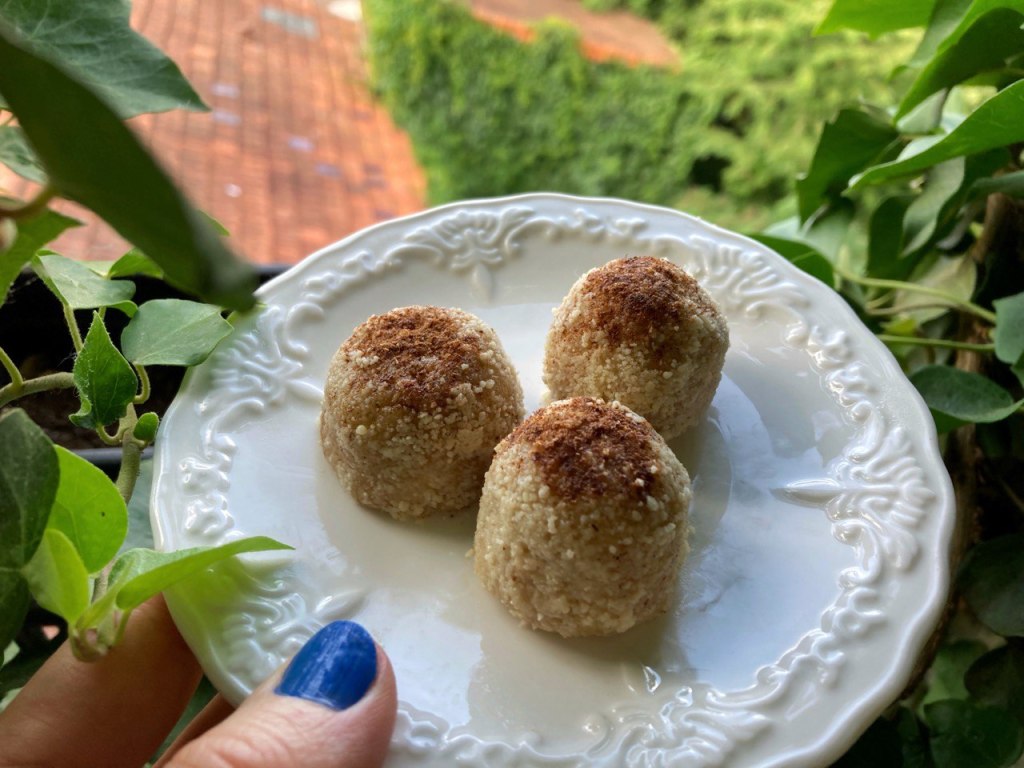
This recipe puts the NUT in doughnut holes. Made from ground almonds, nut butter and a few other ingredients, these no-bake, raw doughnut holes can be whipped up in a flash.

I devised them one day when I wanted just a very small dessert to go with my afternoon tea but didn’t have anything in the house. A package of ground almonds happened to be sitting on my kitchen counter next to a jar of almond butter, and that reminded me of making truffle-like creations with ingredients like those in the early 2010s when raw food was popular. After stirring the almonds and almond butter together with some maple syrup, vanilla and a tiny bit of salt, and then rolling them into balls, I realized they were like a more filling, stick-to-your-ribs version of the doughnut “holes” you can get from doughnut shops. Especially with a dusting of cinnamon.

These doughnut holes are better for you than their traditional counterpart, with their protein content and as a source of vitamin E and minerals such as calcium, phosphorus and magnesium, as well as certain phytonutrients. Almonds furthermore have antioxidant and anti-inflammatory properties, and although calorie-dense, are not associated with weight gain, possibly because the fat and fiber content help promote feelings of satisfaction and fullness.

They’re also nice on a hot summer day when you don’t want to fire up your oven.

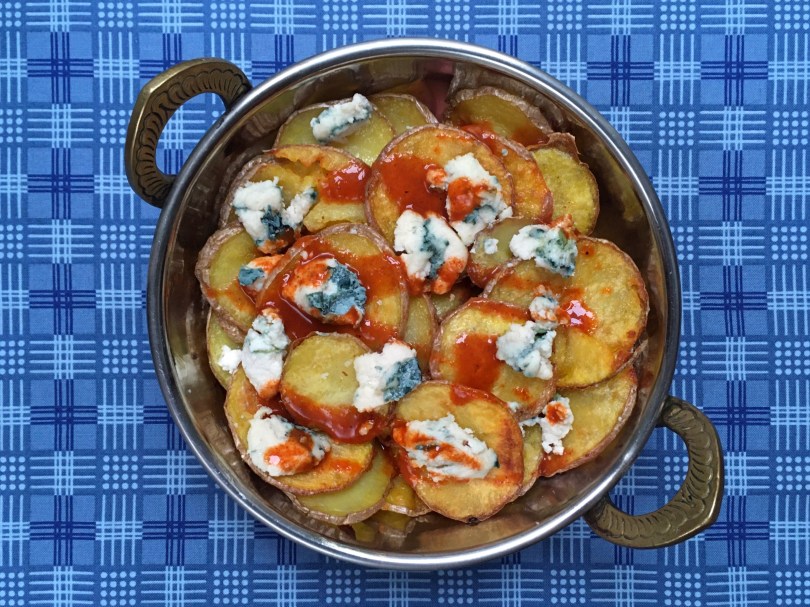
Countless variations are possible, since many types of ground nuts and nut (or seed) butters can be used. I like the almond flavor of these, but it would be interesting to try a version with peanut butter, pistachio butter or black tahini. For the doughnut holes pictured here, I used white almond butter.

Nutty doughnut holes

Makes three doughnut holes.

  • 6 tablespoons ground almonds, plus extra for coating
  • 3 teaspoons almond butter (the thicker the better)
  • 3 teaspoons maple syrup
  • 1/4 teaspoon vanilla extract
  • small pinch of salt
  • 1/2 teaspoon ground cinnamon

Directions

Mix all the ingredients except the cinnamon together with a spoon in small, round-bottomed bowl. Adjust the quantities as needed: if your nut butter is on the runny side, or you use more maple syrup for a sweeter result, you may need to add more ground almonds to compensate. Roll the paste into balls with your hands, then coat the balls with extra ground almonds. Finally, dab the tops of the balls in some cinnamon (this helps it to stick better), or dust the cinnamon on top. Serve immediately, as is, or place in the refrigerator for an hour for a firmer result.

Just about any nut or seed butter will work. Try to use one that’s fairly thick (the white almond butter I used was a bit on the runny side and I had to add more ground almonds).

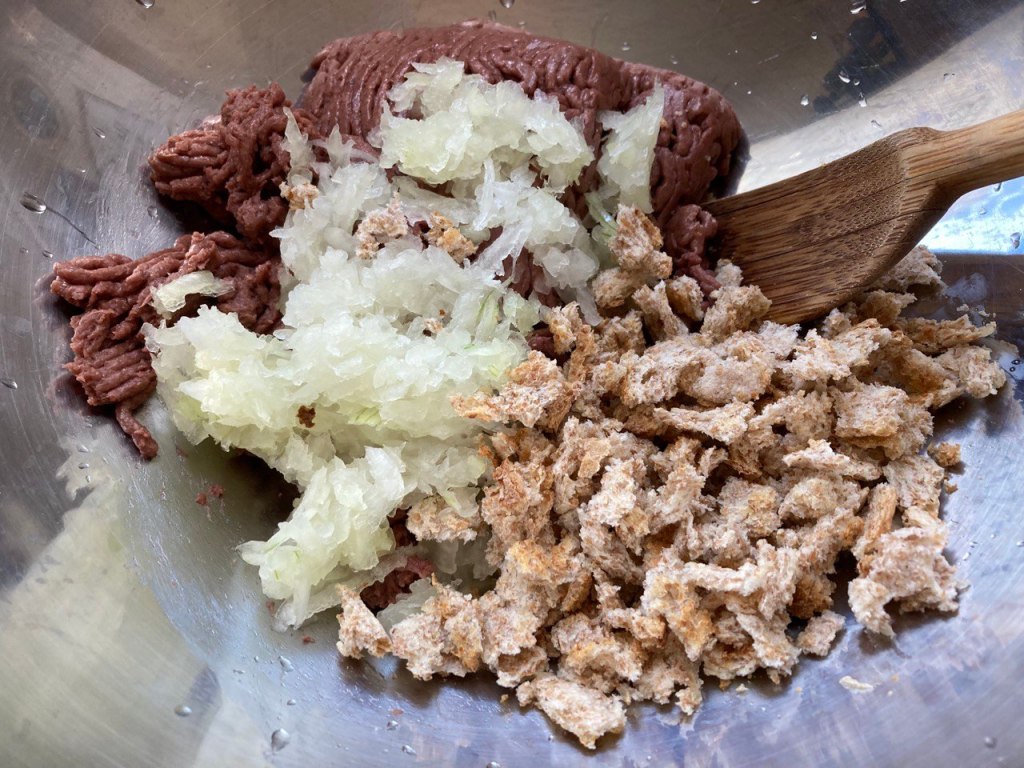
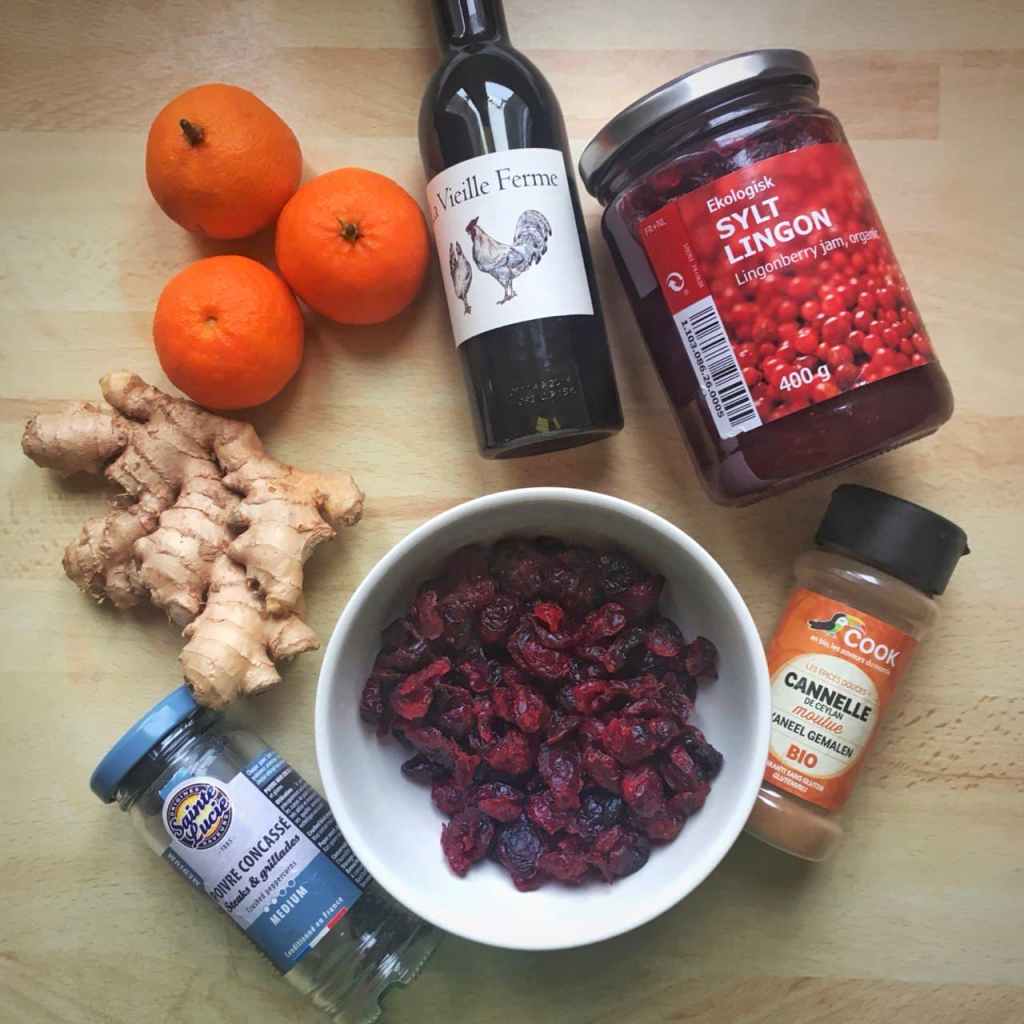
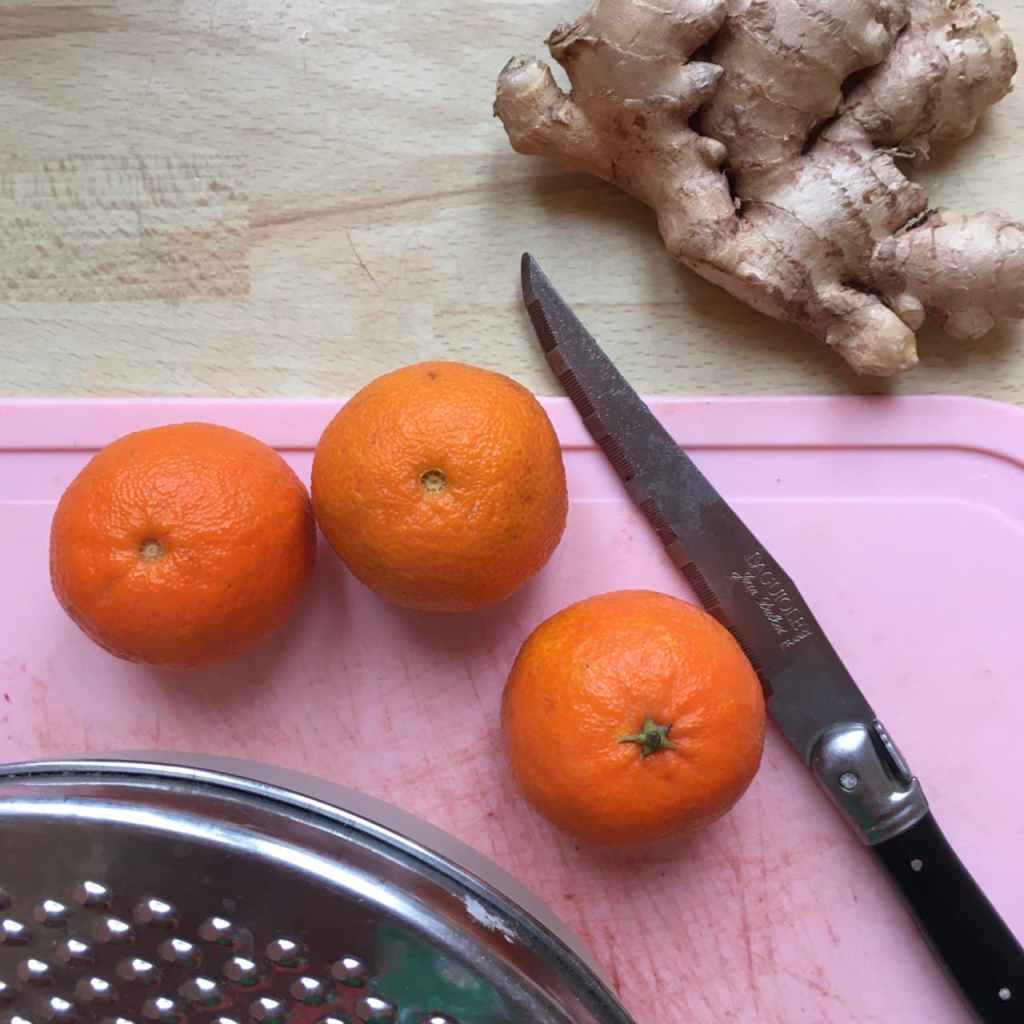
Mise en place. I received the maple syrup, a very nice high-grade, artisanal variety from Williamstown, Massachusetts, as a gift from a thoughtful client who lives in the area.

I often make just one doughnut hole at a time, mixing up the ingredients in a small condiment bowl.

Mash the ingredients together against the bottom of the bowl with a spoon for best results.

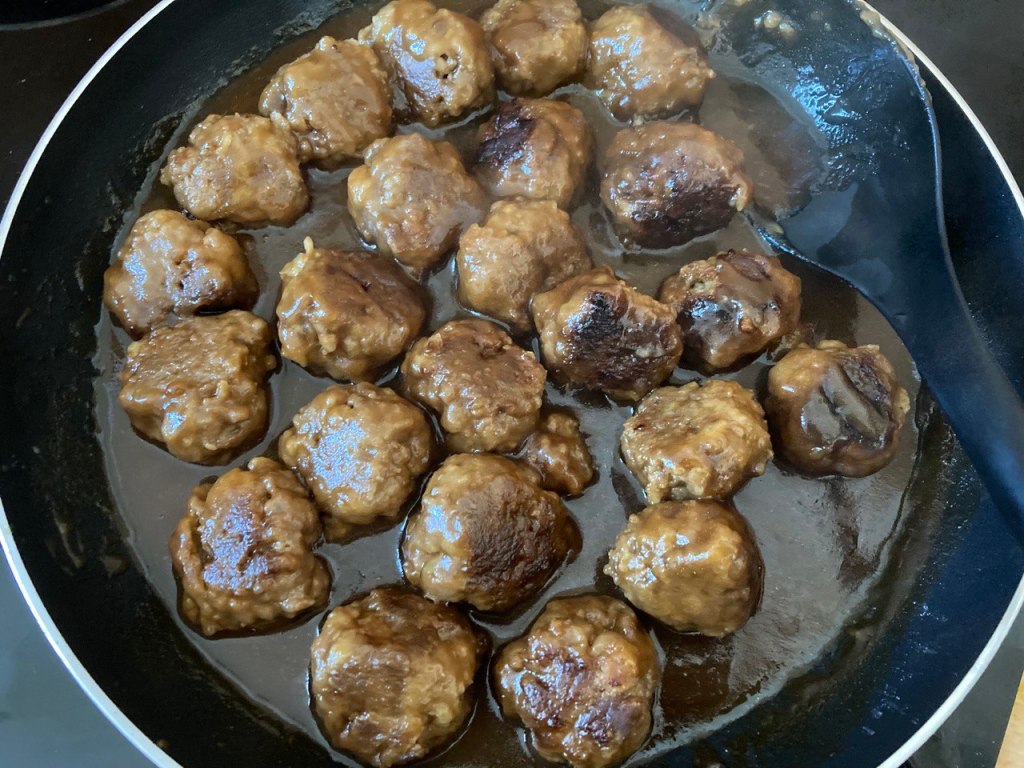
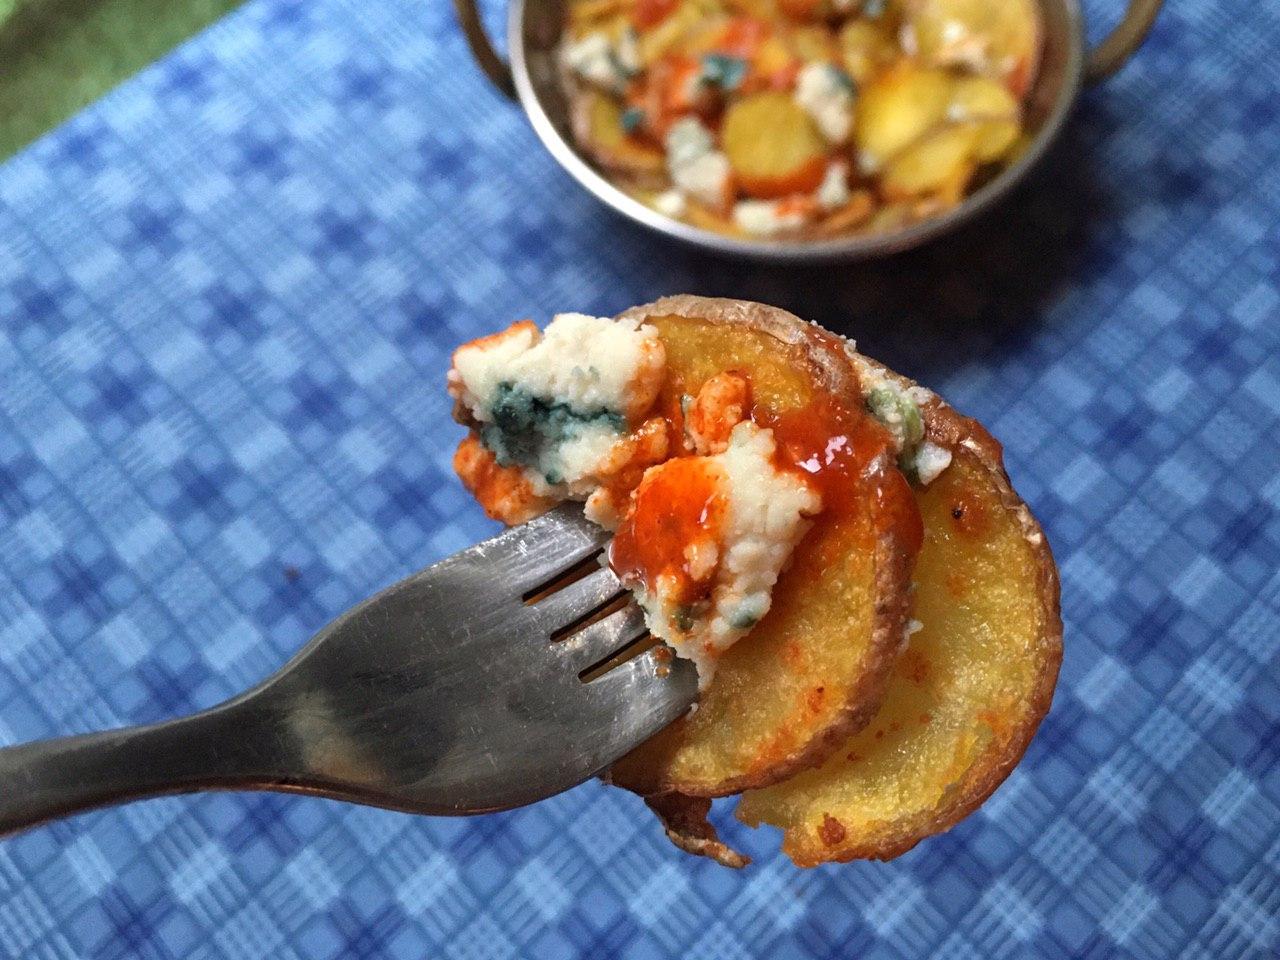
Enjoy! Don’t forget to tag me on Instagram if you make these and post them there. 🙂

And if you too are a big fan of nut and seed butters in general, take a look at my nut butter cake, peanut butter and chocolate cookies, striped sesame cake and black sesame turnovers.

Sauerbraten meatballs

Earlier this month, I discovered there’s a National German-American Day (October 6th) in my home country. It seems it was created in 1883 but got put on the shelf during World War I, when German descendants wanted to keep their roots on the down-low. Then in 1983, sensing an auspicious anniversary, Ronald Reagan brought it back. I’ve never known this particular day to be celebrated in Wisconsin, which is home to countless people of German ancestry. But it may just be that it doesn’t stand a chance against Oktoberfest, a much bigger deal for the gentle folk of this state.

As my own family is mostly German on both sides, and almost everyone I knew growing up had this same background, Germany never seemed very exotic or interesting to me when I was younger. I half-heartedly studied the language for a semester as an undergrad, but then when a scheduling conflict made the second semester inaccessible, I enrolled in an Arabic class instead. I’ve taken more of an interest in my heritage in recent years though, so when I heard about this little holiday I decided to pay homage to it with this vegan version of a favorite family dish.

It’s a shortcut version of sauerbraten, a beef pot roast that’s marinated in vinegar over days and days (the name means “sour roast”), although I liked the meatball alternative better in any case. My mom always served the meatballs over a fettucine-type pasta, but they could also be paired with rice or presented on a plate skewered with toothpicks for a buffet dinner.

What sets this recipe apart is its special ingredient. The sauce is made with – hold onto your hats – gingersnap cookies! My mom makes her own gingersnaps, but I used Lotus brand speculoos, which have a similar enough taste. The cookie element makes this dish a bit sweet (there’s some brown sugar in there too!), so to balance out the flavors, consider serving it with a neutral-tasting side dish like green beans, or even something bitter such as arugula/rocket or endives.

Sauerbraten meatballs and sauce

Makes about 23 meatballs (two or three servings)

  • 14 oz (400 g) vegan ground “beef” (look for brands like HappyVore, Herta or Beyond Meat)
  • 1 small onion, grated
  • 1 cup breadcrumbs (1 piece of pre-sliced fresh bread)
  • 1/4 cup (60 ml) unsweetened plant-based liquid cream
  • 1/2 teaspoon salt
  • 1/4 teaspoon black pepper
  • About 6 tablespoons flour, for coating
  • A few tablespoons vegan butter or margarine, for the frying pan
  • Fettuccine or similar pasta, prepared according to package instructions

For the sauce:

  • 1 cup (236 ml) vegetable broth
  • 1/3 cup crushed gingersnaps or speculoos/biscoff cookies
  • 3 tablespoons brown sugar
  • 3 tablespoons vinegar (any kind, but I used red wine vinegar)
  • 1/3 cup (80 ml) water

Equipment needed: vegetable grater, large frying pan with cover.

Begin placing the meatball ingredients in a medium mixing bowl.

Using a vegetable grater, grate the onion (alternatively, dice it very, very finely).

Add the breadcrumbs. I just tore up a slice of bread with my fingers, but you could use store-bought fine breadcrumbs and it would also work well.

Add the salt, pepper and cream and stir thoroughly until you have a homogeneous texture. Then place the flour in a small shallow bowl. Roll the meatballs in your hands, making them each about the size of a walnut. Place them in the bowl with the flour and roll them around to lightly coat them.

Place the rolled meatballs on a plate as you go along.

Warm some vegan butter or margarine in a large frying pan over medium heat. Add the meatballs.

Cover (not shown, oops!) and cook the meatballs for several minutes on each side. Keep a close eye on them to be sure they aren’t burning or getting too brown.

While the meatballs are cooking, start making the sauce. Roughly crush the gingersnap or speculoos cookies into a 1/3 measuring cup (the crumb size doesn’t matter since the crumbs will quickly dissolve).

Heat the broth, add the crushed cookies, brown sugar and vinegar. Once the cookie crumbs have dissolved and the mixture is drawing close to a boil, remove from heat.

Immediately pour the sauce over the meatballs, cover the pan again and let simmer for 20 minutes. The flour coating from the meatballs will thicken the sauce. Stir occasionally, turning the meatballs over to ensure they’re all evenly coated with the sauce.

While the meatballs are simmering, prepare your pasta or rice. Use whatever amount you’ll need to serve the number of people who will be sharing this meal.

And there you have it! As a side note, I’m happy to report that my mom now makes this dish in a meat-free version herself even when I’m not there. With Beyond Meat or similar products, the taste is so close to the original, but the impact in terms of health, biodiversity and the planet is much, much better. Not to mention nicer for the animals!

As always, if you try this, let me know how it turned out!

And if you’re a fan of meatballs, be sure to check out my favorite holiday recipe, Scandinavian juleboller with spiced blackcurrant sauce.

Peanut butter and chocolate cookies

Who doesn’t love peanut butter and chocolate together? Such a successful combination, especially in these cookies! I paired a basic peanut butter cookie recipe (my mom’s!) with one of the best vegan chocolate bars on the planet, German brand Rapunzel’s Nirwana Vegan, which has a delightful hazelnut cream center.

Like with my matcha cookies from the other month, the trick is to add the chocolate squares to the cookies near the end of the baking process so they don’t melt too much. This recipe makes about 2 dozen cookies, so you can opt to get one chocolate bar and leave some of the cookies plain (make a criss-cross design with a fork if you like), or get two chocolate bars to cover them all.

For the binding ingredient, I used Orgran’s egg replacer for baking. In North America, you can use Ener-G egg replacer, following the directions to replace one traditional whole egg. Alternatively, opt for a flax egg or applesauce.

The peanut butter I used is incidentally also from Rapunzel, and is “American style” which I think means with added sugar and salt? (probably, haha)

Scroll to the bottom for the recipe.

Peanut butter and chocolate cookies

Makes about 24 cookies.

  • 1 teaspoon Orgran Egg Replacer for baking, or similar (the equivalent of one egg)
  • 2 tablespoons water
  • 1/2 cup (100 g) vegan butter or margarine
  • 3 tablespoons plant-based milk
  • 2 teaspoons vanilla
  • 1/2 cup (110 g) brown sugar
  • 3/4 cup (180 g) peanut butter
  • 2 cups (260 g) flour
  • 3/4 teaspoon baking soda
  • 1/4 teaspoon salt
  • 1 or 2 Rapunzel Nirwana chocolate bars

Directions:

  1. Preheat your oven to 375 F (190 C).
  2. Mix the Orgran Egg Replacer powder with the water in a small bowl and set aside.
  3. Combine the butter, milk, vanilla and brown sugar in a medium mixing bowl, stirring until completely combined.
  4. Incorporate the peanut butter and egg replacer mixture, and stir again until fully combined.
  5. In a separate medium bowl, sift together the flour, baking soda and salt.
  6. Add the peanut butter mixture to the flour and stir until just combined, taking care not to overmix.
  7. Form balls with the cookie dough, place them on a paper-lined baking sheet, evenly spaced, and flatten them slightly with your fingers.
  8. Place the baking sheet in the preheated oven and bake for 8 to 9 minutes.
  9. Break the chocolate bar into squares.
  10. Remove the baking sheet and press one chocolate square into the top of each cookie. Return the baking sheet to oven for another 3 minutes, watching the chocolate to be sure it doesn’t look like it’s going to melt too much.
  11. Remove from oven, allow to cool and enjoy!

If you like these cookies, you may also enjoy my chocolate & peanut butter mini-pies and nut butter cake recipes too. 🙂

Sloppy lentils

We take things so literally when we’re little. Sloppy joes were a frequent meal at our house when I was growing up, and I always wondered about the name. Who was this Joe, and why was he so sloppy? I reasoned it might be my own uncle Joe, whose shirts were often untucked and face unshaven.

Whoever Joe may have been, the sloppy part is clear enough – this isn’t a dish for a first date. But it is delicious, so feel free to make it once the relationship’s sealed and the person’s no longer a flight risk. Also, thanks to advanced lentil technology, your sloppy joe can now be vegan!

Scroll to the bottom for my take on this iconic recipe.

Sloppy lentils

Serves about 4.

  • 1 cup dry green or brown lentils (don’t use red lentils)
  • 1 bay leaf
  • ¾ cup (80 g) onion (any color), diced
  • ½ cup (60 g) green pepper, diced
  • ½ cup (55 g) celery, diced
  • 1 cup ketchup
  • 1 tablespoon brown or red miso paste
  • 1 teaspoon prepared mustard
  • 1 teaspoon dried Italian herbs (oregano, thyme etc.) or herbes de Provence
  • A few squeezes fresh lemon juice (about 1 teaspoon)
  • ½ teaspoon garlic powder
  • A couple grinds fresh black pepper
  • Soy sauce, to taste (optional)
  • Maple syrup, to taste (optional)
  • 4 hamburger buns
  1. Start by cooking the lentils in 3 cups water, with the bay leaf, for 20 minutes. Remove bay leaf, drain any excess water, and set aside.
  2. While the lentils are cooking, chop and dice the onion, green pepper and celery.
  3. In a large skillet, sauté these vegetables in a bit of olive oil over medium heat until tender.
  4. Add the cooked lentils and stir to combine.
  5. Incorporate the ketchup, miso paste, mustard, dried herbs, lemon juice, garlic powder and black pepper.
  6. Taste and adjust seasoning as desired. If it isn’t salty enough, I recommend a splash of soy sauce rather than actual salt because soy sauce will boost the umami profile of the dish. If you would like the sauce to be sweeter, add a bit of maple syrup (but I find that the ketchup usually makes the sauce sweet enough).
  7. Toast your hamburger buns, if you like, and then load them with the sloppy lentil mixture. Eat leaning well over your plate, which many globs of lentils and sauce will land on, in the company of someone who already knows and accepts you even with sauce all over your face. 😉

Variation: try this same recipe using about 2 cups vegan ground “beef” from a brand like Beyond Meat, Impossible Meat or (in France), HappyVore or Herta.

Enjoy! If you’re a lentil aficionado, you might also like my Lockdown Lentils recipe. And if you too are curious about the name sloppy joe, you’ll find some theories here.

Italian egg toast

My mom’s birthday is in March, and her favorite film is Moonstruck (1987), starring Cher and Nicolas Cage as Loretta and Ronnie, Italian-Americans in Brooklyn who meet and, against all odds, rather abruptly fall in love. The charming story, set in and around neighborhood shops and Loretta’s beautiful family home, features a close-knit clan whose members nevertheless have their secrets. One of the most endearing characters, who doesn’t come into the plot nearly enough for my taste, is the old Italian grandpa who seems to always be walking his five or six dogs, or preparing to walk them, or coming back from walking them.

Memorable moments in this film include Ronnie meeting Loretta, his future sister-in-law, at his bakery, immediately launching into a long melodramatic rant about how his brother ruined his life, asking for a knife so he can kill himself, and then – about an hour after meeting her – knocking over his kitchen table, scooping her up and taking her to his bed.

The next night, they go to see La Bohème at the beautiful Metropolitan Opera, which I visited two years ago to take some photos for my mom.

Moonstruck is a favorite of mine too, so we tend to rewatch it every time I’m back home. The last occasion was this January, during my extended Christmas visit in Wisconsin. For some reason I noticed the breakfast that Loretta’s mother makes for her one morning while questioning her about her life: slices of bread with an egg cooked in the center of each one and topped with sautéed red pepper. It’s apparently a traditional breakfast dish in Italy (but also in other places), and is sometimes called egg-in-a-hole.

It looked fun. Could it be made vegan, I wondered? Challenge accepted!

I experimented once I got back to Paris, and as the results were quite successful, decided to share the recipe here this month in honor of both my mom’s birthday and nice mother-daughter moments.

The key ingredient in my version is a vegan scrambled-egg/omelet mix (I used Orgran Vegan Easy Egg, which you can find at Vegami in Paris, but in North America you could try Just Egg). And I added shallot and garlic to the red peppers for an extra dimension. Note that the kala namak salt is a must in this recipe, to get that sulfury egg flavor, if your egg mix doesn’t already contain it. It’s called “black” salt but once ground, it’s actually pink in color. I have this salt in ground form, which is good for incorporating it into a recipe, and also as crystals in a grinder, which is a nice way to season a dish that’s already made but just needs a bit more salt – both are available at Vegami, but you can also find the ground form at most Indian grocery stores.

Italian egg toast with red pepper

Serves two (four pieces of egg toast).

4 pieces of bread
1/4 cup (30 g) Orgran Vegan Easy Egg mix or similar
1/4 teaspoon kala namak (sulfury Indian “black” salt)
Several whole or sliced roasted (canned) red bell peppers
2 shallots
2 cloves garlic
Olive oil
Margarine
Freshly cracked black pepper
Fresh parsley or other herbs, to garnish

Combine the 1/4 cup (30 g) egg mix with 1/2 cup + 2 tablespoons (150 ml) water, and whisk until smooth. Add the kala namak salt and stir to combine. Set aside.

Begin warming some olive oil in a small frying pan over medium heat, and chop up your shallots and garlic.

Now take out the roasted red pepper (estimate how much you want based on visual quantity – you can’t go too far wrong) and slice into strips.

Sauté the shallot, garlic and red pepper in the olive oil, stirring occasionally, until the shallot and garlic is soft. Don’t add any salt at this point because the egg mixture will probably be salty enough for the whole dish.

Now get out your bread. This is the kind I like to use, a type of bread that’s solid enough not to get mushy and fall apart. I recommend bread that’s sliced with a machine (rather than you slicing it) so that the sides of each slice are nice and even and will heat uniformly in the frying pan.

Find a glass, teacup or cookie cutter to cut out a circle from the middle of each slice of bread. Be sure that enough bread is remains between the hole and the crust so that it won’t fall apart. Tip: save the cut-out parts to mop up the last delectable bits of sauce from the frying pan at the end!

Spread both sides of each slice of bread with margarine.

Grill the bread on each side until lightly golden brown, then fill the holes with the egg mixture.

Cook for a minute or two on the first side (you may wish to cover the frying pan to speed this along), and once this first side seems done (test by jiggling it with the spatula), flip it over and repeat on the other side.

Transfer to a plate and top with the pepper, shallot and garlic mixture.

Garnish with freshly ground black pepper (I couldn’t find my pepper mill so used a mortar and pestle), fresh parsley or other herb, and have some extra kala namak handy in case you want to add more salt.

Serve and enjoy! It might taste best in the company of your mother or another trusted person you can share your troubles with.

So delicious!

Rumor has it that eating this egg toast for breakfast will help you untangle any complicated messes you may have gotten yourself into the night before. But never underestimate the potential for lasting love with your fiancé’s unstable estranged brother! Basically, if you can suspend your disbelief and forget the laws of cold hard reality long enough, you too many enjoy Moonstruck.

Cranberry sauce for expats

When the holiday season comes around, Americans and Canadians living abroad often find themselves with a dilemma: cranberry sauce, or even just the (whole, uncooked) cranberries you would need to make your own sauce from scratch, cannot be found in every country. And cranberry sauce is a cornerstone of Thanksgiving and Christmas dinners. So this is a truly serious (first-world) problem. 😉

Of course, there are sometimes ways to get imported cranberry sauce from local stores specializing in North American foods. But this option is always expensive, and you might not be able to get to the store if it’s remote or has limited opening hours, or if you don’t live in a major city.

Having lived in France for over 12 years now, I’ve missed having cranberry sauce over the holidays many a time. But this year, I decided to try an idea that popped into my head: why not make a sauce from dried cranberries, which are abundantly available here in Paris at organic and now even mainstream grocery stores? To extend the tart, fruity flavor, I added some lingonberry jam (from IKEA), which has a similar flavor as cranberry, but any red jam will do. Finally, I mixed in some red wine, spices, orange juice and zest and fresh grated ginger.

I gave it a shot yesterday and was very pleased by the results. Read on for the recipe!

Cranberry sauce

Makes a little over 1 cup (236 ml) of sauce.

  • 1 cup dried cranberries
  • 1/2 cup (118 ml) water
  • 1/4 cup (60 ml) orange juice
  • 1/4 cup (60 ml) inexpensive red wine
  • 2 tablespoons red jam (raspberry, strawberry etc.)
  • 1 teaspoon grated orange zest
  • 1/2 teaspoon grated ginger root, or more to taste
  • 1/4 teaspoon ground cinnamon
  • 1/4 teaspoon ground black pepper
  • small pinch salt

Grate your orange(s), squeeze to obtain the juice, and grate your ginger root (remove the skin with a spoon). Roughly chop the dried cranberries – or alternatively, process the sauce at the end to make it smoother – and add these to a medium-sized saucepan along with all the other ingredients.

Stir all the ingredients together while heating over medium heat. When the mixture is just starting to boil, reduce heat to low and simmer, stirring occasionally, until the sauce has thickened (maybe 5 to 10 minutes). Taste and adjust the ingredients as necessary – you may wish to add sugar or mix in more jam if it’s too tart.

As the sauce cools it will thicken further (above, the sauce just after taking it off the heat). Allow to cool fully, then transfer to a serving dish or storage container for the fridge if you won’t be using it right away.

Serve chilled or room-temperature as a condiment for your favorite holiday dishes (lentil Wellington, Tofurkey roast, stuffing and green beans or mashed potatoes with gravy).

You might also like to try it in a dessert, in a mixed-fruit turnover or an apple crumble, topped with vanilla ice cream or whipped cream.

Variations: Add additional spices (nutmeg, allspice, cloves) and other dried fruit such as apricot or fig. To make it into a savory chutney to serve with cheese and baguettes, add some sautéed shallot and a dash of tamari.

Curry “chicken” and pinenut salad

Here’s a fun and easy salad that you can use as a sandwich filling or serve atop a green salad or in lettuce cups. It’s a vegan dish inspired by a chicken and pinenut salad sandwich I used to have at Beans & Barley in Milwaukee back in my student days. The curry adds a delicious warming dimension, the chopped celery gives a nice crunch and the toasted pine nuts lend a gourmet air.

Curry “chicken” and pinenut salad

Makes enough for 2 to 3 sandwiches

  • 6 oz. (160 g) vegan “chicken” (or substitute firm tofu, tempeh, chickpeas, etc.)
  • 1/4 cup (25 g) pine nuts
  • 1/4 cup (25 g) chopped celery
  • 1/3 cup (5 tablespoons) vegan mayonnaise
  • 3 teaspoons fresh curry powder
  • red or white onion (optional)
  • parsley or cilantro, for a garnish
  • bread, if you want to make sandwiches

Begin by toasting your pinenuts. Place them in a dry frying pan and heat over low/medium for several minutes, shaking the pan to stir occasionally. Stay right there in the kitchen during this process, so you can keep an eye on them… once they begin toasting, things can go fast and they can end up burnt in no time. Pinenuts are expensive, so it would be sad to have to throw them out. You can also chop your celery during this time (not shown).

This is the vegan “chicken” I used. You can also try this same recipe with firm tofu, tempeh, chickpeas or seitan.

It comes in the form of large chunks, which I recommend chopping into smaller pieces. The package says to cook it, but it’s actually already cooked and since this is a cold sandwich, there’s no need.

I used this German vegan mayonnaise I found at Un Monde Vegan in Paris. These days, more and more vegan and non-vegan brands are coming out with vegan mayo.

Mix the curry powder into the mayonnaise. I used 3 teaspoons for 1/3 cup mayo, but you could add less or more curry powder as you like. Make sure your curry powder is fresh, because after it sits around for a while it loses its flavor, and you don’t want to miss the punch that full-flavor curry packs in this dish.

The curry gives the mayonnaise a beautiful vibrant yellow color.

Mix the curry mayonnaise into the “chicken”, then incorporate the chopped celery and pinenuts. If you won’t be serving the salad right away, wait until the last moment to incorporate the pinenuts so they stay more crunchy. You may want to reserve some pinenuts to add as a final garnish if you’re serving this salad in lettuce cups for example.

To make a sandwich, toast some bread (this is the foldable stovetop “camping” toaster I use because there isn’t room in my kitchen for a normal toaster). 😉

Top the toast with some of the “chicken” salad, then add onion and an herb garnish, if desired. You could also serve this with lettuce and tomato. This can be either an open-faced sandwich, as shown above, or a traditional sandwich with two pieces of bread, as shown below.

Enjoy!

Variation: I recently learned of a British dish, coronation chicken, that’s quite similar to this and was invented for Queen Elizabeth II’s coronation banquet. It differs in that it has no pinenuts but does have chopped dried apricots and flaked almonds.

pancakes

All pancakes great and small

I don’t have a long and elaborate story to go with this recipe (for once!) so let’s just get to it, shall we?

This is your standard, basic, garden-variety vegan pancake recipe. As the title of this post suggests, you can make the pancakes any old size you feel like. Regular sized pancakes are always great on a weekend morning, but tiny ones that can be eaten as pancake cereal, or alternatively served to your cat and/or Barbie doll, are fun too.

Basic pancakes

Makes around 10 medium-sized pancakes, or many more tiny ones.

1 cup flour
3 tablespoons sugar
1/2 teaspoon salt
2 teaspoons baking powder
1 tablespoon vegetable oil
1 cup cold water

Equipment needed: large frying pan, griddle or electric crêpe/pancake maker.

Place all the dry ingredients in a medium-sized mixing bowl.

Add the oil and water and whisk until just combined (be careful not to overmix). At this point, if you have not done so already, you can begin heating your frying pan, griddle or electric crêpe/pancake maker.

With a ladle or large spoon, pour a bit of batter onto the heated surface, trying to make all the pancakes the same size. In the photo above, the ones on the right look larger but this is mainly an effect of iPhone photography.

When the batter has become bubbly and opaque, flip them over. I like to use this long wooden crêpe-turning device. Allow to bake for another minute or two until the bottom side is done, then transfer to a plate and cover until all the pancakes are done. If you like, you can keep them in your oven heated to a very low setting.

Serve with yogurt, fruit and maple syrup.

To make tiny pancakes, prepare the batter as directed above but drop tiny amounts onto the heated surface using a teaspoon.

Since they’re so little, they’ll bake faster than regular-sized pancakes, so you will probably need to begin flipping the first ones before you have covered the whole surface with mini-pancakes.

To serve as pancake cereal, place in a cereal bowl and cover with a milk of your choice.

To stick with the pancake theme, you may wish to top them with some maple syrup. Berries or chocolate chunks might also be nice.

Enjoy!

Variations: add chocolate chips or chunks to the batter or place thin banana slices onto the batter after pouring onto the griddle. Mix some cocoa powder into the batter for chocolate pancakes.

Heavenly hot homefries

My recent discovery of a French vegan blue cheese here in Paris brought back some fond memories from my student days. I was living in downtown Milwaukee, finishing up my bachelor’s degree and working at a popular restaurant on Cathedral Square Park. Some nights after finishing up our last tables, a few fellow servers and I would take our exhausted selves down the street to Elsa’s On the Park, a cocktail bar that was way cooler than the place we worked at. We loved its sophisticated ambiance, avant-garde art, high-end cocktails and the fact that its kitchen stayed open late enough that we could get something to eat after our restaurant closed.

Looking online, I was happy to see that Elsa’s (described on the Google map as “trendy eatery for burgers & martinis”) was still there, in the same beautiful Victorian building. It now had a website and on it I found their menu, which didn’t seem to have changed. I recognized the same burgers, grilled cheese sandwiches and, best of all, their Hell’s Fire Fries: thickly sliced rustic housemade chips topped with melting gorgonzola cheese and hot sauce. Tucking into this spicy dish was the perfect way to forget that awful table that had run you off your feet all night and then tipped you only 10%, I found. The dish was also the perfect accompaniment to a stiff drink, ordered for the same reasons.

This Proustian trip down memory lane of course inspired me to see if I could reproduce this yummy treat, now that blue cheese had re-entered my world. A friend from the olden days volunteered to stop by Elsa’s to order the dish and report on what she was served, and it turned out to be the same as I’d remembered – thick fried potato slices with the skin on, something midway between fries and chips.

I’m quite happy with the result, which I have named in homage to the original dish.  The vegan blue cheese I used, the Jeanne from Jay & Joy, is made with the very same mold cultures that you find in animal-sourced blue cheese (just in a base of cashews and almond milk instead of animal milk), and its flavors go as well with the hot sauce as I remembered.

Elsa’s is part of the student-days nostalgia I share with my brother, who also lived in Milwaukee in that time, also worked as a server (at a different restaurant) and also loved visiting this favorite spot. If recipes could be dedicated to people like books are, I would dedicate this one to him.

Anyway, if you can get your hands on a cheese like this and want to try it for yourself, all the info is right here.

Heavenly hot homefries

Makes a smallish dish of homefries (serves 1 or 2)

  • 12 oz (350 g) firm potatoes, skin on, or more for a bigger portion
  • 1 cup vegetable oil (such as canola, rapeseed or colza) for frying
  • vegan blue cheese, as much as you like – I used about 0.5 oz (15 g)
  • Mexican hot sauce
  • salt

Equipment required: mandoline slicer (recommended)

The potatoes I used are a variety called Grenadine in French, but any firm potatoes, such as you would use to make regular fries or a potato gratin, will be fine. If you opt to leave the skin on, clean them thoroughly with a vegetable brush.

Using a mandoline, cut the potatoes into slices about 1/8th in. (3 mm) thick. Be REALLY careful and make sure to use the safety attachment when you get near the end of the potato.  If you don’t have a mandoline, you can try slicing them with a knife, but cutting them evenly may prove challenging.

IMG_0299

In a deep saucepan, heat the vegetable oil on high. Once it’s hot enough for frying (350°F or 180°C – check out these directions for determining the temperature without a thermometer), carefully immerse the potato slices in the oil. I used 1 cup of oil and fried my potatoes in two batches, but you could opt to use 2 cups and fry them all at once if you like. The goal is to not crowd the slices so they don’t stick together.

IMG_0302

Once the slices have begun to turn golden brown (it took about 10 minutes for mine), carefully remove them from the oil using a metal slotted spoon and place them on paper towel, ideally in a single thickness. Sprinkle a bit of salt over the top. As soon as the paper towel becomes saturated with oil, get another sheet for the remainder of the slices or the whole batch is likely to be overly oily and might get mushy.

Now that they’ve been fried, in your home, the potato slices are homefries!

Before they cool too much, transfer the homefries to a plate or bowl. Crumble some gorgonzola or blue style cheese over them and then drizzle some hot sauce on top. I used a Mexican sauce I brought back from my last stay in the US, but just about any hot sauce will do – choose whatever level of heat you can tolerate. I recommend against Sriracha, since it has a sweet side that might not be so good in this dish.

If your homefries have gotten cold or you just want to warm up the cheese a bit, you can place the fully assembled dish under the broiler for a few minutes (in an oven-proof container, of course). Note that vegan cheese tends not to melt as much as animal-sourced cheese.

IMG_0407photo_2020-03-09_11-42-11photo_2020-03-08_19-57-17 (2)photo_2020-03-08_22-42-42

And there you have the perfect dish to help you unwind, along with a martini, mojito or merlot, at the end of a long and aggravating day. Be sure to keep the hot sauce handy so you can turn up the heat if needed.

Rumor has it this dish tastes even better when you’re wearing Tapatio socks!


Where to find ingredients…

Vegan blue cheese: This may not be an easy item to find, depending where you live, but if it does exist in your area, it’s likely to be at organic or vegan food stores. In France, you can find the Jay & Joy brand at their own shop in Paris (and online shop), Naturalia organic food stores, and also vegan shops like Aujourd’hui Demain, Un Monde Vegan (and its online shop) and Mon Epicerie Paris. And if you’re ambitious (and patient!), you can even make it yourself with this recipe.


White squirrel

Baileys AlmandeToday we have yet another recipe I concocted while visiting my parents back in the US this summer. I’d purchased a bottle of Baileys Almande, which isn’t easy to find in France but is so very delicious, and wondered if I could create a cocktail of some kind with it.

Its creaminess seemed to make it ideal for an ice cream drink. That made me remember the pink squirrel, a fun retro cocktail involving crème de cacao and crème de noyaux (made from apricot, peach or cherry pits, which give it an almond flavor – perfect for squirrels!) and prepared with either heavy cream or ice cream. Crème de noyaux usually also contains red food coloring, which is what gives the pink squirrel its pretty pastel hue.

Incidentally, in researching the pink squirrel, I learned it was actually invented at a cocktail lounge in Milwaukee, Wisconsin, one of the cities where I spent my formative years.

wh squirrel 2
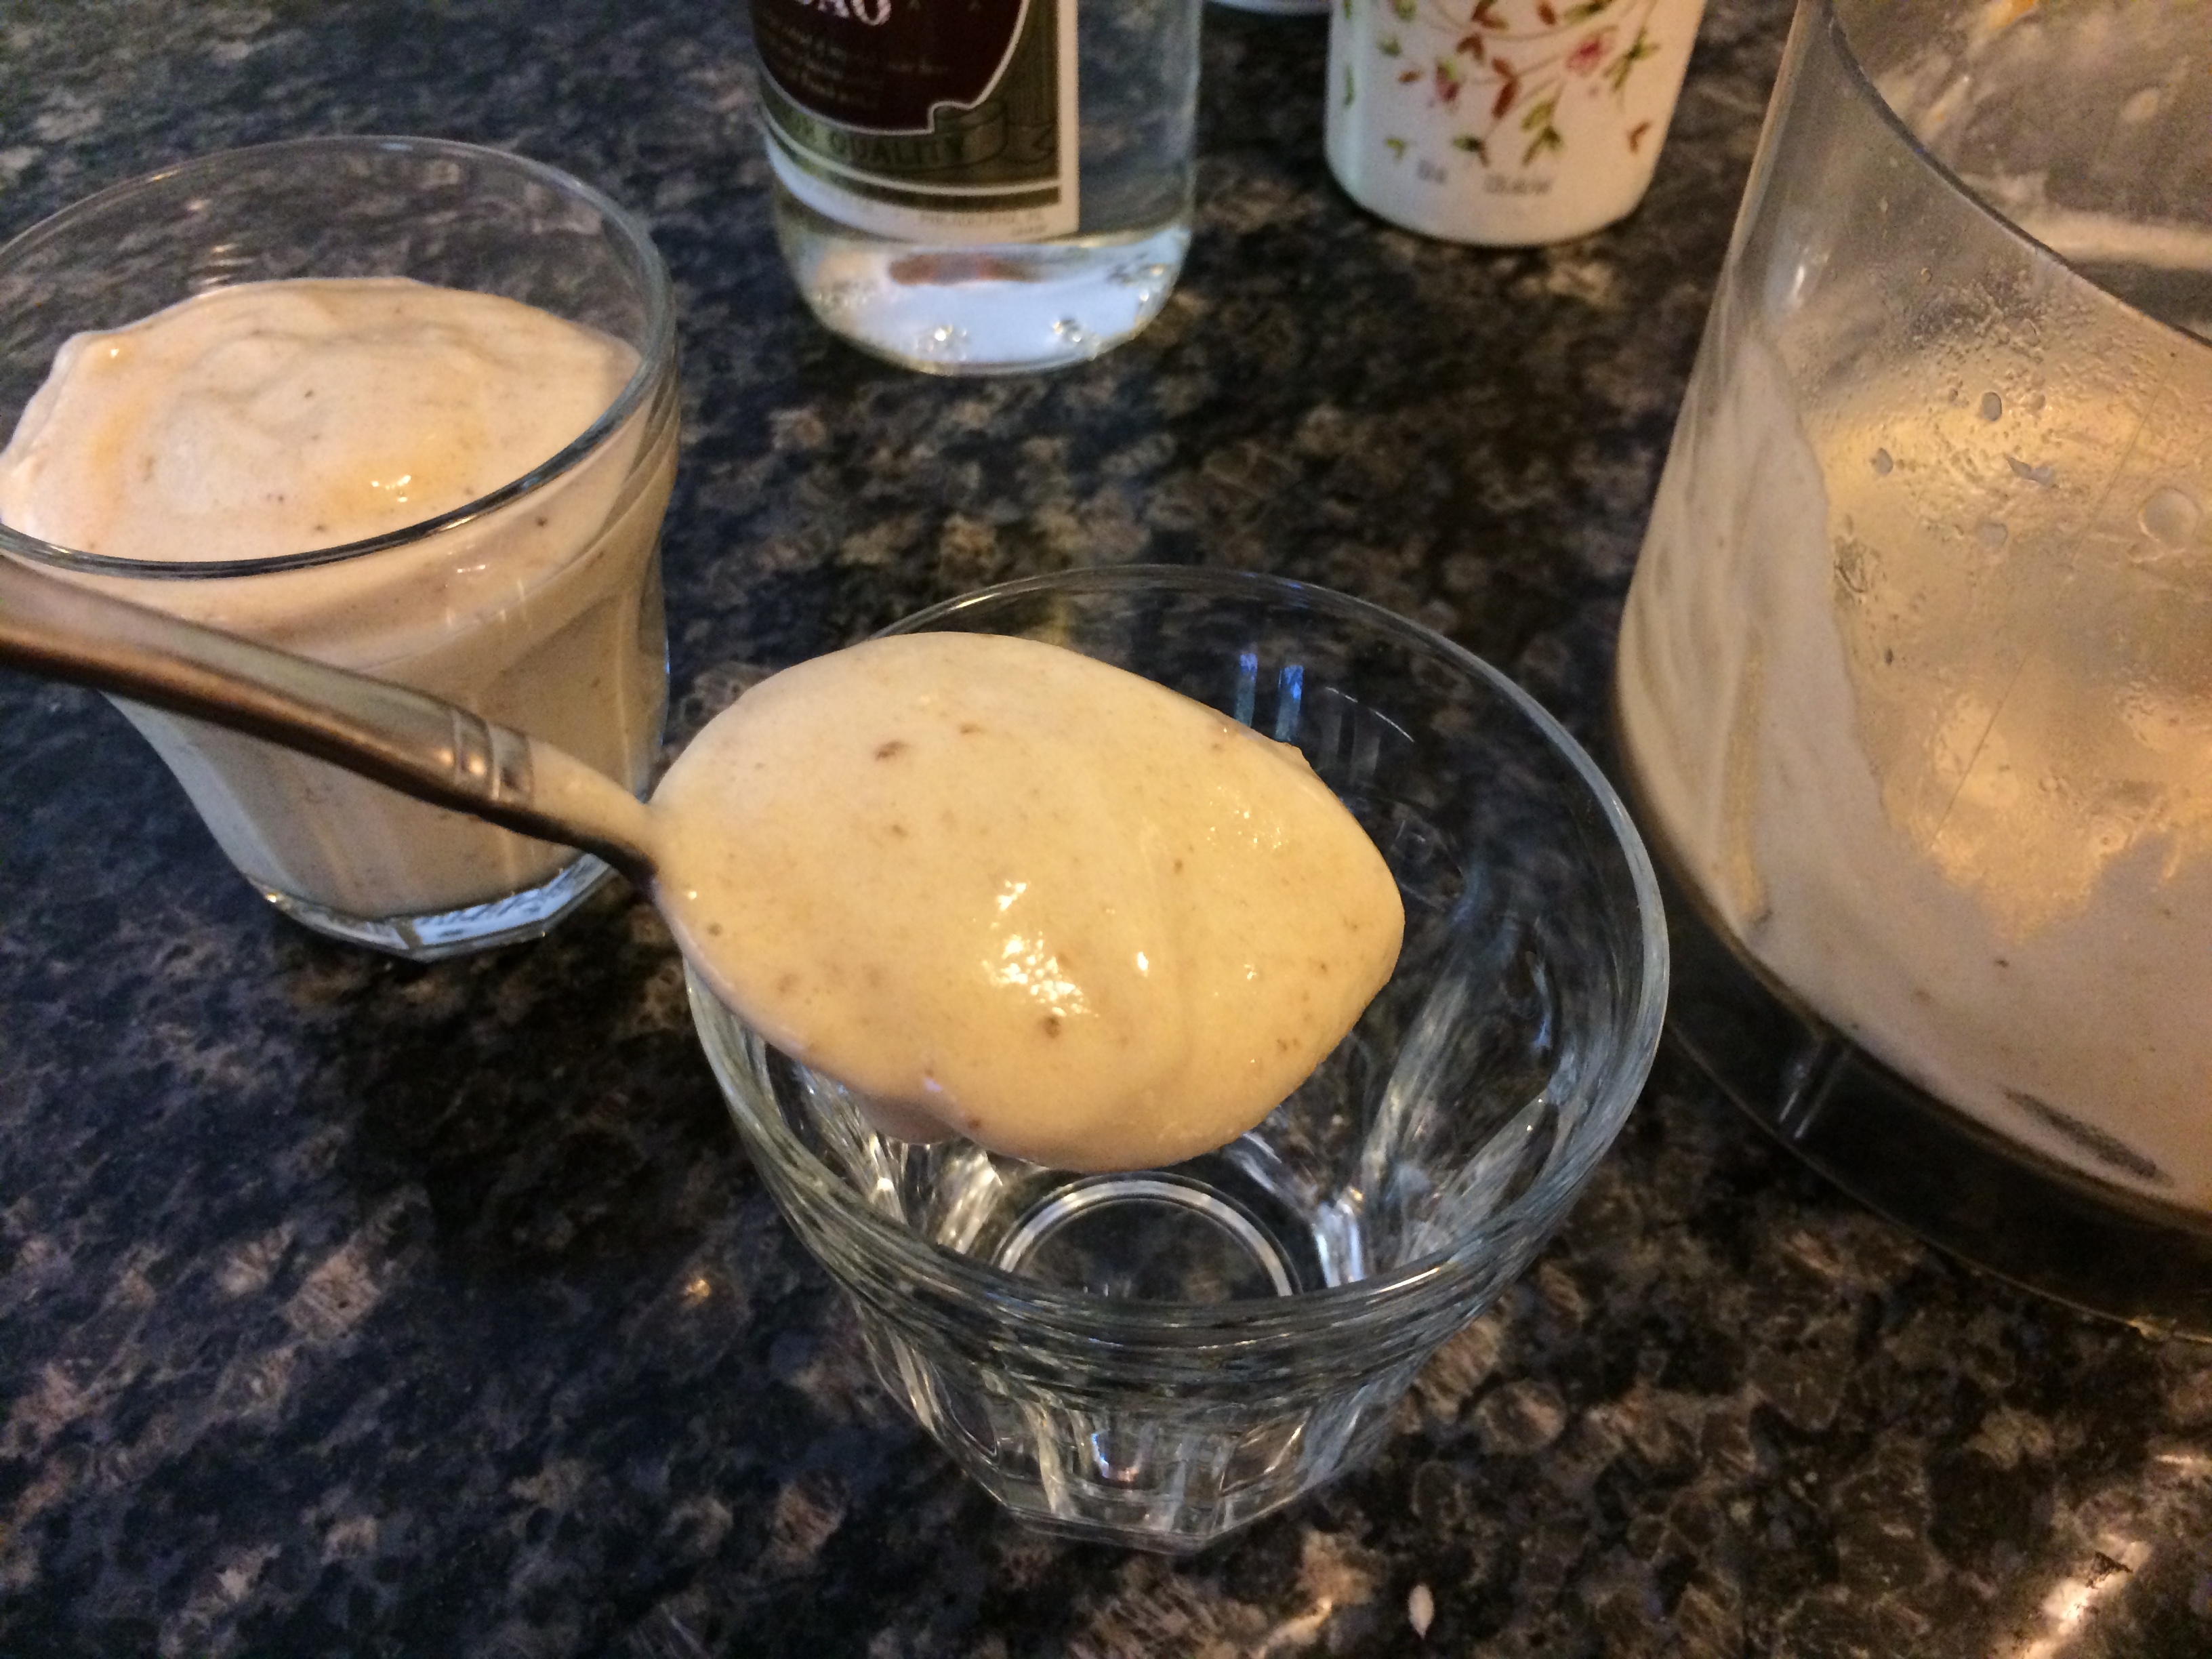
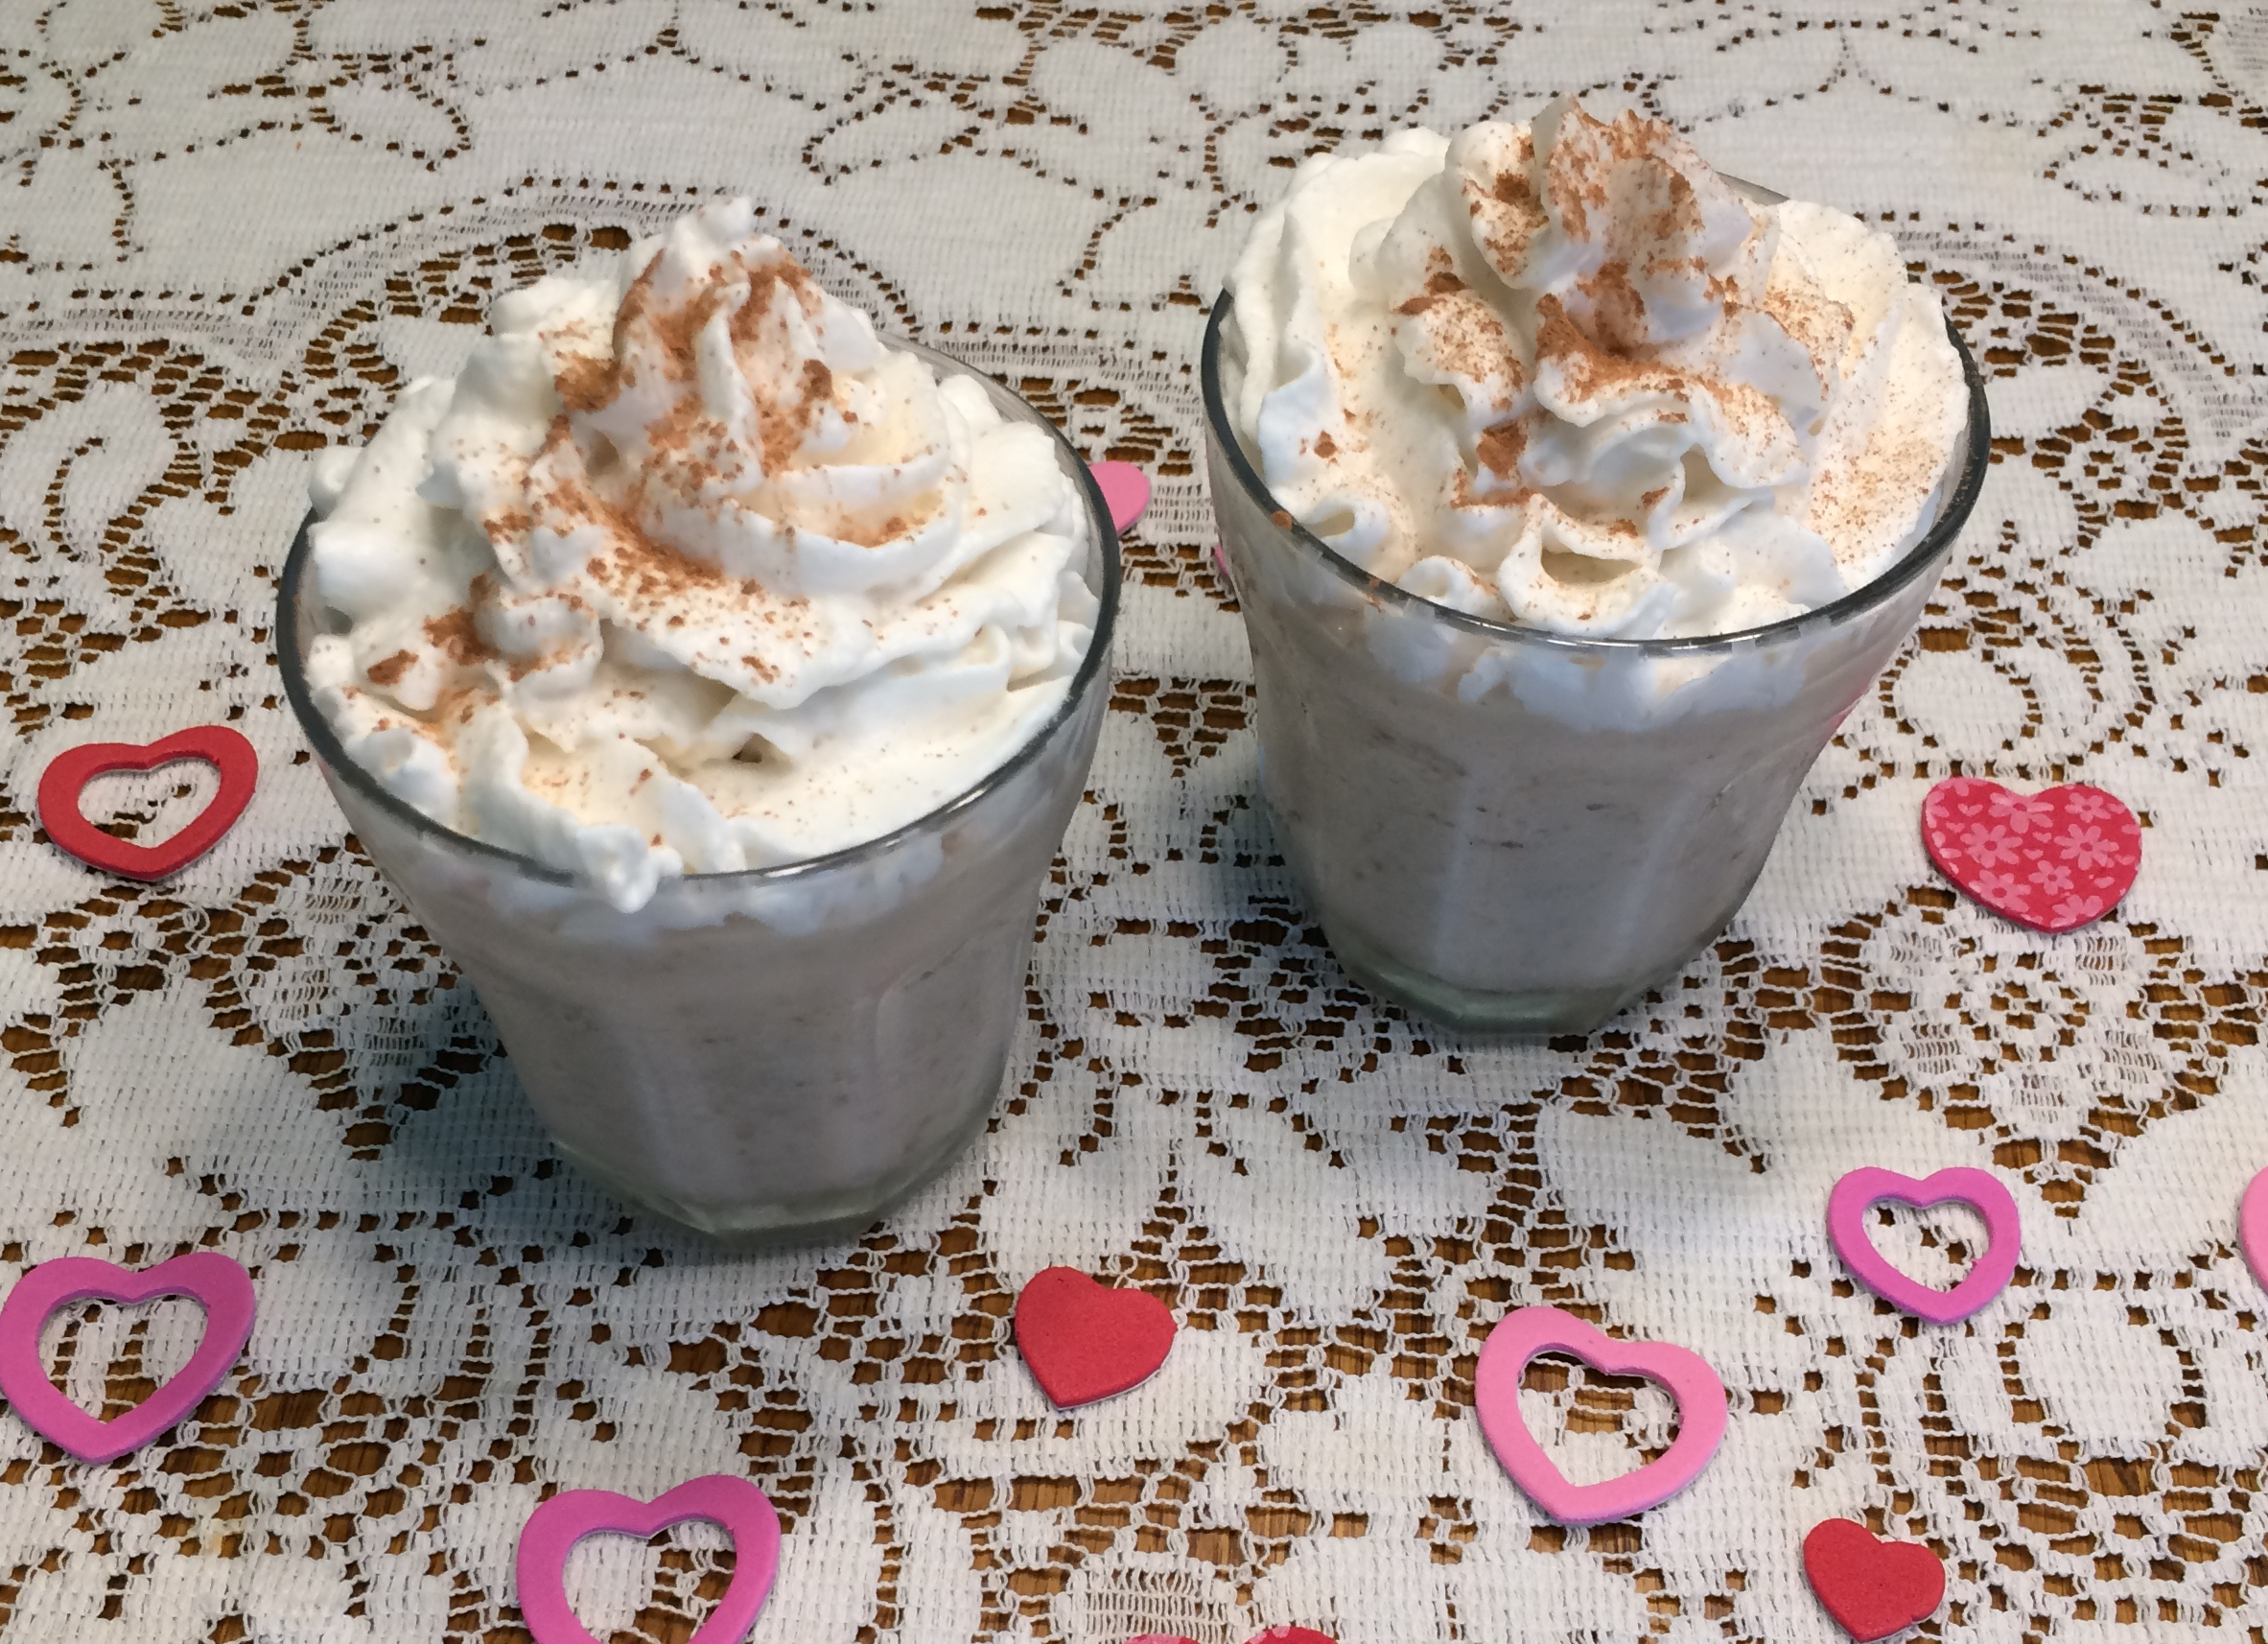
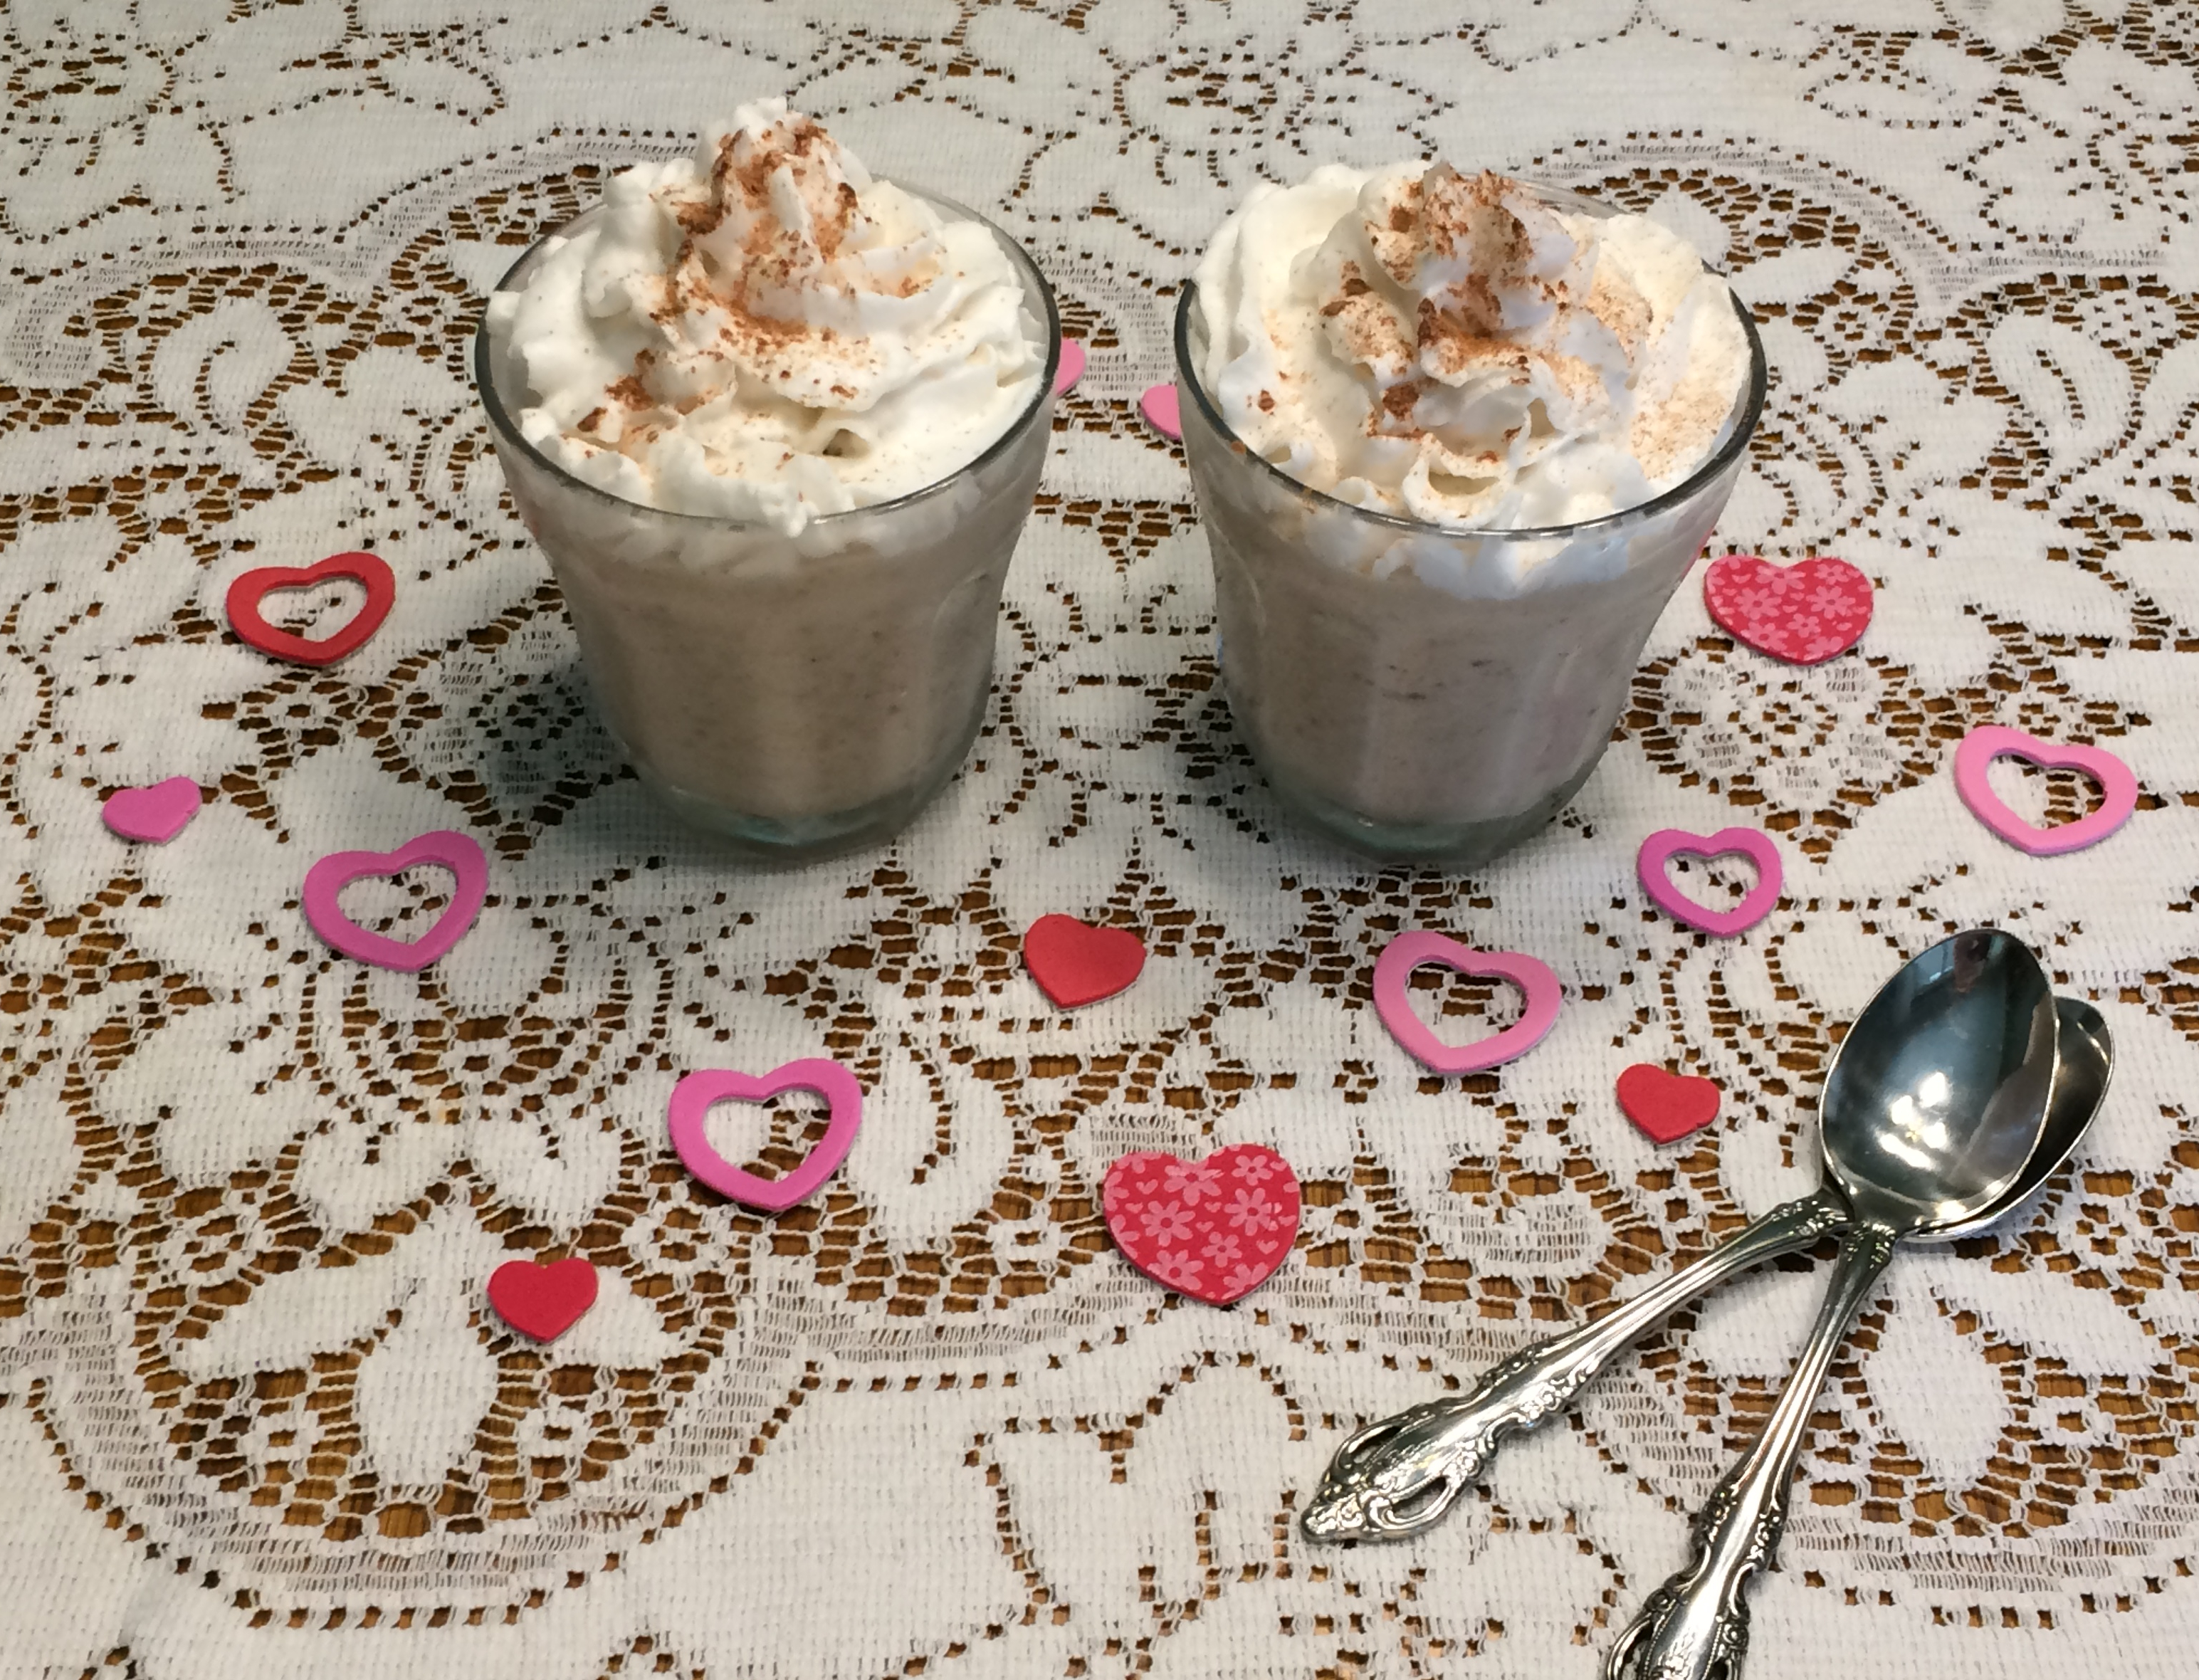
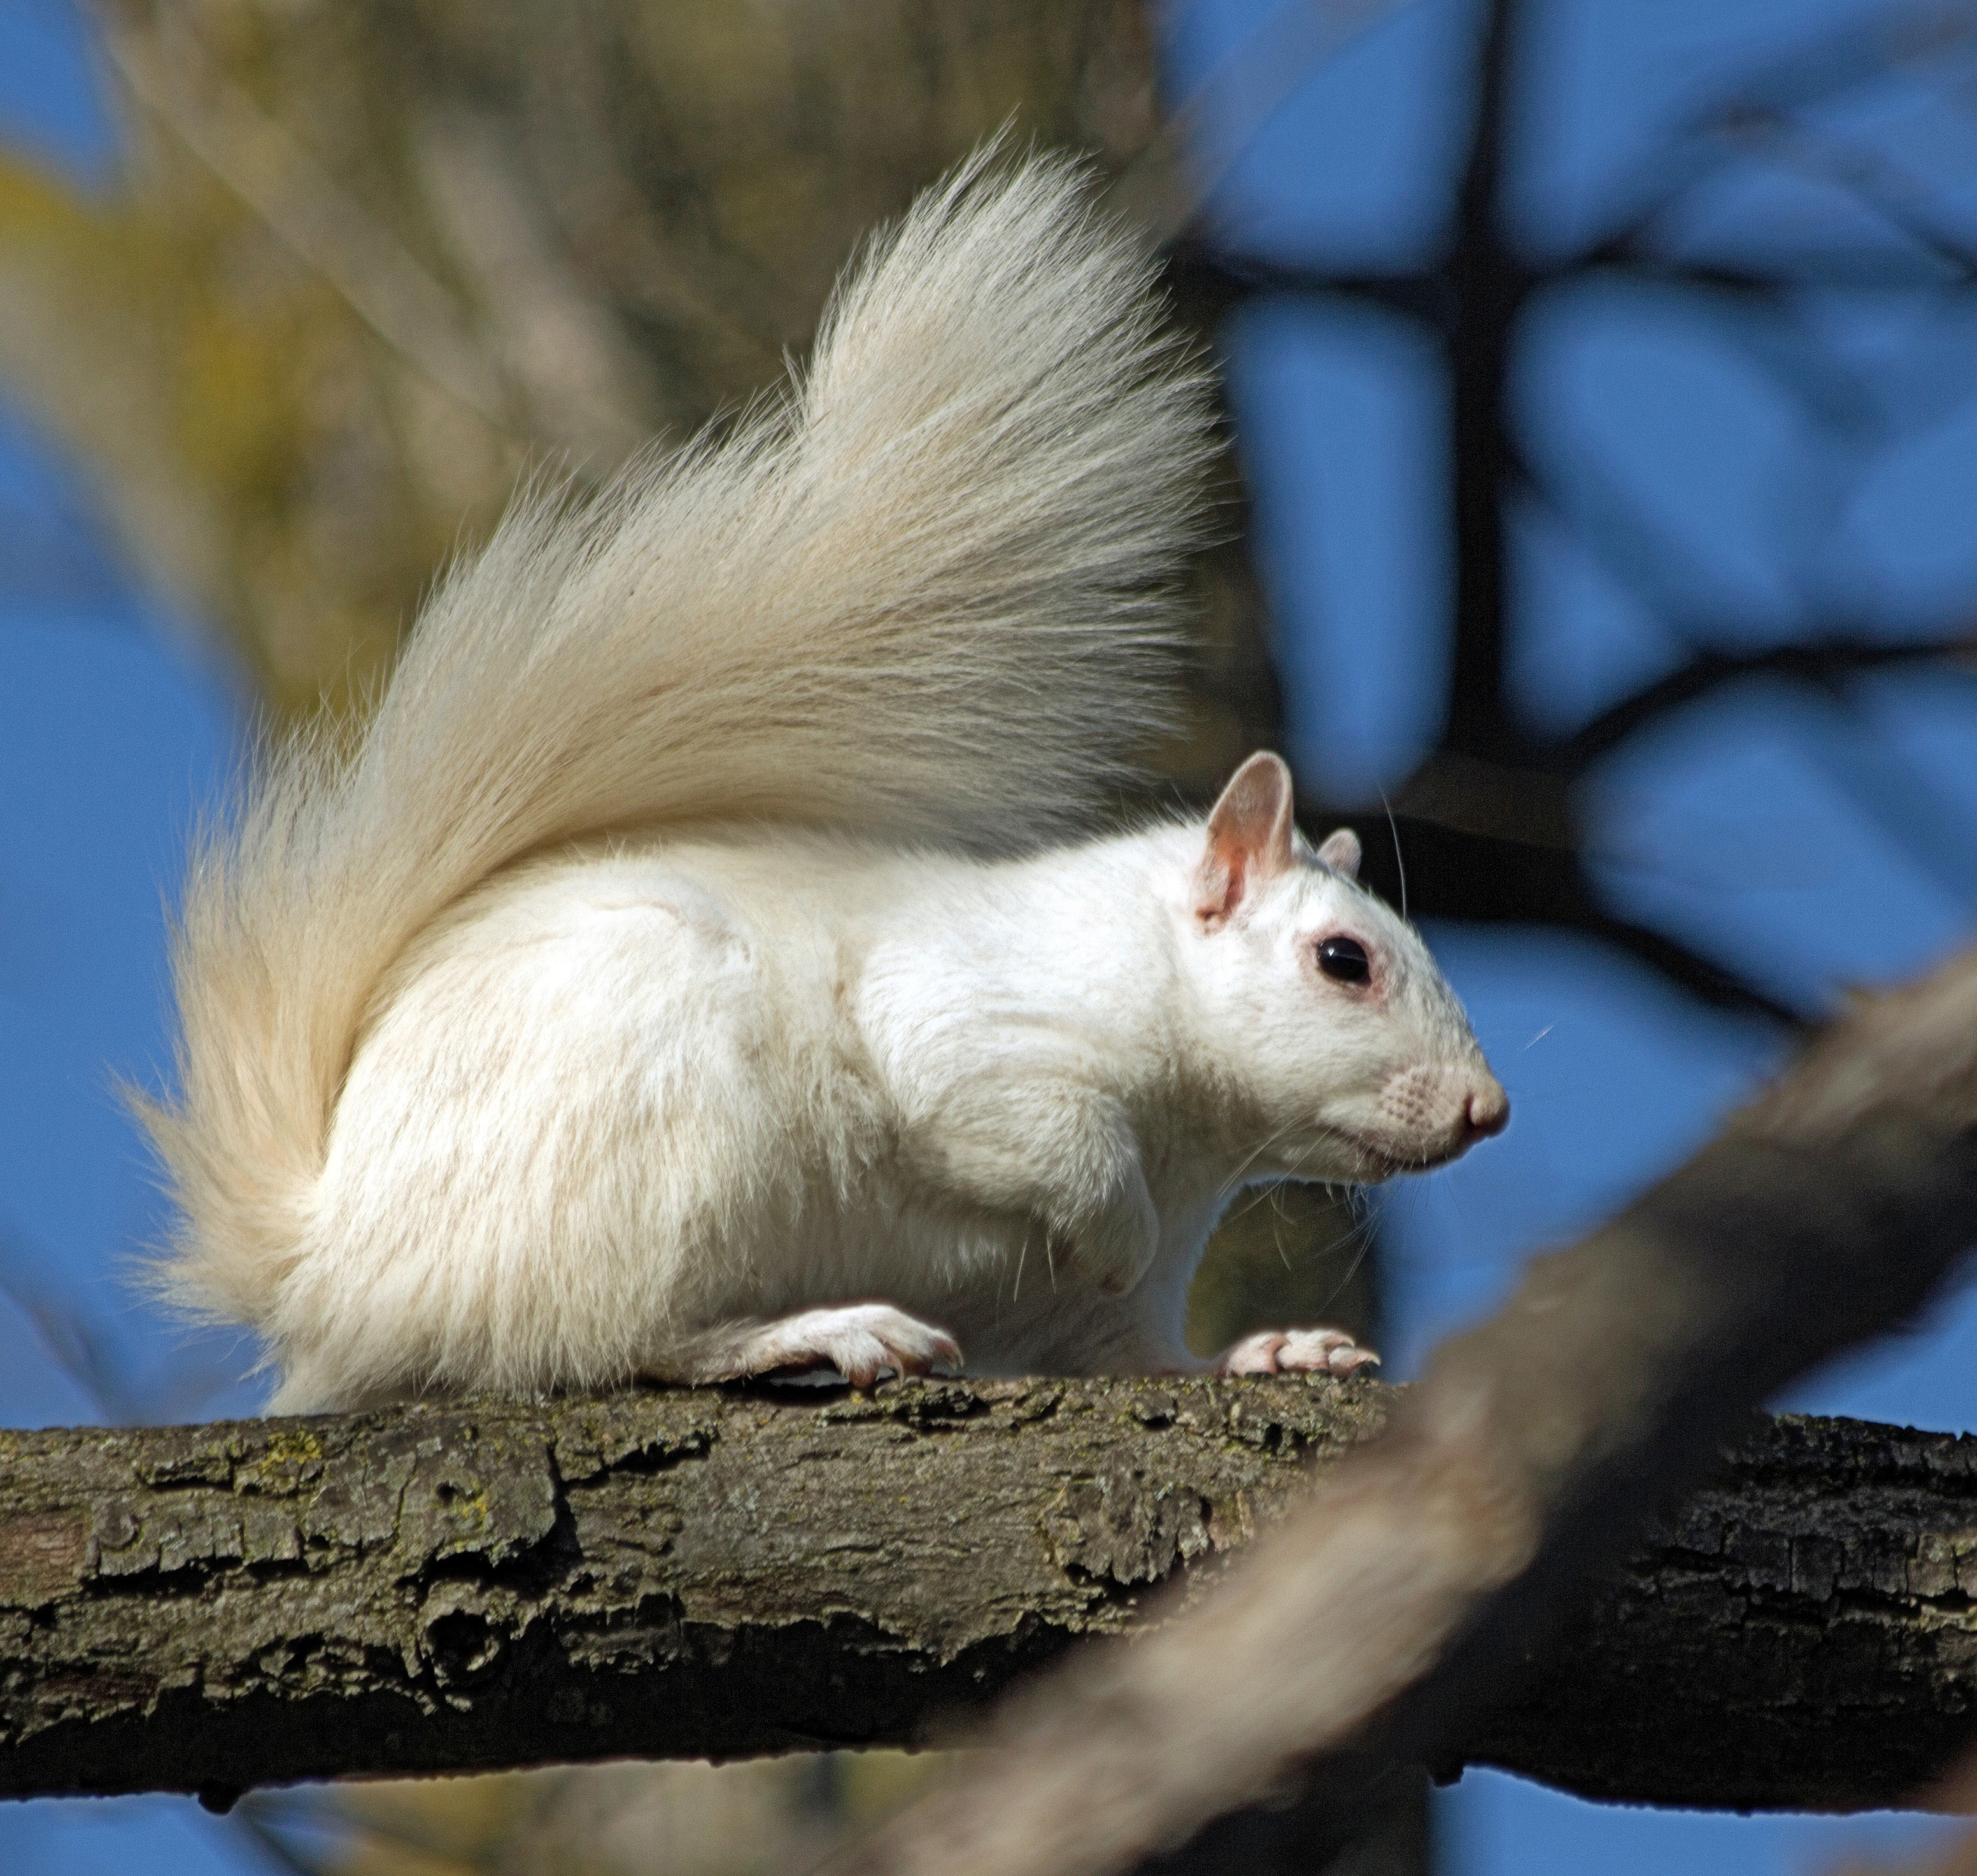
I thought it would be fun to make a similar drink with a vegan twist, using Baileys Almande and nice cream (blended frozen bananas) instead of ice cream made from animal milk, and this is the result, which I have named “white squirrel.”

Of course, the drink is a bit more beige (or banana-colored) than white, but “beige squirrel” doesn’t have quite the same ring to it, and even actual white squirrels are kinda beige, so it works, right? I think so.

The white squirrel would be a nice after-dinner indulgence for Valentine’s Day, which is nearly upon us. All you need are a few key ingredients and some advance planning, since the bananas have to be frozen for a few hours before you can start. Of course, if you have some vanilla dairy-free ice cream on hand, you could use that in place of the nice cream. If you can’t get your hands on Baileys Almande, you can substitute amaretto or another similar liqueur (scroll to the bottom of this post to see a Baileys-like product that’s available in France).

pink_squirrel

I found this fun vintage pink squirrel recipe, which appears to come from one of those great 1970s recipe card libraries like my mom has. As always with these old recipe photos, the creation is given a confusing mise en scène with unattractive colors and problematic lighting. What’s a cocktail doing on the kitchen table from Little House on the Prairie? And why is it being served with fruitcake? It’s an elegant drink that functions as a dessert in its own right, and as such should be served by itself.

So let’s make some white squirrels, shall we?

white squirrel spoon

White squirrel

Makes 2 one-cup (236 ml) servings

  • 3 frozen bananas (roughly 16 oz/450 g in total)
  • 2 ounces (59 ml) white (clear) crème de cacao liqueur
  • 2 ounces (59 ml) Baileys Almande (or similar – see end of post)
  • non-dairy whipped topping
  • cocoa powder or ground cinnamon/nutmeg, for garnish

Equipment needed: freezer, food processor or high-powered blender

IMG_0473

Take your frozen bananas out of the freezer (after freezing for at least 4 hours) and weigh the amount you need, depending how many servings you want to make. In the photos in this post, you’ll see larger quantities because I was making more than two servings. Place the bananas in your food processor, but allow them to thaw for 10 or 15 minutes so they’re soft enough to blend without damaging your food processor.

Add the liqueurs to the food processor and begin blending the bananas. It’ll take a little while, but after a few minutes the bananas will take on a smooth soft-serve ice cream consistency. You may need to pause the blending to scrape down the inside from time to time, to help all the chunks to get blended.

When the nice cream looks like this and all of the banana has gotten blended, it’s ready!

IMG_0340

Fill up your glasses with the nice cream mixture and top with the nondairy whipped topping. Sprinkle a bit of cocoa powder or grated cinnamon or nutmeg on top if you like. Serve with spoons!

If you’re looking for additional Valentine’s recipes, check out the ones in my archives: mini fruit pavlovas, rosewater raspberry hearts and white chocolate mendiants.

white squirrel.jpgIMG_0371

Variations:

  • Make a virgin white squirrel by substituting your favorite plant-based milk + 1/2 teaspoon almond extract per serving for the alcohol.
  • Turn this drink into a brown squirrel by adding some cocoa powder during the blending stage.

Where to find ingredients…

In North America: Baileys Almande can be found at most liquor stores these days, and most grocery stores carry a range of non-dairy whipped toppings, sometimes with a range of options (almond, rice, coconut). The products shown in the photos above were all purchased at mainstream grocery stores in the US.

In Europe: Baileys Almande is available in some countries (Germany and England, to my knowledge) but for some reason has still not become widely available in France.  You can substitute amaretto or a similar liqueur – for example, Aujourd’hui Demain in Paris currently has this maca and almond milk liqueur (photo below), which I haven’t tried but which seems similar to Baileys Almande. Non-dairy whipped toppings (in a pressurized can or small carton) can be purchased at vegan grocery stores and also sometimes at kosher stores or in the kosher section of a general grocery store. See also my whipped coconut cream recipe.