Matcha and white chocolate cookies

Here’s an easy recipe for delectable matcha cookies that you can make for Valentine’s Day or just any old time. You can make them plain, but I find they’re especially nice and eye-catching adorned with some vegan white chocolate, such as Vegó (in Paris, you can find this at Vegami near République).

“Valentine’s Day?!” you might be thinking. “But these cookies are green!” Yes, they are, but why should Valentine’s desserts always be pink, red or white? Green is a lovely color too, and just as appropriate for love, if not more, as it’s the one corresponding to the heart chakra!

White chocolate—which as a loyal reader once pointed out, is not actually chocolate at all—sometimes melts faster than “regular” chocolate, so for this recipe I added it at the very end of the baking time. More details below…

Matcha cookies

Makes about 20 cookies

  • 2 cups (300 g) all-purpose flour
  • 2 teaspoons baking powder
  • 1 teaspoon baking soda
  • ⅔ cup (131 g) white granulated sugar
  • 1½ tablespoon unsweetened matcha powder
  • ½ teaspoon salt
  • 2 teaspoons vanilla extract
  • ⅓ cup (79 ml) plant-based milk
  • ½ cup (118 ml) neutral-tasting oil such as grapeseed or canola
  • 2½ oz (100 g) vegan white chocolate (two Vegó bars)

First, preheat your oven to 350°F (180°C). Then sift the flour, baking powder, baking soda, salt and matcha powder into a medium-sized bowl. In another bowl, combine the sugar, vanilla extract, milk and oil. Add the liquid mixture to the dry ingredients and stir gently until just combined (if it seems too dry, add more milk), taking care not to overmix.

Form balls of equal size and place on a cookie sheet lined with baking paper, pressing down to flatten them. Place in your preheated oven and set a timer for 8 minutes. Break the white chocolate squares into pieces that will fit easily in the center of each cookie and keep an eye on the timer because timing will be of the essence for the next step.

When the timer goes off, remove the cookie sheet from the oven and quickly press a piece of white chocolate down into the center of each cookie. Doing this will cause the cookie surface to crack nicely. Place the cookie sheet back into the oven and bake for another 60 seconds, long enough for the chocolate to melt just slightly and fuse with the cookie. The melting speed can vary depending on the brand. If you have one that seems to melt less slowly you can add it earlier on.

Remove the cookie sheet from the oven and transfer the cookies to a cooling rack, brown paper bag or paper towel. The cookies will be soft until they cool, so be careful to keep them flat. Store any cookies you aren’t serving right away in an airtight container, as exposure to the air can make the matcha turn brown.

Enjoy with some tea (green tea? why not!) and a Japanese novel. I recommend Haruki Murakami’s Norwegian Wood.

Variation: colorful m&m type candies can give these cookies a whole new look (perfect for Easter). I use the ones by Clarana, also available at Vegami. As the tops of the candies can crinkle with too much heat, I add them about halfway through baking. They can withstand heat longer than the white chocolate.

And if you love matcha as much as I do, you might also like my matcha galette des reines, a modern spin on a traditional French pastry.

Yukiwa plate by Yoshida Pottery via Brutal Ceramics. Trinidad photo backdrop by Fondos para Fotógrafos.

Raspberry cocopane pastries

Necessity truly is the mother of invention, as I learned last month when I wanted to make my annual vegan galette des rois (see my matcha version for more details). As soon as the first of January rolls around, everyone in France is seized with the desire to make one of these frangipane-filled pastries, which require a sizable quantity of ground almonds. If you don’t happen to think of it ahead of time and buy your ground almonds before the end of December, you may be out of luck. I was, at least, on the day I went out to get mine… all three stores I tried were out of stock even though it was past the middle of the month.

Ordinarily, I might have given up at this point, but I was determined to make the dessert to serve at my Biden-Harris inauguration viewing party (well, not really a party since there were just two of us, but it felt festive!) because I had a plan to make it BLUE. Yes, blue, in honor of the Democratic Party’s color. And it struck me that grated coconut could probably substitute quite nicely for the almonds and would also accommodate the blue spirulina I planned to use as a natural food coloring. It worked out really well, and I realized I’d inadvertently invented something new, which I am calling “cocopane” (as in coconut frangipane; pronounced “coco pan”).

So for this month’s recipe, I decided to experiment more with this new filling and to try pairing it with a fruit. I initially thought of banana, but then since it was to be a Valentine’s recipe, I decided to use something pink instead.

These lovely turnovers would make an excellent romantic breakfast for you and your Valentine – whether they’re human or a furry friend – but could also serve as a dessert. They’re best enjoyed soon after baking, so if you plan to have them as an after-dinner treat you could prepare them earlier in the day, up to the point where they would go into the oven, but then chill them in the fridge, preferably in a sealed container so the dough doesn’t dry out.

Raspberry cocopane pastries

Makes 4 turnovers

  • 1 prepared flaky pastry crust (keep refrigerated until the last moment)
  • 3/4 cup (50 g) dried grated coconut
  • 2 tablespoons cornstarch
  • 3 tablespoons white sugar
  • 1/4 cup (60 ml) unsweetened liquid coconut cream or canned coconut milk
  • 1 tablespoon coconut oil, melted
  • 1/2 cup fresh or frozen raspberries (or raspberry jam)
  • 1 teaspoon additional white sugar
  • 1 to 2 tablespoons powdered sugar for dusting

Preheat your oven to 350°F (180°C) and mix together the grated coconut, cornstarch, sugar, liquid coconut cream (or canned coconut milk) and melted coconut oil. If you can’t find coconut cream/milk, another unsweetened liquid plant-based cream (such as soy or rice) will do.

You now have a bowlful of “cocopane” and it should have the consistency of a moist paste. If your mixture is too dry, add a bit more coconut cream/milk, and if it’s too wet, add some more grated coconut.

Now for the raspberries… I used frozen berries and allowed them to thaw on the counter for a few hours. I then strained out the juice they released while thawing and mashed the berries lightly with a fork. I added about a teaspoon of white sugar, but you could use less or more according to taste. If you can’t find berries, you could always use prepared raspberry jam or compote (in this case, do not add sugar).

You can use the raspberry juice later as a food coloring, for example to make a pink frosting as in my Valentine’s cookie recipe or to color almost anything else pink (the juice will keep in the fridge for a few days).

Trace a few circles onto the pastry, either with a paper template or an upturned bowl. I made mine 5.5 inches (14 cm) in diameter, but the size will depend on the size of your pastry. I then pieced together the remaining pastry bits to make a fourth circle. Alternatively, you can cut the pastry into four parts and fold each one over for a more triangle-shaped turnover.

Place about a tablespoon of the cocopane onto one half of each pastry circle, leaving a border around the edge. Be careful not to overfill.

Now add some of the crushed raspberry mixture on top of that.

Fold the pastry circle over until the edges meet.

Now seal the edges firmly with a finger or thumb to ensure that they don’t come apart while baking. Some cocopane and raspberry mixture may be left over when all your pastry circles are filled (they make a nice topping for plain yogurt).

Place the pastries onto a baking sheet lined with parchment paper, and bake for 20 to 25 minutes in your preheated oven.

They’re ready when the tops are golden brown. As you can see, the one at the back left didn’t have a good seal because some of the raspberry mixture overflowed while I was closing it. The one at the back right was made from the pieced-together pastry scraps so did not stay completely together… Luckily, the powdered sugar dusting is a remedy for small flaws like these!

Allow the pastries to cool for a few minutes, then dust the top with some powdered sugar. I like to put mine through a small sieve to ensure a fine consistency.

And there you have some lovely, freshly baked raspberry cocopane pastries… the perfect thing for a very romantic Valentine’s Day breakfast!

Crunchy and flaky on the outside, soft and fruity on the inside.

Just before serving these yummy treats, hit “play” on this video:

Variations:

  • Use another type of fruit (cherries, apricot, apple or banana come to mind).
  • Color the cocopane blue with blue spirulina before adding the raspberry (your result will undoubtedly be a bit purple) or green with matcha.
  • Add a bit of rosewater to make a raspberry-rosewater version.
  • For a frangipane version, use ground almonds instead of grated coconut, and substitute soy cream and canola oil for the coconut cream and coconut oil.

Brazilian carrot cake

In all my years eating (American) carrot cake, it somehow never once occurred to me to put chocolate on it. But when I discovered that such a thing existed in Brazil (bolo de cenoura com calda de chocolate in Portuguese), it made nothing less than perfect sense to me. Here’s my vegan version of this tasty treat – try it for yourself and see what you think!

Traditionally, Brazilian carrot cake doesn’t contain raisins or walnuts, but I couldn’t resist adding them for nostalgia reasons (they’re totally optional though and can be omitted without the need to change the other ingredients). For the chocolate topping, I made a simple glaze from cocoa powder, maple syrup and a bit of salt. I recommend mixing up the glaze and applying it to the individual slices just before serving them, so the amounts given for the glaze are for two pieces of cake. You can double or triple this as needed however, if you’re making this after the Great Pandemic of 2020-2021 is over (fingers crossed it doesn’t last longer) and you actually have nine people eating this together in one place.

Carrot cake

Makes one 8 x 8 in. (20 x 20 cm) cake

  • 1 packed cup (150 g) grated carrot
  • 1/2 cup (118 ml) applesauce or other fruit compote
  • 1/4 cup (59 ml) neutral-flavored oil
  • 2 teaspoons apple-cider or white vinegar
  • 2 teaspoons vanilla extract
  • 1/4 teaspoon lemon zest
  • 1 & 1/2 teaspoon cinnamon
  • 3/4 teaspoon salt
  • 1/2 teaspoon baking soda
  • 1/2 cup sugar
  • 1 & 1/2 cups flour
  • 1/4 cup golden raisins (optional)
  • 1/4 cup walnuts, roughly chopped (optional)

Begin by grating up your carrot into a medium or large mixing bowl. If it’s organic, you can just scrub it with a vegetable brush rather than peeling it. Preheat your oven to 350°F (180°C).

Next, add your applesauce or other fruit compote to the bowl. I actually used apricot sauce (compote) as that’s what I had on hand, without it changing the flavor of the cake in particular.

Grate a bit of lemon zest to add some brightness to the cake. I used 1/4 teaspoon, but you could add a bit more if you’re partial to a lemony flavor.

Now add all the other ingredients apart from the flour, and stir thoroughly to combine.

Finally, add the flour and stir gently until just combined (be careful not to overstir).

Transfer the batter to an 8 x 8 inch (20 x 20 cm) baking dish lined with baking paper or oiled. Place in the preheated oven and bake for 25 to 30 minutes. Check for doneness by inserting a toothpick into various parts of the cake. If it comes out clean, it’s ready but if there’s some batter sticking to it, give it another 5 minutes and then test it again.

The nice thing about baking paper is you can just lift the entire cake out of the baking dish and put it on your countertop for easier cutting. Allow the cake to cool for 15 minutes or so before cutting or you might not be able to make clean cuts through it.

I cut mine into nine pieces, each measuring about 2.5 inches (6 cm) square. Now you’re ready to mix up some chocolate glaze!

Chocolate glaze

Makes enough glaze for two pieces of the carrot cake.

  • 2 teaspoons unsweetened cocoa powder
  • 2 teaspoons pure maple syrup (add more for a thinner glaze)
  • tiny pinch salt

You can hardly find a simpler recipe… just put these three things together and stir! At first the maple syrup will not seem to mix into the cocoa powder, but keep persisting and it will suddenly become a frosting/glaze. If you want it to be thinner and more drippy, add a bit more maple syrup.

Apply the glaze in whatever amount you like.

And there you have it!

Time to take a bite…

Looks moist and yummy. But how will it taste?

Two thumbs up!

And as you may be aware, Valentine’s Day is just around the corner! This dessert may not seem very Valentine-y at first glance, but stick a heart on it and it suddenly is. 🙂

White squirrel

Baileys AlmandeToday we have yet another recipe I concocted while visiting my parents back in the US this summer. I’d purchased a bottle of Baileys Almande, which isn’t easy to find in France but is so very delicious, and wondered if I could create a cocktail of some kind with it.

Its creaminess seemed to make it ideal for an ice cream drink. That made me remember the pink squirrel, a fun retro cocktail involving crème de cacao and crème de noyaux (made from apricot, peach or cherry pits, which give it an almond flavor – perfect for squirrels!) and prepared with either heavy cream or ice cream. Crème de noyaux usually also contains red food coloring, which is what gives the pink squirrel its pretty pastel hue.

Incidentally, in researching the pink squirrel, I learned it was actually invented at a cocktail lounge in Milwaukee, Wisconsin, one of the cities where I spent my formative years.

wh squirrel 2I thought it would be fun to make a similar drink with a vegan twist, using Baileys Almande and nice cream (blended frozen bananas) instead of ice cream made from animal milk, and this is the result, which I have named “white squirrel.”

Of course, the drink is a bit more beige (or banana-colored) than white, but “beige squirrel” doesn’t have quite the same ring to it, and even actual white squirrels are kinda beige, so it works, right? I think so.

The white squirrel would be a nice after-dinner indulgence for Valentine’s Day, which is nearly upon us. All you need are a few key ingredients and some advance planning, since the bananas have to be frozen for a few hours before you can start. Of course, if you have some vanilla dairy-free ice cream on hand, you could use that in place of the nice cream. If you can’t get your hands on Baileys Almande, you can substitute amaretto or another similar liqueur (scroll to the bottom of this post to see a Baileys-like product that’s available in France).

pink_squirrel

I found this fun vintage pink squirrel recipe, which appears to come from one of those great 1970s recipe card libraries like my mom has. As always with these old recipe photos, the creation is given a confusing mise en scène with unattractive colors and problematic lighting. What’s a cocktail doing on the kitchen table from Little House on the Prairie? And why is it being served with fruitcake? It’s an elegant drink that functions as a dessert in its own right, and as such should be served by itself.

So let’s make some white squirrels, shall we?

white squirrel spoon

White squirrel

Makes 2 one-cup (236 ml) servings

  • 3 frozen bananas (roughly 16 oz/450 g in total)
  • 2 ounces (59 ml) white (clear) crème de cacao liqueur
  • 2 ounces (59 ml) Baileys Almande (or similar – see end of post)
  • non-dairy whipped topping
  • cocoa powder or ground cinnamon/nutmeg, for garnish

Equipment needed: freezer, food processor or high-powered blender

IMG_0473

Take your frozen bananas out of the freezer (after freezing for at least 4 hours) and weigh the amount you need, depending how many servings you want to make. In the photos in this post, you’ll see larger quantities because I was making more than two servings. Place the bananas in your food processor, but allow them to thaw for 10 or 15 minutes so they’re soft enough to blend without damaging your food processor.

Add the liqueurs to the food processor and begin blending the bananas. It’ll take a little while, but after a few minutes the bananas will take on a smooth soft-serve ice cream consistency. You may need to pause the blending to scrape down the inside from time to time, to help all the chunks to get blended.

When the nice cream looks like this and all of the banana has gotten blended, it’s ready!

IMG_0340

Fill up your glasses with the nice cream mixture and top with the nondairy whipped topping. Sprinkle a bit of cocoa powder or grated cinnamon or nutmeg on top if you like. Serve with spoons!

If you’re looking for additional Valentine’s recipes, check out the ones in my archives: mini fruit pavlovas, rosewater raspberry hearts and white chocolate mendiants.

white squirrel.jpgIMG_0371

Variations:

  • Make a virgin white squirrel by substituting your favorite plant-based milk + 1/2 teaspoon almond extract per serving for the alcohol.
  • Turn this drink into a brown squirrel by adding some cocoa powder during the blending stage.

Where to find ingredients…

In North America: Baileys Almande can be found at most liquor stores these days, and most grocery stores carry a range of non-dairy whipped toppings, sometimes with a range of options (almond, rice, coconut). The products shown in the photos above were all purchased at mainstream grocery stores in the US.

In Europe: Baileys Almande is available in some countries (Germany and England, to my knowledge) but for some reason has still not become widely available in France.  You can substitute amaretto or a similar liqueur – for example, Aujourd’hui Demain in Paris currently has this maca and almond milk liqueur (photo below), which I haven’t tried but which seems similar to Baileys Almande. Non-dairy whipped toppings (in a pressurized can or small carton) can be purchased at vegan grocery stores and also sometimes at kosher stores or in the kosher section of a general grocery store. See also my whipped coconut cream recipe.

Mini pavlovas

Valentine’s Day is just around the corner once again… This year, how about serving your sweetheart (or yourself) some light, crunchy vanilla clouds topped with rich coconut cream and colorful, juicy fruit? Meet the pavlova, a meringue-based cake named for Russian ballerina Anna Pavlova (rumored to have been created in 1926 in New Zealand), but in a mini version. It’s vegan too!

anna-pavlova-1909.jpg
Anna Pavlova in 1909

The actual origins of this fancy dessert are debated, but the Russian and potential New Zealand connections are reason enough to consider this an “Around the world” recipe.

It’s based on an airy meringue shell made from the brine from a can of chickpeas (or other legume – brine from navy, kidney or other beans works too). In yet another international connection, this culinary innovation, which opened up a world of new possibilities for vegan and egg-free cuisine, was discovered by French tenor and occasional food blogger Joël Roessel back in 2014. Aquafaba, as the brine came to be known, also makes it possible to create other items such as French macarons, chocolate mousse, the topping for lemon meringue pie, royal icing and even cheese and butter.

This is a fairly simple recipe, but it does require some time because the meringue-baking process is long and each batch of meringues must cool fully inside the oven once the baking time is up. For this reason, I recommend making the meringue shells the day before you plan to serve this dessert. Be sure to transfer them immediately to an airtight container once they’re finished cooling in the oven to ensure that they don’t absorb humidity and become sticky, losing their crunch. And when you’re ready to serve them, remove them from the airtight container and add the toppings only at the very last minute.

A side benefit to making this recipe is that you’ll have a freshly opened can of chickpeas on hand. And that means you can make hummus, chickpeas in spicy tomato sauce or my famous chickpea of the sea salad! But for now, roll up your sleeves so we can make these pavlovas!

Mini pavlovas

Makes around 10 pavlovas

For the meringue shells

  • 1/2 cup (118 ml) aquafaba (chickpea brine from the can or jar)
  • 1/2 cup (100 g) granulated white sugar (table sugar)
  • 1/4 teaspoon liquid vanilla extract (do not use any flavoring containing oil)
  • 1/4 teaspoon cream of tartar (optional)

For the whipped coconut cream

  • 3/4 cup (200 ml) coconut cream, chilled
  • 1 or 2 tablespoons powdered sugar or maple syrup
  • 1/4 teaspoon liquid vanilla extract

For the topping

  • Seasonal or canned fruit. I used canned peaches and fresh pomegranate seeds, but consider kiwi, strawberries, raspberries, blueberries, passionfruit or a combination of these.

Equipment needed: hand or stand mixer with “egg” beater attachments, metal or glass bowl (not plastic), baking sheet with baking paper, airtight container for storing the finished meringues (can be plastic).

If this is the first time you’ve whipped aquafaba, get ready to see a fun transformation. Turn your mixer to the highest setting and in a matter of about three minutes, the clear brine will magically turn into something fluffy and white that looks just like whipped egg whites.

IMG_9139

The aquafaba is ready for the next step once stiff peaks have formed and it stays in the bowl when you turn it upside down, as shown. Add the vanilla extract and cream of tartar, if using, and beat until incorporated.

IMG_9147

Now you’ll add the sugar. Continue beating, pouring the sugar in bit by bit. The mixture is done once it looks glossy. At this point, it will look and taste just like marshmallow fluff. In fact, you can even use some of it as marshmallow fluff if you like (but it will deflate after a while, so would need to be used right away).

At this point, you can begin preheating your oven to 210°F (100°C). Be careful not to get these two numbers mixed up, as I did the first time around!

On a clean sheet of baking paper, deposit some blobs of meringue mixture of a similar size. With the back of a spoon, spread each blob out into a flatter round shape and make a depression in the center. This is where you’ll place the coconut whipped cream and fruit once the shells have baked.

Place the sheet in your preheated oven and bake for 70 to 75 minutes. Any shorter, and you risk having a crunchy outside but a gooey, gummy inside. When the time is up, leave the meringues where they are for a further 45 minutes to fully cool without opening the oven door.

When they’re done baking, as shown in the third photo above, the meringues are no longer shiny and may also have spread out a bit.

img_3217

Up to an hour before serving the pavlovas, whip your coconut cream together with the powdered sugar or maple syrup and the vanilla extract until it holds a shape. Store the whipped cream, covered, in your refrigerator.

img_e9176.jpg

Immediately before serving the pavlovas, top each meringue shell with a dollop of the coconut whipped cream, then add the fruit. Note that the meringue will begin to gradually break down as soon it comes into contact with the whipped cream, so prepare only the number of pavlovas that will be eaten right away.

photo_2019-02-12_20-49-49photo_2019-02-12_20-49-49 (2)photo_2019-02-12_20-49-48photo_2019-02-12_20-49-49 (3)

Crunch, crunch. Yum!

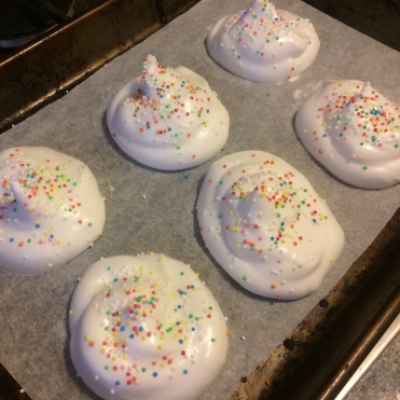
If you have enough pavlovas and there’s still some meringue mixture left, you can make meringue “kisses” such as the ones above by making blob shapes with a teaspoon or, if you want to get fancy, with a pastry bag. If you want to add jimmies, sprinkle them on top before putting the meringues in the oven. Bake as directed above.

vintage v card teapot

Brew yourself a pot of tea and enjoy your mini pavlovas this Valentine’s Day!

In search of other Valentine’s Day recipes? Check out my recipes for heart-shaped sugar cookies with rosewater-raspberry icing and French-inspired white chocolate mendiants.

White chocolate mendiants

It’s that time of year again… hearts seem to be popping up all around town, mingling strangely with the last remaining Christmas decorations and sometimes (like this year) accompanied by snow. For my Valentine’s Day post last year, I waxed philosophical about the meaning of the holiday and presented you with a recipe for sugar cookies with rosewater-raspberry icing. This year, perhaps inspired by all the discarded Christmas trees I’ve been walking past on the sidewalks over the past few weeks, I decided to revisit a traditional French yuletide confection in a white, pink and red version.

As with the original dark chocolate version, this is a very easy and versatile recipe. You need only melt a bar of chocolate or two and then add whatever fruit and nut toppings you like. At the end, you have a very cute little DIY treat to give to your loved ones.

White chocolate mendiants

Makes around 12 mendiants

Ingredients:

  • about 5.6 oz. (160 g) vegan white chocolate
  • a few teaspoons of coconut oil, if needed to thin the chocolate (do not use any other type of oil)
  • freeze-dried strawberry slices
  • dried cranberries or other dried red berries of your choice
  • optional: toasted almond slivers, toasted pine nuts, candied ginger

Equipment needed: double-boiler or metal mixing bowl plus saucepan, parchment or waxed paper. A tray that can fit inside your refrigerator and a heat-safe silicone spatula will be handy too.

Gather the white chocolate plus all the berries and any other toppings you want to use. I used these 80-gram bars of vanilla-infused white chocolate from iChoc that I found at Un Monde Vegan in Paris, but if you live somewhere else you can look for white chocolate at an organic shop or online.

IMG_7354

Set up a double-boiler or, as I have done here, boil some water in a saucepan with a metal bowl on top. Make sure that the bottom of the bowl doesn’t touch the water.

IMG_7355

Break the chocolate into squares/chunks and put them in the bowl. You’ll be keeping the heat on so that the water continues to boil throughout the entire process.

IMG_7361

Using a heat-safe silicone spatula, stir the chocolate as it melts. While waiting for it to be ready, grab a tray that’s the right size to fit inside your refrigerator and prepare it with a sheet of parchment or waxed paper.

IMG_7362

If your chocolate seems too thick or dry, you can add a small amount of coconut oil to thin it. Add the oil sparingly, incorporating each amount to see the result before adding more.

IMG_E7372

When the chocolate has fully melted and become smooth, place a teaspoonful or so onto a sheet of parchment paper and shape into a circle of even thickness. Make only around six rounds at once so you have time to garnish them with the fruit and other toppings before the surface of the chocolate cools. Once you’ve filled an entire tray, place it in the refrigerator to cool and set (this takes about an hour).

IMG_7363

Continue the process with the remaining melted chocolate. I melted three bars, which made about six mendiants per bar, and opted to do a different type of topping with each set of six. For the ones above, I used strawberries, cranberries and some almonds. I added a few pine nuts here and there after taking this photo.

IMG_7370

A strawberry-only version. Which of these three topping versions do you like best?

IMG_7379

After about an hour, the mendiants should be fully cooled and set. You can take them out of the fridge and put them on a plate!

IMG_7380

I plated mine for this post on this great contrasting blue/green plate that I nabbed in the sales at Habitat the other day… but if you’re making these to give to friends as gifts, you can wrap them up in a bit of waxed or parchment paper tied with some fancy string.

IMG_7433

They look kind of nice on a smaller rectangular plate, too.

IMG_E7390_b

Two paws up from Sésame, who wishes you a very happy Valentine’s Day, by the way. 🙂

Enjoy!

Variations: experiment with other combinations of fruit and nuts. Make some dark chocolate mendiants to create an assorted set.

Rosewater raspberry hearts

I know many people who object to Valentine’s Day on the grounds that it’s mainly a commercial holiday invented to get people to buy things. This may be true, but whether we actually go out and buy things or instead just celebrate love in ways that cost little or nothing is entirely up to us. I guess you can see which way I lean!

My thought is that a day dedicated to love is a pretty good thing. Especially if you don’t make it exclusively about romantic love but expand your focus to include the love you feel for family members, friends and your cat or dog. It can be a reason to think back fondly on times that others have shown you love and that you have shown love to others. The trick, of course, is not to get sidetracked into unpleasant memories of past partners… and that’s why the more general focus is useful.

If you opt to celebrate the day by also giving a gift to someone to show your appreciation for them, consider something handmade. Like heart-shaped cookies flavored with rosewater and raspberry! It’s something you don’t come across every day, and definitely a departure from the usual chocolate.

This recipe combines a basic sugar cookie base (with a slight rose scent) and a fruity, floral and colorful royal icing. Traditionally made with beaten egg whites, royal icing (a hard, dry type of frosting) can now easily be made in a vegan version thanks to the magic of aquafaba.

I decided to color the icing with raspberry juice for the natural color and fruity notes. If you’ve ever bought frozen berries and then forgot the bag on the counter, you know that when they thaw, they release a juice (which invariably manages to leak out of the bag). This juice is fairly concentrated and thick, so is an effective coloring agent when used in a small enough quantity—something like a store-bought cranberry juice would probably be too thin and might water down the icing. If berries are in season where you live, you could try blending and straining fresh ones to obtain a juice. If you attempt this, comment below and let us know how it went! Be sure to choose red-colored berries, unless of course you want the darker, more purple color of blackberries or blueberries.

After coming up with this rose/raspberry combination, I realized it has a lot in common with my new favorite perfume, a truly unique scent featuring notes of Bulgarian rose and crushed blackcurrant leaves. So who knows, this scent may have been working on the back burner unbeknownst to me as I chose the flavors for this icing.

But let us move on to the recipe, at last…

Rosewater cookies

Makes about 2 dozen heart-shaped cookies measuring 2 in. (5 cm) across at widest part

Ingredients

  • 1 and 1/2 cups all-purpose flour
  • 1 tablespoon cornstarch
  • 1/8 teaspoon salt
  • 1/8 teaspoon baking powder
  • 1/2 cup margarine
  • 1/2 cup granulated sugar
  • 1 teaspoon rosewater flavoring

Equipment needed: mixer, plastic wrap, rolling pin, heart-shaped cookie cutter

(For the icing recipe, scroll midway down the page)

img_6003

Start by combining all the dry ingredients, except for the sugar, in a medium bowl: flour, cornstarch, salt and baking powder. Set aside.

img_6004

Place the margarine, sugar and rosewater flavoring in a large mixing bowl.

img_6005

Beat on medium-high for about four minutes, until the sugar and margarine are completely combined.

img_6011

It will look something like this (above).
img_6014

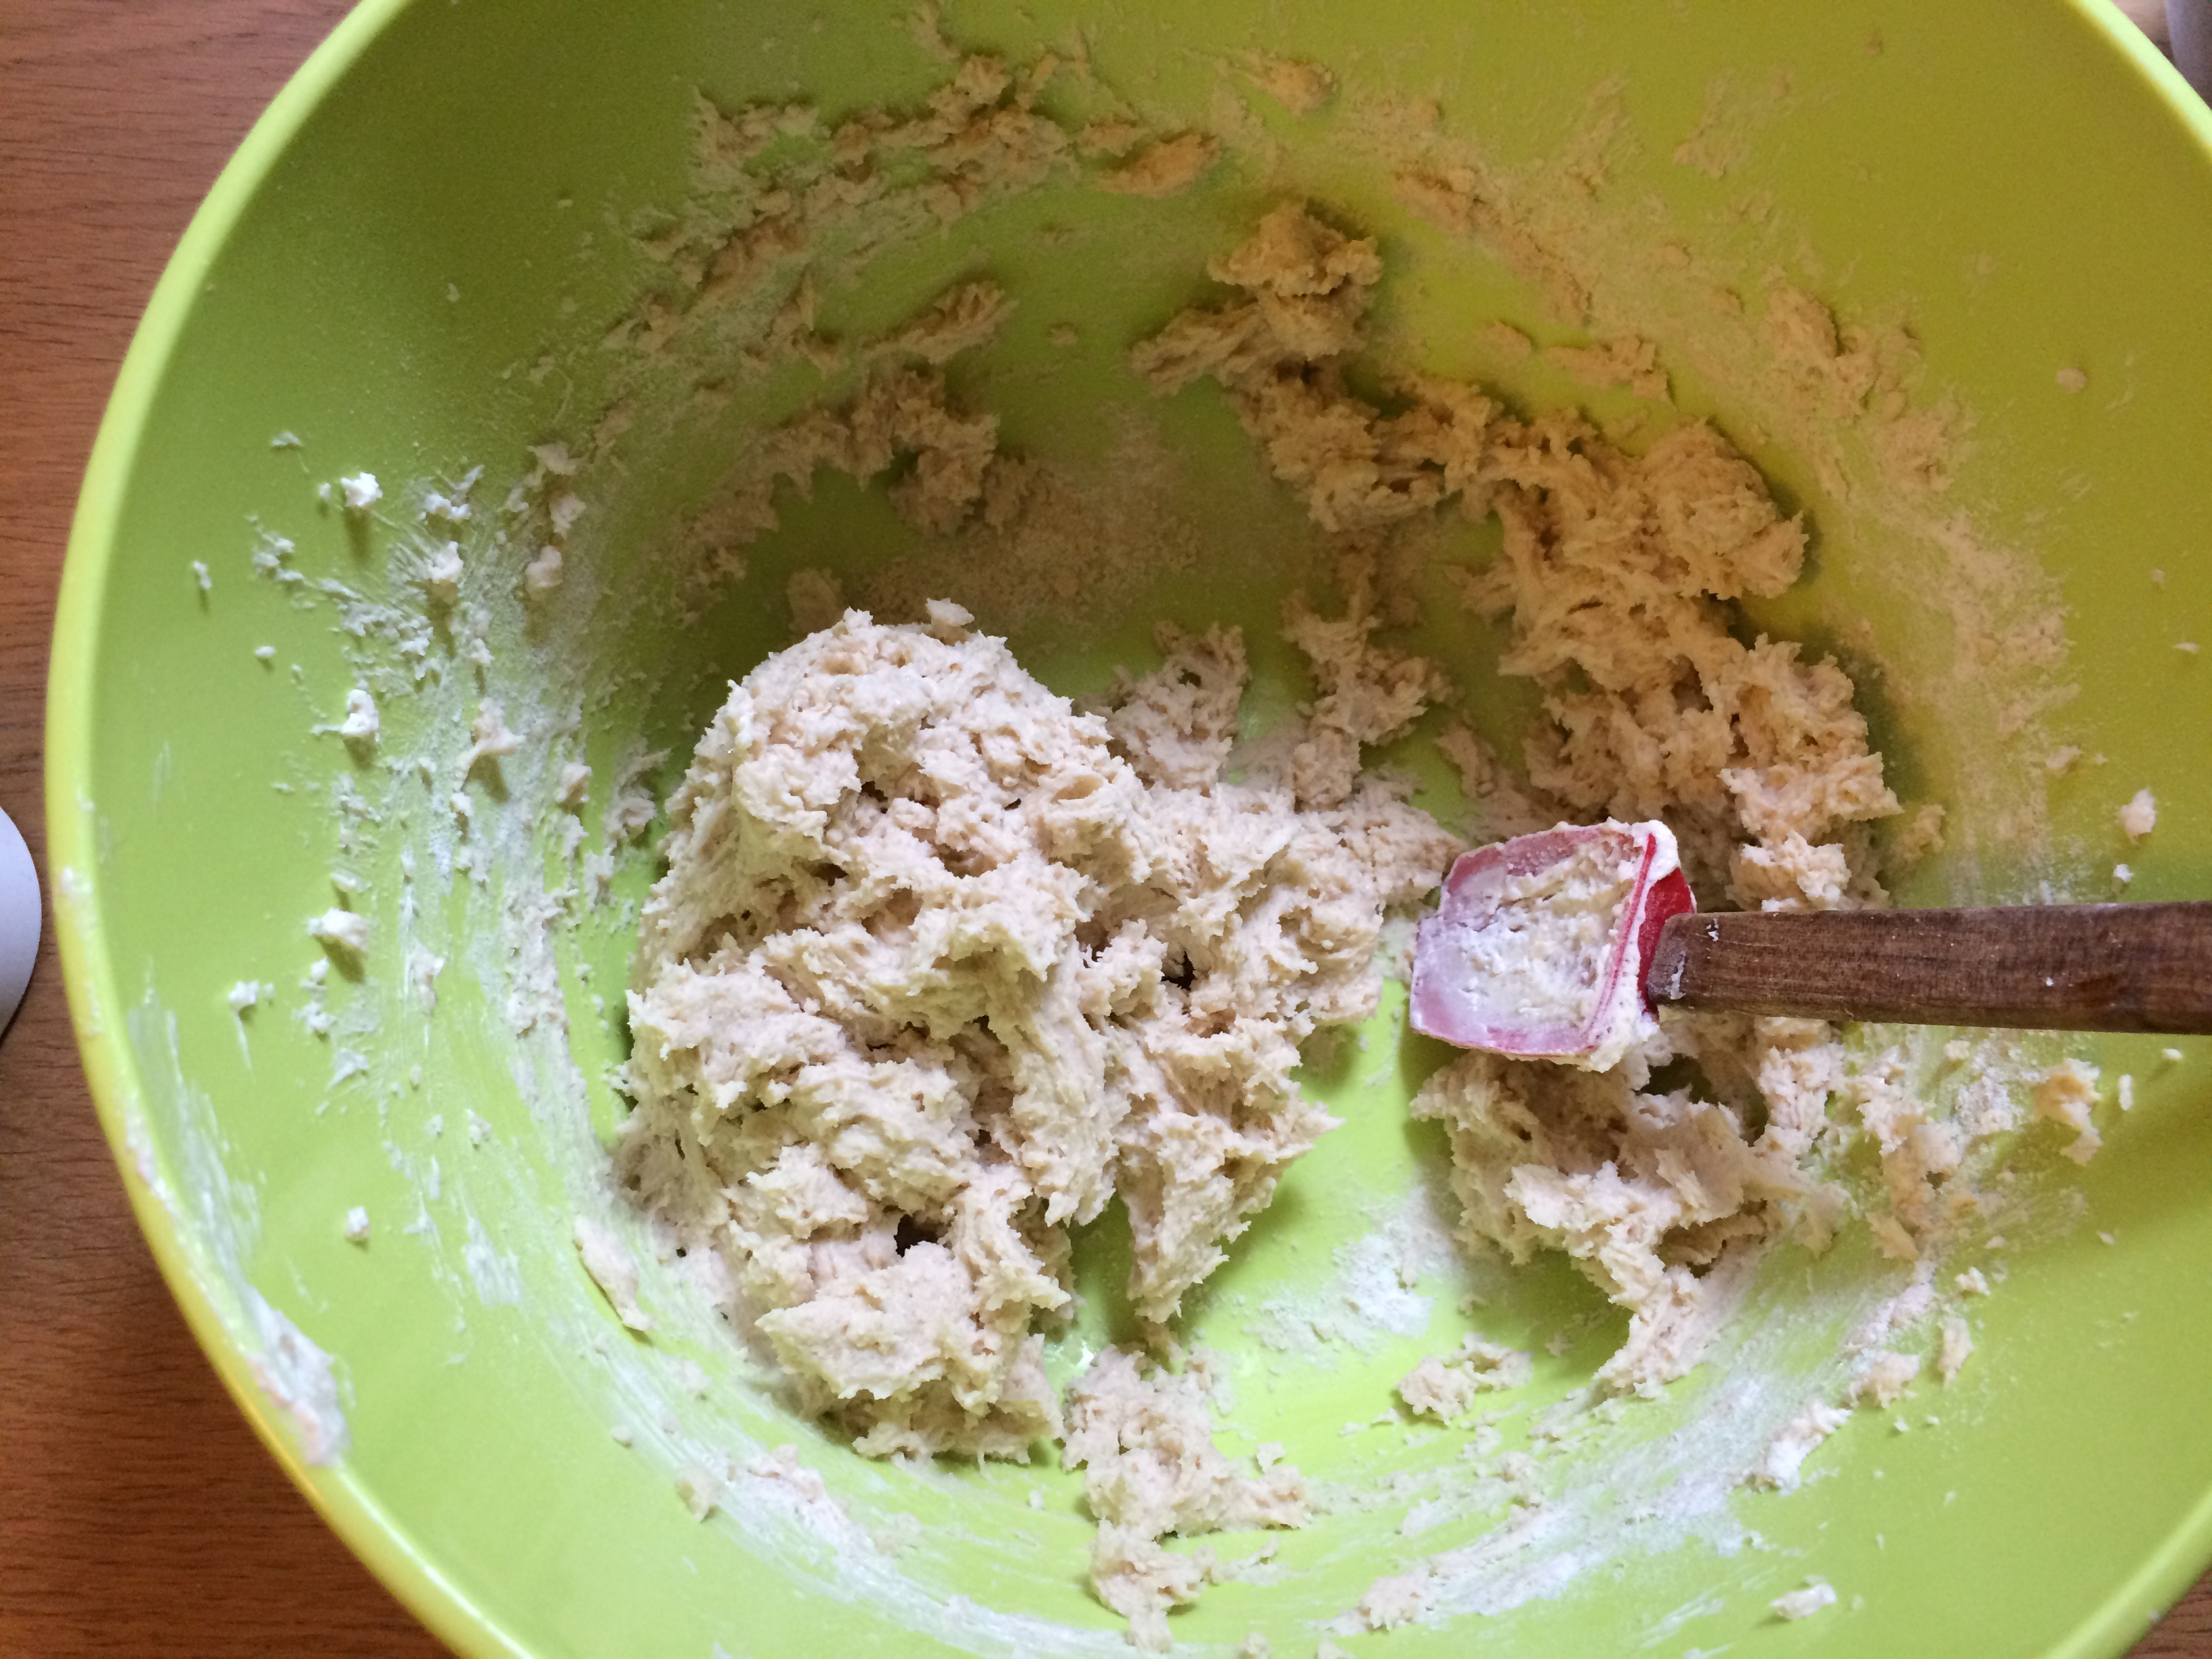
Now add half the flour mixture and beat until just moistened (as shown above). Incorporate the remaining flour mixture, beating only as much as necessary to achieve a uniform texture and form a dough. Add a bit more flour if the dough seems too sticky.

img_6016

With your hands, shape the dough into a flat disk shape and wrap in plastic wrap. Place in the refrigerator for at least three hours or even overnight. Go read a book or watch a documentary about love while you wait!

img_6024

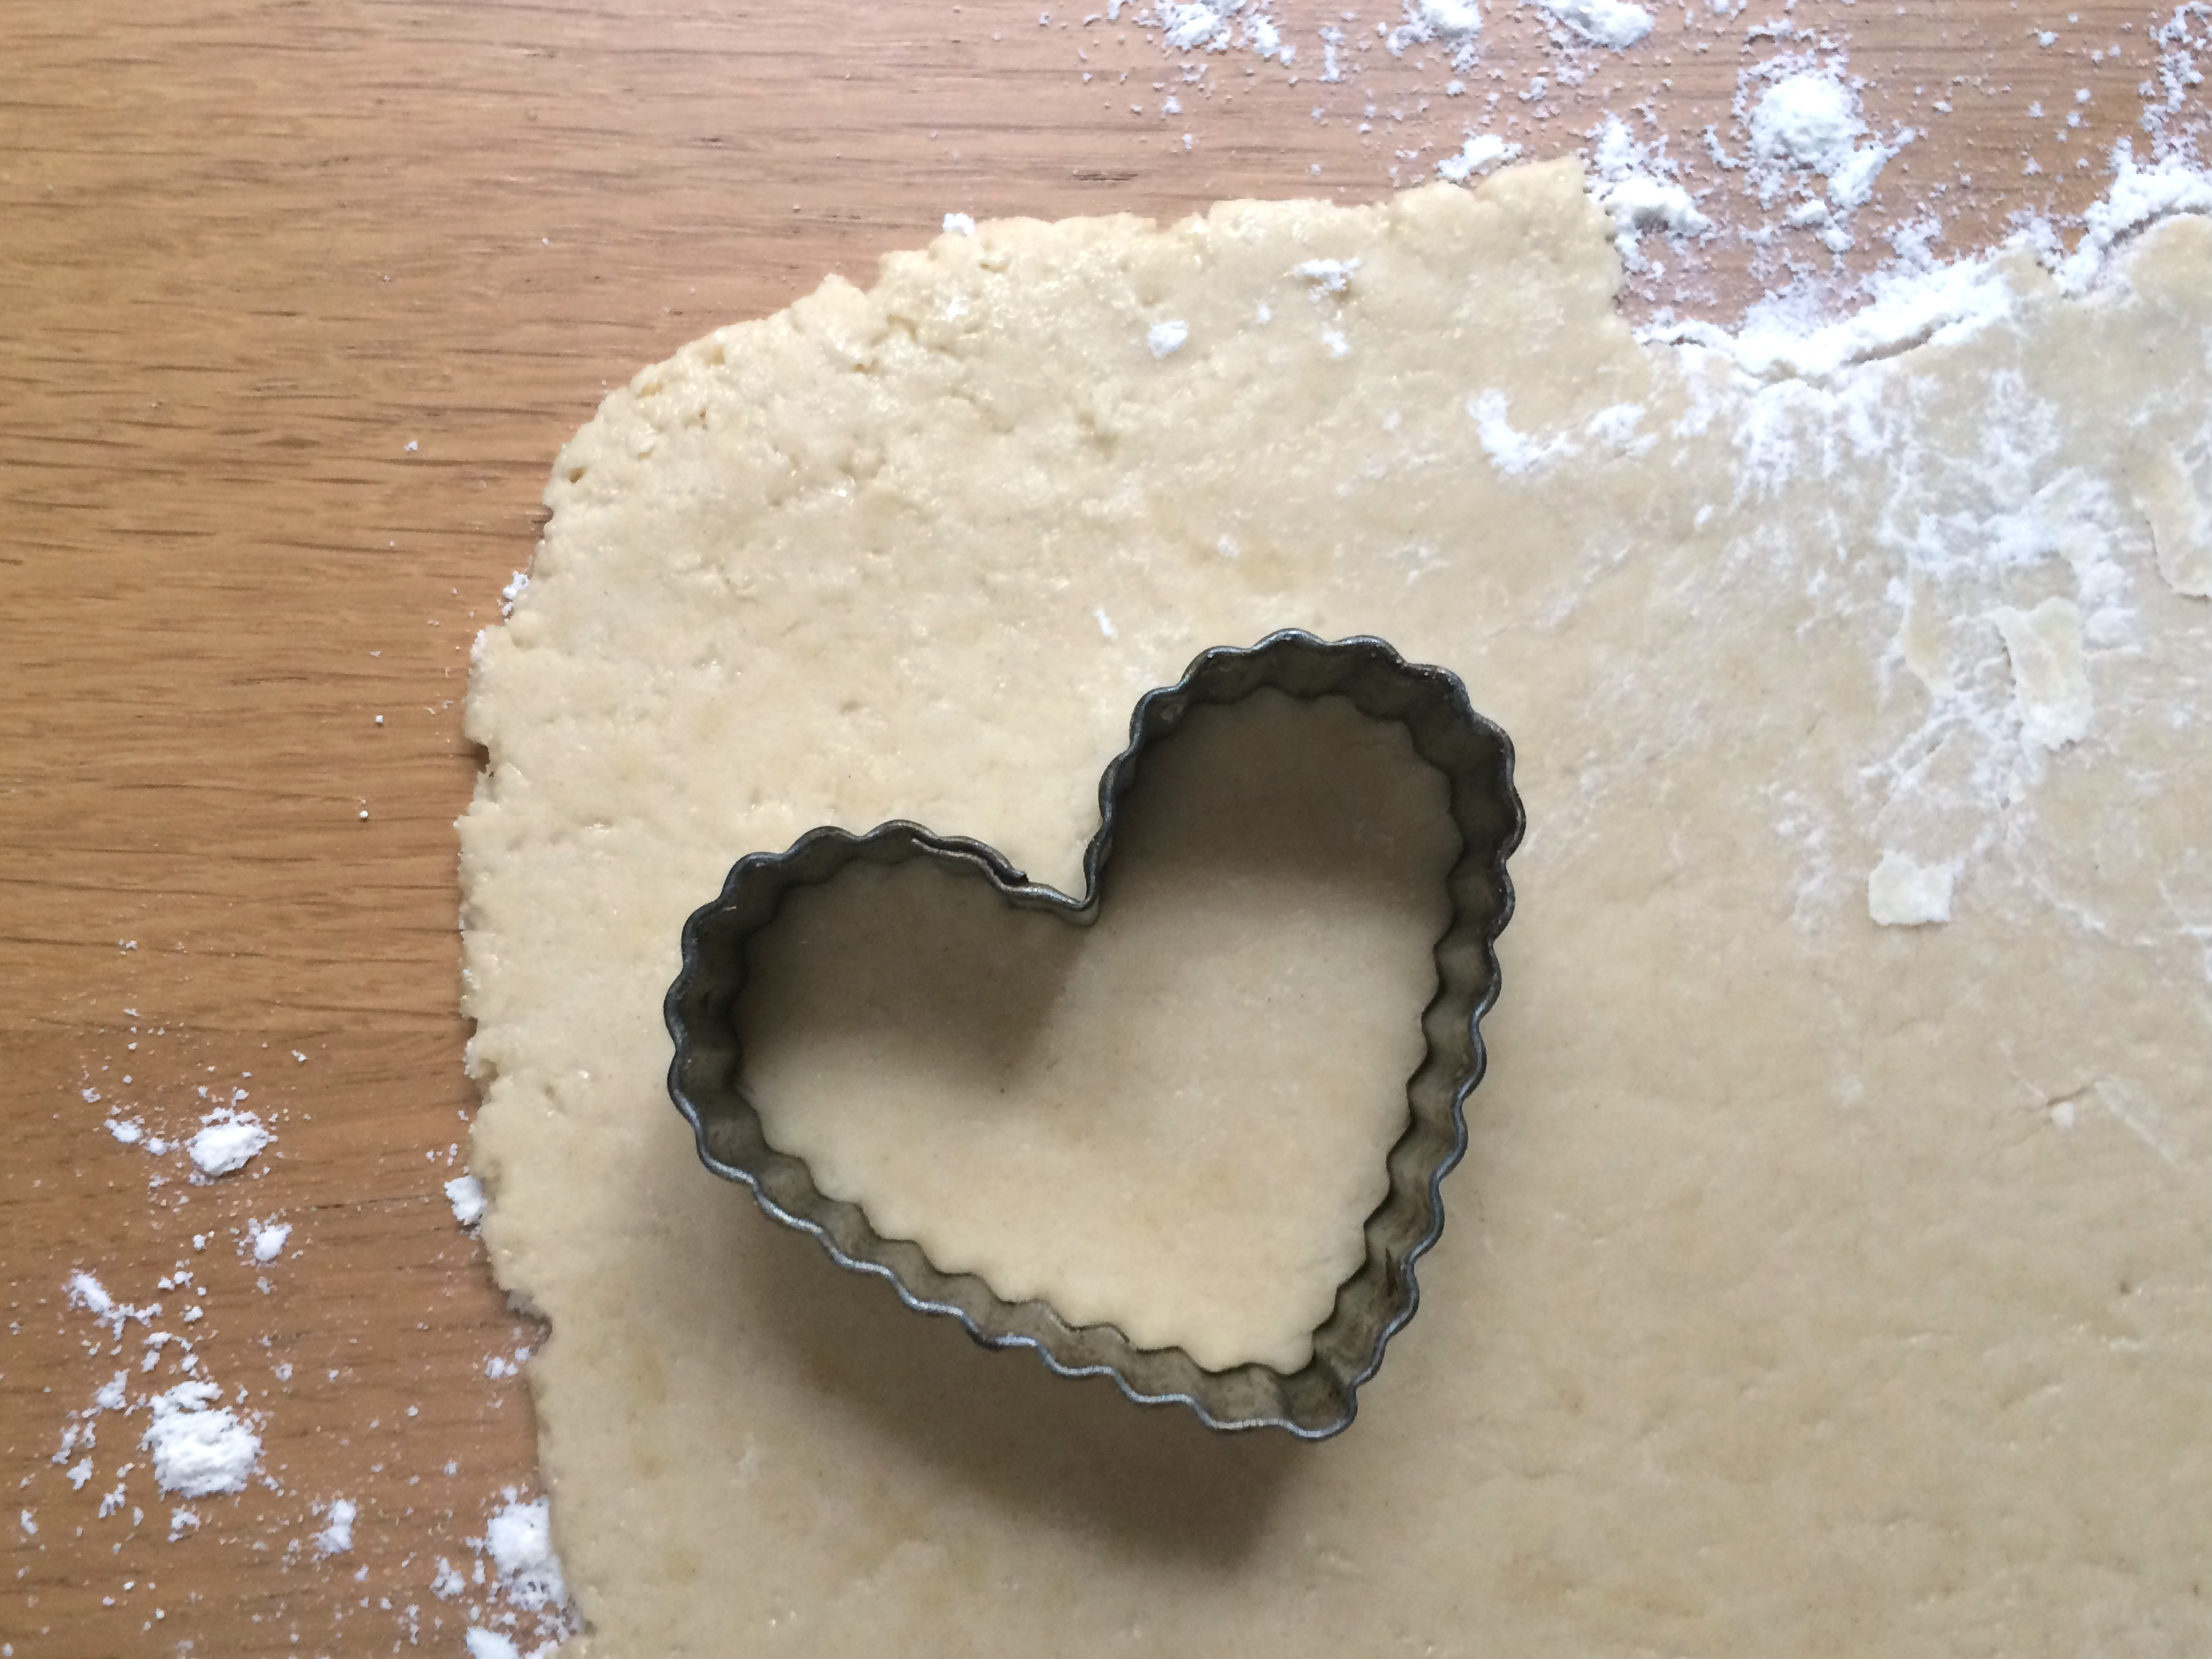
After the chilling time has ended and you’re ready to bake the cookies, preheat your oven to 350°F (180°C). Remove the dough from the refrigerator and, on a floured surface, roll it out flat with your rolling pin. Dust the rolling pin with flour as you go along so the dough doesn’t stick to it. The rolled-out dough should be about 1/4 inch (1/2 cm) thick across the entire surface.
img_6026

Cut the heart shapes with your cookie cutter and transfer them carefully to a baking tray lines with baking paper (or oiled). You may want to use a thin metal spatula to unstick the hearts from the table top so they don’t become misshapen as you pick them up. Continue until you have filled up the tray or used up all the dough.

img_6027

The cookies will not spread as they bake, so you can place them fairly close together on the baking tray. Place on a middle rack of your preheated oven and set a timer for 10 minutes. When the 10 minutes are up, check to see whether the edges have turned a bit golden-brown. If they have not, leave them in the oven another couple of minutes.

img_6038

Remove from oven and leave to cool while you make the icing.

Rosewater raspberry royal icing

Makes about two cups of icing

Ingredients

  • 3 tablespoons aquafaba (liquid from a can or jar of chickpeas)
  • 1 to 2 cups powdered sugar
  • 2-3 teaspoons rosewater flavoring
  • 1/4 cup juice from thawed frozen raspberries or other red berries

Equipment needed: mixer, small strainer

img_6195

Open a can or jar of cooked chickpeas or other legumes such as navy beans, kidney beans or black beans.

img_6197

Measure three tablespoons of the liquid from the can or jar into a mixing bowl, ideally with a round bottom (best for working with an electric mixer). Put the can of chickpeas in the fridge to make hummus or chickpea salad with later. If you have not begun thawing your raspberries yet, take them out of the freezer and pour them into a bowl.

img_6199

Beat on medium until frothy, about 30 seconds. Do not go beyond this stage, as the mixture will start to turn into marshmallow fluff!

img_6202

Add the powdered sugar (must be powdered—granulated is too grainy for this recipe) and begin beating to incorporate. Start with one cup of the sugar, then add more until you’ve reached the right consistency. To prevent the sugar from flying out of a shallow mixing bowl, combine the aquafaba and sugar briefly with a rubber spatula first.

img_6203

After four or five minutes, the icing will have reached more or less the right consistency (as shown above). Add the rosewater flavoring, one teaspoon at a time, and incorporate briefly with the mixer. Taste the icing after adding each teaspoonful to see if you want to stop there or make it rosier. I personally found that three teaspoons were necessary to really taste the rose, as it’s a somewhat subtle flavor, but your preference may differ. If you want to ice some of your cookies with a white color, as I have done, reserve some of the frosting in a small bowl or cup at this point. If the icing is too thick, add tiny amounts of water (1 teaspoon at a time) until it is thin enough.

img_6214

Your thawing raspberries will be releasing juices as their temperature increases. If they have not yet done this, you can help the process along by placing the bowl into another bowl with a small amount of hot water inside. If you do this, make sure that the bowls are heat-resistant enough to withstand the temperature change without cracking. Skim some juice from the side of the bowl with a spoon.

img_6217

Add a few drops of the raspberry juice to your icing. If there seem to be some seeds mixed in, or if you can’t tell, use a small strainer to ensure that the icing remains seed-free (and thus smooth).

img_6222

Incorporate the juice with the mixer bit by bit until you have achieved a nice pink. Note that the more juice you add, the more liquid the icing will become and the less uniform the final result may be (and it will also take longer to dry). A lighter pink is thus safer, especially if you’re pressed for time and need to take the cookies somewhere soon after icing them. If you want to use multiple shades of pink, reserve some of your lighter-pink mixture before adding more raspberry juice.

img_6229

If your icing gets to this color or darker, you may end up needing to add a bit of extra powdered sugar to make it thicker again.

img_6235

Now that you have all your colors ready, you can begin icing the hearts! Use a smallish spoon, like the one above, to place a small amount of icing on the cookie’s surface and kind of push it around to cover the top.

img_6240

Leave the iced cookies somewhere safe (where your cat won’t walk on them, etc.) to dry. Again, the darker pinks will take longer to dry than the white icing and lighter pinks. In the photo above, the white hearts had been iced some time earlier and the pink icing had just been applied.

img_6273

It’s funny how I got such different sizes using the same cookie cutter (must be due to stretching when picking the hearts up from the tabletop), but I guess that gives the collection a true artisanal look. 😉

img_6326c

In the photo above, you can see what each color looks like when completely dry. The darker pink, being thinner, ended up with bubbles and some streaking, so again, I would recommend sticking with the lighter pinks.

Now you can package up your hearts to give to that special someone. They’ll love the handmade touch.

Variations: Use a different flavoring in place of rose (vanilla, almond, coconut, etc.). Create even more colors of icing using matcha, blue spirulina or a combination of these two for purple). Use different shaped cutters (star, moon, Eiffel Tower, etc.).