We take things so literally when we’re little. Sloppy joes were a frequent meal at our house when I was growing up, and I always wondered about the name. Who was this Joe, and why was he so sloppy? I reasoned it might be my own uncle Joe, whose shirts were often untucked and face unshaven.
Whoever Joe may have been, the sloppy part is clear enough – this isn’t a dish for a first date. But it is delicious, so feel free to make it once the relationship’s sealed and the person’s no longer a flight risk. Also, thanks to advanced lentil technology, your sloppy joe can now be vegan!
Scroll to the bottom for my take on this iconic recipe.
Sloppy lentils
Serves about 4.
1 cup dry green or brown lentils (don’t use red lentils)
1 bay leaf
¾ cup (80 g) onion (any color), diced
½ cup (60 g) green pepper, diced
½ cup (55 g) celery, diced
1 cup ketchup
1 tablespoon brown or red miso paste
1 teaspoon prepared mustard
1 teaspoon dried Italian herbs (oregano, thyme etc.) or herbes de Provence
A few squeezes fresh lemon juice (about 1 teaspoon)
½ teaspoon garlic powder
A couple grinds fresh black pepper
Soy sauce, to taste (optional)
Maple syrup, to taste (optional)
4 hamburger buns
Start by cooking the lentils in 3 cups water, with the bay leaf, for 20 minutes. Remove bay leaf, drain any excess water, and set aside.
While the lentils are cooking, chop and dice the onion, green pepper and celery.
In a large skillet, sauté these vegetables in a bit of olive oil over medium heat until tender.
Add the cooked lentils and stir to combine.
Incorporate the ketchup, miso paste, mustard, dried herbs, lemon juice, garlic powder and black pepper.
Taste and adjust seasoning as desired. If it isn’t salty enough, I recommend a splash of soy sauce rather than actual salt because soy sauce will boost the umami profile of the dish. If you would like the sauce to be sweeter, add a bit of maple syrup (but I find that the ketchup usually makes the sauce sweet enough).
Toast your hamburger buns, if you like, and then load them with the sloppy lentil mixture. Eat leaning well over your plate, which many globs of lentils and sauce will land on, in the company of someone who already knows and accepts you even with sauce all over your face. 😉
Variation: try this same recipe using about 2 cups vegan ground “beef” from a brand like Beyond Meat, Impossible Meat or (in France), HappyVore or Herta.
Enjoy! If you’re a lentil aficionado, you might also like my Lockdown Lentils recipe. And if you too are curious about the name sloppy joe, you’ll find some theories here.
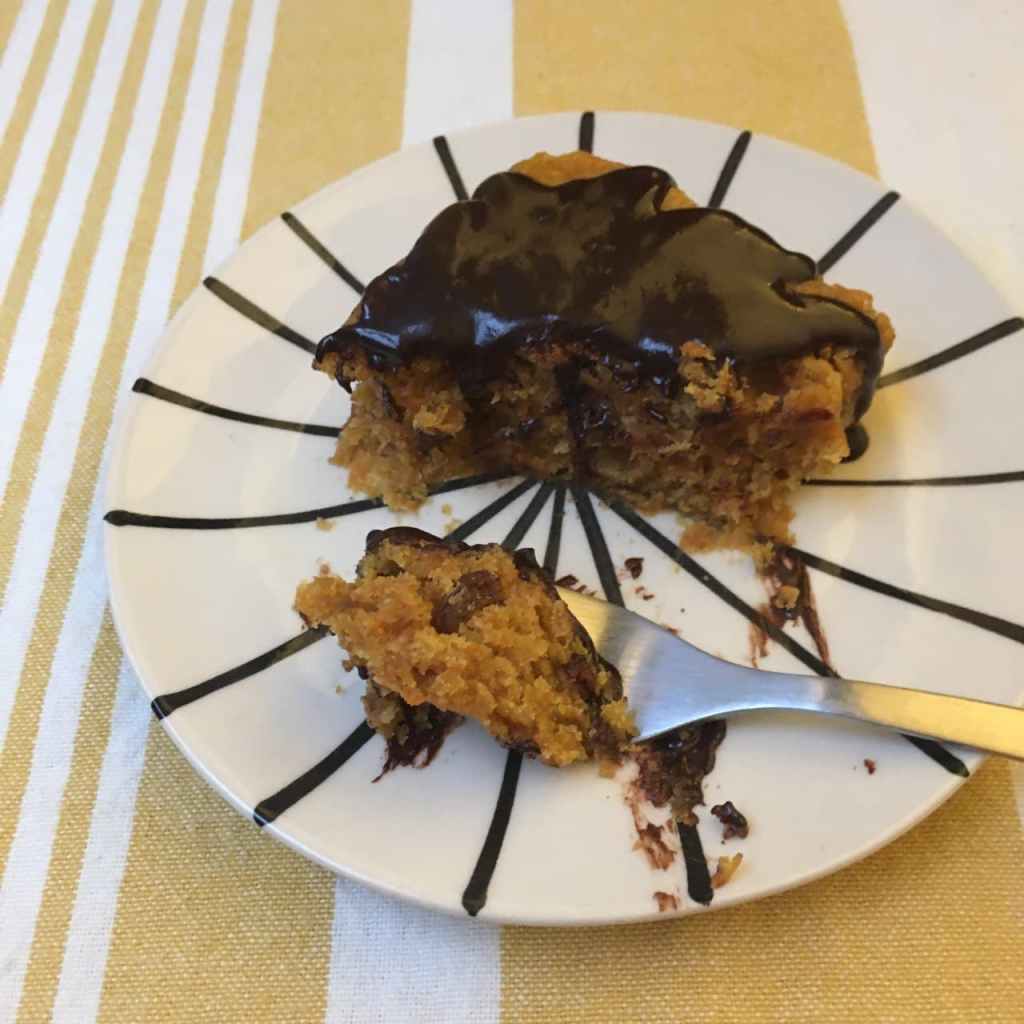
In all my years eating (American) carrot cake, it somehow never once occurred to me to put chocolate on it. But when I discovered that such a thing existed in Brazil (bolo de cenoura com calda de chocolate in Portuguese), it made nothing less than perfect sense to me. Here’s my vegan version of this tasty treat – try it for yourself and see what you think!
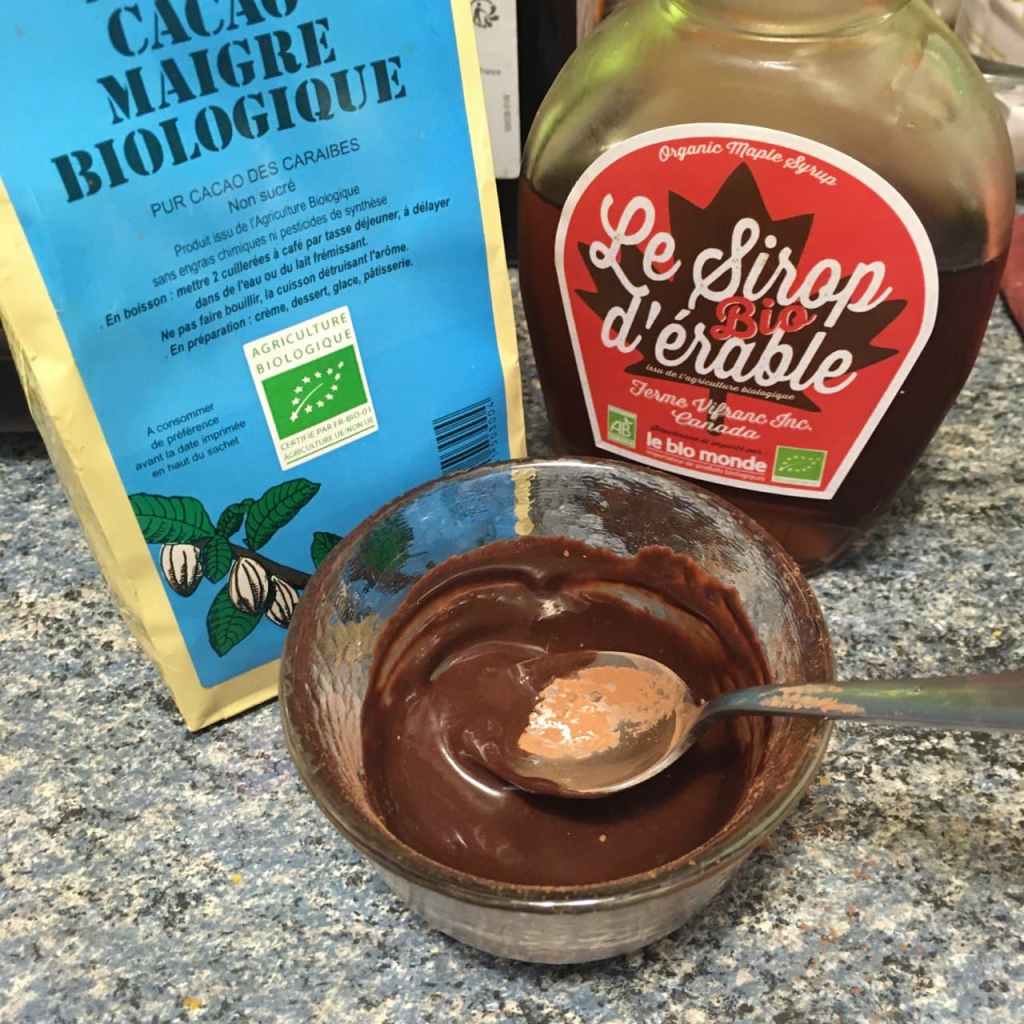
Traditionally, Brazilian carrot cake doesn’t contain raisins or walnuts, but I couldn’t resist adding them for nostalgia reasons (they’re totally optional though and can be omitted without the need to change the other ingredients). For the chocolate topping, I made a simple glaze from cocoa powder, maple syrup and a bit of salt. I recommend mixing up the glaze and applying it to the individual slices just before serving them, so the amounts given for the glaze are for two pieces of cake. You can double or triple this as needed however, if you’re making this after the Great Pandemic of 2020-2021 is over (fingers crossed it doesn’t last longer) and you actually have nine people eating this together in one place.
Carrot cake
Makes one 8 x 8 in. (20 x 20 cm) cake
1 packed cup (150 g) grated carrot
1/2 cup (118 ml) applesauce or other fruit compote
1/4 cup (59 ml) neutral-flavored oil
2 teaspoons apple-cider or white vinegar
2 teaspoons vanilla extract
1/4 teaspoon lemon zest
1 & 1/2 teaspoon cinnamon
3/4 teaspoon salt
1/2 teaspoon baking soda
1/2 cup sugar
1 & 1/2 cups flour
1/4 cup golden raisins (optional)
1/4 cup walnuts, roughly chopped (optional)
Begin by grating up your carrot into a medium or large mixing bowl. If it’s organic, you can just scrub it with a vegetable brush rather than peeling it. Preheat your oven to 350°F (180°C).
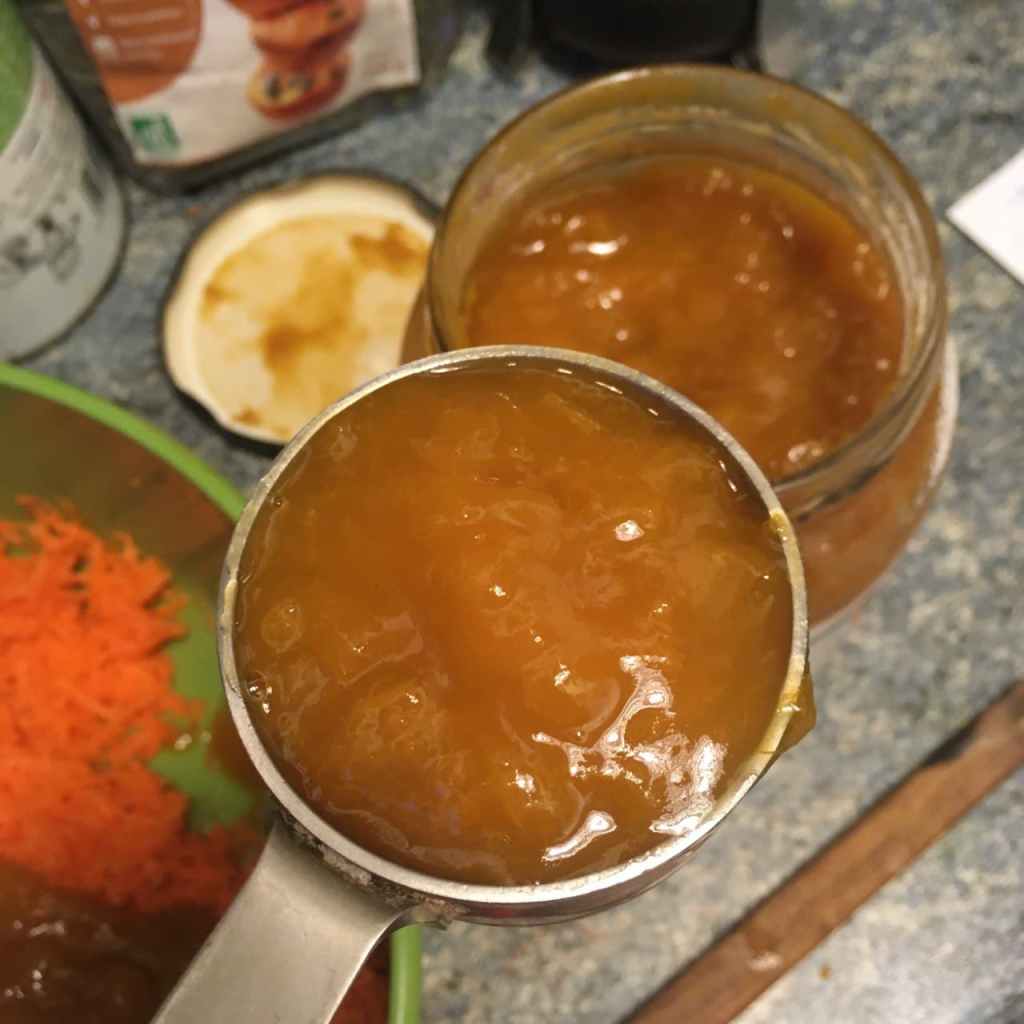
Next, add your applesauce or other fruit compote to the bowl. I actually used apricot sauce (compote) as that’s what I had on hand, without it changing the flavor of the cake in particular.
Grate a bit of lemon zest to add some brightness to the cake. I used 1/4 teaspoon, but you could add a bit more if you’re partial to a lemony flavor.
Now add all the other ingredients apart from the flour, and stir thoroughly to combine.
Finally, add the flour and stir gently until just combined (be careful not to overstir).
Transfer the batter to an 8 x 8 inch (20 x 20 cm) baking dish lined with baking paper or oiled. Place in the preheated oven and bake for 25 to 30 minutes. Check for doneness by inserting a toothpick into various parts of the cake. If it comes out clean, it’s ready but if there’s some batter sticking to it, give it another 5 minutes and then test it again.
The nice thing about baking paper is you can just lift the entire cake out of the baking dish and put it on your countertop for easier cutting. Allow the cake to cool for 15 minutes or so before cutting or you might not be able to make clean cuts through it.
I cut mine into nine pieces, each measuring about 2.5 inches (6 cm) square. Now you’re ready to mix up some chocolate glaze!
Chocolate glaze
Makes enough glaze for two pieces of the carrot cake.
2 teaspoons unsweetened cocoa powder
2 teaspoons pure maple syrup (add more for a thinner glaze)
tiny pinch salt
You can hardly find a simpler recipe… just put these three things together and stir! At first the maple syrup will not seem to mix into the cocoa powder, but keep persisting and it will suddenly become a frosting/glaze. If you want it to be thinner and more drippy, add a bit more maple syrup.
Apply the glaze in whatever amount you like.
And there you have it!
Time to take a bite…
Looks moist and yummy. But how will it taste?
Two thumbs up!
And as you may be aware, Valentine’s Day is just around the corner! This dessert may not seem very Valentine-y at first glance, but stick a heart on it and it suddenly is. 🙂
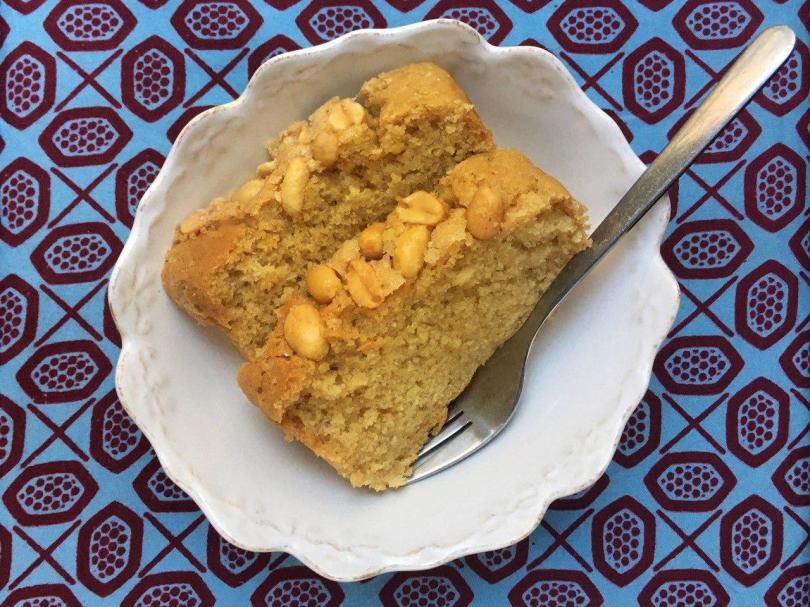
Followers of my Instagram page will know I’ve been making a lot of nut butter loaf cakes lately – I find they make a really good breakfast item, especially with a lower amount of sugar (a half-cup or less). But they’re also tasty enough to be served at a tea party, especially if topped with a sprinkling of powdered sugar or a drizzle of simple chocolate icing (cocoa powder + maple syrup).
Below is a recipe for an all-American (lol) peanut butter version that can easily be adapted with a different type of nut or seed butter such as hazelnut, pistachio, cashew, sesame seed or sunflower seed. Take a look at myalmond cake and sesame cake recipes for some ideas.
And if you’d like to fancy things up, you can always bake the batter in a round cake pan. For a layer cake, double the ingredients and divide the batter between two round cake pans, and use more of the nut butter, mixed with some powdered sugar, as the filling. Certain flavors also go well with fruit: try white sesame with slices of apple or pear on top. Scroll to the bottom of this post for some ideas.
Peanut cake
Dry ingredients:
1½ cups (188 g) all-purpose flour
½ cup (100 g) granulated sugar (add up to ¼ cup more for a sweeter cake)
1 teaspoon baking soda
½ teaspoon salt
Liquid ingredients:
1 cup (236 ml) cold water
¼ cup (60 ml) neutral-tasting oil
1 tablespoon white vinegar or apple-cider vinegar
1½ teaspoon vanilla extract
3 heaping tablespoons peanut butter
Optional garnish:
salted peanuts and/or extra granulated sugar
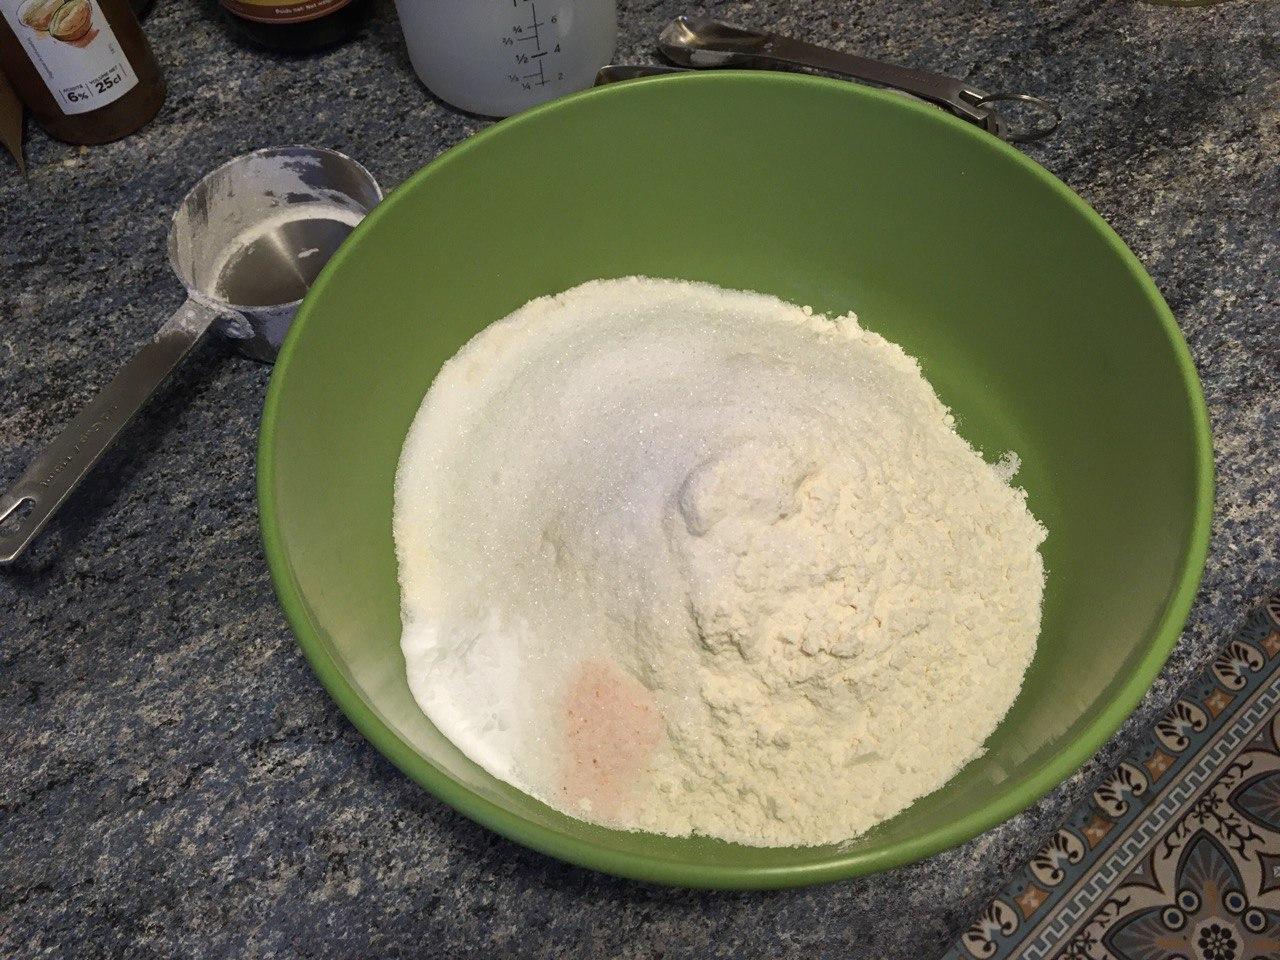
Preheat your oven to 350°F (180°C). Combine all the dry ingredients except the salted peanut garnish in a large mixing bowl.
In a smaller container, combine the liquid ingredients, adding the peanut butter last.
Whisk everything together thoroughly until the peanut butter is completely blended into the rest. If you’re using a very thick peanut butter, you may need to add a bit more water.
Add the liquid mixture to the dry ingredients and stir until smooth (be careful not to overstir).
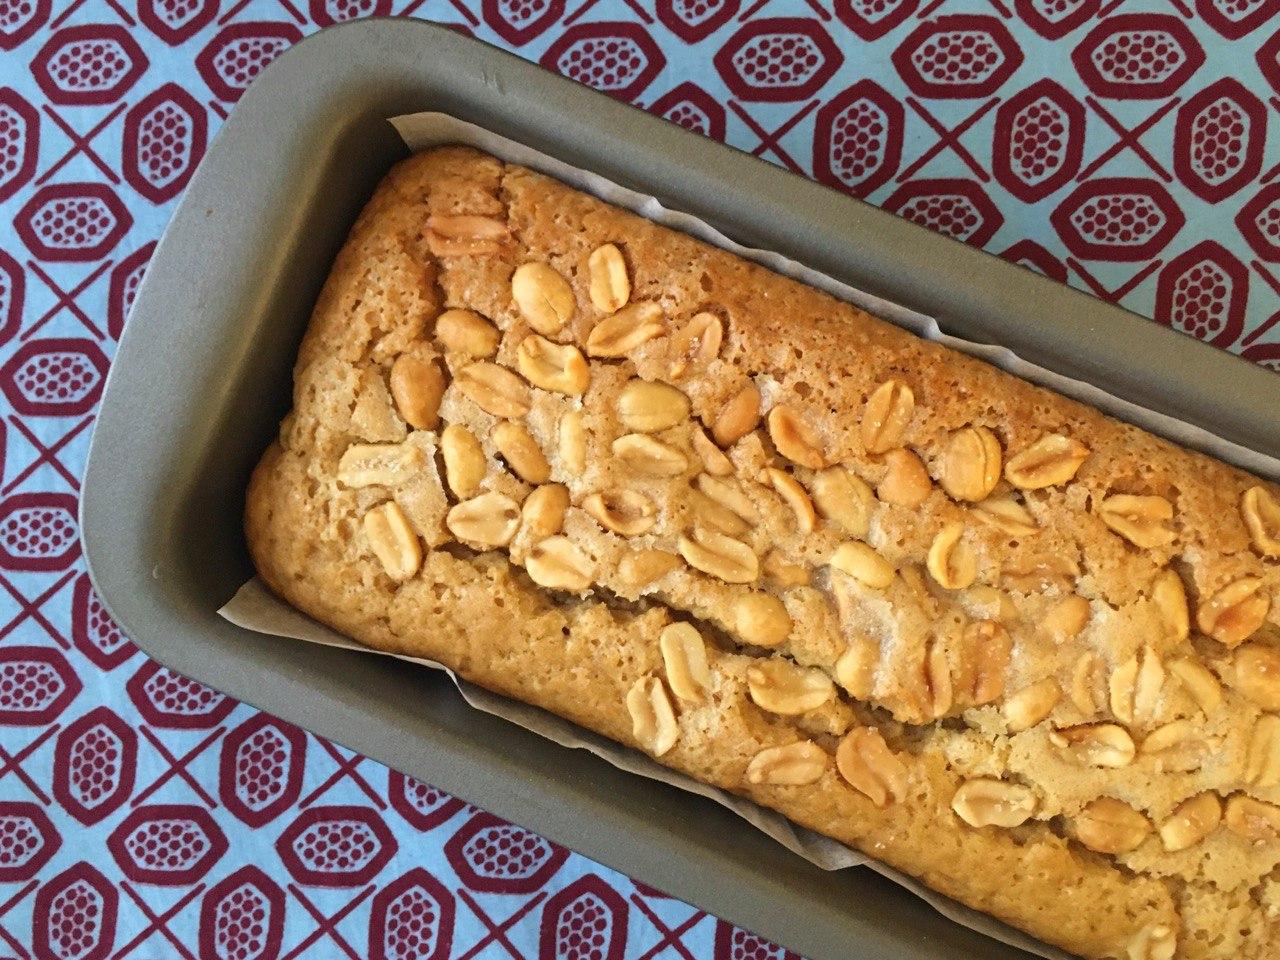
Pour the batter into a loaf pan (oiled or lined with baking paper) and top with salted peanuts and a sprinkling of granulated sugar. Bake at 350°F (180°C) for 30 to 35 min.
When you take it out of the oven, stab the cake in the middle with a toothpick to make sure the inside is fully baked. If it comes out with batter on it, bake for an extra 5 minutes, then test again. When it’s done baking, allow to cool for at least 10 minutes before cutting into it, or the slices may fall apart.
Enjoy as is or with some vanilla yogurt and/or fruit.
Some variations: black sesame topped with nectarine slices and toasted almond slivers (left), white sesame and walnut topped with apple slices and sesame seeds (top right) and white sesame and topped with apple slices, sesame seeds and powdered sugar (bottom right).
If you try one of these nut butter cakes and share a photo on Instagram, be sure to tag @rd.violet so I can see! 🙂
One day, for reasons I no longer recall, I visited the website of Maille, a famous French mustard brand and national institution of sorts (its history going back to 1747). I noticed that it offered a number of recipes that call for mustard, including desserts! This naturally intrigued me and I began looking for something to veganize. I settled upon their honey-mustard caramel corn, a fun item that’s halfway between a dessert and a snack. And it was pretty good! I made it at my parents’ house, which provided me with an immediate test panel. The results of this two-person population sample were conclusive: it was a hit! Or rather, my mom loved it and my dad wouldn’t try it at all, but that doesn’t count since he might very well have liked it if he’d just given it a chance. Right?
The French recipe is already very nearly vegan, with the exception of the honey. Elsewhere on this blog I’ve already shown you how to make a fantastic apple honey, but failing that you can also look for one of the ready-made vegan honeys that have been popping up here and there, or even a ready-made vegan honey mustard.
For ideas for what to watch while munching on this caramel corn, scroll to the end of this post and you’ll find a list of some of my favorite lesser-known films.
Whisk the four ingredients together in a small bowl.
After using 3 tablespoons for the caramel corn recipe, you can serve the rest as a dip for pretzels or crudités, or incorporate it into a salad dressing.
Honey mustard caramel corn
3 tablespoons honey mustard (see recipe above)
3 tablespoons melted coconut oil
1/4 cup (50 g) granulated sugar
1/8 teaspoon baking soda
1/2 cup (95 g) unpopped popcorn kernels, or 15 cups popped
1/4 cup (30 g) peanuts or mixed nuts (optional)
Equipment needed: large stockpot with a lid to make the popcorn in (if making on the stovetop), oven for baking the caramel coating into the popcorn
First, make your popcorn, either on your stovetop (for instructions, click here), in a microwave or using a fancy popcorn popper, if you have one. Do not add salt or any other seasonings.
Preheat your oven to 200°F (100°C). Combine the honey mustard, melted coconut oil (melt it beforehand so you can easily measure the amount needed) and sugar in a medium saucepan and heat over medium, stirring often, until the sugar has melted, about 3 or 4 minutes.
Turn off the heat and add the baking soda (the mixture will suddenly bubble up and grow) and whisk for 30 seconds or so.
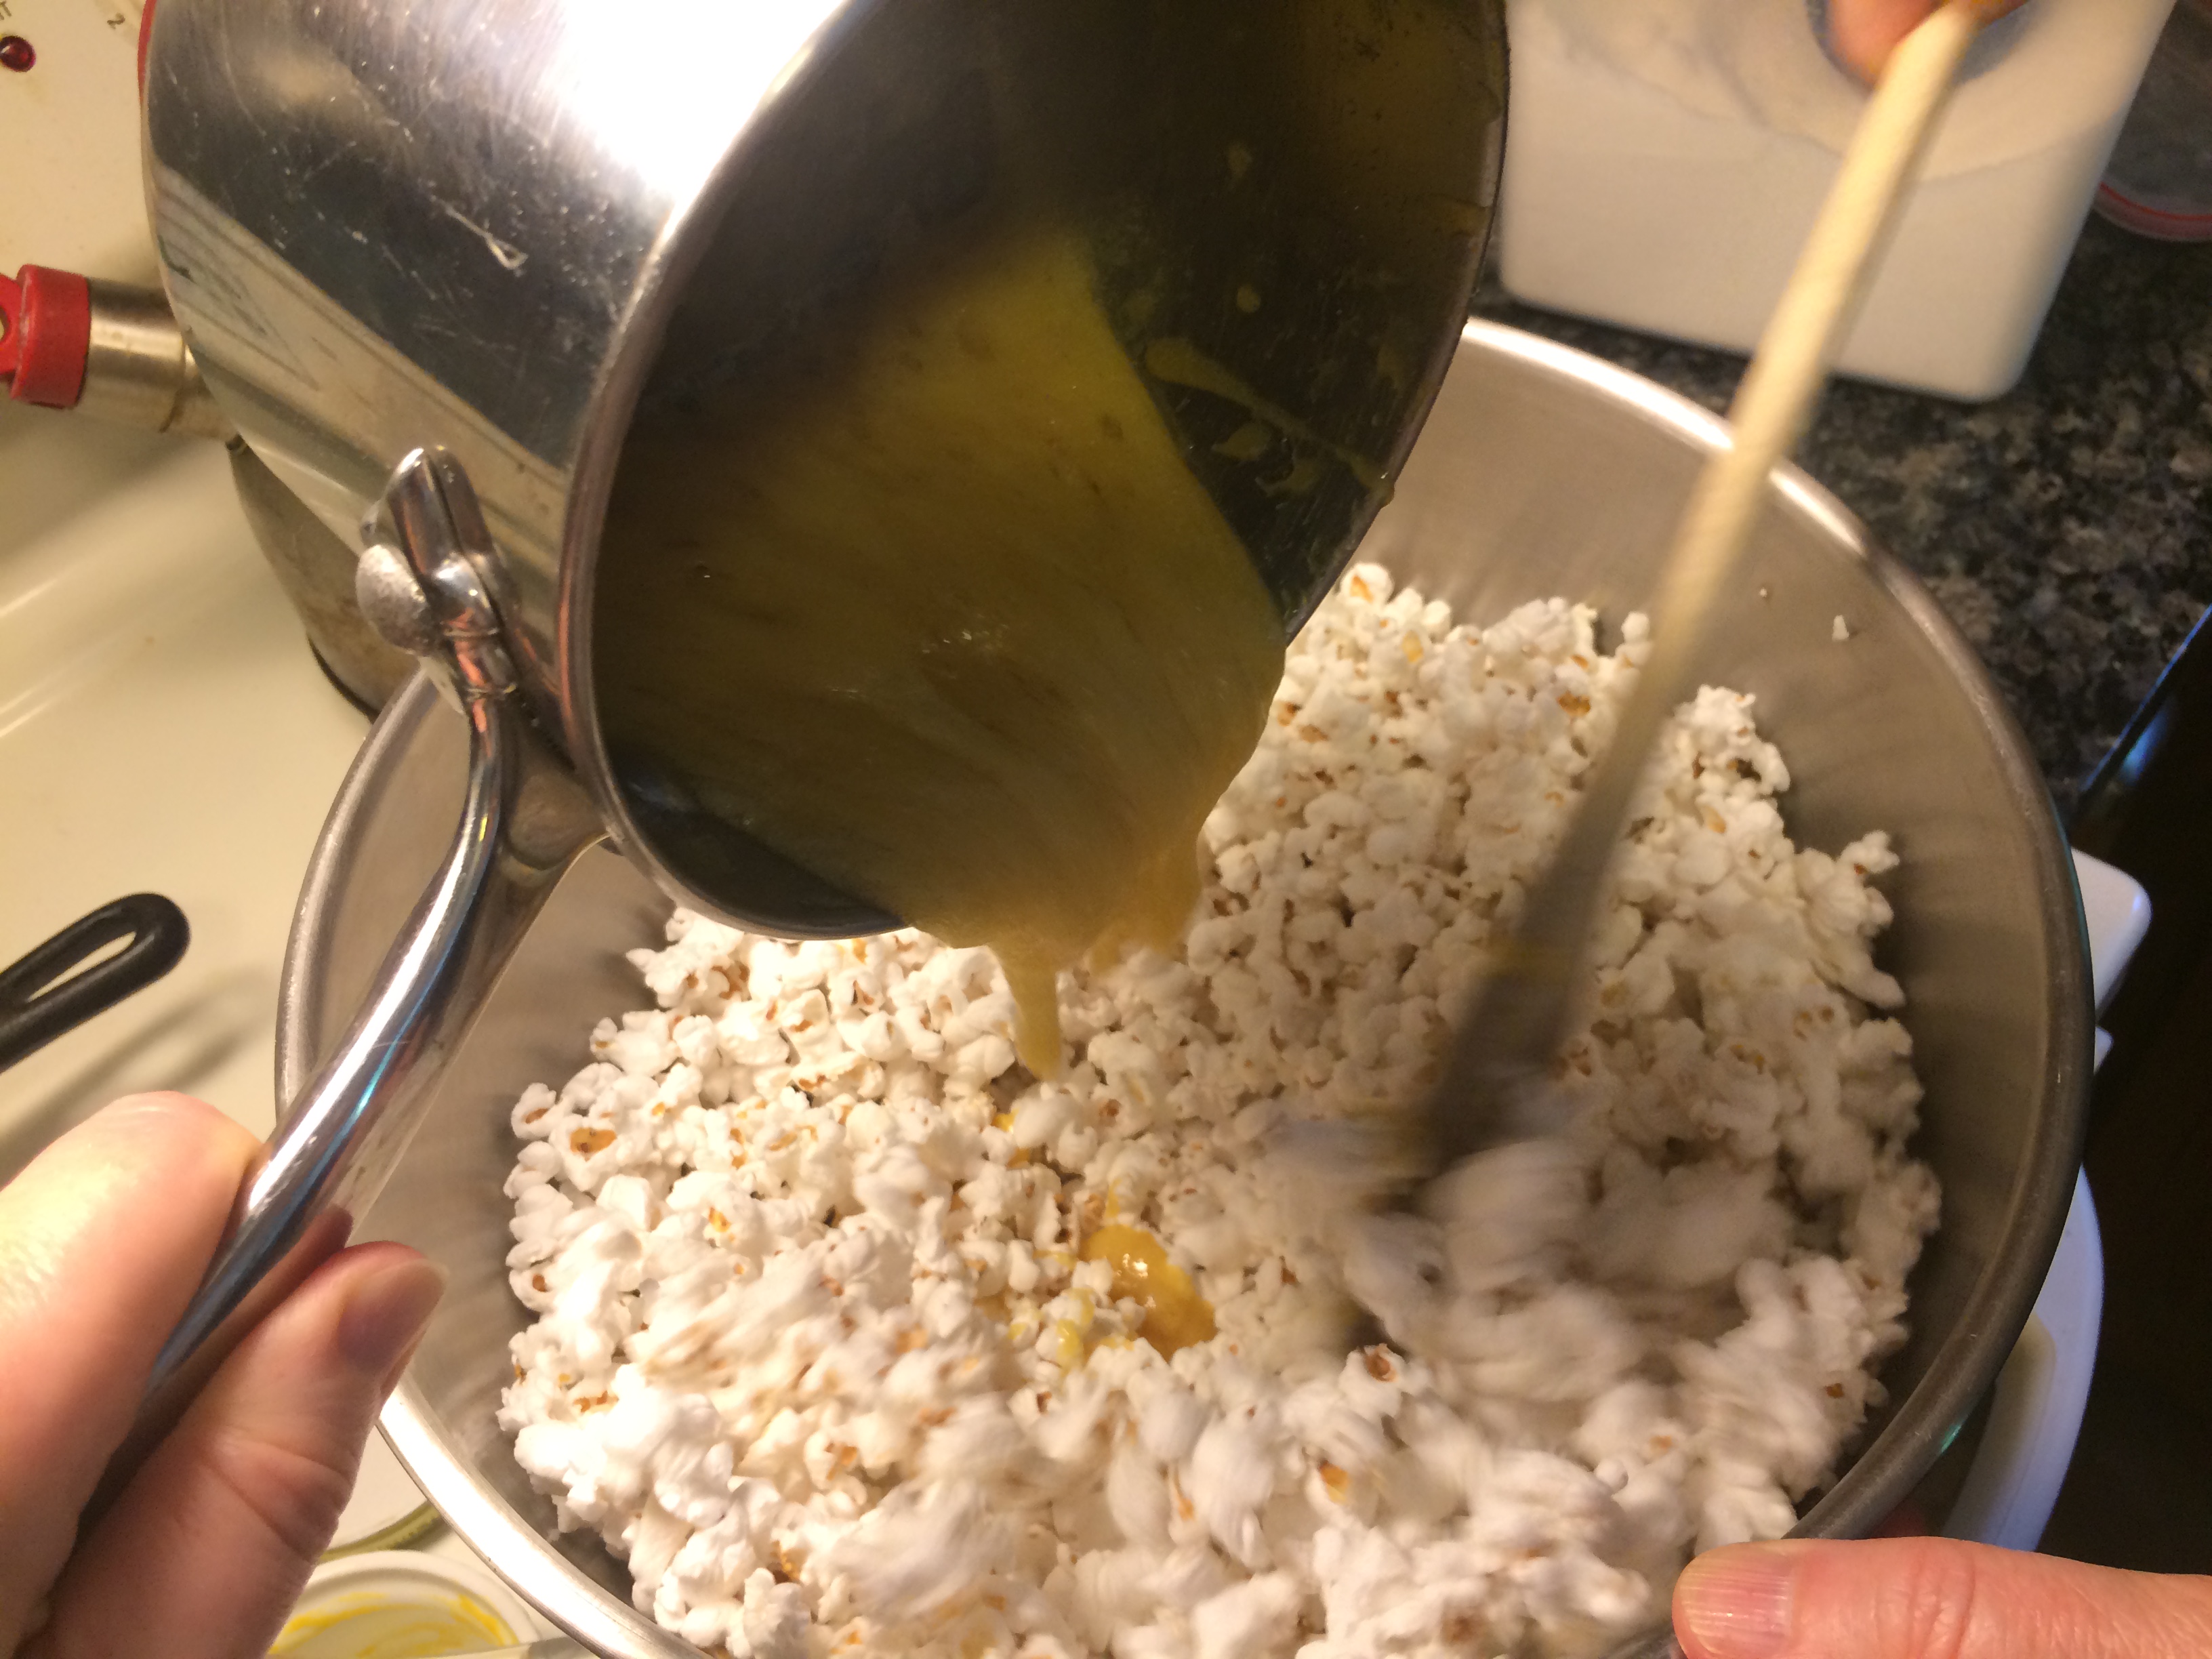
With the popcorn in a large bowl, slowly add the caramel mixture, stirring constantly. It is VERY helpful to do this with the help of a second person – one to pour and one to stir.
Continue stirring, the idea being to coat all the popcorn evenly. If you’re using nuts, this would be a good time to add them. But if you forget you can throw them in at the very end (they just won’t stick to the popcorn).
Once you’ve coated it all, transfer the popcorn to a large baking dish, preferably large enough that you can stir the popcorn during the baking process without any kernels falling overboard.
Bake at 200°F (100°C) for 20 minutes or so, stirring occasionally. The goal with the baking process is to dry and harden the caramel mixture so that the resulting caramel corn is nice and crunchy. Depending on your oven, this may take less or more time than it did for me.
The French recipe strangely doesn’t include this baking step, which is probably just an oversight or the result of not testing the recipe before publishing it.
Serve and enjoy! Store any uneaten caramel corn in a container with a tight lid to keep humidity out.
No idea what to watch?
If you’re fresh out of ideas for what to watch, check out my suggestions for some older or lesser-known but excellent films.
Goodbye Again (1961) by Anatole Litvak. Paula Tessier (Ingrid Bergman) is a 40-year-old interior designer who for the past five years has been the mistress of Roger Demarest (Yves Montand), a philandering business executive who refuses to stop seeing other women. When Paula meets Philip (Anthony Perkins of Psycho fame), the 25-year-old son of one of her wealthy clients, he falls in love with her and insists that the age difference will not matter. Filmed in English, Goodbye Again is set in Paris and based on Françoise Sagan’s novel Aimez-Vous Brahms?
Le Pays des Sourds(In the Land of the Deaf, 1992) by Nicolas Philibert. This French documentary is a beautiful homage to deaf culture, providing an unsentimental look into the daily lives of deaf and hard-of-hearing individuals from all walks of life. The little-known film was featured in a number of international film festivals and won a Peabody Award.
Secrets & Lies(1996) by Mike Leigh. Hortense Cumberbatch, a successful black middle-class optometrist in London who was adopted as a child, has chosen to trace her family history after the death of her adoptive mother. After being warned by public officials about the troubles she could face by tracking her birth mother down, she continues her investigation and is baffled to learn that her mother is white; she does not resent this fact and wants to know more about her past.
Shall We Dance? (1996) by Masayuki Suo. Shohei Sugiyama (Kōji Yakusho) is a successful salaryman, with a house in the suburbs, a devoted wife and a teenage daughter. He works as an accountant for a firm in Tokyo. Despite these signs of success, however, Shohei begins to feel as if his life has lost meaning and falls into depression. One night, coming home on the train, he spots a beautiful woman with a melancholy expression looking out from a window in a dance studio. Shohei decides to take lessons to get to know her better, and his life changes once his classes begin.
Little Senegal(2001) by Rachid Bouchareb. Aging Senegalese man Alloune (Sotigui Kouyaté) curates a slavery museum in his home country. Spurred by the reaction of curious patrons, Alloune is inspired to find the descendants of the people brought to the United States during the slave trade. So he travels to America, eventually landing in New York and meeting up with his cab driver nephew, Hassan (Karim Koussein Traore), Hassan’s girlfriend, Biram (Adja Diarra), and storekeeper Ida (Sharon Hope), who might be Alloune’s distant relative.
Happy-Go-Lucky(2008) by Mike Leigh. Thirty years old and single, primary school teacher Pauline “Poppy” Cross is free-minded, high-spirited and kind-hearted. When Poppy takes driving lessons for the first time, her positive attitude contrasts starkly with her gloomy, intolerant and cynical driving instructor, Scott. He is emotionally repressed, has anger problems and becomes extremely agitated by Poppy’s casual attitude towards driving.
La Femme aux 5 Eléphants (The Woman with the 5 Elephants, 2010) by Vadim Jendreyko. This touching documentary offers a glimpse into the life of translator Svetlana Geier, an elderly Russian woman who for years has been working with a German translation partner to produce a German version of five major works by Dostoyevsky into German, her “five elephants”. As we see her work, we learn her life story and in particular the reason behind the passion that drives her to translate these novels.
Isle of Dogs (2018) by Wes Anderson. This stop-motion-animated science-fiction comedy drama is set in a dystopian near-future Japan. The story follows a pack of banished dogs, led by street dog Chief (Bryan Cranston), who helps a young boy named Atari (Koyu Rankin) search for his own dog after the species is banished to an island following the outbreak of a canine flu. Of all the movies listed here, this may be the best known, but I’m so fond of it I wanted to give it a shout-out.
For more film suggestions, check out my list of classic Christmas flicks, which can safely be enjoyed at other times of the year too!
Around five years ago, our local organic stores began stocking black sesame paste, and it wasn’t long before I’d bought some and was brainstorming ways to use it. One of my most successful creations was a black sesame cake, which soon became so popular with my friends that I was making it all the time.
And at one point in the middle of my black sesame period, the workings of fate also brought a sweet little abandoned marble tabby kitten into my life. I didn’t name him for a while, preferring to watch his personality unfold and see what felt best, and in the meantime called him Baby (which I still often call him today). As he grew bigger I saw that the dark gray of his grownup fur was about the same color as a black sesame cake… and so his name was found! I decided to call him Sésame… pronounced say-zahm in the French way.
Today is his fifth birthday, so I thought I would share a recipe for the cake he was named for! And to pay further tribute to him I have prepared it using the zebra cake method, alternating between white sesame batter and black sesame batter. It takes a while to achieve this effect, but it’s very pretty I think. To save time, you can make larger stripes or just use one type of sesame paste for a solid color cake – gray if you use black sesame paste or tan/beige if you use white (plain) sesame paste.
This cake is very moist and has a unique flavor profile. The black sesame has fragrant nutty notes that are nicely complemented by the vanilla.
Striped sesame cake
Black sesame batter
¾ cup all-purpose flour
¼ cup granulated sugar
½ teaspoon baking soda
¼ teaspoon salt
1 heaping soup spoon black sesame paste
2 tablespoons neutral-flavored oil
2 teaspoons white vinegar or apple cider vinegar
1 teaspoon vanilla extract
½ cup cold water
White sesame batter
¾ cup all-purpose flour
¼ cup granulated sugar
½ teaspoon baking soda
¼ teaspoon salt
1 heaping soup spoon white (plain) sesame paste
2 tablespoons neutral-flavored oil
2 teaspoons white vinegar or apple cider vinegar
1 teaspoon vanilla extract
½ cup cold water
Equipment needed: one round cake pan (layer-cake type). Mine is 8 in. (200 mm) in diameter.
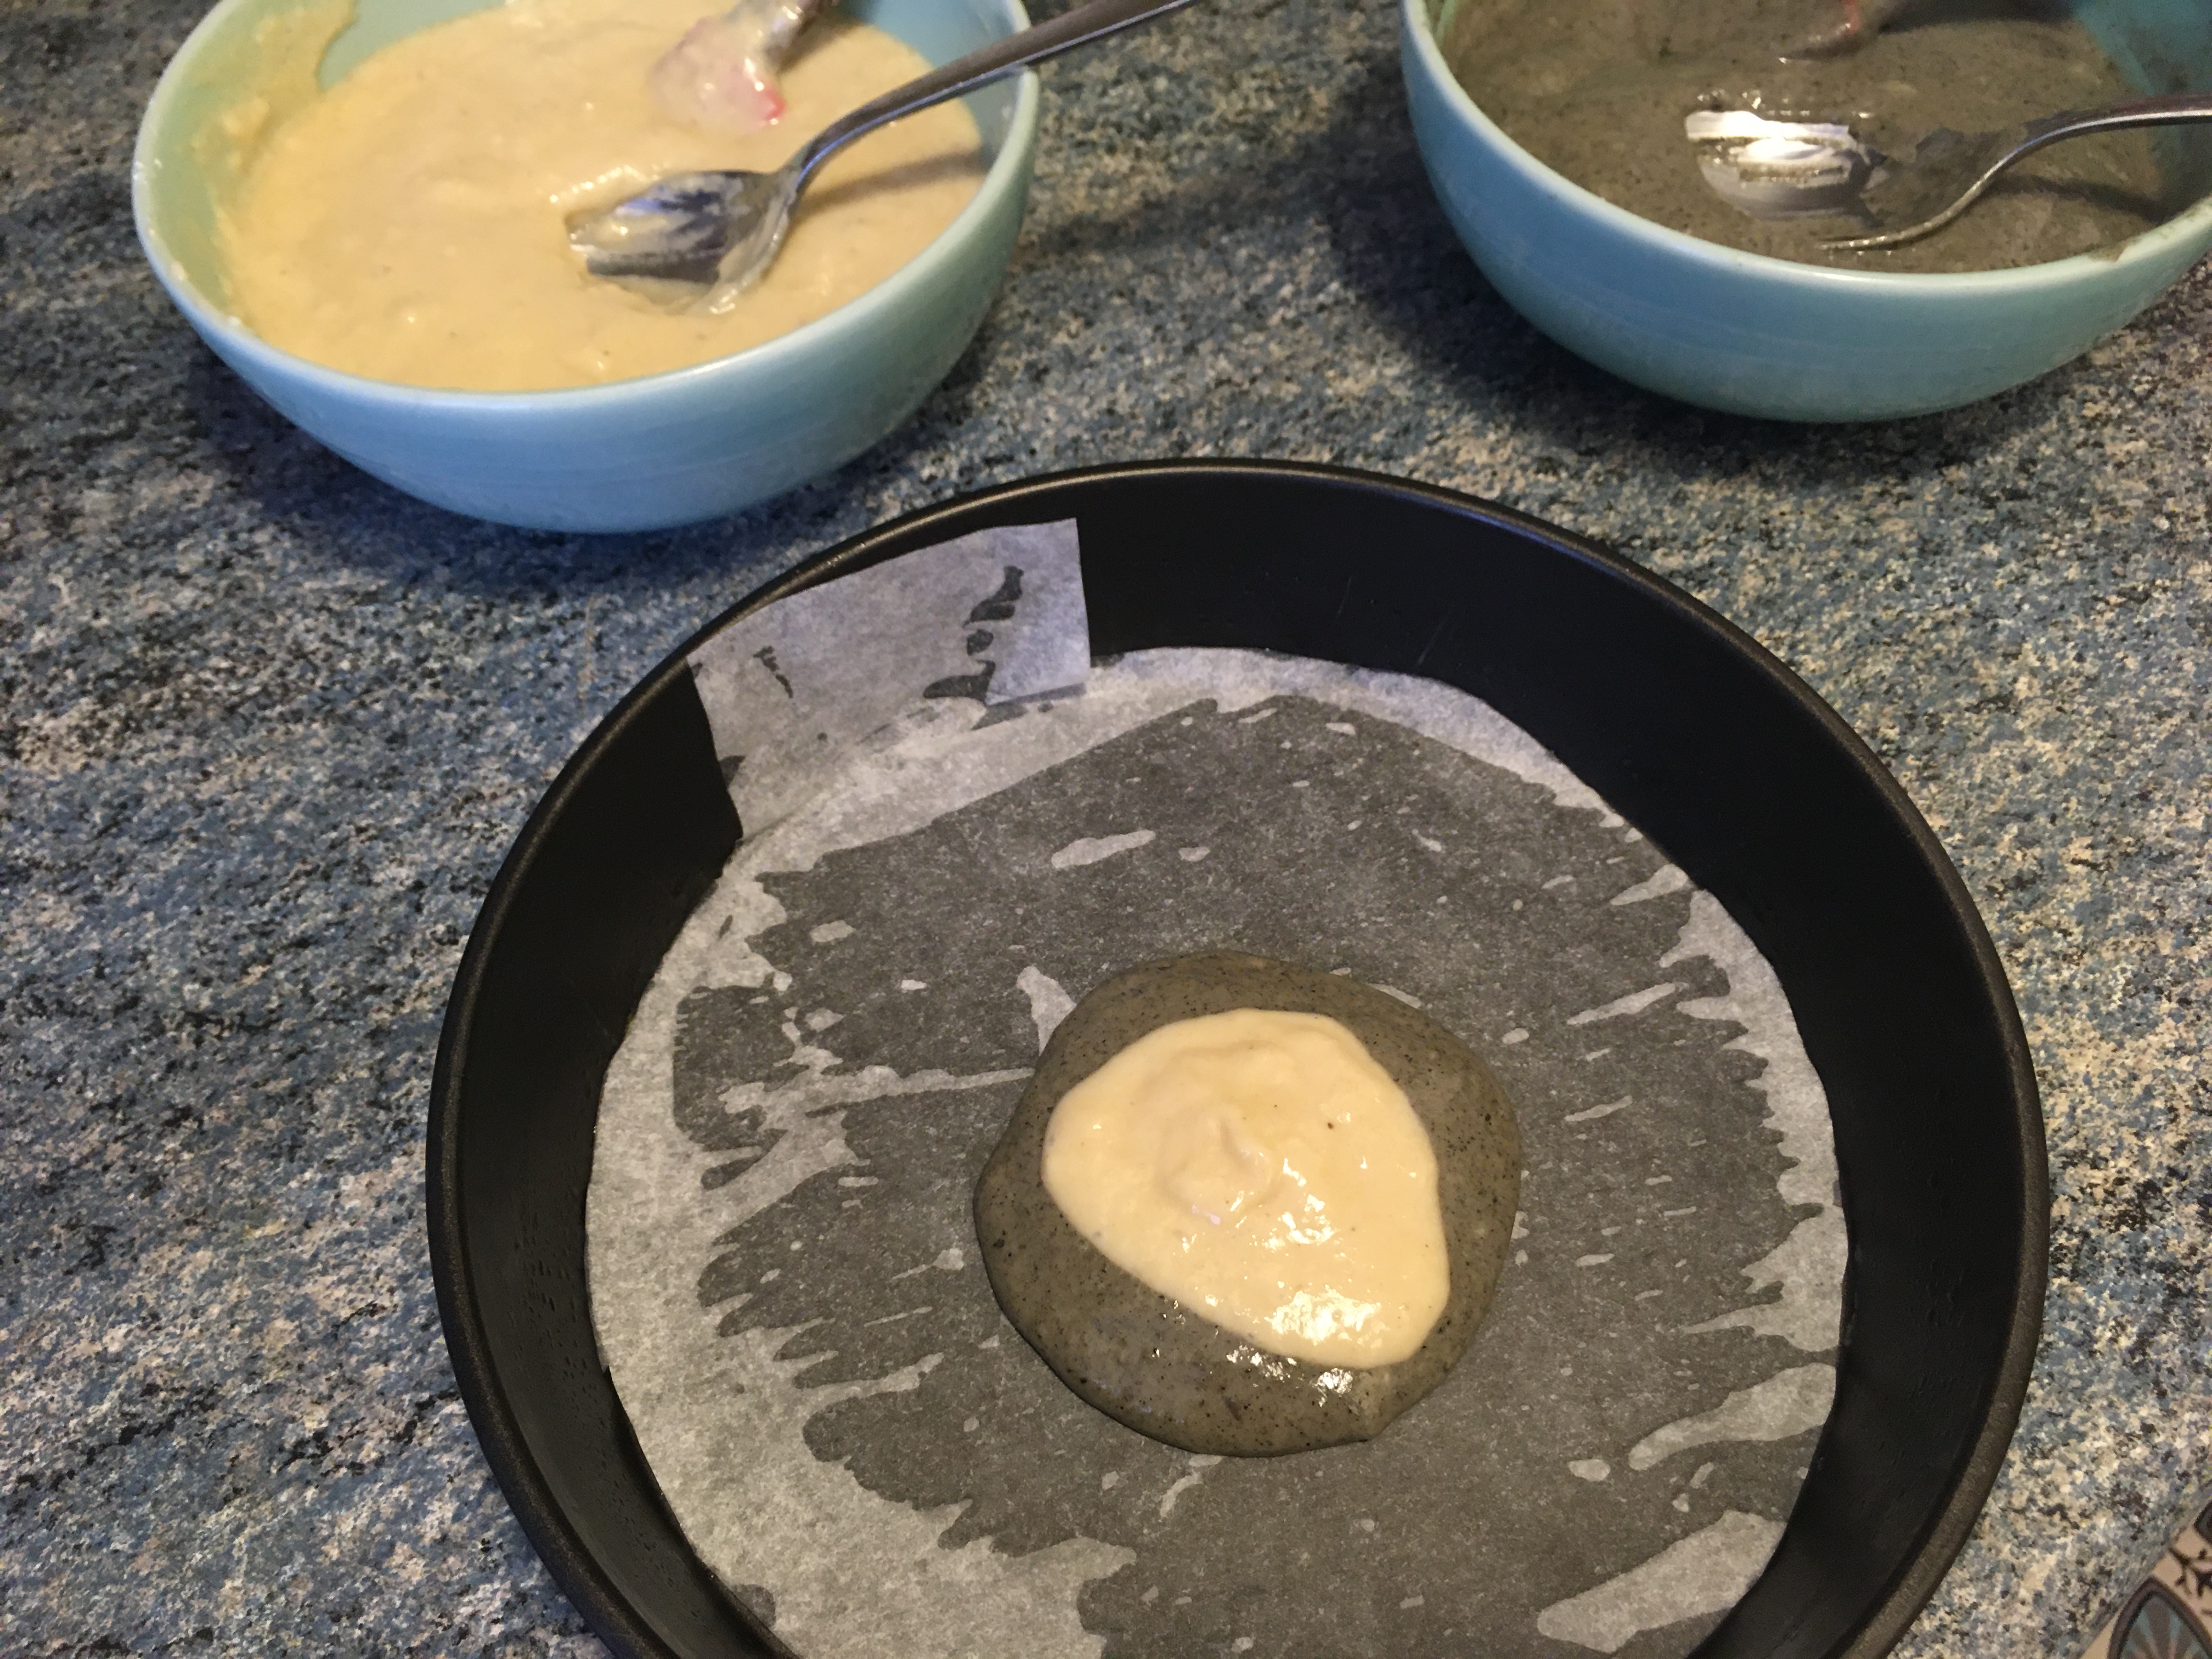
Begin by preparing your cake pan by oiling the bottom and sides or placing some baking paper in the bottom (as you can see in the photo, I like to leave a tab on one side to make it easier to pull the cake out). You’ll also need four small bowls – cereal or soup bowls are fine. Preheat your oven to 350°F/180°C.
Combine the dry ingredients (flour, sugar, baking soda and salt) for each of the batters in two separate bowls. Then do the same with the wet ingredients (sesame paste, oil, vinegar, vanilla and water). I used a heaping soup spoon of each sesame paste, as shown here. Be sure to mix the wet ingredients well so that the sesame paste is fully diluted.
Add each wet mixture to a dry mixture and combine until you have a fairly smooth batter. Be careful not to overmix.
Now take your prepared baking dish and drop a spoonful of black sesame batter onto it, right in the center (if you want your stripes to be bigger, use a larger amount of batter than this).
On top of it, place an equal amount of white sesame batter. As you’ll see, the bottom batter will spread out underneath it all on its own. Do not attempt to spread it yourself as this could damage the pattern.
Add another spoonful of the black sesame batter on top of that. Little by little, the batter will spread, forming stripes.
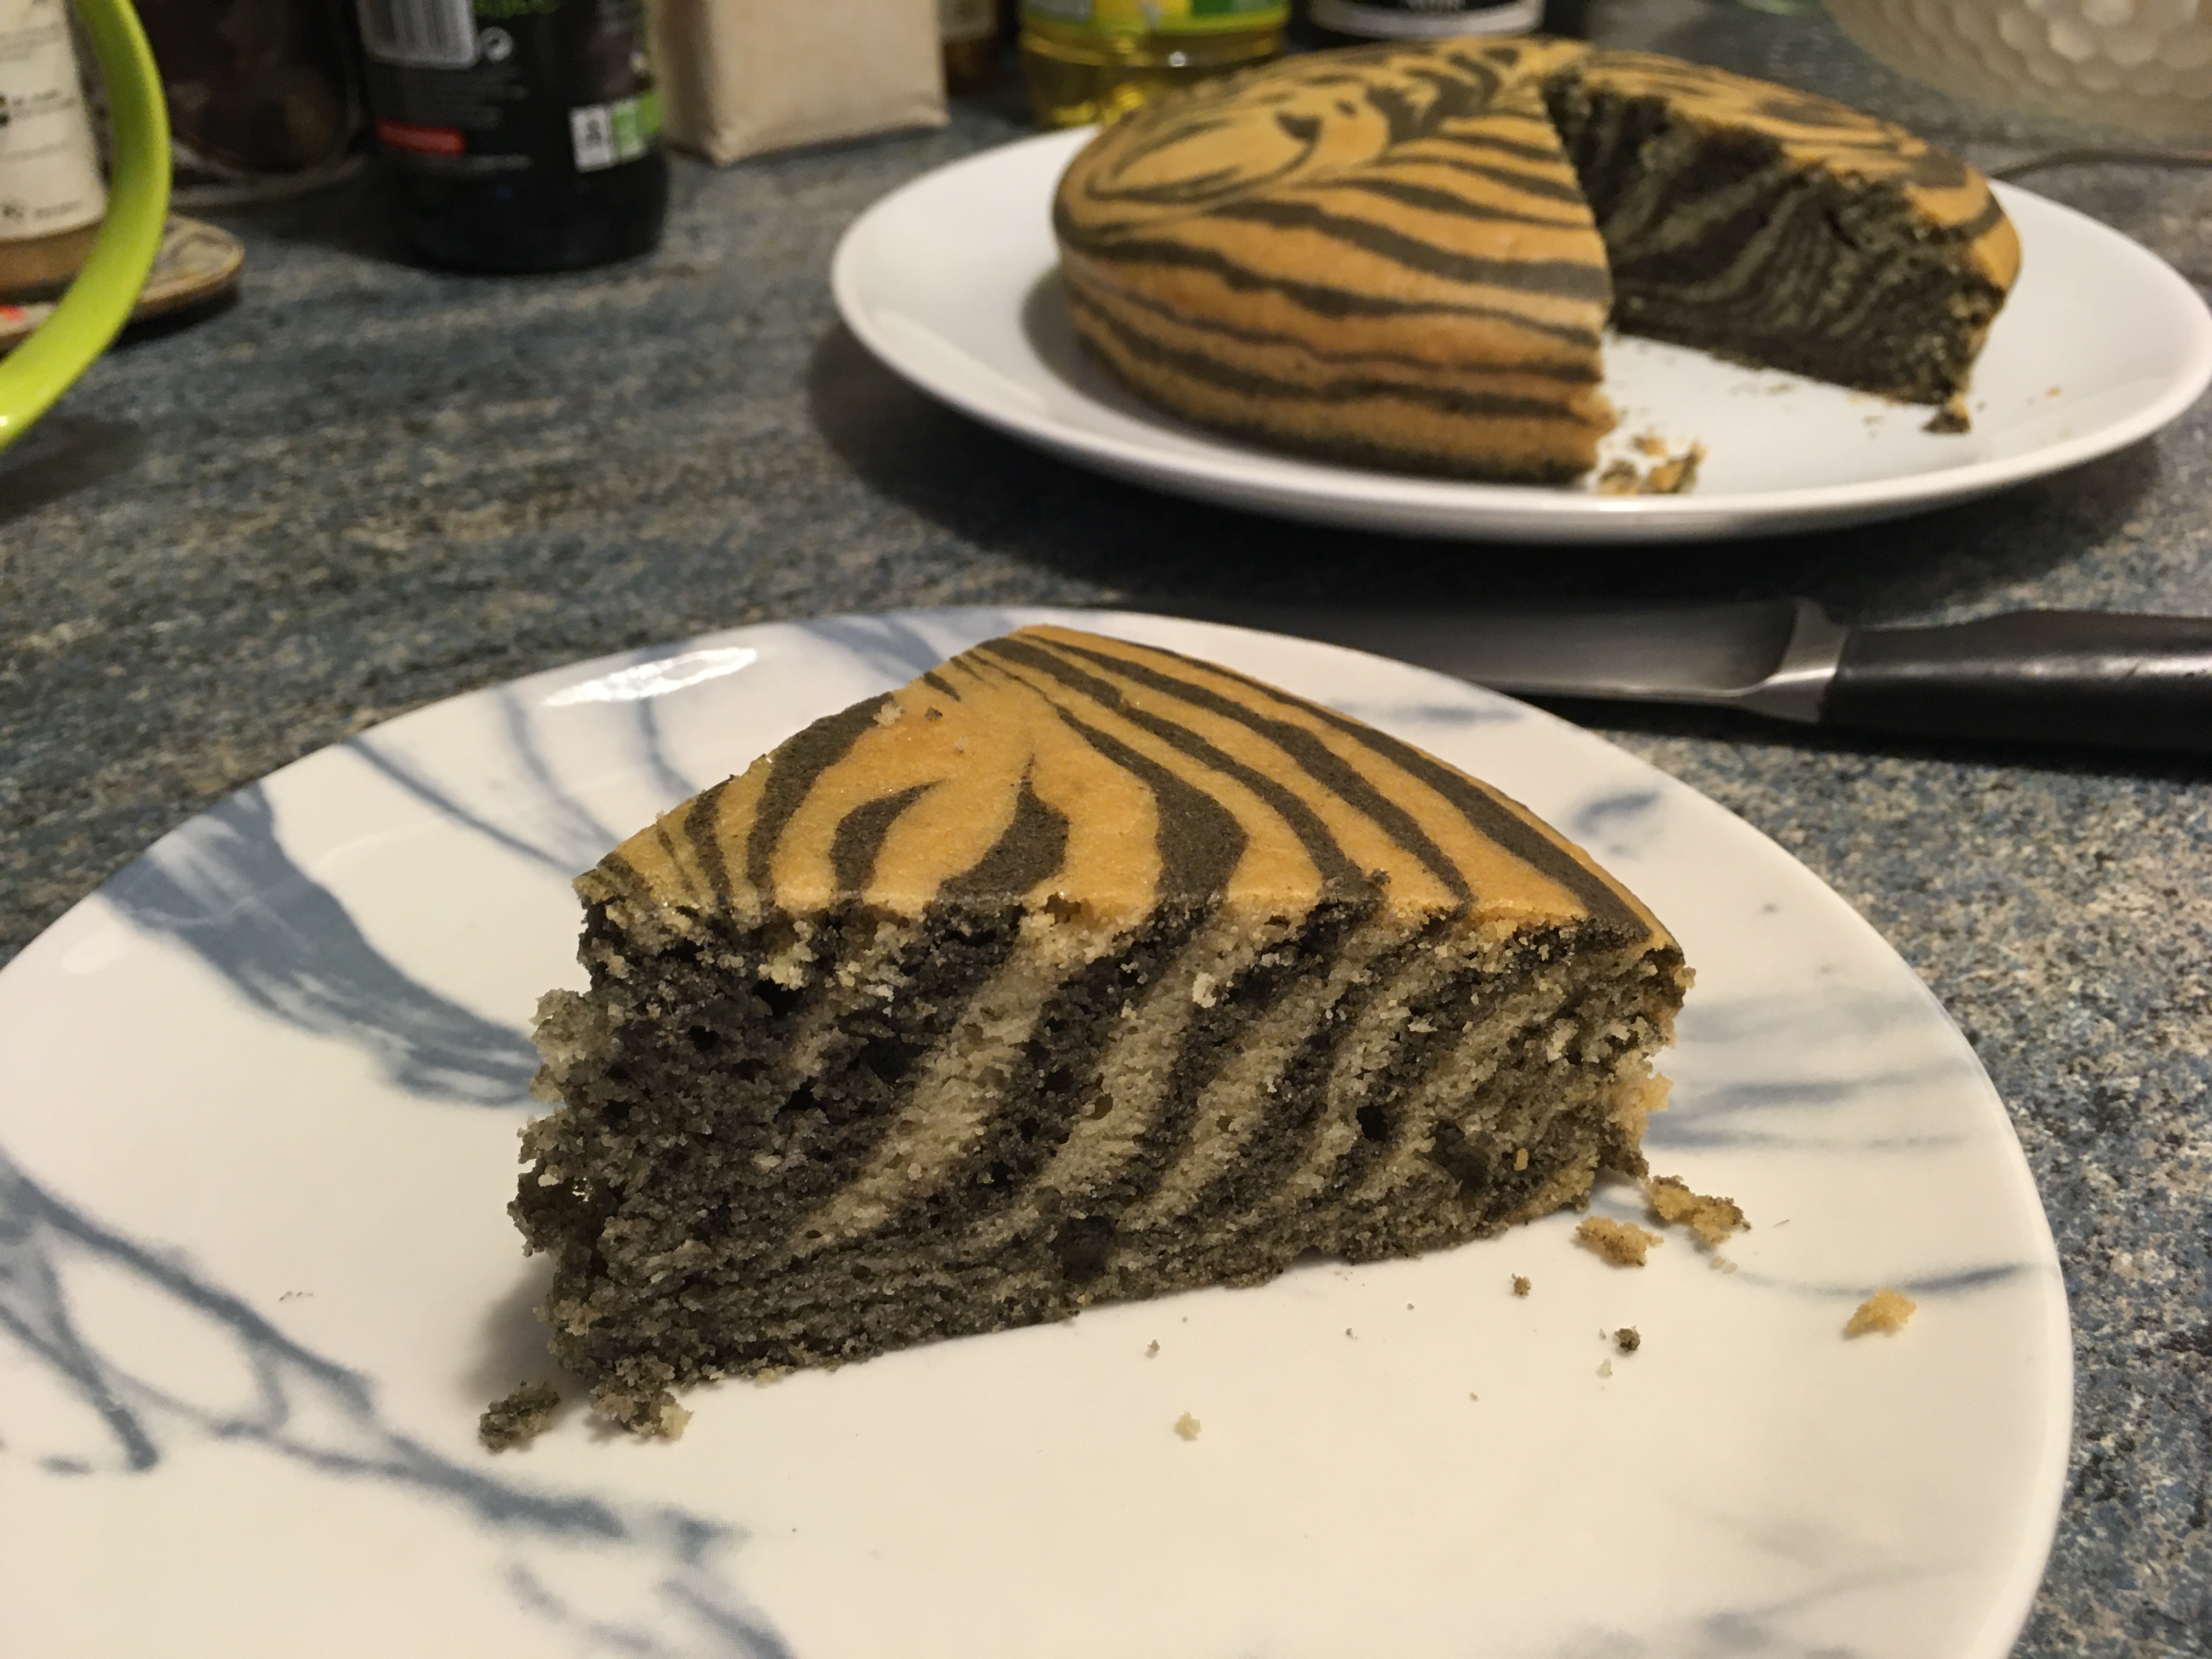
Keep going until you have used up all of both batters (note: it takes a while). At some point, the center of the design may shift over to one side of the pan, but this is fine. It happened to me twice with this cake, creating the design you can see in the photo below. The inside will still be full of stripes!
Place in the oven (preheated to 350°F/180°C) for 20-25 minutes.
Test for doneness by stabbing with a toothpick in various discreet spots (such as any naturally formed cracks). If the toothpick comes out with raw batter on it, put the cake back in the oven for another 5 minutes or more.
Allow the cake to fully cool before cutting into it. Since it’s quite moist due to the sesame paste, it needs to set a bit or the pattern could get smooshed.
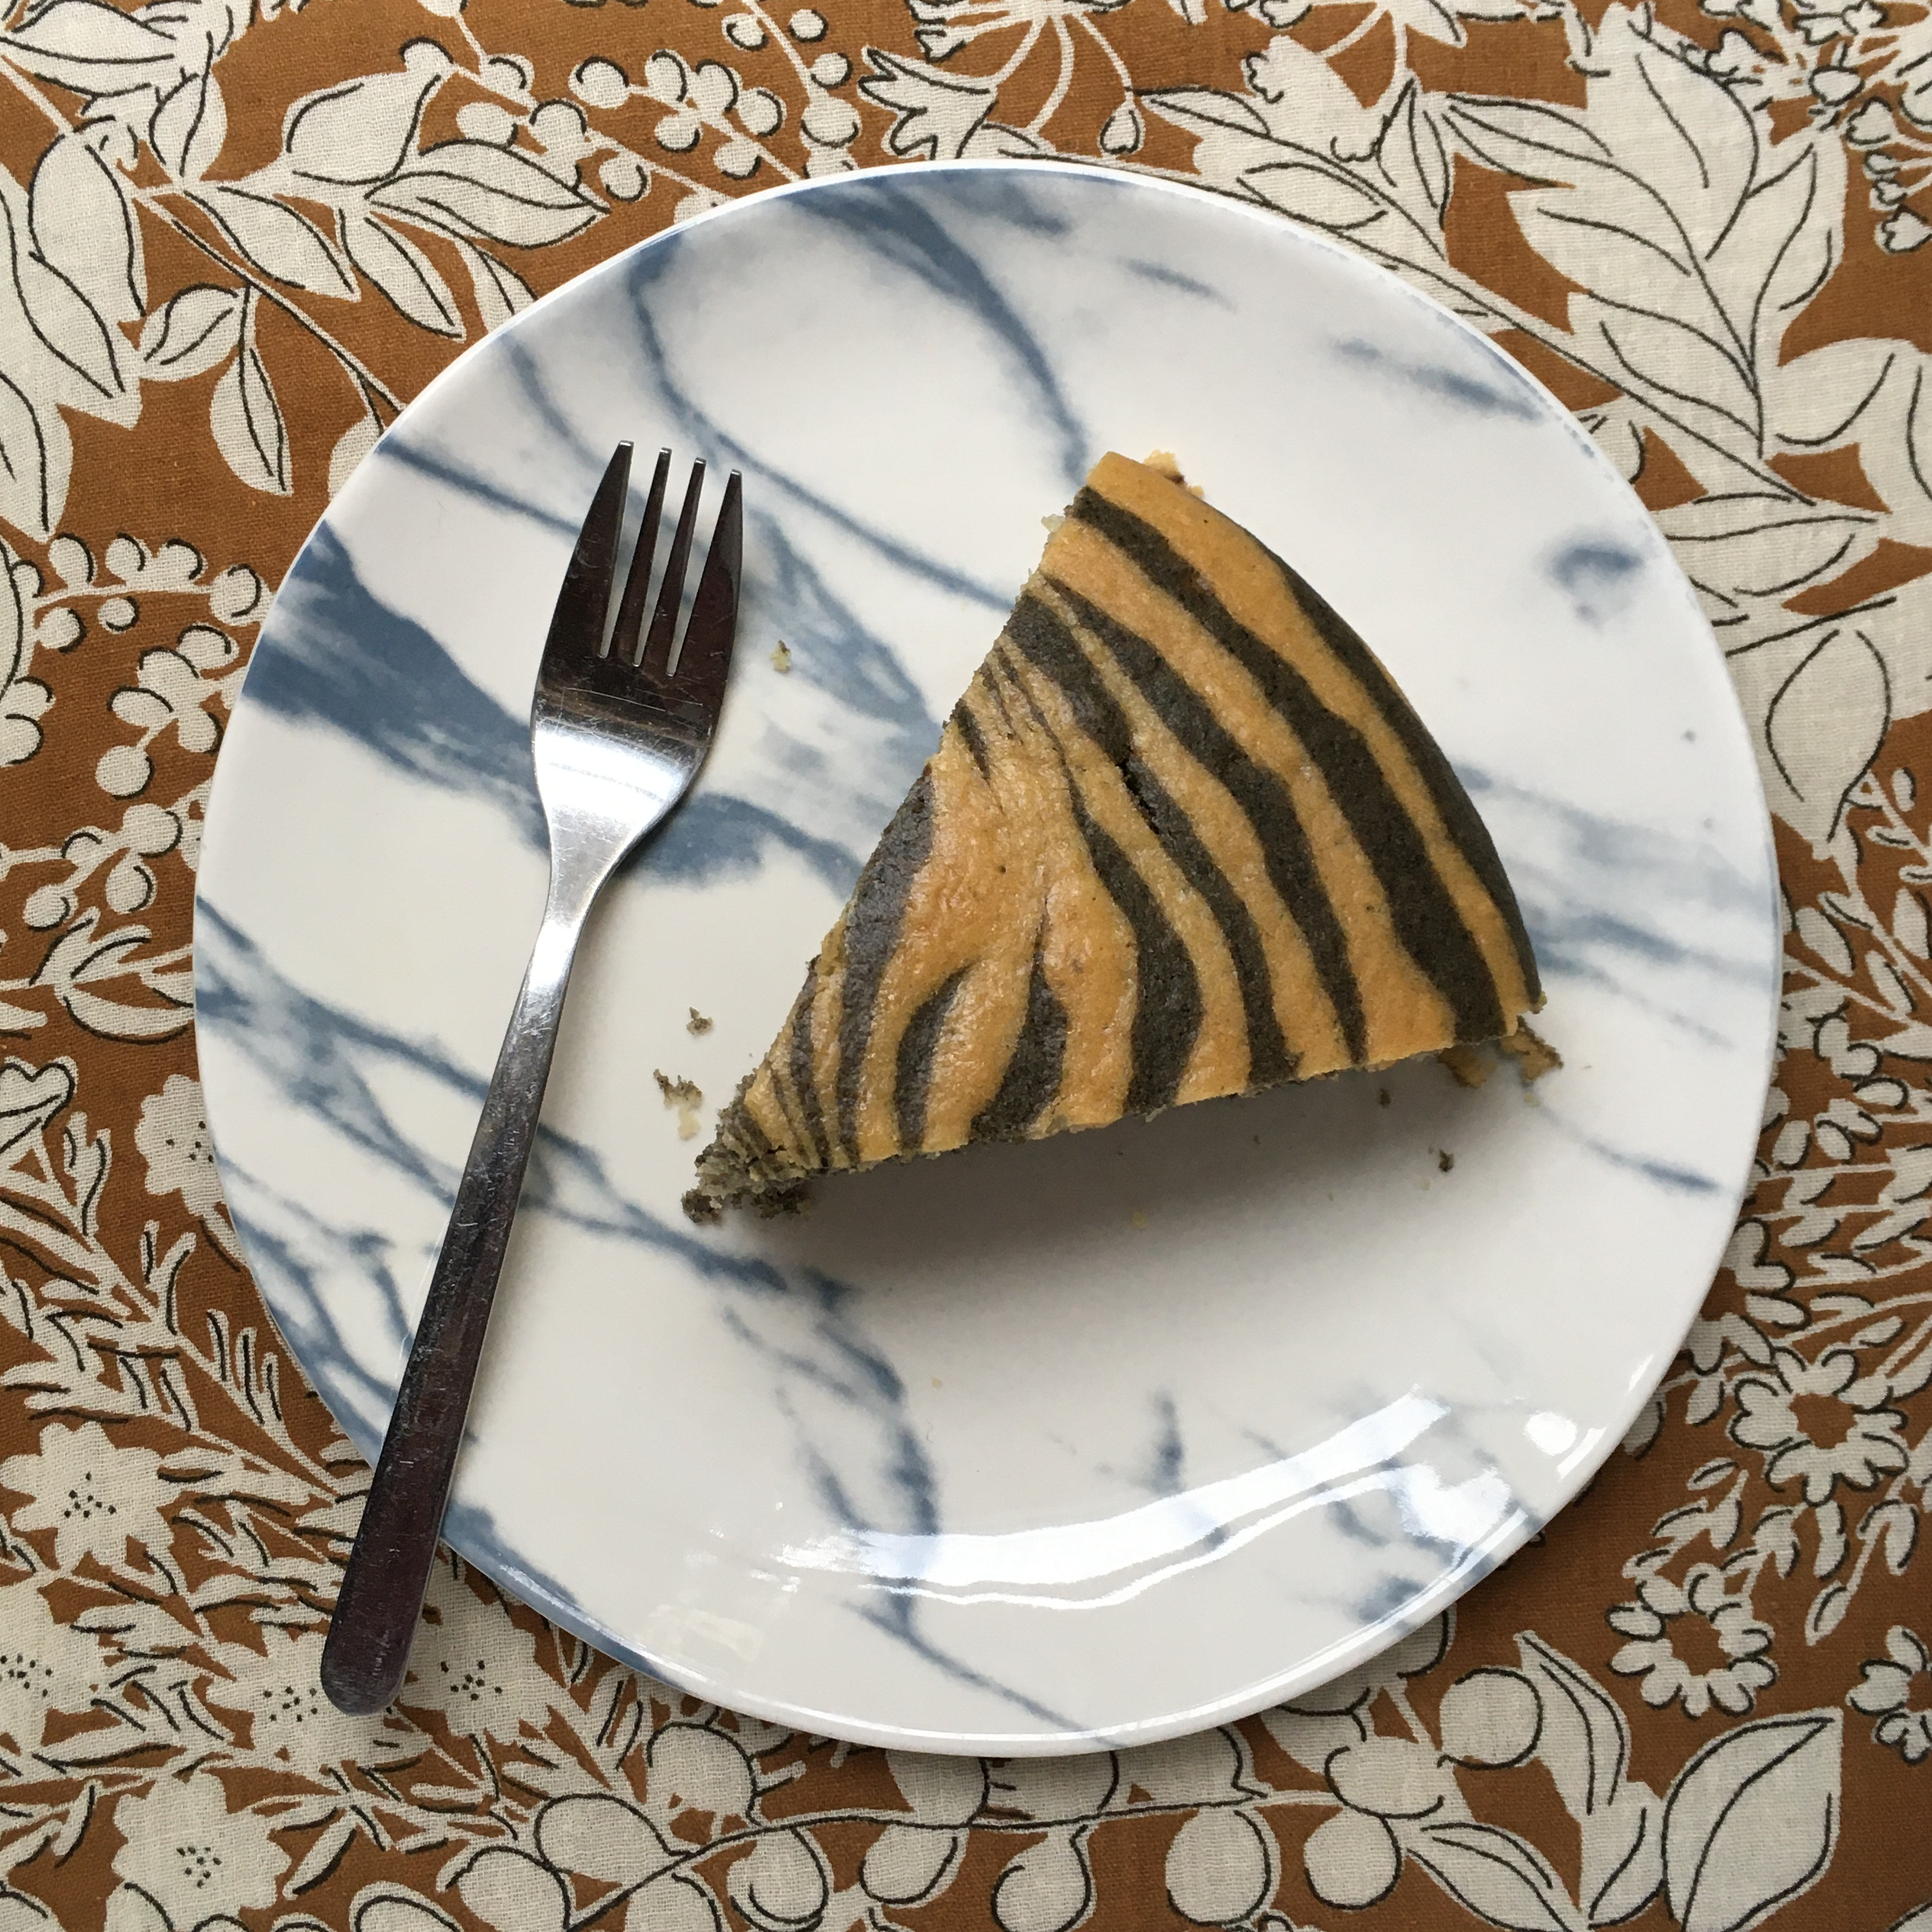
As you can see, the inside is wonderfully striped and marbled!
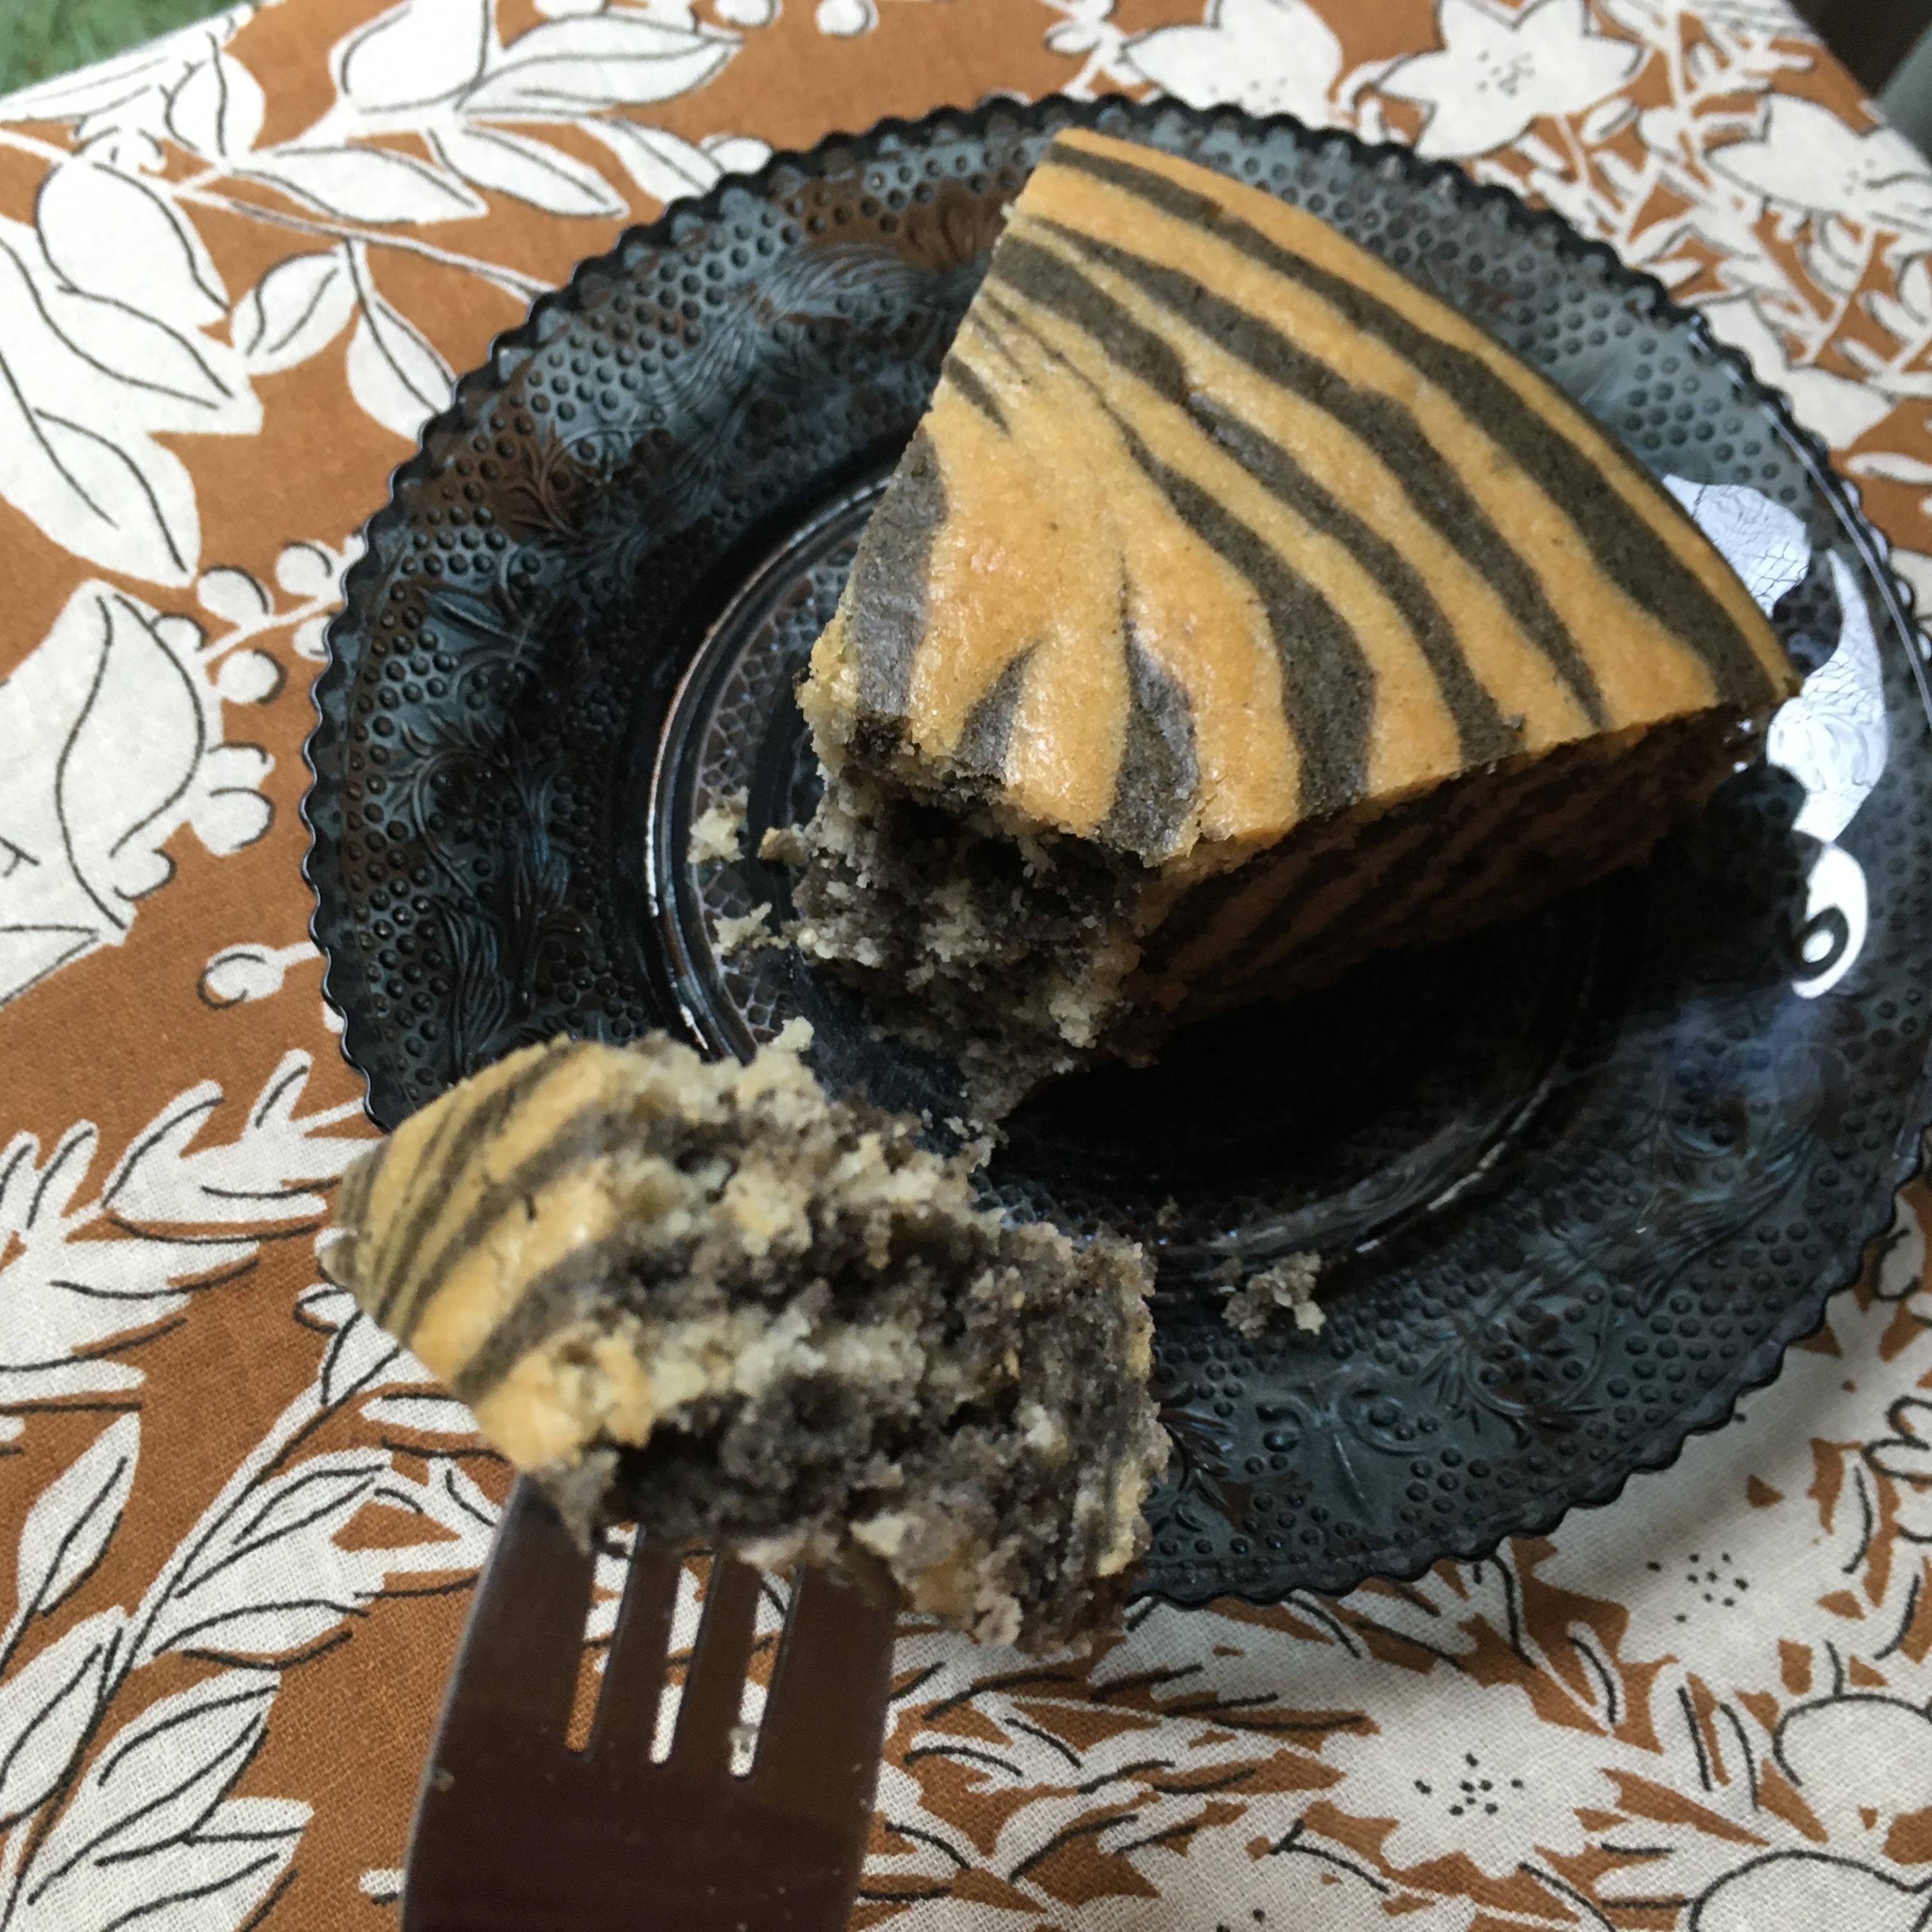
The other side of that same piece looks like this – a bit more marbled than striped.
Enjoy!
Variations: if you don’t have sesame paste or can’t find the black kind, you can make this same zebra-patterned cake in a chocolate and vanilla (or matcha and vanilla, etc.) version.
As you’re already well aware, this is a surreal moment in history, with much of the world’s population on lockdown, under mandatory or recommended stay-at-home orders. Here in Paris, we’ve been en confinement, as the expression goes, since March 17th and we still have a couple more weeks to go.
Among other things, this means we have to do most or all of our own cooking at home, using whatever ingredients we can get our hands on. At a time when we’re supposed to keep trips to the outside world to a minimum, what are the best shelf-stable foods to choose? In the panic-buying rush, most people seemed to think of pasta first, wiping supermarket shelves clean of all its forms. As for me (and I don’t know how many others did this, since I went into self-isolation earlier than the rest of the country), the first place I went was the lentil aisle!
Lentils are quite amazing. They’re super nutritious, not only rich in protein, but also B vitamins, magnesium, zinc and potassium. They furthermore have the highest antioxidant content of all legumes and keep you feeling full for a long time – amazingly enough, even after a different meal later the same day! They’re very yummy too.
I tend to go with dry lentils rather than canned, as they’re less expensive, easier for pedestrians like me to carry home (no water weight), can easily be purchased in bulk (no packaging to throw out or recycle) and take up less room in your pantry.
Even after the lockdown period is over, lentils will be a good thing to have on hand. They can be kept for a year or two without going bad and are a quick fix when you have nothing else in the house and can’t go out for whatever reason.
For those of you who may be new to lentils, or just haven’t had them lately, I thought I’d share a super easy recipe for lentil soup. I’m calling it “lockdown lentils” in reference to these strange times, but also because it can be modified endlessly to accommodate whatever seasonings you have on hand while locked down. The only two ingredients you absolutely need are lentils and water – everything else is optional! I’m nevertheless including some recommended ingredients and spices that take them to another level. Feel free to substitute other things as needed.
The type of lentil you use is also up to you. In the photos shown here I’ve used green, but you could also use brown, yellow, red or beluga (black) lentils. Note, however, that red lentils become mushy as they cook, so a red lentil soup will be thicker than the one you see here.
To make your lentils go farther, serving more people or stretching out over more meals, serve it over a nutritious cooked grain such as brown (whole-grain) rice, spelt or buckwheat.
Lockdown lentils
Makes 2 servings
1 tablespoon olive oil
1 small onion (50 g), any color
1 or 2 cloves fresh garlic
Half a carrot (50 g)
Half a medium to large potato (75 g)
1 cup (175 g) dry lentils
4 cups (950 ml) cold water
Half a vegetable bouillon cube or salt to taste
1 dried bay leaf
½ teaspoon ground coriander
¼ teaspoon ground turmeric
¼ teaspoon black pepper
¼ teaspoon each thyme, rosemary, oregano etc.
unsweetened plain soy cream or yogurt (optional)
fresh cilantro (coriander) or parsley leaves, for garnish
balsamic vinegar or soy sauce, to drizzle on top
Equipment needed: wire sieve
Drizzle a bit of olive oil in a saucepan and turn on the heat to medium-low. Dice the onion and heat it, stirring often, until soft and translucent. Meanwhile, dice the carrot and crush the garlic. Add the garlic to the saucepan and stir constantly for about 30 seconds, being careful not to allow the garlic to overheat or stick to the pan.
Add the diced carrots and continue stirring constantly. After about a minute, add the 4 cups water and stir the vegetables to dislodge anything that may have stuck to the bottom of the pan. Cover the saucepan and turn the heat to high to bring the water to a boil.
While waiting for the water to heat, place the lentils in a wire sieve and rinse thoroughly. Check through the lentils to remove any rogue items such as tiny twigs or stones.
Add the lentils to the saucepan and continue to bring to a boil. Once the water is boiling, turn the heat down to low. Peel and dice the potato and add to the pot, along with the half-cube of bouillon (or salt), bay leaf and other herbs and spices. Stir to combine everything, cover the saucepan loosely and let simmer.
After about 25 minutes, the lentils should be cooked all the way through and the carrot and potato should be tender. Turn off the heat, stir and taste to adjust the seasonings. If it seems too salty, you can add a bit of extra water. Remove and discard the bay leaf.
Ladle the soup into bowls. If you like, you can top it with some unsweetened soy cream or soy yogurt (or other plant-based alternatives). Drizzle a bit of balsamic vinegar or soy sauce over that and garnish with fresh herbs.
Enjoy!
Variation: omit the potato and carrot and use less water to prepare lentils for use in a salad (I don’t recommend red lentils for this, since they become mushy when cooked).
Let’s take a break from current events and go on a little trip to Iceland! One that takes place mainly in our kitchens.
I had the good fortune to visit this fascinating and beautiful country back in 2011, spending a week in Reykjavík with a side trip to see the attractions of the Golden Circle. I loved my time there, and although I haven’t had the chance to go back yet, Iceland has continued to have a special place in my heart. Below are a few more of my photos from that trip (click on any photo to open a slideshow view).
One of the things this tiny island nation is known for is its literary output, with one of the world’s highest numbers of authors per capita (one in 10 Icelanders will publish a book). In the years just after my visit I read a couple of novels by Halldór Laxness (Iceland’s Bell) and Sjón (From the Mouth of the Whale), but I didn’t get to any further Icelandic literature until this past December.
In France, a major general strike began early in December 2019 and lasted nearly until the end of January. This meant very few metros and buses were running, and even when they were, the prospect of squeezing into one and possibly getting crushed by the other sardines did not appeal. So I decided just to lay low and not really go anywhere (except by foot) until it was over. As an introvert, I didn’t see that as much of a sacrifice, especially since it was also pretty cold and miserable outside. Of course, if I’d only known what was to happen just a couple months later, I would have gone out more…
With my extra free time I began reading even more than usual. I delved into an Icelandic novel I’d found in the street, Heaven and Hell by Jón Kalman Stefánsson, which turned out to be the first in a trilogy. Many parts of this story fit in perfectly with my situation, following solitary characters who had to trudge across hostile frozen landscapes (not totally unlike my 35-minute trudges through December rains and heavy air pollution to reach my Japanese class). But the story drew me totally and completely into Iceland and reawakened my passion for the country. See my review of the book here.
As you know, one of the things I often do when I’m enthusiastic about a book or film is to make a recipe inspired by it! And this was no exception.
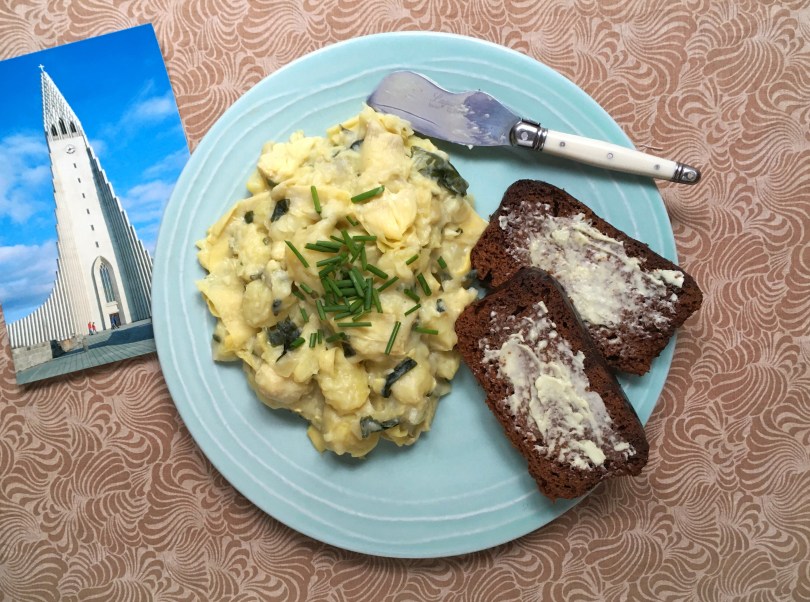
I looked online for an interesting Icelandic recipe and found something called plokkfiskur, which is a blend of mashed potatoes, onion and mashed fish mixed with a creamy béchamel type sauce. The dish originally hails from Norway, as do the people of Iceland themselves, if you go back far enough in history. To veganize it, I replaced the fish with artichoke hearts (a very good suggestion by my mom) and wakame seaweed. And if I do say so myself, the result is really delicious! It’s like a very gourmet twist on mashed potatoes, and could be served as a side dish or a main dish, depending on the portion.
A side note about the name… plokkfiskur, I read, means “mashed fish” and since there isn’t any fish in my dish I should really call it… plokkþistilhjörtur? (as þistilhjörtu is the word for artichoke). That seems kind of fun to pronounce! But I’m unsure of how the case ending should be handled, and there could be other details I’m unaware of, so for now am just using the original term in those handy quotation marks. So if you’re an Icelander yourself, or just know the language well, please feel free to suggest an alternate name for this dish!
Icelanders commonly eat plokkfiskur with rugbrauð (rye bread), which in some parts of the island is actually baked right in the ground using geothermal heat! You can see how it’s done here:
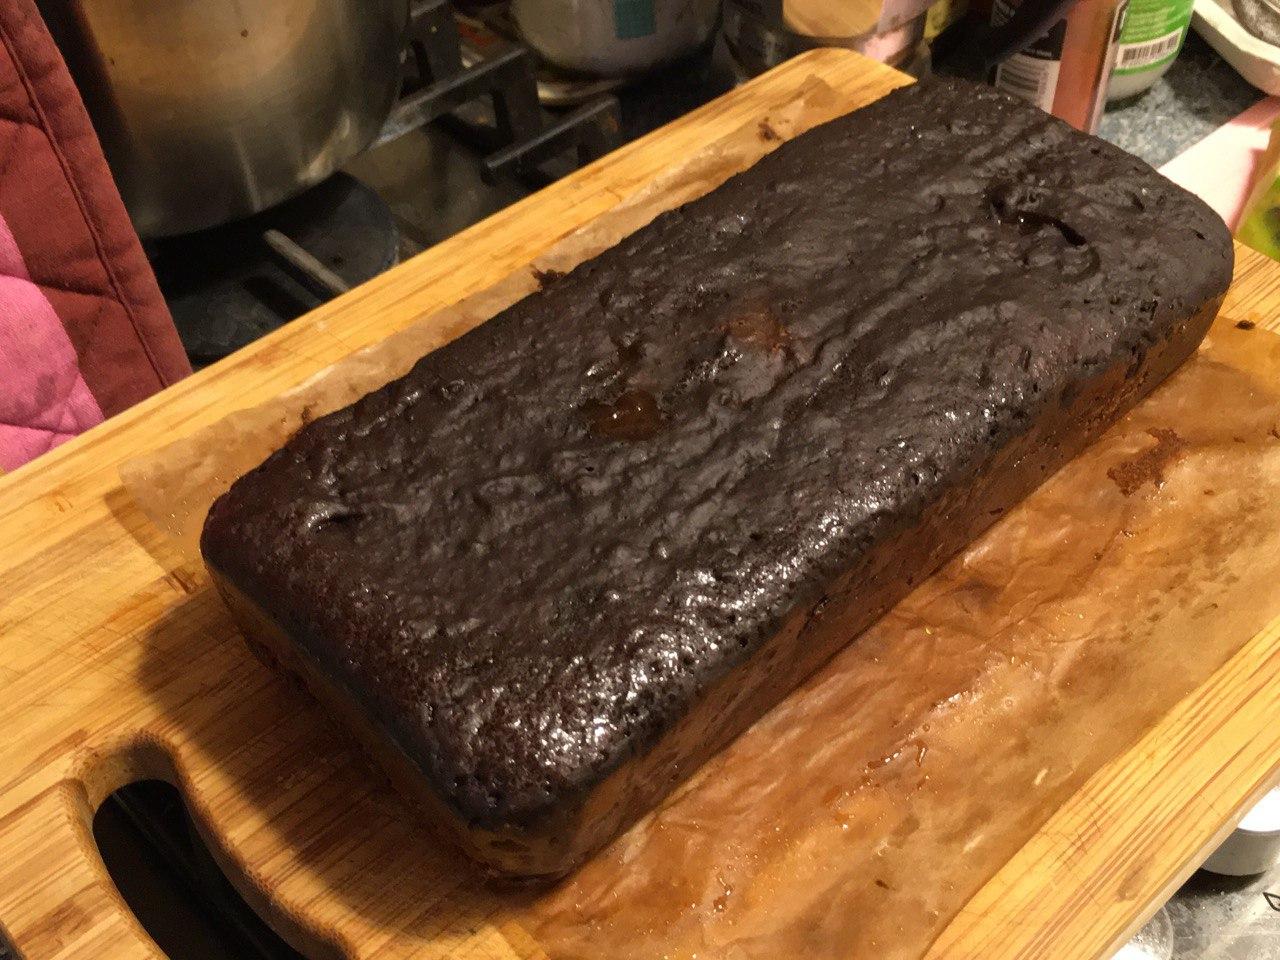
After some Googling, I learned it was possible to replicate this baking method with hot water in a slow-cooker, or even in a conventional oven inside a large pan of water (much like Boston brown bread). I followed a vegan recipe for it that I found on a blog that has since unfortunately disappeared and made some adaptations of my own. My first attempt at it was quite successful and I was absolutely delighted with the bread, which I have now remade several times. One of the interesting things about it is that it contains absolutely no oil, but due to the cooking method comes out very moist. And although it contains molasses and a bit of sugar, it isn’t a sweet bread. It goes well paired with either savory or sweet things.
I realize you may not happen to have a slow-cooker, or it might not be the right size or shape for a loaf pan (although you can get creative here and use a container of a different shape), so feel free to bake it in a conventional oven or simply use store-bought rye bread. But I wanted to include the recipe here for anyone who wants to attempt this culinary adventure. It follows the main recipe below.
Vegan plokkfiskur
Serves 2
10.5 oz (300 g) firm potatoes, peeled
9 oz (250 g) canned artichoke hearts (weight after draining)
3.5 oz (100 g) white or yellow onion, diced (1 medium onion)
1 heaping teaspoon dried wakame seaweed
1 cup (236 ml) soy milk plus more if needed
½ bouillon cube
3 tablespoons flour
¼ teaspoon ground white pepper
small bunch chives
Serve with rye bread (store bought or homemade with the recipe farther below).
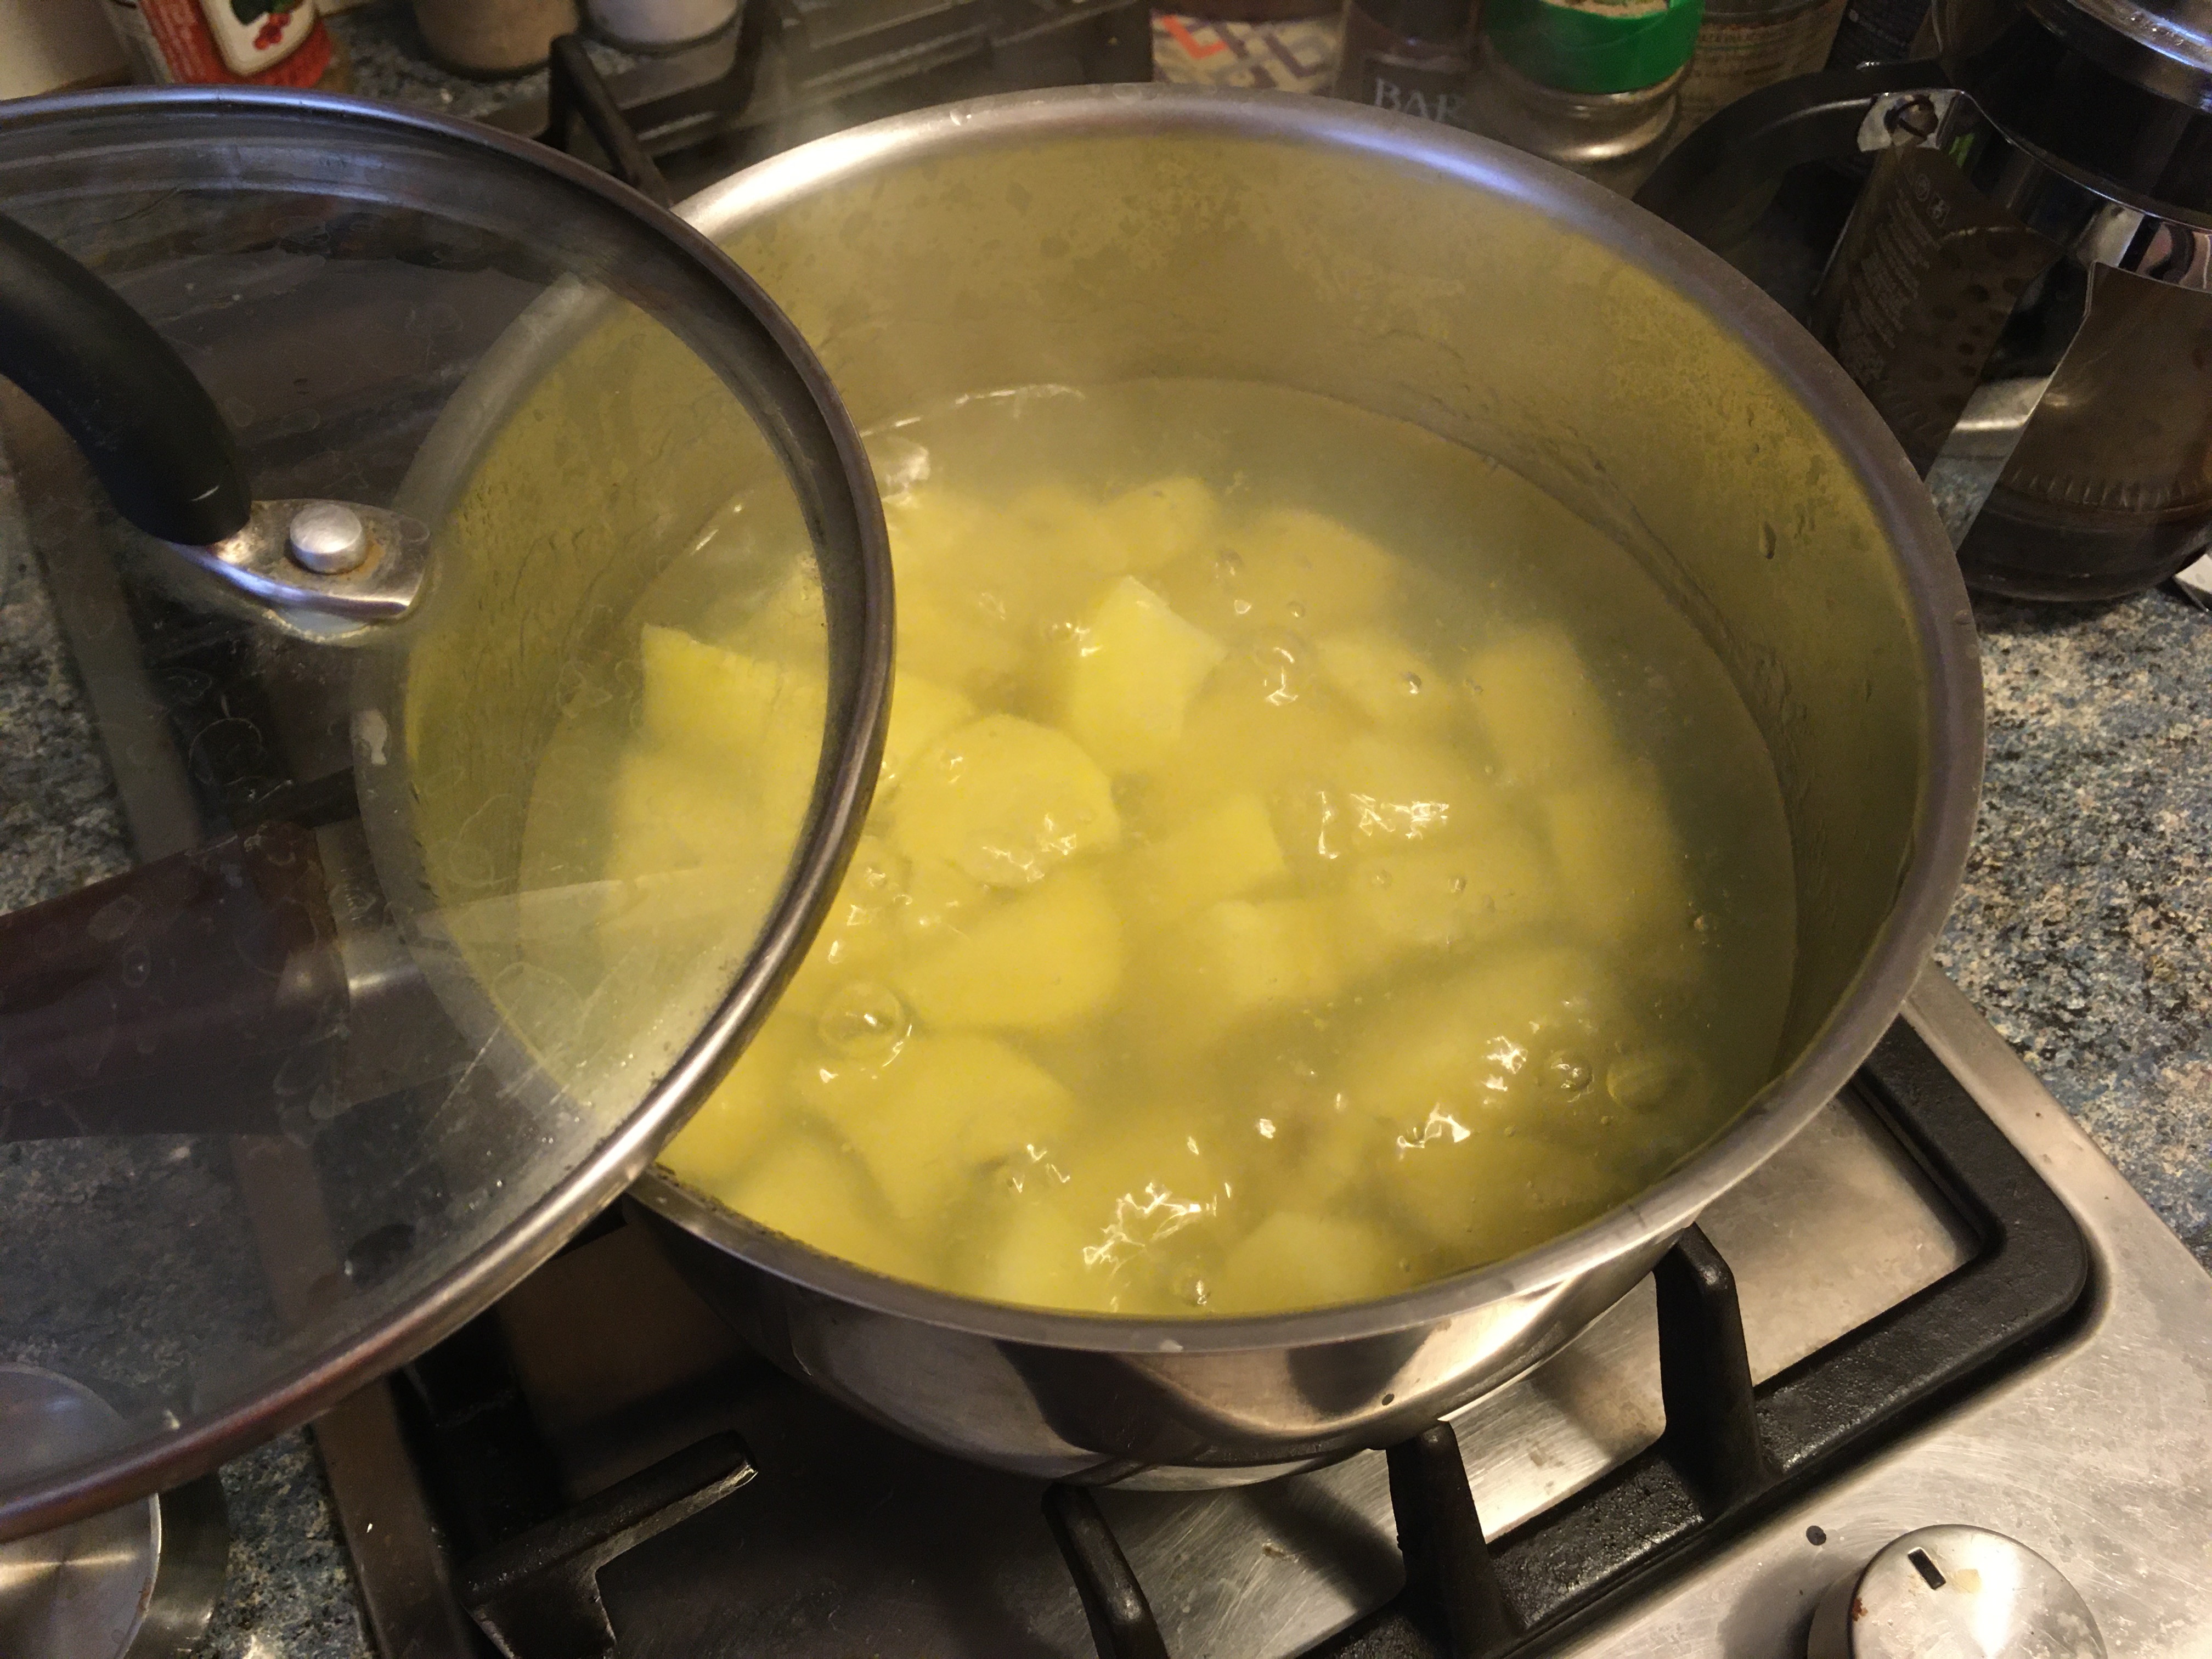
Start by peeling and chopping the potatoes. Boil for 20 minutes or until tender.
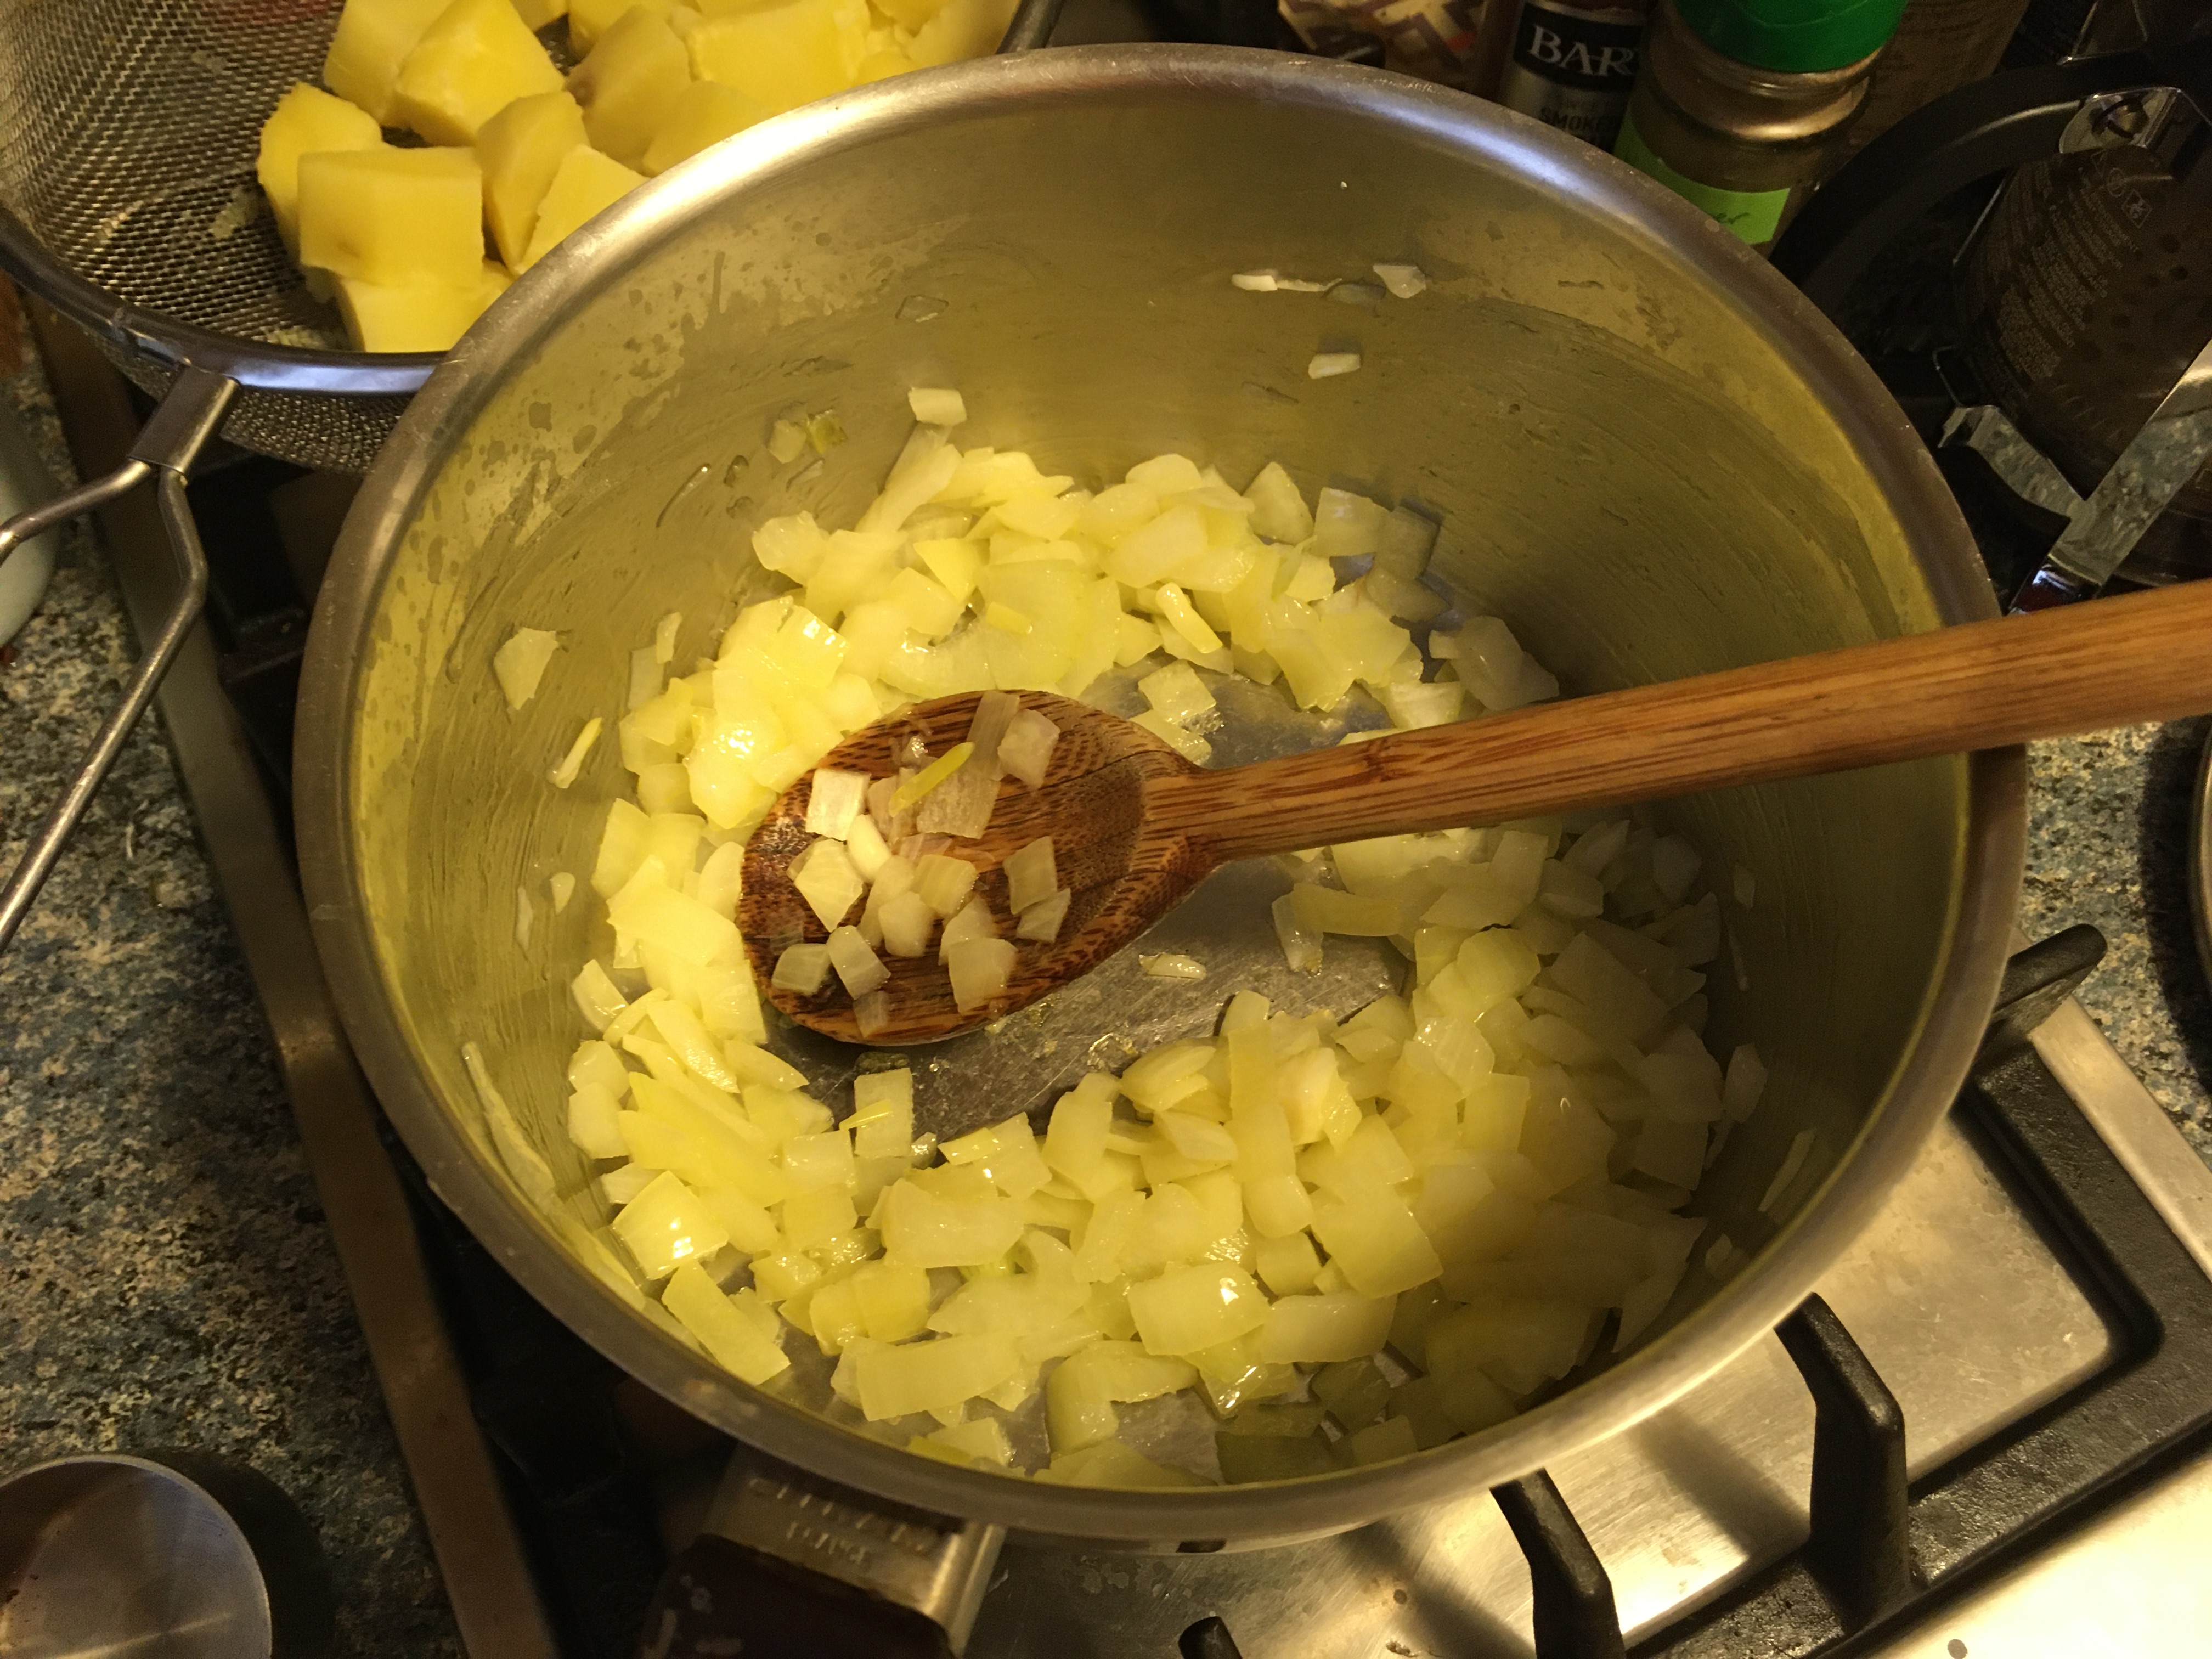
While the potatoes are cooking, continue preparing the rest of the ingredients. Dice the onion and sauté them in a little olive oil until translucent (do not allow to brown).
Incorporate the flour, stirring well to coat all the onions.
Add the soy milk, stirring well. Crumble the bouillon into the milk once it heats up, and add the white pepper. In combination with the flour, the milk will form a kind of béchamel sauce. You may need to add a bit more milk than the one cup, if the result is too dry.
Combine the seaweed with a bit of cool water (it will plump up and double in size in a few minutes).
Add the potatoes and then the seaweed to the pot.
Slice the artichoke hearts into quarters and gently incorporate into the mixture.
You now have a delightful gourmet and slightly oceany tasting mashed potato dish! Top with fresh chives after serving.
Icelanders often scoop some of the plokkfiskur onto their rye bread to eat them together.
Geothermal rye bread
Makes 1 loaf
1½ cup (150 g) rye flour
¾ cup (94 g) all-purpose wheat flour
2 teaspoons baking powder
1½ teaspoon salt
½ teaspoon baking soda
1 cup (236 ml) soy milk
3 tablespoons molasses
2 tablespoons sugar
Equipment needed: electric slow-cooker large enough to fit loaf pan (or a large stovetop stockpot and a container that can fit inside it).
This bread may just change your life!
Start by sifting all the dry ingredients into a bowl.
Add the molasses to the soy milk and whisk to incorporate it fully. Be sure to do this as a separate step rather than mixing the molasses straight into the batter.
Prepare your loaf pan with a piece of baking paper (or oil the inside well). Fold the molasses and soy milk mixture into the dry ingredients and stir only until you have achieved a homogeneous consistency. Be careful not to overstir.
Transfer the batter to the prepared loaf pan, and spread it around to an even level. Cover the top with a piece of aluminum foil.
Fill the slow-cooker with boiling water (this one takes 3 liters), or else fill it with water and allow enough time for it to preheat. It is very important for the water to be around 90°C before you add the loaf pan. If the dough is heated too slowly, the baking powder and soda will not be activated and the bread won’t rise. My slow-cooker heats to around 90° to 95° on the high setting, but yours may be different. You can check the exact temperature using a candy thermometer.
In my slow-cooker, the baking process takes about 18 hours. Since the lid does not form a complete seal, the water evaporates down after a few hours, so I try to time the baking so that I can check it every few hours and refill with hot water as necessary. To check if the bread is done, stick a toothpick in it, both in the middle and the sides. With this method, unlike in an oven, the bread begins baking from the center outwards so the sides and ends are the parts that will not be done if the bread is not yet ready.
When you have confirmed that the bread is indeed baked all the way through, remove it from the slow-cooker and allow it to cool. Unmold it onto a cutting board and you’re ready to slice and serve it! It can be used with either savory or sweet things – serve it with the plokkfiskur above or with vegan butter and jam.
To learn more about Iceland, I recommend checking out the All Things Iceland podcast, created by American expat Jewells, who also happens to be vegan! She can also be found on YouTube and Instagram. I also enjoy the Stories of Iceland podcast by native Icelander Óli Gneisti Sóleyjarson. And I of course highly recommend reading the authors I mentioned earlier, as well as (one day, when it’s possible) visiting Iceland yourself.
My recent discovery of a French vegan blue cheese here in Paris brought back some fond memories from my student days. I was living in downtown Milwaukee, finishing up my bachelor’s degree and working at a popular restaurant on Cathedral Square Park. Some nights after finishing up our last tables, a few fellow servers and I would take our exhausted selves down the street to Elsa’s On the Park, a cocktail bar that was way cooler than the place we worked at. We loved its sophisticated ambiance, avant-garde art, high-end cocktails and the fact that its kitchen stayed open late enough that we could get something to eat after our restaurant closed.
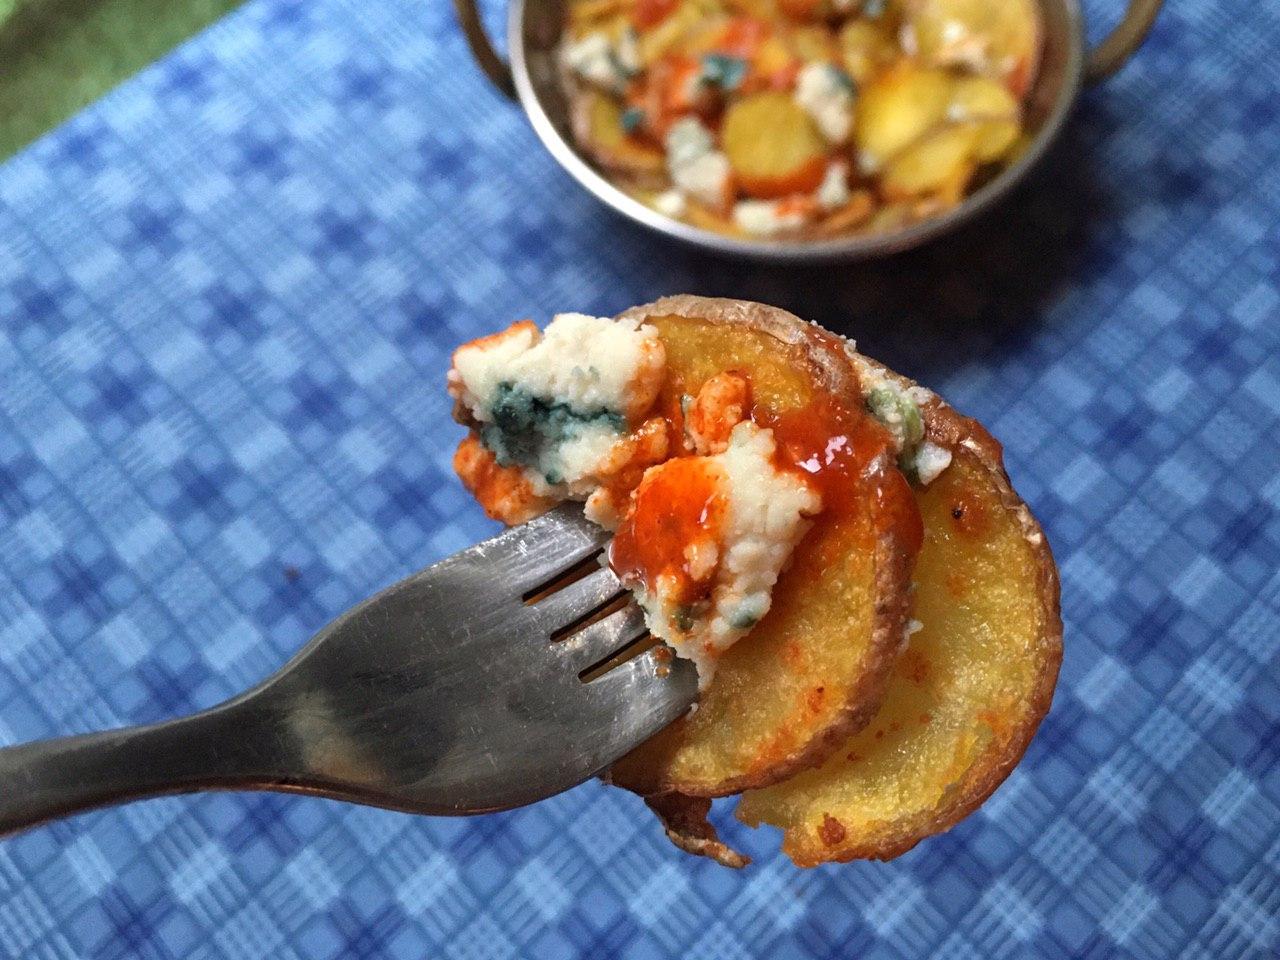
Looking online, I was happy to see that Elsa’s (described on the Google map as “trendy eatery for burgers & martinis”) was still there, in the same beautiful Victorian building. It now had a website and on it I found their menu, which didn’t seem to have changed. I recognized the same burgers, grilled cheese sandwiches and, best of all, their Hell’s Fire Fries: thickly sliced rustic housemade chips topped with melting gorgonzola cheese and hot sauce. Tucking into this spicy dish was the perfect way to forget that awful table that had run you off your feet all night and then tipped you only 10%, I found. The dish was also the perfect accompaniment to a stiff drink, ordered for the same reasons.
This Proustian trip down memory lane of course inspired me to see if I could reproduce this yummy treat, now that blue cheese had re-entered my world. A friend from the olden days volunteered to stop by Elsa’s to order the dish and report on what she was served, and it turned out to be the same as I’d remembered – thick fried potato slices with the skin on, something midway between fries and chips.
I’m quite happy with the result, which I have named in homage to the original dish. The vegan blue cheese I used, the Jeanne from Jay & Joy, is made with the very same mold cultures that you find in animal-sourced blue cheese (just in a base of cashews and almond milk instead of animal milk), and its flavors go as well with the hot sauce as I remembered.
Elsa’s is part of the student-days nostalgia I share with my brother, who also lived in Milwaukee in that time, also worked as a server (at a different restaurant) and also loved visiting this favorite spot. If recipes could be dedicated to people like books are, I would dedicate this one to him.
Anyway, if you can get your hands on a cheese like this and want to try it for yourself, all the info is right here.
Heavenly hot homefries
Makes a smallish dish of homefries (serves 1 or 2)
12 oz (350 g) firm potatoes, skin on, or more for a bigger portion
1 cup vegetable oil (such as canola, rapeseed or colza) for frying
vegan blue cheese, as much as you like – I used about 0.5 oz (15 g)
The potatoes I used are a variety called Grenadine in French, but any firm potatoes, such as you would use to make regular fries or a potato gratin, will be fine. If you opt to leave the skin on, clean them thoroughly with a vegetable brush.
Using a mandoline, cut the potatoes into slices about 1/8th in. (3 mm) thick. Be REALLY careful and make sure to use the safety attachment when you get near the end of the potato. If you don’t have a mandoline, you can try slicing them with a knife, but cutting them evenly may prove challenging.
In a deep saucepan, heat the vegetable oil on high. Once it’s hot enough for frying (350°F or 180°C – check out these directions for determining the temperature without a thermometer), carefully immerse the potato slices in the oil. I used 1 cup of oil and fried my potatoes in two batches, but you could opt to use 2 cups and fry them all at once if you like. The goal is to not crowd the slices so they don’t stick together.
Once the slices have begun to turn golden brown (it took about 10 minutes for mine), carefully remove them from the oil using a metal slotted spoon and place them on paper towel, ideally in a single thickness. Sprinkle a bit of salt over the top. As soon as the paper towel becomes saturated with oil, get another sheet for the remainder of the slices or the whole batch is likely to be overly oily and might get mushy.
Now that they’ve been fried, in your home, the potato slices are homefries!
Before they cool too much, transfer the homefries to a plate or bowl. Crumble some gorgonzola or blue style cheese over them and then drizzle some hot sauce on top. I used a Mexican sauce I brought back from my last stay in the US, but just about any hot sauce will do – choose whatever level of heat you can tolerate. I recommend against Sriracha, since it has a sweet side that might not be so good in this dish.
If your homefries have gotten cold or you just want to warm up the cheese a bit, you can place the fully assembled dish under the broiler for a few minutes (in an oven-proof container, of course). Note that vegan cheese tends not to melt as much as animal-sourced cheese.
And there you have the perfect dish to help you unwind, along with a martini, mojito or merlot, at the end of a long and aggravating day. Be sure to keep the hot sauce handy so you can turn up the heat if needed.
Rumor has it this dish tastes even better when you’re wearing Tapatio socks!
As you may have noticed, I really love fusion cuisine and the improbable but delicious flavor pairings that come into being when traditions from different parts of the world are combined. Today’s recipe is one such dish: part Italian, part American and part… Nigerian? Allow me to explain.
This summer, I had plantains on the brain because I’d recently gotten my hands on a really cool plantain cookbook – by Tomi Makanjuola, who runs the blog The Vegan Nigerian – which has over 40 recipes showcasing the underappreciated fruit in almost every kind of dish you can imagine. As I always try to make at least five recipes from every cookbook I acquire, in line with the philosophy behind my cookbook challenge, I set about making some of the dishes right away (my favorites are the beans & plantain pottage and the smoky plantain, mushroom & avocado on toast).
As I began to appreciate the humble plantain more and more, I thought it would be fun to create a plantain recipe of my own for this blog. As I set about reflecting upon savory and sweet combinations not already covered in that cookbook, Hawaiian pizza popped into my mind. Many are the opponents of pineapple on pizza, especially one Italian friend of mine, but I happen to love it. So I thought plantain might work on a pizza too as long as there was also something spicy to balance out the sweetness. After brainstorming a list of likely ingredients, I rolled up my sleeves and got to work.
To be honest, even I was not totally sure if plantain on pizza would work out. But I looooooved it! My mom and dad did, too (I was at their house when I made it). It has smoky, savory notes from the smoked vegan deli meat, crunchy oniony-ness from the red onion, freshness from the cilantro and of course the crispy sweet plantain goodness of the star ingredient. I also love how colorful it is (red, white, yellow, purple, black, green).
So as I was saying, this pizza is a fusion dish – pizza has its origins in Naples but was developed into the dish we know today in early 20th century New York City (listen to this interesting How to Be American podcast episode for more on that) and this particular one has a key ingredient that’s grown in Nigeria, but also other parts of Africa as well as Asia and Latin America. Plantain is therefore not a specifically Nigerian thing, but since a Nigerian cookbook author inspired me to create this dish, I’ve associated it that way in my mind.
If all this has intrigued you and you want to try making it too, read on!
A note about the crust: when I made this pizza, I used an overly complicated homemade pizza dough recipe that I wouldn’t recommend, so I’ll leave it to you to find one you like. It just needs to be thick or firm enough to support the rather hefty plantain slices.
Plantain pizza
Makes an approximately 12-inch (30-cm) pizza
one thickish (but not deep-dish) pizza crust, purchased or homemade
5 to 6 tablespoons pizza sauce (or tomato sauce plus Italian herbs)
3/4 cup (75 g) mozzarella-style vegan cheese (optional)
2 to 3 vegan deli-style smoked “meat” slices
1 to 2 medium-ripe plantains
1/2 cup (60 g) red onion
1/4 cup (30 g) sliced black olives
1/3 cup sliced canned banana, peperoncino or other hot pepper
small bunch fresh cilantro (coriander)
2 tablespoons cornmeal, for pan (or use baking paper)
Preheat your oven to 475°F (250°C) and begin by preparing the plantains. Slice each one lengthwise and remove the peel. Slice into rounds of equal thickness, about 1/4th of an inch (5 mm) thick, and sauté on both sides over medium heat until golden brown. It’s important for the plantain to be fully precooked as undercooked plantain can lead to tummyache, and the time it spends in the oven might not be enough.
Sprinkle your baking sheet with the cornmeal to prevent sticking or, alternatively, line with baking paper. Place the dough upon it, rolling it flat if needed – mine was rectangular and measured 10.5 x 12.5 inches (27 x 32 cm) before baking. Spread the pizza sauce on it evenly, using more than the recommended amount if necessary or desired. Cover that with the vegan mozzarella, if using (I recommend Daiya in North America or Violife in Europe). But you can also opt not to use any cheese at all. If you don’t use cheese, a sprinkling of nutritional yeast before or after baking will add a somewhat cheesy flavor.
Cut the smoky vegan deli “meat” slices into squares. Use however much you like.
Slice your red onion (and black olives, if not presliced) and place on top of the pizza.
Finally, slice up the hot peppers and place on top of the pizza in the amount that you like, depending how partial you are. I started with two peppers but ended up adding some more after the pizza came out of the oven as I really loved the combination.
Place in the oven (preheated to 475°F/250°C) and bake for about 10 minutes. Keep an eye on things because baking times can vary quite a bit depending on the thickness of your particular crust. If after 10 minutes it doesn’t seem done, give it some more time.
Remove from the oven and garnish with fresh cilantro (coriander) leaves. Your one-of-a-kind plantain pizza is ready! Slice it up and serve it to your hungry guests (…or yourself!).
By the way, what do you think of the tablecloth? An uncle of mine brought it from Liberia as a gift for my parents some years ago, and I thought it would fit well with this recipe’s West African theme.
Soooo yummy, if I do say so myself! I want to make it again. 🙂
Where to find ingredients…
Plantains can be found at most supermarkets, but if you don’t find any, look for a Latin-American, African or Asian grocery.
Mozzarella-style vegan cheese is increasingly available at mainstream grocery stores in North America, but organic shops are even more likely to have it. In France, you’ll find it at some organic shops, but for best results check at a vegan food shop first (in Paris: Naturalia Vegan, Mon Epicerie Paris and Aujourd’hui Demain).
Vegan deli “meat” slices will also most likely be found at organic and vegan food shops. In Europe, I recommend the brand Wheaty.
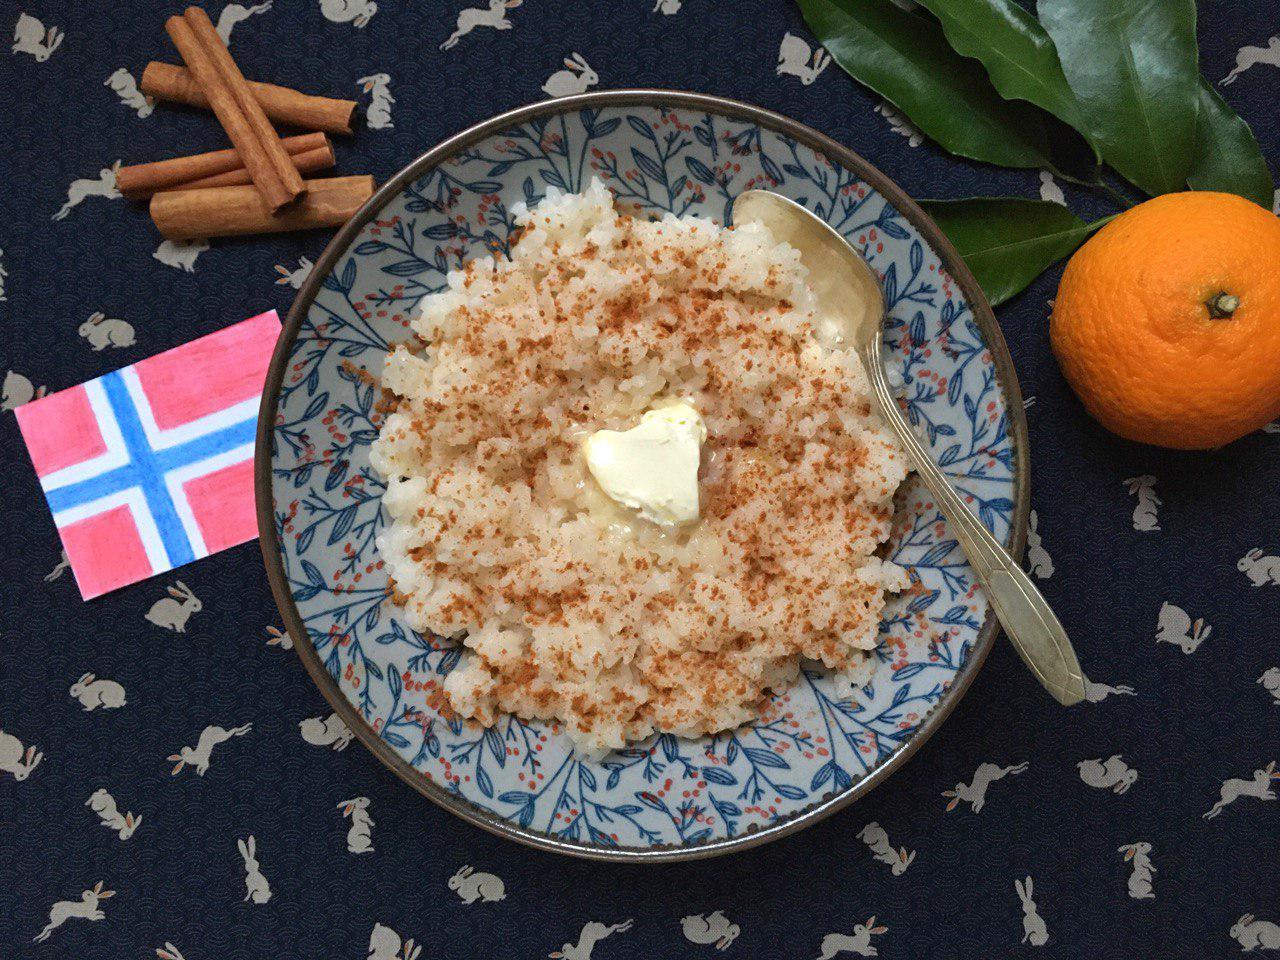
A few years ago, I happened to spend Christmas in the company of a Norwegian friend and got to experience a traditional dish commonly served the morning of December 24th in homes across his northerly homeland. The memory of its subtle sweetness and warming heartiness has stayed with me and this year, I decided to make it here in Paris. And to share it with you! Get ready to experience risengrynsgrøt (rice porridge).
The rising sun announces a cold new day in Stavanger.
This vegan version of the grøt (porridge) is very easy to make, composed of a just a few ingredients. And if you use rice milk, which is naturally sweet, there’s no need to add any sugar.
In preparing my own recipe, I drew inspiration from basic rice pudding recipes and also this Norwegian vegan risengrynsgrøt recipe. Some versions call for other milks, including full-fat canned coconut milk, but I found that rice milk thickened up nicely enough.
Risengrynsgrøt is traditionally served with husholdningssaft, a juice made from apples, grapes and cherries. Personally though, I dislike pairing sweet dishes with sweet beverages. And since I’m not Norwegian myself, I decided to flout tradition and have it with coffee.
Some Julenisser (Nordic Christmas elves), disappointed in me for not drinking husholdningssaft.
My Norwegian friend later assured me that it was okay to have coffee too (emphasis his). I promised to have some berry juice later in the day to make up for it, but he only sighed and shook his head in dismay.
A word of caution about cinnamon:
There are two types, Cassia and Ceylon. Cassia, the most common kind due to its lower cost, can cause stomach pains and more serious problems if consumed in higher doses (1 teaspoon or more per person, per day) due to the coumarin it contains. So although cinnamon is yummy, be careful not to overdo it if you suspect yours is the Cassia variety.
Norwegian Christmas rice porridge
Makes about 3 cups (2 to 3 hearty servings)
1 cup (200 g) short-grain rice
3½ cups (830 ml) rice milk or rice milk blend
pinch salt
1 cinnamon stick (optional, preferably the Ceylon variety)
The rice you want for this recipe is the short-grain type, the kind used to make risotto. For the liquid, I recommend rice milk because it is naturally sweet (I used a rice and coconut milk blend). But you can substitute another plant-based milk and add a bit of sugar if needed.
Combine the rice, milk, pinch of salt and cinnamon stick in a saucepan. Cover and bring to a boil over high heat. Once it is boiling, turn the heat down to low and simmer (still covered) for 15-20 minutes until the rice is soft. During this time, stay close, stirring occasionally and ensuring that the mixture doesn’t boil over.
When the rice is done, taste it to see if you want to add some sugar. Remove the cinnamon stick (tip: save it to make pot-pourri with later).
Serve the rice porridge in cereal bowls. Place a pat of margarine or vegan butter in the center of each bowl and sprinkle the top with a small amount of ground cinnamon (see my word of caution about cinnamon above). When the margarine has melted, stir it into the porridge to combine.
Enjoy!
If reheating leftover rice porridge, mix in some extra milk while stirring to achieve a creamy texture again.
Variations: add diced raw apple, raisins or dried cranberries to the rice near the end of the cooking process. Dust some sugar and/or gomasio over the top if you like.
Sunrise and Julenisser photos courtesy of Jon Helge Hesby
Where to find ingredients…
Short-grain rice: most general grocery stores offer this type of rice, labeled variously as risotto rice, arborio rice or sushi rice. In France, riz rond is what you want.
Ceylon cinnamon (Cinnamomum verum or true cinnamon): check at high-end or specialty shops, or look online. Note that Saigon or Vietnamese cinnamon (Cinnamomum loureiroi) is closely related to the Cassia variety (Cinnamomum cassia) and therefore should probably also be consumed only in small quantities.


 One day, for reasons I no longer recall, I visited the website of Maille, a famous French mustard brand and national institution of sorts (its history going back to 1747). I noticed that it offered a number of recipes that call for mustard, including


 Among other things, this means we have to do most or all of our own cooking at home, using whatever ingredients we can get our hands on. At a time when we’re supposed to keep trips to the outside world to a minimum, what are the best shelf-stable foods to choose? In the panic-buying rush, most people seemed to think of pasta first, wiping supermarket shelves clean of all its forms. As for me (and I don’t know how many others did this, since I went into self-isolation earlier than the rest of the country), the first place I went was the lentil aisle!


 I had the good fortune to visit this fascinating and beautiful country back in 2011, spending a week in Reykjavík with a side trip to see the attractions of the Golden Circle. I loved my time there, and although I haven’t had the chance to go back yet, Iceland has continued to have a special place in my heart. Below are a few more of my photos from that trip (click on any photo to open a slideshow view).


 A side note about the name… plokkfiskur, I read, means “mashed fish” and since there isn’t any fish in my dish I should really call it… plokkþistilhjörtur? (as þistilhjörtu is the word for artichoke). That seems kind of fun to pronounce! But I’m unsure of how the case ending should be handled, and there could be other details I’m unaware of, so for now am just using the original term in those handy quotation marks. So if you’re an Icelander yourself, or just know the language well, please feel free to suggest an alternate name for this dish!


 While the potatoes are cooking, continue preparing the rest of the ingredients. Dice the onion and sauté them in a little olive oil until translucent (do not allow to brown).
 Incorporate the flour, stirring well to coat all the onions.
 Add the soy milk, stirring well. Crumble the bouillon into the milk once it heats up, and add the white pepper. In combination with the flour, the milk will form a kind of béchamel sauce. You may need to add a bit more milk than the one cup, if the result is too dry.


 Slice the artichoke hearts into quarters and gently incorporate into the mixture.
 You now have a delightful gourmet and slightly oceany tasting mashed potato dish! Top with fresh chives after serving.

 Icelanders often scoop some of the plokkfiskur onto their rye bread to eat them together.
 This bread may just change your life!


 Fill the slow-cooker with boiling water (this one takes 3 liters), or else fill it with water and allow enough time for it to preheat. It is very important for the water to be around 90°C before you add the loaf pan. If the dough is heated too slowly, the baking powder and soda will not be activated and the bread won’t rise. My slow-cooker heats to around 90° to 95° on the high setting, but yours may be different. You can check the exact temperature using a candy thermometer.
 In my slow-cooker, the baking process takes about 18 hours. Since the lid does not form a complete seal, the water evaporates down after a few hours, so I try to time the baking so that I can check it every few hours and refill with hot water as necessary. To check if the bread is done, stick a toothpick in it, both in the middle and the sides. With this method, unlike in an oven, the bread begins baking from the center outwards so the sides and ends are the parts that will not be done if the bread is not yet ready.


 My Norwegian friend later assured me that it was okay to have coffee too (emphasis his). I promised to have some berry juice later in the day to make up for it, but he only sighed and shook his head in dismay.