Earl Grey lemon cake

Today’s recipe pays tribute to one of my favorite fruits, the bergamot lemon. Different in shape and a darker yellow than common lemons, bergamot lemons also have that distinctive flavor that makes Earl Grey tea what it is. Hence the title of this cake!

To make this cake plus the icing, you’ll need two lemons.

You can of course always make this cake with regular lemons, or another type (Meyer lemon for example) if bergamot lemons are hard to find. And note that there isn’t actually any tea in this cake, although you could infuse the milk with it to see what happens. I haven’t tried that yet because the tea is likely to make the cake dark, but I might experiment with it another time!

Earl Grey lemon cake

Cake

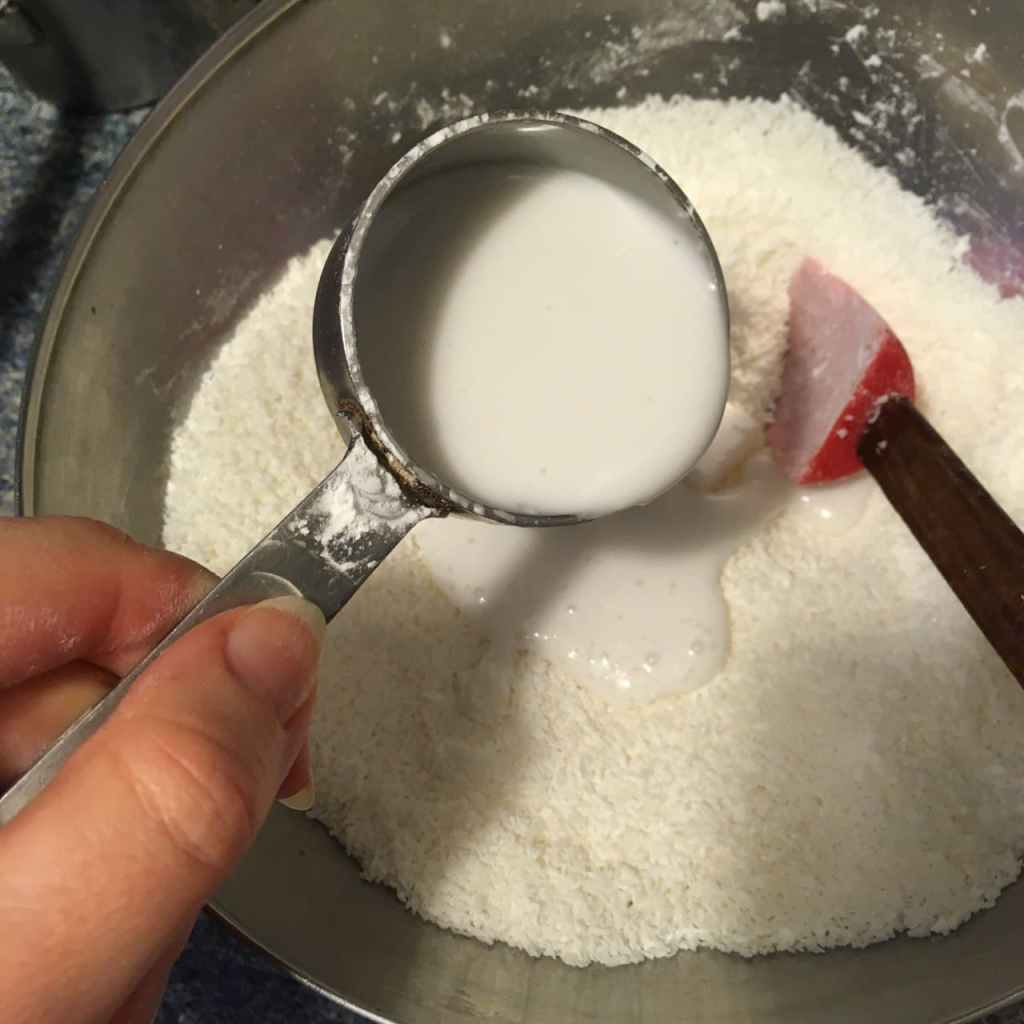
  • 1 cup (236 ml) soy or oat milk
  • zest from 1 bergamot lemon
  • juice from 1 bergamot lemon (about 1/4 cup or 60 ml juice)
  • 1/3 cup (78 ml) neutral-flavored vegetable oil
  • 1 teaspoon vanilla extract
  • 1 and 3/4 cups (300 g) all-purpose flour
  • 3/4 cup (150 g) white granulated sugar
  • 1 teaspoon baking powder
  • pinch salt

Icing

  • 1 cup (100 g) powdered sugar
  • zest from 1 bergamot lemon
  • 2 tablespoons bergamot lemon juice, or more as desired

DIRECTIONS

  1. Preheat your oven to 350°F (180°C).
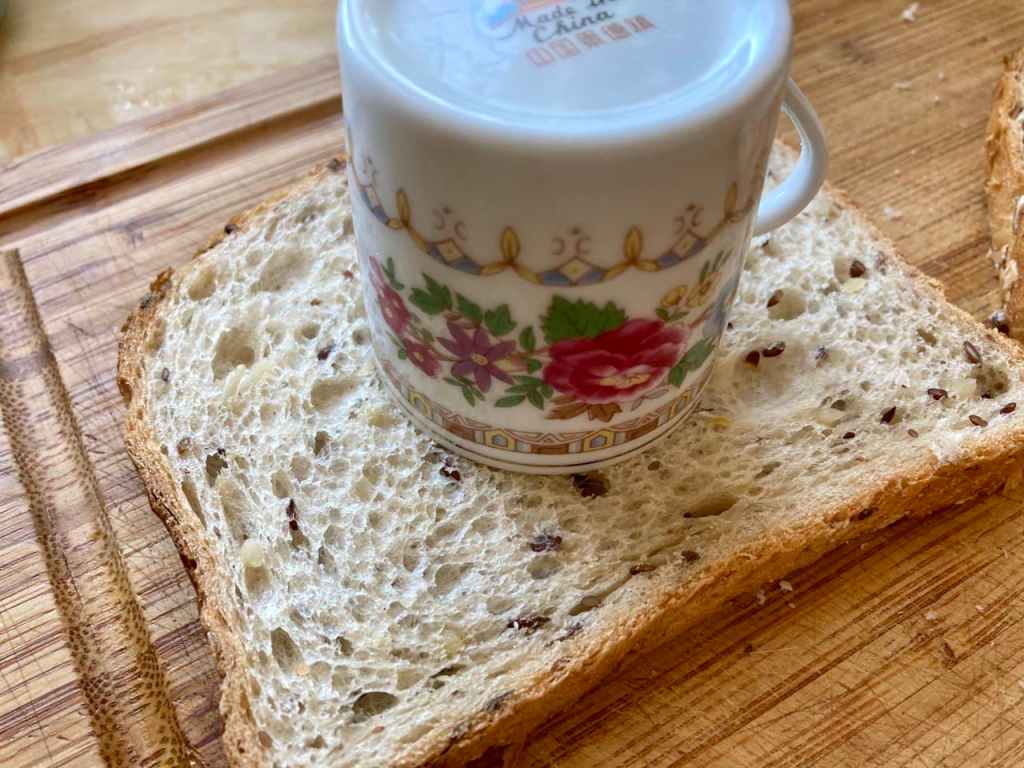
  2. Line a loaf pan with baking paper, or grease and flour the inside.
  3. Grate one lemon to remove the zest, then cut it in half and juice it.
  4. Pour the milk into a small or medium mixing bowl and add the zest and juice of one lemon. Set aside for several minutes to thicken.
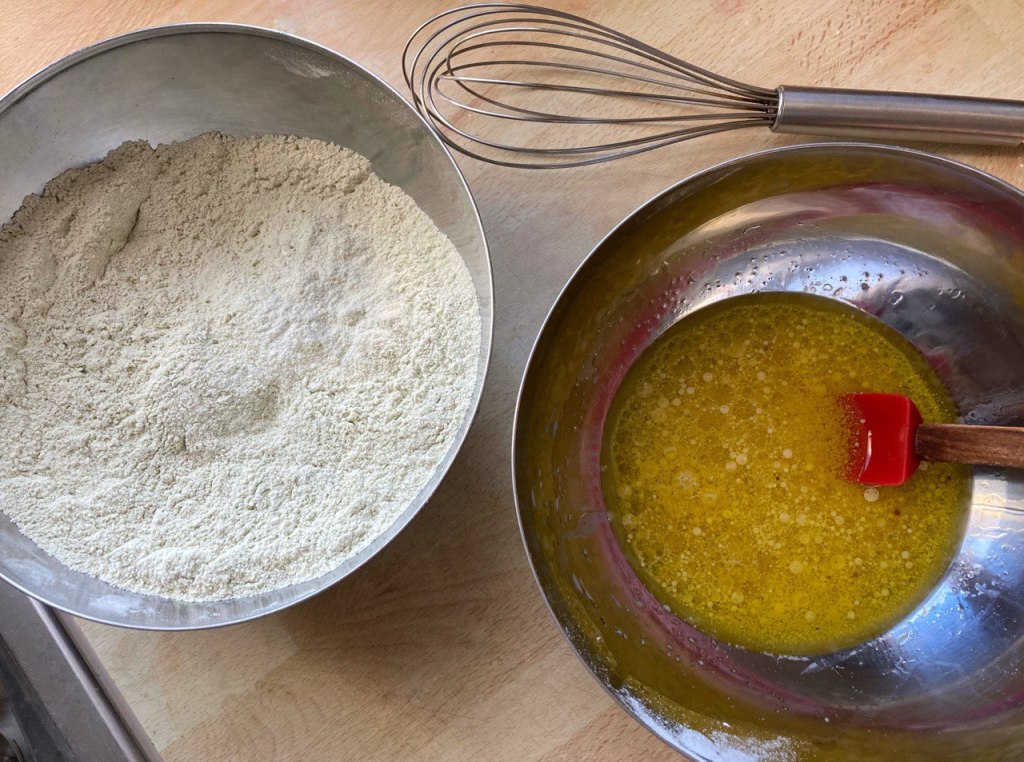
  5. In a large mixing bowl, combine the flour, granulated sugar, baking powder and salt. Stir with a whisk until well combined.
  6. Add the oil and vanilla extract to the milk and lemon mixture and stir.
  7. Pour the wet ingredients into the dry ingredients and fold gently until just combined, taking care not to over mix.
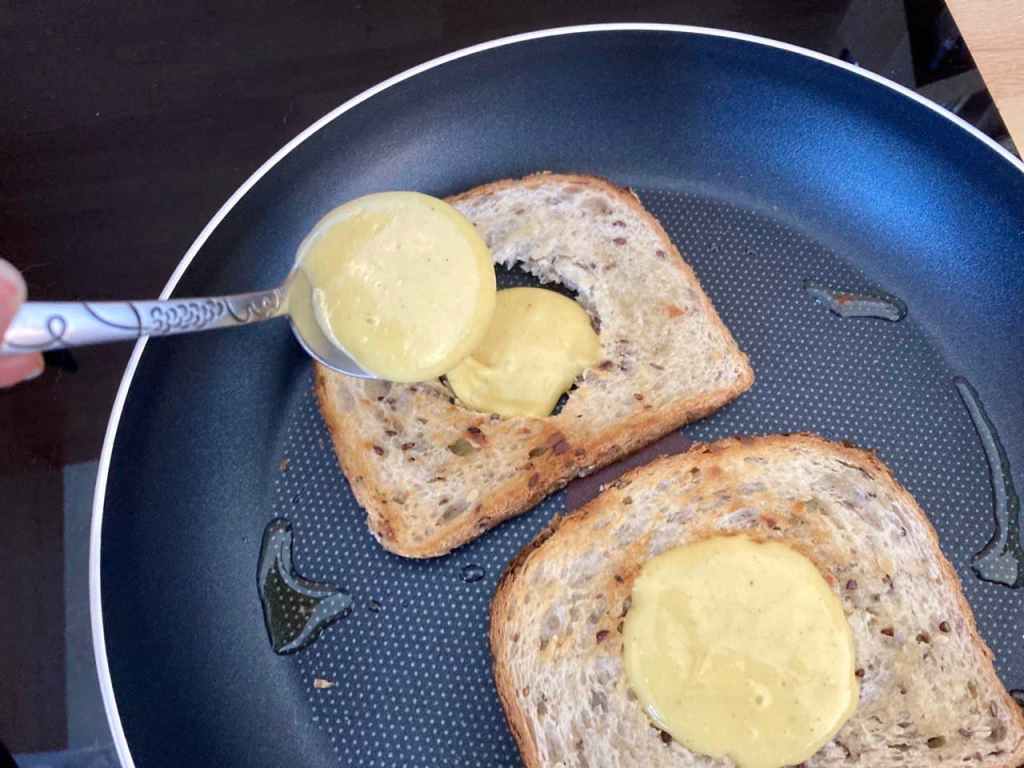
  8. Pour the cake batter into your loaf pan and place in the pre-heated oven. Bake for 40 to 45 minutes, checking with a fork or toothpick toward the end of the baking time (if it comes out clean, the cake is done).
  9. Place the pan on a baking rack to cool.
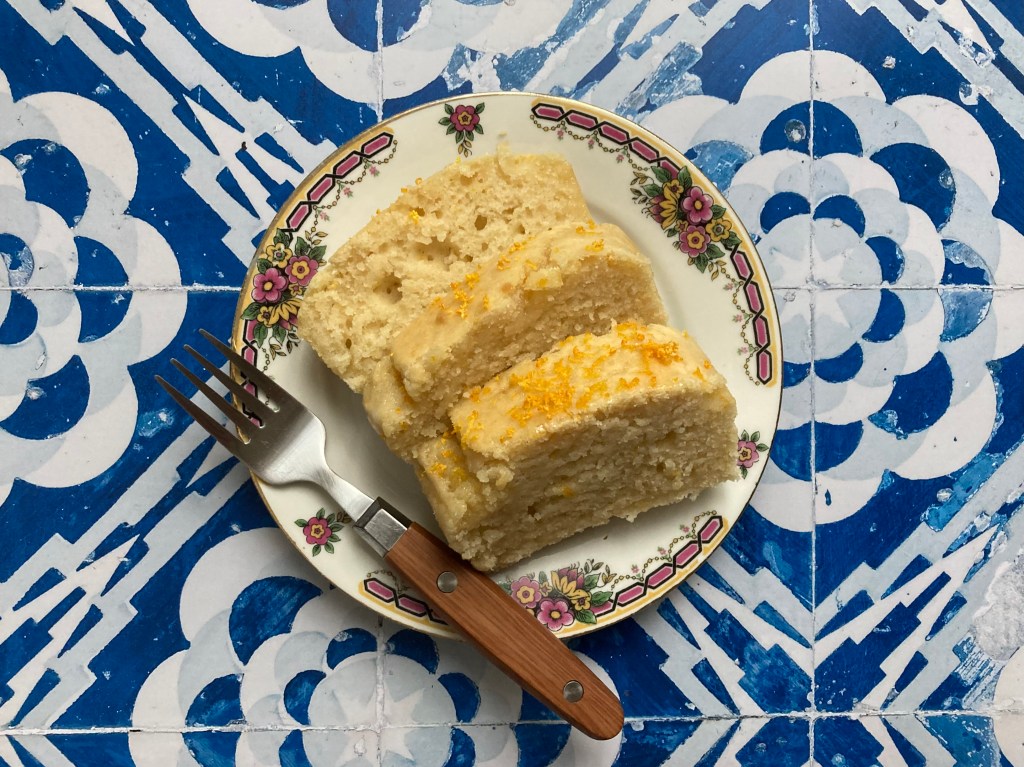
  10. While waiting for the cake to cool, make your icing. Take your second lemon, zest it (set the zest aside) and then juice it. Now combine the powdered sugar and lemon juice, stirring until you have the right consistency. If you want it to be thicker, add more sugar, and add more juice if you want it to be thinner (personally, I love to douse the cake in as much juice as possible for maximum lemon flavor!) Finally, sprinkle the lemon zest on top of the icing before it dries.

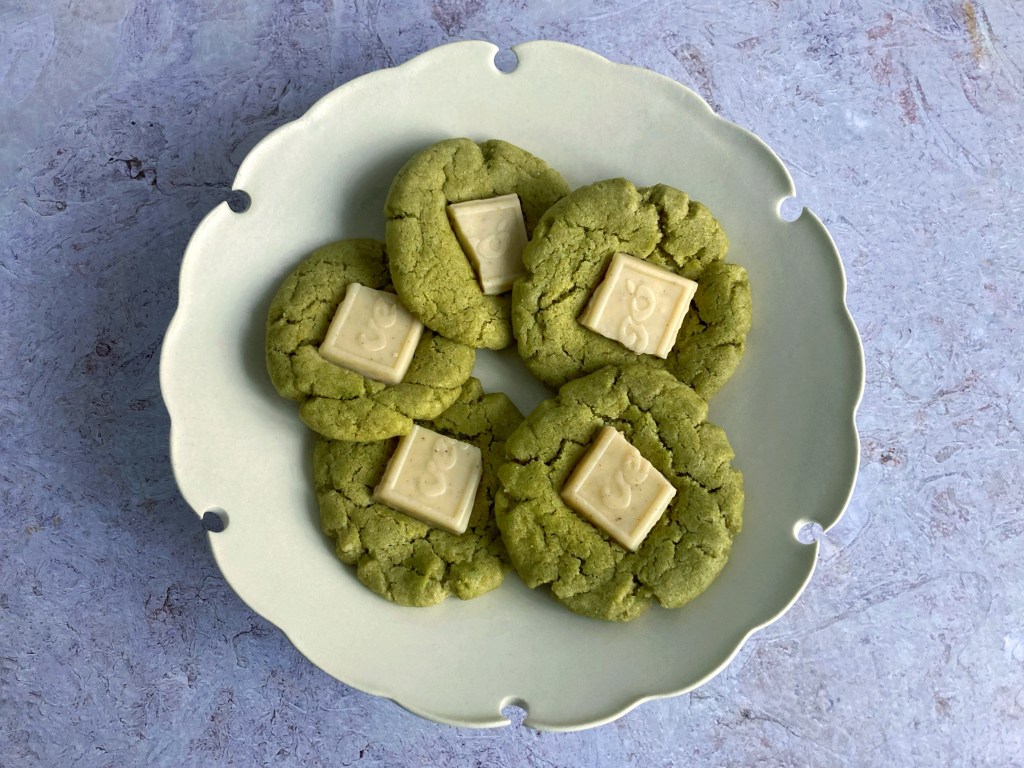
Enjoy your cake with – what else? – a cup of Earl Grey tea! Who was this Earl Grey anyway? The Internet tells me it’s this fine fellow, whose date of birth hints at his being an unknown son of Lord John Grey of Outlander fame. I mean, yes in the one case it’s a title and the other it’s a last name, but let’s just pretend that’s what happened! 🙂

Speaking of which, click here for a special Outlander recipe! Or two actually…

Italian egg toast

My mom’s birthday is in March, and her favorite film is Moonstruck (1987), starring Cher and Nicolas Cage as Loretta and Ronnie, Italian-Americans in Brooklyn who meet and, against all odds, rather abruptly fall in love. The charming story, set in and around neighborhood shops and Loretta’s beautiful family home, features a close-knit clan whose members nevertheless have their secrets. One of the most endearing characters, who doesn’t come into the plot nearly enough for my taste, is the old Italian grandpa who seems to always be walking his five or six dogs, or preparing to walk them, or coming back from walking them.

Memorable moments in this film include Ronnie meeting Loretta, his future sister-in-law, at his bakery, immediately launching into a long melodramatic rant about how his brother ruined his life, asking for a knife so he can kill himself, and then – about an hour after meeting her – knocking over his kitchen table, scooping her up and taking her to his bed.

The next night, they go to see La Bohème at the beautiful Metropolitan Opera, which I visited two years ago to take some photos for my mom.

Moonstruck is a favorite of mine too, so we tend to rewatch it every time I’m back home. The last occasion was this January, during my extended Christmas visit in Wisconsin. For some reason I noticed the breakfast that Loretta’s mother makes for her one morning while questioning her about her life: slices of bread with an egg cooked in the center of each one and topped with sautéed red pepper. It’s apparently a traditional breakfast dish in Italy (but also in other places), and is sometimes called egg-in-a-hole.

It looked fun. Could it be made vegan, I wondered? Challenge accepted!

I experimented once I got back to Paris, and as the results were quite successful, decided to share the recipe here this month in honor of both my mom’s birthday and nice mother-daughter moments.

The key ingredient in my version is a vegan scrambled-egg/omelet mix (I used Orgran Vegan Easy Egg, which you can find at Vegami in Paris, but in North America you could try Just Egg). And I added shallot and garlic to the red peppers for an extra dimension. Note that the kala namak salt is a must in this recipe, to get that sulfury egg flavor, if your egg mix doesn’t already contain it. It’s called “black” salt but once ground, it’s actually pink in color. I have this salt in ground form, which is good for incorporating it into a recipe, and also as crystals in a grinder, which is a nice way to season a dish that’s already made but just needs a bit more salt – both are available at Vegami, but you can also find the ground form at most Indian grocery stores.

Italian egg toast with red pepper

Serves two (four pieces of egg toast).

4 pieces of bread
1/4 cup (30 g) Orgran Vegan Easy Egg mix or similar
1/4 teaspoon kala namak (sulfury Indian “black” salt)
Several whole or sliced roasted (canned) red bell peppers
2 shallots
2 cloves garlic
Olive oil
Margarine
Freshly cracked black pepper
Fresh parsley or other herbs, to garnish

Combine the 1/4 cup (30 g) egg mix with 1/2 cup + 2 tablespoons (150 ml) water, and whisk until smooth. Add the kala namak salt and stir to combine. Set aside.

Begin warming some olive oil in a small frying pan over medium heat, and chop up your shallots and garlic.

Now take out the roasted red pepper (estimate how much you want based on visual quantity – you can’t go too far wrong) and slice into strips.

Sauté the shallot, garlic and red pepper in the olive oil, stirring occasionally, until the shallot and garlic is soft. Don’t add any salt at this point because the egg mixture will probably be salty enough for the whole dish.

Now get out your bread. This is the kind I like to use, a type of bread that’s solid enough not to get mushy and fall apart. I recommend bread that’s sliced with a machine (rather than you slicing it) so that the sides of each slice are nice and even and will heat uniformly in the frying pan.

Find a glass, teacup or cookie cutter to cut out a circle from the middle of each slice of bread. Be sure that enough bread is remains between the hole and the crust so that it won’t fall apart. Tip: save the cut-out parts to mop up the last delectable bits of sauce from the frying pan at the end!

Spread both sides of each slice of bread with margarine.

Grill the bread on each side until lightly golden brown, then fill the holes with the egg mixture.

Cook for a minute or two on the first side (you may wish to cover the frying pan to speed this along), and once this first side seems done (test by jiggling it with the spatula), flip it over and repeat on the other side.

Transfer to a plate and top with the pepper, shallot and garlic mixture.

Garnish with freshly ground black pepper (I couldn’t find my pepper mill so used a mortar and pestle), fresh parsley or other herb, and have some extra kala namak handy in case you want to add more salt.

Serve and enjoy! It might taste best in the company of your mother or another trusted person you can share your troubles with.

So delicious!

Rumor has it that eating this egg toast for breakfast will help you untangle any complicated messes you may have gotten yourself into the night before. But never underestimate the potential for lasting love with your fiancé’s unstable estranged brother! Basically, if you can suspend your disbelief and forget the laws of cold hard reality long enough, you too many enjoy Moonstruck.

Matcha and white chocolate cookies

Here’s an easy recipe for delectable matcha cookies that you can make for Valentine’s Day or just any old time. You can make them plain, but I find they’re especially nice and eye-catching adorned with some vegan white chocolate, such as Vegó (in Paris, you can find this at Vegami near République).

“Valentine’s Day?!” you might be thinking. “But these cookies are green!” Yes, they are, but why should Valentine’s desserts always be pink, red or white? Green is a lovely color too, and just as appropriate for love, if not more, as it’s the one corresponding to the heart chakra!

White chocolate—which as a loyal reader once pointed out, is not actually chocolate at all—sometimes melts faster than “regular” chocolate, so for this recipe I added it at the very end of the baking time. More details below…

Matcha cookies

Makes about 20 cookies

  • 2 cups (300 g) all-purpose flour
  • 2 teaspoons baking powder
  • 1 teaspoon baking soda
  • ⅔ cup (131 g) white granulated sugar
  • 1½ tablespoon unsweetened matcha powder
  • ½ teaspoon salt
  • 2 teaspoons vanilla extract
  • ⅓ cup (79 ml) plant-based milk
  • ½ cup (118 ml) neutral-tasting oil such as grapeseed or canola
  • 2½ oz (100 g) vegan white chocolate (two Vegó bars)

First, preheat your oven to 350°F (180°C). Then sift the flour, baking powder, baking soda, salt and matcha powder into a medium-sized bowl. In another bowl, combine the sugar, vanilla extract, milk and oil. Add the liquid mixture to the dry ingredients and stir gently until just combined (if it seems too dry, add more milk), taking care not to overmix.

Form balls of equal size and place on a cookie sheet lined with baking paper, pressing down to flatten them. Place in your preheated oven and set a timer for 8 minutes. Break the white chocolate squares into pieces that will fit easily in the center of each cookie and keep an eye on the timer because timing will be of the essence for the next step.

When the timer goes off, remove the cookie sheet from the oven and quickly press a piece of white chocolate down into the center of each cookie. Doing this will cause the cookie surface to crack nicely. Place the cookie sheet back into the oven and bake for another 60 seconds, long enough for the chocolate to melt just slightly and fuse with the cookie. The melting speed can vary depending on the brand. If you have one that seems to melt less slowly you can add it earlier on.

Remove the cookie sheet from the oven and transfer the cookies to a cooling rack, brown paper bag or paper towel. The cookies will be soft until they cool, so be careful to keep them flat. Store any cookies you aren’t serving right away in an airtight container, as exposure to the air can make the matcha turn brown.

Enjoy with some tea (green tea? why not!) and a Japanese novel. I recommend Haruki Murakami’s Norwegian Wood.

Variation: colorful m&m type candies can give these cookies a whole new look (perfect for Easter). I use the ones by Clarana, also available at Vegami. As the tops of the candies can crinkle with too much heat, I add them about halfway through baking. They can withstand heat longer than the white chocolate.

And if you love matcha as much as I do, you might also like my matcha galette des reines, a modern spin on a traditional French pastry.

Yukiwa plate by Yoshida Pottery via Brutal Ceramics. Trinidad photo backdrop by Fondos para Fotógrafos.

Christmas sandwich

What do you do if you like Christmas well enough, but just can’t be bothered to make a whole elaborate Christmas dinner? Or what if you have to travel or go to work on Christmas day and can only bring a sandwich lunch? Today’s post is the answer – you make a Christmas sandwich!

This recipe was inspired by a product, Vantastic Foods soy protein, that I got from Vegami (formerly Un Monde Vegan) in Paris as part of my partnership with them. When I saw the package on the shelf, I wondered how soy protein could be made into a Christmas dish. The photo on the package seemed to suggest a sandwich was the way to go. Could there be such a thing as a Christmas sandwich? I asked myself. Challenge accepted!

Next, I had to figure out what kinds of “Christmasy” ingredients could go together with this soy protein in a sandwich. Cranberry sauce came to mind, and cheese… in the end, this became a fusion dish, with the cranberry sauce we North Americans are so fond of, plus French camembert-style cashew cheese, the kind with a rind (I used L’Affiné de Margot by Les Nouveaux Affineurs) and of course the quintessentially French baguette. I added bitter greens to offset the sweetness of the cranberry sauce. Incidentally, this sandwich idea is what inspired my most recent recipe: homemade cranberry sauce made from dried cranberries, for people living in places without fresh/frozen whole cranberries.

If you don’t have time to make cranberry sauce, you can substitute IKEA’s lingonberry jam.

Christmas sandwich

Makes two sandwiches.

  • 1 baguette or submarine sandwich bread
  • 1½ cup dry soy protein or 9 oz (250 g) seitan (I recommend Lima Gourmet Grill)
  • 1 recipe hatcho miso gravy (see below)
  • 4.5 oz (120 g) vegan camembert-style cheese with rind
  • 1/2 cup (118 ml) cranberry sauce or lingonberry jam
  • Handful arugula or other bitter greens

Hatcho miso gravy

Makes about 2 cups (473 ml) of gravy.

  • 1/4 cup flour
  • 2 tablespoons nutritional yeast
  • 1 teaspoon garlic powder
  • 1/4 teaspoon black pepper
  • 2 cups (473 ml) vegetable broth
  • 2 tablespoons soy sauce
  • 1/2 teaspoon Dijon mustard
  • 1 tablespoon hatcho miso paste (strong/dark miso)

Start by soaking the soy protein chunks in hot water in a small bowl. Cover the bowl and let sit for at least 10 minutes.

Make the gravy. Toast the flour, nutritional yeast, garlic powder and pepper in a dry saucepan for a few minutes on medium heat. Then add the broth slowly, whisking constantly, until incorporated. Now whisk in the soy sauce and mustard. Reduce heat to low and simmer until thick.

Dilute the hatcho miso in a small amount (maybe 1/3 to 1/2 cup) of hot water, stirring and breaking the miso up with a spoon. Some of the miso will settle at the bottom of your bowl so stir thoroughly to get it all.

By now the soy protein should be fully hydrated. Drain and squeeze out the excess water with your hands once the soy protein has cooled enough. Add the miso mixture to the gravy and combine the soy protein and gravy in a skillet. Simmer for another 10 minutes or so until the soy protein has absorbed the gravy.

Cut two lengths of baguette, one for each sandwich. Slice the bread lengthwise and cover with a layer of the soy protein in gravy.

Slice the cheese lengthwise. You’ll need about three slices for each sandwich.

Cover with the slices of cheese, which will melt a little.

Add some cranberry sauce on top of the cheese.

Finally, top the cranberry sauce with the bitter greens.

And here’s your yummy Christmas sandwich!

Cranberry sauce for expats

When the holiday season comes around, Americans and Canadians living abroad often find themselves with a dilemma: cranberry sauce, or even just the (whole, uncooked) cranberries you would need to make your own sauce from scratch, cannot be found in every country. And cranberry sauce is a cornerstone of Thanksgiving and Christmas dinners. So this is a truly serious (first-world) problem. 😉

Of course, there are sometimes ways to get imported cranberry sauce from local stores specializing in North American foods. But this option is always expensive, and you might not be able to get to the store if it’s remote or has limited opening hours, or if you don’t live in a major city.

Having lived in France for over 12 years now, I’ve missed having cranberry sauce over the holidays many a time. But this year, I decided to try an idea that popped into my head: why not make a sauce from dried cranberries, which are abundantly available here in Paris at organic and now even mainstream grocery stores? To extend the tart, fruity flavor, I added some lingonberry jam (from IKEA), which has a similar flavor as cranberry, but any red jam will do. Finally, I mixed in some red wine, spices, orange juice and zest and fresh grated ginger.

I gave it a shot yesterday and was very pleased by the results. Read on for the recipe!

Cranberry sauce

Makes a little over 1 cup (236 ml) of sauce.

  • 1 cup dried cranberries
  • 1/2 cup (118 ml) water
  • 1/4 cup (60 ml) orange juice
  • 1/4 cup (60 ml) inexpensive red wine
  • 2 tablespoons red jam (raspberry, strawberry etc.)
  • 1 teaspoon grated orange zest
  • 1/2 teaspoon grated ginger root, or more to taste
  • 1/4 teaspoon ground cinnamon
  • 1/4 teaspoon ground black pepper
  • small pinch salt

Grate your orange(s), squeeze to obtain the juice, and grate your ginger root (remove the skin with a spoon). Roughly chop the dried cranberries – or alternatively, process the sauce at the end to make it smoother – and add these to a medium-sized saucepan along with all the other ingredients.

Stir all the ingredients together while heating over medium heat. When the mixture is just starting to boil, reduce heat to low and simmer, stirring occasionally, until the sauce has thickened (maybe 5 to 10 minutes). Taste and adjust the ingredients as necessary – you may wish to add sugar or mix in more jam if it’s too tart.

As the sauce cools it will thicken further (above, the sauce just after taking it off the heat). Allow to cool fully, then transfer to a serving dish or storage container for the fridge if you won’t be using it right away.

Serve chilled or room-temperature as a condiment for your favorite holiday dishes (lentil Wellington, Tofurkey roast, stuffing and green beans or mashed potatoes with gravy).

You might also like to try it in a dessert, in a mixed-fruit turnover or an apple crumble, topped with vanilla ice cream or whipped cream.

Variations: Add additional spices (nutmeg, allspice, cloves) and other dried fruit such as apricot or fig. To make it into a savory chutney to serve with cheese and baguettes, add some sautéed shallot and a dash of tamari.

Red kuri squash cookies

Here’s an easy fall recipe that celebrates my very favorite vegetable, red kuri squash! Its French name is potimarron, which describes its unique flavor – a cross between pumpkin (potiron) and chestnut (marron). But if you can’t find it, you can also use pumpkin, butternut or another non-stringy squash for this recipe, working either with a prepared purée or one that you make yourself.

These yummy, cozytime-comfort cookies with warming spices are relatively low in sugar, but in my opinion the chocolate chunks make up for that. Feel free to add a bit more sugar than the amounts given below if you have a sweet tooth.

Red kuri squash cookies

Makes 15-18 cookies, depending on size

Wet ingredient mixture
1¼ cup squash purée (red kuri squash, pumpkin, butternut squash etc.)
½ cup coconut oil, other vegetable oil or margarine
⅓ cup brown sugar
⅓ cup white sugar
1 teaspoon vanilla extract

Dry ingredient mixture
2½ cups all-purpose flour
3 teaspoons baking powder
2 teaspoons ground cinnamon
2 teaspoons ground ginger
½ teaspoon nutmeg
½ teaspoon salt
½ to ¾ cup chocolate, roughly chopped

Since prepared squash purées are few and far between in France (you can get pumpkin purée imported from the US, but it’s super expensive), I just make my own. I love red kuri squash for this because its skin is so fine that there’s no need to remove it, especially if it’s organic.

To make a red kuri squash purée, I usually bake it in a shallow glass baking dish with water, as shown above, after removing the seeds. Around an hour at 400°F (200°C) should do it. You can of course do this step a day or two before making the cookies. Otherwise, lower the temperature to 350°F (180°C) to prepare the oven for the cookies.

After the squash is baked, you ideally blend it in a food processor, skin and all, along with the rest of the wet mixture ingredients (oil, sugars, vanilla extract). In my case, having moved so recently, I couldn’t find the blade for my processor and had to mash it by hand using a fork. I left out some of the skin, since it’s harder to mash this way. But I like the way the dark orange flecks of skin look in the finished cookies.

After the squash and wet mixture ingredients are blended together, transfer them to a large mixing bowl and add the dry ingredients. At this point you may find it easier to mix and knead it together with your hands, taking care not to work it too much so the dough won’t be tough.

Finally, roughly chop your chocolate – either a chocolate bar, large chips such as these hazelnut ones from the Vegó brand (available at Vegami in Paris or online), or regular small chips – and mix them into the dough.

Form evenly sized balls with the dough and flatten slightly. For me, the balls didn’t really spread while baking, so you can probably place them fairly close together. Put in your oven, preheated to 350°F (180°C), and bake for around 15 minutes. Ovens vary though, so check earlier than this to see if yours bake faster.

Remove from oven and allow to cool. Enjoy them with some tea!

Recipe adapted from this one by Nora Cooks.

Artisanal blue ceramic plate by French ceramicist Anaïs Trivier.

Turmeric chai latte

Today I’d like to share a recipe for one of my favorite warming comfort beverages that’s perfect for a rainy day or just whenever you need a little boost physically or to your mood. And not only is turmeric in warm milk with chai spices delicious and calming (try it in the evening at bedtime), but it’s also kind of a superfood with health benefits.

Turmeric has very potent anti-inflammatory properties, helping prevent or alleviate inflammatory conditions such as arthritis and stroke. It contains curcumin, a powerful compound that’s been shown to inhibit the growth of certain types of cancer, from cell mutation to metastasis, killing cancer cells without harming your healthy cells. Many sources recommend taking one teaspoon of turmeric per day, which is why I put a full teaspoon in my turmeric chai latte, but you can definitely use less if the taste is too strong for you, especially at first. I found that the flavor grew on me and I was able to have more of it at once over time. The other spices and the sweetener in this drink also help make the turmeric more palatable.

The exact spices (and quantities thereof) you use in this latte are up to you, but don’t skip the black pepper because it greatly enhances your absorption of the turmeric.

Just one thing to be careful of… turmeric’s bright yellow color is almost impossible to get out of fabric and other porous materials! So be sure not to let this chai latte splash on your clothes or get onto your kitchen towels. Similarly, don’t put anything containing turmeric into a plastic container.

The recipe below is for one serving.

Turmeric chai latte

  • 1 cup (240 ml) plant-based milk such as oat or soy
  • 1 teaspoon ground turmeric, or less to taste
  • 1/4 teaspoon ground black pepper
  • 1/4 teaspoon ground ginger
  • 1/4 teaspoon ground cinnamon
  • 1/4 teaspoon ground nutmeg
  • 1/4 teaspoon ground cloves (optional)
  • 1 teaspoon agave syrup, other liquid sweetener or sugar, or more/less to taste
  • vegan marshmallows (optional but nice!)

Begin by heating up your milk, either on the stovetop or in a microwave, to just below a simmer. Then either turn off the heat or reduce it to very low.

Add the turmeric and other spices.

Whisk everything together to make sure none of the spices form clumps, and to make it a bit frothy.

Now add your agave syrup or other sweetener. Taste and adjust the spices and sweetener to suit your taste.

Serve in a glass or ceramic container that’s non-porous enough not to become stained yellow by the turmeric. Top with a sprinkle of cinnamon or any of the other spices in the drink.

And to make this latte into even more of a treat, why not top it with some marshmallows? I used my very favorite vegan vanilla marshmallows (from Ökovital, available at Un Monde Vegan in France) and sprinkled more cinnamon on top.

Apple pie toast

Every year when spring comes around, I find myself suddenly coming back to life after months of a dark, dreary existence that’s gone on so long, I’ve forgotten it’s possible to feel different. All at once I’m able to float outdoors, light and unencumbered by the heavy, hateful coat that’s been my constant companion as long as I can remember. The world is fresh and new, I am fresh and new and an unsuspected life force appears, motivating me to get out of bed, do things and make plans.

It’s all the more cruel when nature realizes it launched spring too early and takes it back for a couple more weeks. That happened recently – after a glorious, wonderful last week of March, during which I felt like a different person, cold weather and colorless skies returned for days and days and days, dousing my inner light.

Clearly, the sun and warmish weather play an enormous role in my well-being. I’m kind of like a solar-powered calculator, malfunctioning or just shutting down when there isn’t enough sunlight. Does this mean I should move to Ecuador? Probably.

Anyway, it was during the bitterness of this time-between-springs here in Paris, as my heart stopped throbbing to the pulse of flowers and honeybees and began muttering existential complaints, that I felt the need for a comfort food of some kind. Especially for breakfast, waking up to another cold day and definitely needing some crunchy, apple-y courage to face it. Toast naturally came to mind, as did apple pie. But you can’t have both. Or can you?

Introducing apple pie toast: a very easy apple pie, or a very fancy kind of toast, depending on your point of view. You can whip it up fairly quickly, cooking the apples while your coffee is brewing, and the results are well worth it. There’s also lots of room for variation and different flavor combinations depending on the spreads you use.

Happily, the weather has turned nice again (for good this time, let’s hope), but I’m glad to have come up with this chilly-season comfort breakfast while awaiting spring’s return.

Apple pie toast

Makes enough for 2 to 3 pieces of toast

  • 1 apple (I prefer a green, tart kind like Granny Smith)
  • Juice from half a lemon
  • 3 teaspoons sugar, white or unrefined cane, or more to taste
  • Small pinch salt
  • Ground cinnamon
  • Ground nutmeg
  • Ground ginger
  • 2 or 3 pieces of sliced bread
  • Nut butter (white almond, cashew or other)
  • Optional garnish: raisins, sliced strawberries etc.

Chop your apple up into smallish cubes. If it’s organic, you can leave the skin on.

Place in a small frying pan over medium-high heat. Squeeze the juice of about half a lemon over the diced apple and stir to incorporate. If the apple seems like it’s going to stick to the pan, add a small amount (a few tablespoons) of water.

As the apple cooks, add the sugar and stir it in (I used rapadura). The sugar will caramelize a bit, so be sure to keep stirring occasionally so nothing burns.

Add a few shakes each of ground cinnamon, nutmeg and ginger. If you like, add other seasonings such as ground cloves (be careful: a little goes a long way) or tonka bean.

Take the apple off the heat once it reaches the level of done-ness that you like. For me, that’s somewhere between crisp (raw) and the texture of apples inside a traditional apple pie baked in an oven with a crust on top.

Now toast your bread. I’m still using the trusty camping toaster you first saw in my curry “chicken” salad post.

Spread some nut butter on your toast. Here, I’ve used white almond butter (which is a bit runny), but you could opt for cashew butter or something with a more noticeable flavor like hazelnut butter, speculoos spread, chocolate-hazelnut spread or even peanut butter (?). Alternatively, plain or vanilla yogurt or cream cheese would work too. If your spread has a lot of sugar in it, consider adding less sugar when cooking your apple.

Now place the cooked apple evenly over the toast, and serve. Optional garnish: I used dried strawberry, but man, are they expensive! I recommend fresh strawberry instead, or maybe raisins or dried cranberries. Consider a sprinkling of gomasio too.

Apple pie toast makes for a lovely breakfast, together with coffee or tea. Keep it in mind if you want something to amaze and delight your next overnight guest!

(Also yummy in bed if your place has circa-1912 single-paned windows and is just too drafty.)

If you try this, let me know in the comments what your favorite spread to use is!

Curry “chicken” and pinenut salad

Here’s a fun and easy salad that you can use as a sandwich filling or serve atop a green salad or in lettuce cups. It’s a vegan dish inspired by a chicken and pinenut salad sandwich I used to have at Beans & Barley in Milwaukee back in my student days. The curry adds a delicious warming dimension, the chopped celery gives a nice crunch and the toasted pine nuts lend a gourmet air.

Curry “chicken” and pinenut salad

Makes enough for 2 to 3 sandwiches

  • 6 oz. (160 g) vegan “chicken” (or substitute firm tofu, tempeh, chickpeas, etc.)
  • 1/4 cup (25 g) pine nuts
  • 1/4 cup (25 g) chopped celery
  • 1/3 cup (5 tablespoons) vegan mayonnaise
  • 3 teaspoons fresh curry powder
  • red or white onion (optional)
  • parsley or cilantro, for a garnish
  • bread, if you want to make sandwiches

Begin by toasting your pinenuts. Place them in a dry frying pan and heat over low/medium for several minutes, shaking the pan to stir occasionally. Stay right there in the kitchen during this process, so you can keep an eye on them… once they begin toasting, things can go fast and they can end up burnt in no time. Pinenuts are expensive, so it would be sad to have to throw them out. You can also chop your celery during this time (not shown).

This is the vegan “chicken” I used. You can also try this same recipe with firm tofu, tempeh, chickpeas or seitan.

It comes in the form of large chunks, which I recommend chopping into smaller pieces. The package says to cook it, but it’s actually already cooked and since this is a cold sandwich, there’s no need.

I used this German vegan mayonnaise I found at Un Monde Vegan in Paris. These days, more and more vegan and non-vegan brands are coming out with vegan mayo.

Mix the curry powder into the mayonnaise. I used 3 teaspoons for 1/3 cup mayo, but you could add less or more curry powder as you like. Make sure your curry powder is fresh, because after it sits around for a while it loses its flavor, and you don’t want to miss the punch that full-flavor curry packs in this dish.

The curry gives the mayonnaise a beautiful vibrant yellow color.

Mix the curry mayonnaise into the “chicken”, then incorporate the chopped celery and pinenuts. If you won’t be serving the salad right away, wait until the last moment to incorporate the pinenuts so they stay more crunchy. You may want to reserve some pinenuts to add as a final garnish if you’re serving this salad in lettuce cups for example.

To make a sandwich, toast some bread (this is the foldable stovetop “camping” toaster I use because there isn’t room in my kitchen for a normal toaster). 😉

Top the toast with some of the “chicken” salad, then add onion and an herb garnish, if desired. You could also serve this with lettuce and tomato. This can be either an open-faced sandwich, as shown above, or a traditional sandwich with two pieces of bread, as shown below.

Enjoy!

Variation: I recently learned of a British dish, coronation chicken, that’s quite similar to this and was invented for Queen Elizabeth II’s coronation banquet. It differs in that it has no pinenuts but does have chopped dried apricots and flaked almonds.

Raspberry cocopane pastries

Necessity truly is the mother of invention, as I learned last month when I wanted to make my annual vegan galette des rois (see my matcha version for more details). As soon as the first of January rolls around, everyone in France is seized with the desire to make one of these frangipane-filled pastries, which require a sizable quantity of ground almonds. If you don’t happen to think of it ahead of time and buy your ground almonds before the end of December, you may be out of luck. I was, at least, on the day I went out to get mine… all three stores I tried were out of stock even though it was past the middle of the month.

Ordinarily, I might have given up at this point, but I was determined to make the dessert to serve at my Biden-Harris inauguration viewing party (well, not really a party since there were just two of us, but it felt festive!) because I had a plan to make it BLUE. Yes, blue, in honor of the Democratic Party’s color. And it struck me that grated coconut could probably substitute quite nicely for the almonds and would also accommodate the blue spirulina I planned to use as a natural food coloring. It worked out really well, and I realized I’d inadvertently invented something new, which I am calling “cocopane” (as in coconut frangipane; pronounced “coco pan”).

So for this month’s recipe, I decided to experiment more with this new filling and to try pairing it with a fruit. I initially thought of banana, but then since it was to be a Valentine’s recipe, I decided to use something pink instead.

These lovely turnovers would make an excellent romantic breakfast for you and your Valentine – whether they’re human or a furry friend – but could also serve as a dessert. They’re best enjoyed soon after baking, so if you plan to have them as an after-dinner treat you could prepare them earlier in the day, up to the point where they would go into the oven, but then chill them in the fridge, preferably in a sealed container so the dough doesn’t dry out.

Raspberry cocopane pastries

Makes 4 turnovers

  • 1 prepared flaky pastry crust (keep refrigerated until the last moment)
  • 3/4 cup (50 g) dried grated coconut
  • 2 tablespoons cornstarch
  • 3 tablespoons white sugar
  • 1/4 cup (60 ml) unsweetened liquid coconut cream or canned coconut milk
  • 1 tablespoon coconut oil, melted
  • 1/2 cup fresh or frozen raspberries (or raspberry jam)
  • 1 teaspoon additional white sugar
  • 1 to 2 tablespoons powdered sugar for dusting

Preheat your oven to 350°F (180°C) and mix together the grated coconut, cornstarch, sugar, liquid coconut cream (or canned coconut milk) and melted coconut oil. If you can’t find coconut cream/milk, another unsweetened liquid plant-based cream (such as soy or rice) will do.

You now have a bowlful of “cocopane” and it should have the consistency of a moist paste. If your mixture is too dry, add a bit more coconut cream/milk, and if it’s too wet, add some more grated coconut.

Now for the raspberries… I used frozen berries and allowed them to thaw on the counter for a few hours. I then strained out the juice they released while thawing and mashed the berries lightly with a fork. I added about a teaspoon of white sugar, but you could use less or more according to taste. If you can’t find berries, you could always use prepared raspberry jam or compote (in this case, do not add sugar).

You can use the raspberry juice later as a food coloring, for example to make a pink frosting as in my Valentine’s cookie recipe or to color almost anything else pink (the juice will keep in the fridge for a few days).

Trace a few circles onto the pastry, either with a paper template or an upturned bowl. I made mine 5.5 inches (14 cm) in diameter, but the size will depend on the size of your pastry. I then pieced together the remaining pastry bits to make a fourth circle. Alternatively, you can cut the pastry into four parts and fold each one over for a more triangle-shaped turnover.

Place about a tablespoon of the cocopane onto one half of each pastry circle, leaving a border around the edge. Be careful not to overfill.

Now add some of the crushed raspberry mixture on top of that.

Fold the pastry circle over until the edges meet.

Now seal the edges firmly with a finger or thumb to ensure that they don’t come apart while baking. Some cocopane and raspberry mixture may be left over when all your pastry circles are filled (they make a nice topping for plain yogurt).

Place the pastries onto a baking sheet lined with parchment paper, and bake for 20 to 25 minutes in your preheated oven.

They’re ready when the tops are golden brown. As you can see, the one at the back left didn’t have a good seal because some of the raspberry mixture overflowed while I was closing it. The one at the back right was made from the pieced-together pastry scraps so did not stay completely together… Luckily, the powdered sugar dusting is a remedy for small flaws like these!

Allow the pastries to cool for a few minutes, then dust the top with some powdered sugar. I like to put mine through a small sieve to ensure a fine consistency.

And there you have some lovely, freshly baked raspberry cocopane pastries… the perfect thing for a very romantic Valentine’s Day breakfast!

Crunchy and flaky on the outside, soft and fruity on the inside.

Just before serving these yummy treats, hit “play” on this video:

Variations:

  • Use another type of fruit (cherries, apricot, apple or banana come to mind).
  • Color the cocopane blue with blue spirulina before adding the raspberry (your result will undoubtedly be a bit purple) or green with matcha.
  • Add a bit of rosewater to make a raspberry-rosewater version.
  • For a frangipane version, use ground almonds instead of grated coconut, and substitute soy cream and canola oil for the coconut cream and coconut oil.