Chocolate cake with azuki filling

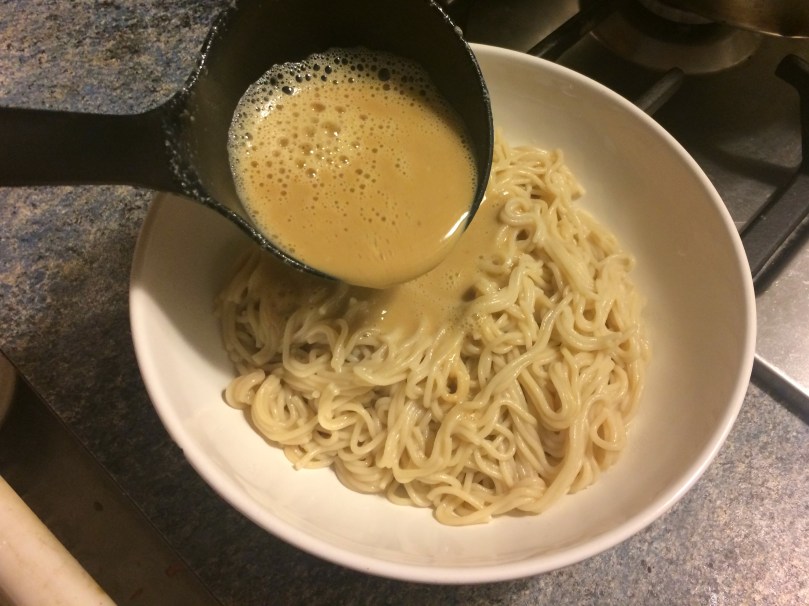
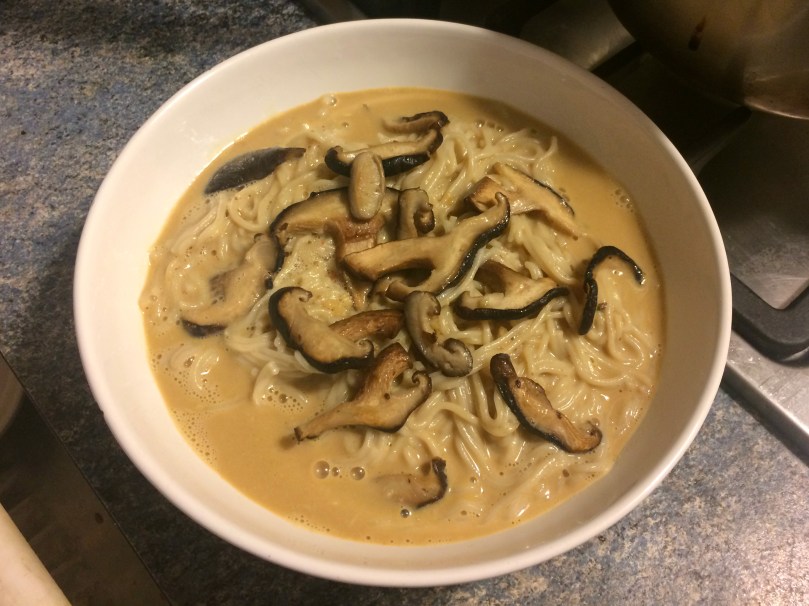
In recent weeks, I’ve been experimenting with more and more Asian-inspired flavors and ingredients. It all began when my friend Yukiko introduced me to a Japanese dish that has become one of my top favorite recipes of all time. My discovery then furthered when I got my hands on Elizabeth Andoh’s outstanding recipe book Kansha. In it, she focuses on shojin ryori, or “temple cooking”, which in line with the Buddhist principle of non-harm is plant-based. I now realize how much more there is to Japanese cuisine than the usual sushi, maki rolls and mochi that we’re all familiar with. I’ve tried about seven or eight recipes from this book so far, including cold buckwheat noodles with a tangy umeboshi sauce and herbaceous shiso, creamy/crispy kabocha squash croquettes, candied sweet potatoes and pancakes filled with red-bean jam (check my Instagram from a few weeks ago for photos of all these).

61j58mxqSzL

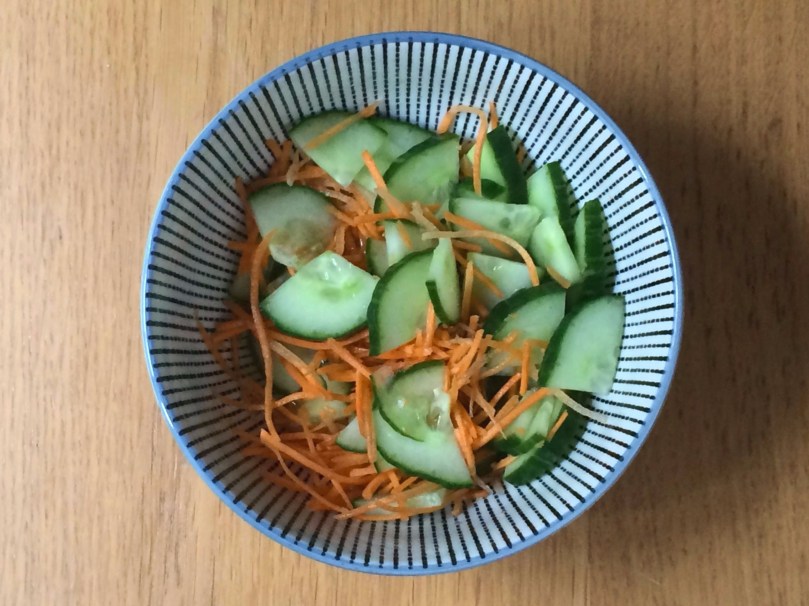
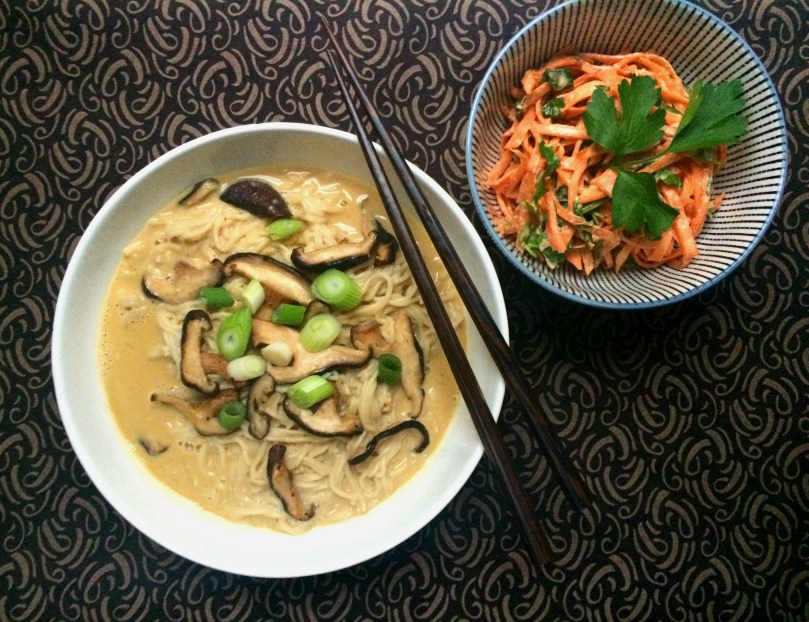
In Japanese cuisine, an effort is made to combine a range of colors, textures and flavors in each dish. Pasta with a creamy sauce is paired with a crunchy, tangy salad made of colorful carrot, cucumber or red pepper. White rice is cooked together with a few spoonfuls of black rice to become lavender, and is then studded with bright green edamame beans. Sweet preparations may include a few drops of soy sauce or a touch of miso to temper the sugary taste. Such combinations result in works of art that are pleasing to both the palate and the eyes.

It was in this context, then, that I began imagining ways of integrating these principles and ingredients into familiar Western dishes. After my discovery of red-bean (azuki) jam, I wondered how it would taste paired with chocolate. This fusion recipe is the result: a traditional chocolate layer cake with a sweet azuki filling, topped with a sprinkling of powdered sugar and kinako (toasted soybean flour).

I’m quite pleased with the way this experiment turned out. The dark, rich chocolate goes very well with the sweet paste, which gains a caramel-like dimension from the soy sauce. The kinako adds an interesting color contrast as well as a nutty, toasted flavor. And with the traditional layer cake form, it would be the perfect birthday cake for anyone who (like me!) enjoys Asian cuisines and is not a huge fan of cakes slathered in frosting. 😉

This recipe is also a good example of mindful, contemplative shojin cooking (“slow food” in contrast with today’s trends), since the azuki paste takes time and watchfulness to make. I recommend making it the day before the actual cake.

So, what exactly are azuki beans? They’re smallish red legumes with a white stripe and must not be confused with kidney beans (see below). I get mine from my local organic shop, but they should also be available online.

kidney vs. azuki

You may already have heard of azuki (sometimes spelled adzuki) beans, or red beans, being used in Asian desserts. When I lived in San Francisco, I would sometimes buy something called a mooncake, which has a red-bean filling, when I passed through Chinatown. If you live near an Asian supermarket, you may be able to get pre-made red-bean paste there. But if you’re a do-it-yourself type, like I am, or want your filling to be free from preservatives and coloring agents, or just less sweet than the ones found at stores, you can make your own with the recipe below. In making this jam, I drew inspiration from two recipes: Andoh’s and this one from the blog Just Hungry (but any errors in the following are purely my own fault).

This azuki preparation (tsubu-an in Japanese) can also be spread on toast or pancakes like jam, used as a topping for oatmeal or rice pudding, or even served with cheese in lieu of a fruit chutney. The blogger behind Just Hungry recommends enjoying it with ice cream and strawberries, which does sound pretty good.

Azuki filling

Makes about 2¼ cups of filling. Can be made a day or two before the cake.

Ingredients

  • 1 cup (200 g) dry azuki beans
  • ¾ cup to 1 cup (150 to 200 g) granulated sugar
  • 1 teaspoon (5 ml) soy sauce, or more to taste

Equipment needed: food processor or high-power blender (alternatively, a potato masher  or fork and some patience).

soak.jpg

Place the dry beans in a bowl and add enough water to cover them. Allow to soak for 24 hours (keep in the fridge for best results). The beans will lose their red color as they soak. If you don’t have time for this soaking step, you can skip it, but the cooking process will take longer.

01

At the end of the soaking stage, rinse the beans and transfer them to a large stock pot. Fill  it with enough water to cover the beans (never add salt when cooking legumes, except at the very end) and bring to a boil. Allow to boil for one minute, then drain and rinse the beans with cold water.

Return the beans to the pot, refill with fresh water and bring to a boil a second time. Allow to boil for one minute as before, then drain and rinse the beans again. Rinse and wipe the inside of the pot with a sponge to remove all residue. Although lengthy, this process ensures that all impurities are removed. If you have plants, you can save the cooking water to water them with once it’s cool.

Now you’re ready to cook the beans for real! Return them to the pot and refill with fresh water to about 1 inch (2 cm) above the beans.

02

Bring to a boil, then reduce the heat to low and simmer, covered, until the beans are soft enough to crush between your thumb and pinky finger (45-60 minutes). If you did not soak the beans before cooking, this step may take longer. Check them every once in a while during this time, adding more water if the level goes down too low and they aren’t done yet. If you have a table in your kitchen, this is a good time to take a seat and delve into a good book.

When the beans pass the thumb-and-pinky test, drain them but reserve about a cup of the cooking water.

03

Return the beans to the pan and add about ½ cup of the reserved cooking water back in, or more as needed—the idea is to have just enough to keep the beans from getting too dry and sticking.

Add the sugar and continue to simmer, stirring occasionally with a wooden spoon, until you have a thick syrupy sauce (about 15 minutes). The beans will darken in color once the sugar is added. If at any point they become too dry, add more of the reserved cooking water in small amounts (¼ cup at a time).

04

Now add the soy sauce, stir to incorporate, and taste. If it seems too salty to you, add a bit more sugar. If it seems too sweet, add a bit more soy sauce, or ¼ teaspoon salt if you need more saltiness but want to limit the soy sauce flavor. Simmer for a minute or two more, then remove from heat and allow to cool.

05

Transfer the beans to a food processor or high-power blender and pulse or purée until you have a smooth, paste-like consistency.

06

Mine ended up looking like this because the little food processor I use is not super powerful. You could also opt to mash it with a potato masher or similar. It’s fine if a few chunky bits remain.

Store the azuki filling in the refrigerator and use within 5 to 7 days.

Chocolate cake

Makes two cake layers.

Ingredients

  • 3 cups (375 g) all-purpose flour
  • 1¼ cup (250 g) white or raw cane granulated sugar
  • 1 teaspoon (7 g) salt
  • 2 teaspoons (9 g) baking soda
  • ½ cup (40 g) unsweetened cocoa powder, sifted
  • 3 teaspoons (15 ml) vanilla extract
  • ¾ cup (177 ml) neutral-flavored oil, like sunflower or canola
  • 2 tablespoons (30 ml) white vinegar
  • 2 cups (500 ml) cold water

Decoration

  • a few tablespoons powdered sugar
  • a few tablespoons kinako (roasted soy flour), optional

Equipment needed: two 8-inch (20-cm) round cake pans (or bake them in two stages using one pan—be careful to divide the batter evenly). You can use pans with a larger diameter if you like, but the layers will be lower and the cake shorter than what you see in these photos.

01

First, preheat your oven to 350°F (180°C). Combine all the dry ingredients in a large mixing bowl. I used a raw cane sugar in this case, but regular white granulated sugar is fine.

02

Combine the liquid ingredients in a smaller bowl and whisk to combine.

03

Prepare your cake pans by lining them with some baking paper. Apply a bit of oil to the pan first to make the paper stick. I like to leave little “handles” like these on the sides to be able to dislodge the baked cakes more easily.

04

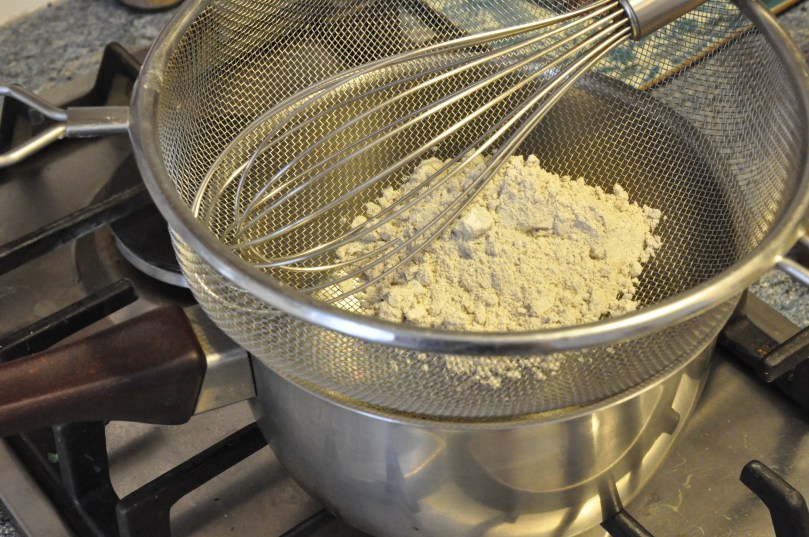
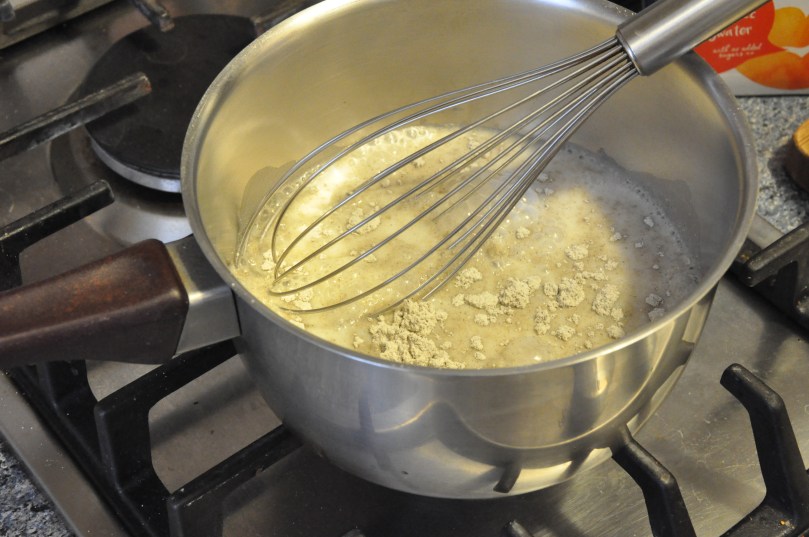
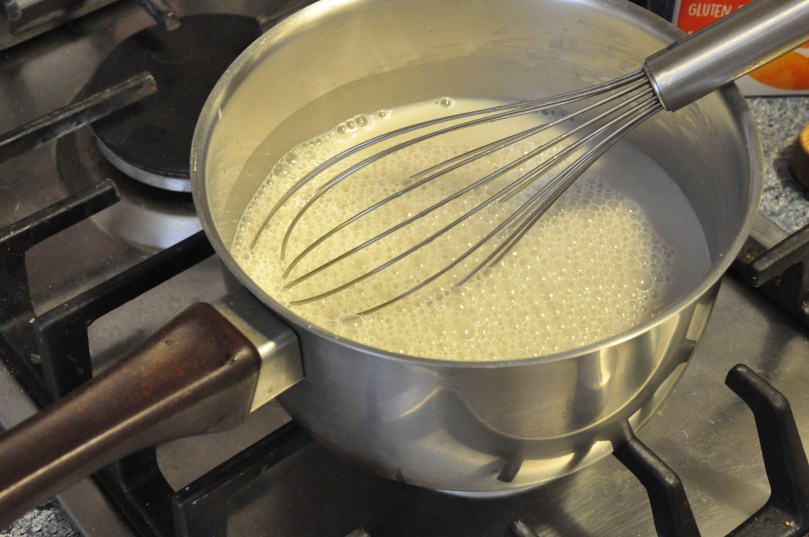
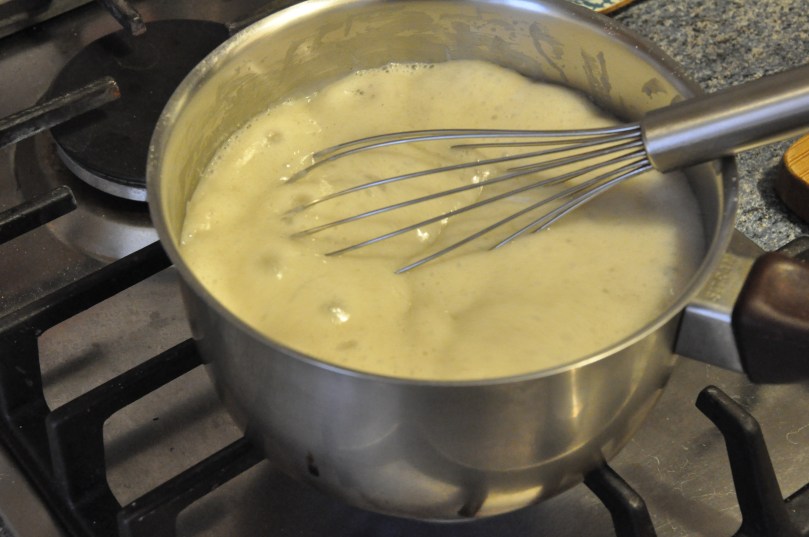
Whisk the dry ingredients together and then add the liquid ingredients to the bowl with the dry mixture. Whisk everything together just until combined, being careful not to over mix as this would make the cake stiff.

05

Transfer the batter to your prepared baking pans, diving it evenly between the two, and place in the oven. Bake at 350°F (180°C) for about 20 minutes.

06

Check for doneness at this point by inserting a toothpick or fork into the center of the cakes. If it comes out clean, the cakes are done. If not, put them back in the oven for another five minutes and check again. When fully baked, place them on a baking rack or stovetop to cool. Allow the cakes to cool completely before attempting to remove them from the pans.

07

You will notice that each cake layer has a domed shape. The tops will need to be leveled before you can assemble the two layers.

08

Using a large knife, carefully slice off the top of each cake, depositing the pieces you cut off into a bowl. Crouch down to look at the cake from the side, at tabletop height, to check whether it’s even enough.

09

It will look something like this. Remove the baking paper from underneath it and transfer it, cut side facing up, to a clean plate.

10

Apply the azuki filling thickly, spreading it with a spoon or large knife to ensure that it covers the surface evenly. Reserve a small amount to fill in any gaps that remain in the sides once you’ve placed the other cake layer on top.

11

Now carefully place the other cake layer, cut side facing down, on top of the filling. The cake will have a nicely defined edge along the top. With a frosting knife or flat spatula, fill in any gaps between the two layers with more azuki filling and smooth out the sides. Cover the cake with a cover or an upside-down salad bowl until just before serving. Powdered sugar tents to “melt” into the surface of a cake, so if you apply it ahead of time you will most likely have to do it again and the results will not be as nice. If you will be serving the cake the next day, keep it in the refrigerator until about an hour beforehand.

12

A few minutes before serving the cake, apply the powdered sugar. I recommend using a sieve such as this one, or a sifter of some kind, to prevent any large clumps of sugar from falling on the surface and ruining the powdered effect.

13

You can use more sugar than this if you like. It depends how opaque you want the surface to be.

01

After the powdered sugar, use the same method to sprinkle some kinako on top. Or if you prefer, you can apply the kinako first and then the powdered sugar. It depends which color you would like to be more prominent.

02

And now you’re done!

03

04

06

05

After serving, cover the remaining cake and place it in the refrigerator (without preservatives apart from sugar, the homemade azuki paste can go bad if left too long at room temperature).

Variations: Use the azuki paste as cupcake filling: after filling the cupcake cups half-way full with batter, deposit a small dollop of azuki paste in the center and push it down until it’s submerged by the batter. Also try it as a frosting for the top of a single-layer cake, or as a spread for toast, etc. as mentioned in the azuki filling recipe above.

Tofu bánh mì

Vietnamese food has been on my mind a bit lately due to the recent opening of a great new vegan restaurant in the 9th arrondissement, La Palanche d’Âulac. I had lunch there a couple weeks ago and fell in love! Scrumptious food (noodles, egg rolls, soups, coconut desserts) and a dining room that manages to be both spacious and cozy at the same time. And it is of course always very nice to be able to choose what actually appeals to you on the menu of an Asian restaurant rather than having to select from only two or three items that happen not to contain oyster sauce. Paris did already have a vegan Vietnamese restaurant, Vietnam in Paris, but for some reason it didn’t win me over like this new place has. If you live in Paris or will be visiting, definitely put La Palanche d’Âulac on your list.

So today I thought I would bring you an easy but delicious Vietnamese recipe that also happens to have a French connection. As you may already be aware, Vietnam is a former French colony—from the late 19th century to 1945, together with what is now Cambodia and Laos, it formed French Indochina. During this time, the colonizers introduced bread to the region and this fusion sandwich featuring traditional Asian ingredients was eventually born. The name bánh mì literally means “wheat cake” and so is the Vietnamese word for bread, as I understand it, but outside of Vietnam, the term is used to refer to this iconic and so very delicious sandwich.

If you have a Vietnamese or general Asian grocery store in your area, you can try looking for Vietnamese baguettes, which are made with added rice flour and so differ a bit from the firmer, crustier traditional French baguettes. But any baguette-shaped bread will work. A must for this recipe is the toasted sesame oil—be sure not to buy untoasted sesame oil by mistake because it’s key to this sandwich’s yumminess.

Since the various components of this sandwich can easily be marinated ahead of time, it’s ideal for bringing to a picnic or a day of hiking. Just assemble it shortly before leaving to ensure that the bread doesn’t get too soggy (you may also want to bring the “sauce” or soy-sesame marinade along in a separate container to add just before serving).

Tofu bánh mì

Makes two sandwiches

  • 7 oz (200 g) firm tofu
  • 1 long baguette or 2 submarine sandwich type buns
  • 1/2 cup (50 g) carrot, shredded/grated
  • 1/2 cup (75 g) cucumber, sliced thinly and chopped into quarters
  • 1/4 cup (60 ml) rice vinegar
  • 1 green onion/scallion, chopped into rounds
  • small bunch fresh cilantro (or coriander in UK English)
  • 1/4 cup (60 ml) soy sauce or tamari sauce
  • 1/4 cup (60 ml) toasted sesame oil (be sure it’s the toasted kind)
  • 2 cloves garlic, minced
  • 1 teaspoon Sriracha or other hot sauce
  • a few tablespoonfuls vegan mayonnaise
  • 1 or 2 limes


IMG_4792

The first thing you’ll want to do is get your carrot and cucumber marinating. Shred or grate the carrot and chop the cucumber into small pieces. Place in a smallish bowl and add 1/4 cup (60 ml) rice vinegar. Stir the veggies a bit with a fork to make sure they’re evenly covered by the vinegar. Set aside and take note of the time, as this should marinate for about an hour (longer is okay too).

IMG_4798

Next you’ll be preparing the tofu for its marinade.

IMG_4802

With a non-serrated knife, chop the tofu into slices as shown. Be careful not to cut overly thin slices as the tofu could break apart. Each sandwich will get three or four of these slices.

IMG_4815

In a non-stick pan over low heat and without any oil (this makes it firmer — also there will be plenty of oil in the marinade!), brown the tofu about five minutes on each side until golden as shown and slightly crispy.

IMG_4806

While you’re waiting for the tofu to brown, prepare the tofu marinade. Combine the soy sauce, toasted sesame oil and hot sauce, and then stir in the two minced garlic cloves.

IMG_4809IMG_4820

As soon as the tofu is done browning, transfer it to the soy sauce and sesame oil marinade and toss a bit to coat evenly. Allow to marinate for the remainder of the time that the veggies are marinating, or longer, but the tofu should ideally marinate for at least a half hour. Stir them halfway through, changing the positions of the tofu slices to be sure that they all get to soak up some of this magical marinade.

IMG_4821

Once the marinating step is finished, you can begin to assemble your sandwiches.

IMG_4834

With a serrated knife, slice a length of baguette (this one was about 8 inches/20 cm long), taking care not to cut entirely through to the other side as having one uncut side helps keep all the fillings in. Spread the bottom part with some mayonnaise and squeeze a bit of lime juice over the top. Alternatively, you could mix the mayonnaise and lime juice ahead of time, but the result will be much the same.

IMG_4836

Add three or four slices of marinated tofu, depending on the size of your bread and how stuffed you want the sandwich to be. Spoon some of the marinade over the top.

IMG_4838

Now top that with your marinated carrot and cucumber, plus some sliced green onion and fresh cilantro leaves. Make sure you’re using only half of all the ingredients for your first sandwich so that the ingredients for the second one don’t come up short!

IMG_4849 (1)

Close the sandwich, and you’re done! If you have overstuffed it and it threatens to spring open, you can secure the bread with some of those long toothpicks that have fancy decorative tops.

IMG_4858b

You can use the excess tofu marinade to stir-fry some seitan, mushrooms or other veggies for a great Asian umami dish (serve over rice or noodles). If any of the rice vinegar remains from the other marinade, you can add it to a homemade salad dressing.

Variations: Substitute or add different fillings: avocado, marinated radish, red bell pepper, etc. Experiment with a peanut-based sauce by mixing some peanut butter into the tofu marinade. Garnish the fillings with sesame seeds before closing the bread for an extra-fancy touch. For a gluten-free version, prepare everything as described (making sure that the soy or tamari sauce you use is a gluten-free one) but serve over a bowl of rice noodles.

Creamy miso ramen soup

Have you ever met a new friend and immediately felt as if you’d always known them? I experienced this not long ago when Yukiko, an online contact of mine (we first met in a group for volunteers of an international vegan organization) visited Paris from her native Japan and we got together for a smoothie in the Marais. It turned out she was planning to move to France very soon to be with her French boyfriend. As we shared impressions of Paris and discussed expat life in France, and of course the usual favorite topic of vegans from anywhere in the world—food and cooking!—the time ran short and we still had more to say. Another meetup was thus in order, and we decided to make it a culinary one so she could introduce me to one of her favorite Japanese dishes.

One chilly day not long after, she appeared at my door with a smile, bearing a cloth shopping bag full of goodies—fresh organic oranges, carrots, green onion, ginger root, vegetable bouillon and, best of all, some homemade miso that she’d brought with her from Japan! On my end, I’d stocked up on ramen noodles, sesame paste and toasted sesame oil, shiitake mushrooms and soymilk. We put on aprons, rolled up our sleeves, and set to work making the dish she had chosen: tantanmen (担々麺), a Taiwanese-Japanese fusion dish featuring Chinese ramen noodles and a Japanese-style creamy miso broth, served with a crisp carrot salad for a balance of textures in line with the traditional Japanese approach.

As we worked, Yukiko and I chatted about this and that and all kinds of things and Sésame padded in and out of the kitchen, the tip of his tail curled into a question mark, checking on our doings and trying to detract our guest’s attention to himself. We kept discovering more and more things we had in common, from similar past (mis)adventures in the romance department to literary interests and even our age—we were born the same year, exactly one month apart! In spite of all our chatter, we eventually managed to finish the dish, and sitting down to this fragrant soup at the end of the afternoon was just heavenly.

Tantanmen has since become one of my new favorite dishes. It’s the perfect comfort food for a chilly winter day, especially around this time of year when sunshine and fresh warm breezes are but a distant memory and there’s at least another month of cold ahead. The creamy miso broth with earthy garlic notes and a touch of spicy cayenne warms your tummy while the noodles fill it, the tender shiitake mushrooms and toasted sesame add an extra dimension of texture and flavor, and the tangy ginger and citrus of the carrot salad provides a burst of freshness that reminds you of the spring season that is surely coming back around sooner or later.

Since we can all benefit from a warming winter pick-me-up right about now, I decided (with Yukiko’s blessing) to share her recipe with you!

There’s some room for variation in this dish, for example substituting seitan or tofu for the mushrooms or using a different crisp vegetable (cucumber, radish or a crunchy lettuce such as romaine) in place of the carrot, according to what you have on hand.

The soup and salad may be served separately, as shown in the main photo above, but they’re best enjoyed together for the contrast of textures, so for the presentation you may opt to place the salad directly on top of the noodles, either to one side as shown in the last photo below, or all around the edges of the dish, leaving the noodles and mushrooms visible at the center.

Carrot salad with tangy sesame-ginger dressing

Serves 2 (about 3/4 cup dressing; some will be left over)

  • 14 oz. (400 g) raw carrots, julienned or roughly grated
  • small bunch fresh parsley or cilantro
  • 4 tablespoons sesame paste (tahini)
  • juice of 1 orange
  • 1 tablespoon soy sauce
  • 1 teaspoon toasted sesame oil
  • 1 teaspoon grated fresh ginger

Equipment needed: food processor or blender for the dressing, julienne peeler or other device (spiralizer, grater) for the carrot (or just cut julienne style with a regular knife)

Start by making the dressing (can be made even a day ahead). Place the sesame paste, orange juice, soy sauce, sesame oil and grated ginger in your food processor or blender and pulse until you have a creamy consistency. Taste and add more soy sauce, sesame oil or ginger if needed.

img_3791-x

Julienne the carrots, roughly chop the herbs, and toss together in a salad bowl. If you will be serving the noodle soup within the hour, you can go ahead and add the dressing, tossing to coat the carrots evenly. If you’re using a more delicate item such as lettuce or cucumber in place of the carrots, wait to add the dressing just before serving or your salad may wilt. Add the dressing a little bit at a time; you probably won’t need the whole amount, but it’s good to have it on hand in case you do! (If some remains, it makes an excellent dip for crudités, and can also work as a spread in a bánh mì type sandwich.) Transfer to serving bowls and top with an extra sprig of parsley.

Creamy miso ramen soup

Serves 2

  • 10 oz. (280 g) brown rice ramen noodles, or other noodles
  • 6 oz. (175 g) fresh shiitake mushrooms
  • 1 tablespoon miso, preferably red
  • 2 tablespoons blond sesame paste (tahini)
  • 1 cube vegetable bouillon
  • 2 tablespoons sesame oil, divided
  • 1 and 3/4 cup (400 ml) unsweetened soy milk
  • 3/4 cup to 1 cup (200-250 ml) hot water
  • 2 cloves garlic
  • 1 tablespoon soy sauce, or more to taste
  • pinch cayenne pepper
  • 2 green onions/scallions

img_3801-x

Begin by rinsing and slicing the shiitake mushrooms.

img_3805-x

Place them in a nonstick skillet or frying pan over medium heat, without any oil at this stage as the mushrooms will release liquid as they cook. As always with mushrooms, the volume will reduce considerably, so don’t worry too much about overcrowding at the beginning if your skillet is on the smaller size, as is this one in the photo above.

While the mushrooms cook, mince one clove garlic.

img_3812-x

When the mushrooms have become tender and browned, as shown, you can push them to one side and, tipping the skillet slightly, add the toasted sesame oil and minced garlic to the other side. Reduce the heat to low or medium-low, cook the garlic a minute or two, stirring gently, then mix it in with the mushrooms and remove from heat. Note that this is just my own convenience-based approach and not the way my friend did it. You can alternatively remove the mushrooms and return them to the pan again to combine them once the garlic has browned. Set the mushroom-garlic mixture aside. Ideally, keep them in the skillet and cover them so they retain some of their heat (unlike what I have done in the photo below). 😉

img_3815-x

Prepare your ramen (or other) noodles according to the directions on the package, being very careful not to overcook them because they will be heated further once combined with the hot broth at the end. If in doubt, go for al dente. Drain the noodles, return them to the pan they cooked in, cover to maintain the heat and set aside.

img_3798-x

You will now make the creamy miso broth. Combine the sesame paste, the remaining clove of garlic (minced), miso paste, bouillon cube, soy sauce (not shown) and 1 tablespoon of the toasted sesame oil in a small or medium ceramic or glass bowl. Ideally, you should prepare these ahead of time so the mushrooms and noodles don’t lose too much heat while you make this part. Heat 1 cup water in a tea kettle, but not to boiling. If you have a way to check the temperature, it should be around 158°F (70°C). Add about 3/4 cup hot water to the bowl and whisk to combine.

img_3822-x

Heat the 1 and 3/4 cup (400 ml) unsweetened soymilk on the stovetop until close to simmering (do not allow to reach a boil). Turn off the heat and quickly incorporate the miso mixture with a whisk. Important: avoid reheating after this stage, and definitely do not bring it to a boil since the soymilk would most likely separate and the health benefits of the miso (a fermented product) would be neutralized.

Add the pinch of cayenne pepper, taste, and adjust if needed. If you want the broth to be saltier, add a bit more soy sauce. Cover the broth and transfer the drained noodles directly to the serving bowls. At this point, you will want to work somewhat fast since you need to put everything together without losing too much of the heat—this is why it’s useful to have the salad already prepared ahead of time.

img_3824-x

Ladle the broth over the top of the noodles, dividing it evenly between the two bowls, until you have the right quantity of broth for a soup but the noodles can still be seen poking through the top.

img_3826-x

Add the shiitake mushrooms to the top of the noodles and ladle a bit of the broth over the top of them. Top with sliced green onions and you’re ready to serve your dish!

img_3830_d

As I mentioned above, you can serve the soup and salad separately, as shown here, or in the same bowl, as below. Encourage your guests to combine noodles and salad together in each bite. 🙂 You will want to remember to provide a spoon too!

img_3849-xb

I hope you enjoy this soup, a fusion dish that celebrates international encounters and friendship. It tastes best when made with a friend! 🙂

Variations: Instead of mushrooms, use finely sliced tender seitan or diced tofu. Substitute lettuce leaves or sliced cucumber for the carrot.

Tunisian sorghum pudding

Last weekend, I had a visit from a longtime Tunisian friend who is very dear to me, and who was passing through Paris on his way to the US. There was just enough time for a short visit. In between updating me on his family’s doings and his plans for the upcoming months, he fished some interesting things out of his bag and placed them before me.

One was a mtabga, a sort of sandwich his sister had made that same day—harissa and chopped yazoul (a delicate wild garlic) in a folded-over homemade semolina flatbread. We shared this, and it was divine, although harissa always involves some sweating and nose-blowing for me (of all North African cuisines, Tunisia’s is said to be the spiciest). Next, he produced a box of scrumptious chickpea cookies from a local bakery, which you may already have seen if you follow my Instagram. And finally, he plunked a clear plastic bag containing an unfamiliar gray flour on the table. “It’s drah,” he explained, in response to my perplexed look. This did not help me much. But we did a quick search and found that its English name is sorghum!

I don’t know about you, but sorghum is not a grain I could have identified in a line-up. I had heard of it, of course, but could not have guessed at how it is used. Turns out it is native to Africa, although the US is now its largest producer, and it’s used as both human food (in part to make sorghum molasses) and as animal fodder. It is the world’s fifth-leading grain crop. As it doesn’t have an inedible hull, it is usually consumed as a whole grain with all its nutrient-rich outer layers. It also happens to be gluten-free and is apparently a common ingredient in gluten-free baking mixes. And after making this dish, I can understand why—the flour gelled easily into a thick flan consistency without any binder.

And now a brief aside for the linguistics enthusiasts among you. The Tunisian name, درع, is sometimes transliterated dro3 with a number 3 at the end to represent the ayn, a pharyngeal consonant that is notoriously difficult for non-native Arabic speakers to pronounce—having studied the language for two years, I can confirm this! The ayn creates a sound almost like an extra syllable (although it is actually not) and, to my ears, the word comes across as something like drah-ah. Elsewhere in the Arabic-speaking world, sorghum is called سورغم, which sounds very similar to the English word. An etymology search revealed that our English word comes to us from Modern Latin via the Italian sorgo, “a tall cereal grass”.

I now bring you a recipe for an easy Tunisian sorghum dish that my friend’s mother makes. Called simply drah after its main ingredient, it’s most commonly eaten as an energy food for breakfast and so can be considered a sort of porridge. But since the consistency is similar to that of flan, I think it would also make a very nice light dessert.

I made mine with rice milk so it would have some extra natural sweetness, but in Tunisia some make it with water only. Flavorings can also vary, but I chose orange-blossom water for its subtle floral notes (ginger is another popular ingredient). In Tunisia, this dish is most often eaten topped with some crumbled halwa chamia, a dense sesame-based confectionery, but almonds and honey are another common way to enjoy it. For a fully plant-based dish, I used Bee Free vegan apple honey, and I imagine that maple syrup, agave syrup or molasses would also work well. Because the honey is so sweet, I did not put any sugar in the pudding itself, but you could add 1 or 2 teaspoons of sugar to the mixture as it cooks if you prefer a sweeter taste or don’t want to use a syrup on top.

Sorghum pudding can be eaten either shortly after it’s made (allowing some time for it to cool, as it immediately forms a skin underneath which the temperature remains molten for a time) or room temperature/chilled. Wait until just before serving before adding the almonds and syrup to ensure that the almonds remain crisp.

Tunisian sorghum pudding

Makes two servings of one cup each

Ingredients

  • 5 tablespoons sorghum flour
  • 1 cup rice milk (or any plant-based milk)
  • 1 cup water
  • 2 teaspoons orange-blossom water
  • small pinch of salt
  • 2 tablespoons flaked or slivered almonds, toasted (see directions below)
  • 2 tablespoons vegan apple honey, maple syrup, agave syrup or molasses

Equipment needed: strainer, hand whisk

dsc_0062_bdsc_0064

Begin by sifting the sorghum flour through a strainer into a medium saucepan to break up any lumps. The burner should not be turned on yet.

dsc_0065

Add the (cold or room-temperature) rice milk, water and pinch of salt and whisk to thoroughly combine BEFORE turning on the heat. Note that once the liquid heats, any additional sorghum flour added will turn into lumps and it will be next to impossible to break them up.

dsc_0066

Turn on the heat to medium and heat to simmering, stirring constantly or at least very frequently. When the mixture begins to boil, add the orange-blossom water and continue stirring until it thickens. You will want to stand right there and watch it until it’s ready, whisking to prevent the formation of lumps. It takes about five or six minutes for it to reach the desired thickness and could boil over quickly, so stay put! Make sure you have your serving bowls nearby.

dsc_0067

When it’s ready, it will look pretty much like this and be making dramatic glopping sounds as the mixture boils. When it has the consistency of a thick potato soup, it’s done. Pour it into the serving bowls right away because it begins to form a skin as soon as it’s taken off the heat.

dsc_0073

After the pudding has been poured into the serving bowls, and while it cools a bit, toast your flaked or slivered almonds. Place a dry non-stick frying pan over medium-low heat and stir or toss occasionally until lightly browned. You will want to stick around for this step too as lightly-browned can become far-too-browned or even burnt in very short order. Have a small ceramic bowl ready to transfer them to when done.

dsc_0076_b

When they look like this, they’re ready. Transfer them quickly to the bowl or (as I have done) a cutting board or other heat-resistant surface. If you leave them in the hot pan while searching for a bowl, you run the risk of the almonds browning even further.

dsc_0079_b

If the pudding’s surface seems firm (by now it should have cooled enough, but check the top to be sure), drizzle your honey or syrup on it and finish with the almonds.

img_5808_d

And there you have it! Once the honey or syrup and almonds have been added, it should not sit around too long as the almonds will gradually get soggy and the syrup watery (becoming like a flan with caramel sauce, which is not bad but not the intended presentation either). You can see this effect a bit in the photo below because I got distracted by something between the preceding photo and this one. 😉 But the taste is still good, however it looks. Enjoy!

img_5873_c

Variations: top with halwa chamia or any type of chopped nut (pistachios would be great) or even dried fruit such as golden raisins. Sprinkle some gomasio in with the nuts for a salty contrast to the sweet topping.

Short days in Scandinavia

I usually spend Christmas and New Year’s Eve either in Paris or back home with my parents and sister. But this year, for something different, I went north to Denmark, where my brother is now living. To make things more interesting (and give my trip a much smaller carbon footprint), I decided to travel there and back by train rather than flying. This took me through Germany (with stops in Hamburg and Hannover), which was fun as I hadn’t been there for a few years. And as I also spent an afternoon in Malmö, Sweden (only a half-hour from Copenhagen by train), this trip took me to three countries, two of them new to me. I love this about Europe—with these relatively small nations (compared to the US), it’s so easy to cross borders and experience other cultures and languages.

Another excuse for traveling by rail was the chance to take a train that crosses the Fehmarn Belt strait by ferry! Yes, it drives right into the ferry at Puttgarden, Germany alongside the cars and patiently waits for the boat to reach Rødby, Denmark on the other shore 45 minutes later. During this time, passengers must leave the train and go up the stairs to the upper levels of the boat, where a plethora of duty-free shops and pricey food services can be found.

When you get this far north at the end of December, the days are pretty short—the sun sets at about 3:30 pm. I was hoping that it would still be somewhere in the sky for the beginning of our ferry crossing, but some technical delays meant that we couldn’t get started until around 4 pm. So my photos are a bit dark (click on them for a larger view), but for a better look you can also check out this short video that someone made in the summer.

A good share of the vacation was spent cozily on the couch, indulging in movies with my brother and his wife and kids, with candles and plenty of popcorn (this was where the mysterious Danish hygge was to be found, for me). We watched some Christmas classics, such as A Child’s Christmas in Wales and The Shop Around the Corner, and some of our childhood favorites including Coming to America and The Muppets Take Manhattan. But there was of course also a Denmark outside waiting to be discovered!

Because I was in Copenhagen right in the middle of the holidays (plus a Monday), most museums and restaurants were closed, but I did manage to stroll through the city streets and also explore a bit of Freetown Christiania, a self-proclaimed autonomous neighborhood that happens to lie within the borders of Copenhagen. One restaurant I did get to visit (twice!) is SimpleRAW, which I highly recommend. Despite its name, it does offer a cooked burger plus another cooked dish of the day (dhal, the week I was there), and hot drinks like coffee, tea and matcha latte, of which I was very glad as it really was SO COLD outside. Their raw lime cheesecake was simply divine.

The weather was gray and drizzly most of the time, but I still managed to get some fun and colorful photos. Here’s a selection.

I took one afternoon to go and explore Malmö, Sweden, which as mentioned above is only a short train ride (more trains!) to the east of Copenhagen. Trains leave in both directions several times per hour, and the cost is only around €10. I loved Malmö, a very cute smallish town with lots of old-timey charm. It didn’t hurt that it was also a nice sunny day.

Thanks to some advance planning, I managed to visit two vegan restaurants that were not closed during the holiday period. First, Lotta Love Açaí Bar, where I had—what else?—a huge açaí bowl covered with fruit, nuts and cacao nibs. And later, Vegan Bar, which is more like a restaurant with a bar in it and offers a range of super yummy burgers, including a portobello mushroom one. I also happened upon a thrift shop with lots of cute things (candleholders, clothes and dishes that would have been perfect for my food photos). It was sad, but probably also lucky, that I couldn’t buy anything due to insufficient room in my suitcase (and my apartment!).

If you ever visit Malmö, don’t miss Lilla Torg, a little square with a lamp installation that is lit both at night and during the day, but is most interesting after sunset.

We also took a day trip to Denmark’s second-largest city, Aarhus, to visit the impressive ARoS Aarhus Kunstmuseum. Established in 1859, it is Denmark’s oldest public art museum outside Copenhagen. It has been especially attractive to visitors since 2011, with the addition of the circular skywalk installation Your Rainbow Panorama by Icelandic-Danish artist Ólafur Elíasson. Inside, we enjoyed various exhibits on multiple floors, most of them featuring Scandinavian artists apart from a temporary exhibition devoted to works by Portuguese artist Joana Vasconcelos.

The final excitement of my trip was the New Year’s Eve party with some friends of my brother, for which we made a huge dinner. My contributions included a spinach, red bell pepper and tomato quiche and some almond-apricot cupcakes decorated with toasted slivered almonds and edible gold dust. Everyone in the neighborhood was setting off fireworks the whole evening, but at midnight they multiplied their efforts by 10 and there was no break in the booming, crackling and colorful explosions of lights for a full 35 minutes.

Soon after that, I was back on the road (or rather, rail) again to return to Paris. I stopped for the night in Hannover, where I got to try out the highly acclaimed restaurant Hiller, and the next evening was home and reunited with Sésame, who greeted me with many kitty kisses.

Catalan pasta paella

9788483308868When I arrived in Barcelona earlier this year for my three-week stay, I hoped to learn a lot about the city, the region of Catalonia and Catalan language and culture. Among my most burning questions was what is Catalan cuisine exactly, and how it is different from the food of the rest of Spain?

Answers soon began to appear. One afternoon at the beginning of my stay, I entered a bookstore in the city’s old town in search of a small spiral notebook. As I browsed, I noticed a shelf of cookbooks, some of them devoted to traditional Catalan food. Aha! And I had just begun wondering how easy it might be to adapt the recipes to plant-based versions when my eyes fell on the cover of Vegana i Catalana, whose title left no room for ambiguity. Santa Eulàlia, the city’s patron saint, was clearly smiling on me. It was my lucky day!

The book is in Catalan, but as a translator who speaks French and (some) Spanish, and furthermore is always up for a linguistic challenge, I didn’t see that as any serious obstacle—Catalan is like a combination of the two. I browsed through the pages, recognizing the names of some dishes I’d already heard of (pa amb tomàquet, crema catalana) and soon forgetting my recent resolution not to buy any more new cookbooks for a while. What’s more, according to the book’s publication date, it had just been released a few weeks earlier. Who was I to question the workings of fate?

mcastells
Marta Castells

In Vegana i Catalana, author Marta Castells, a cooking instructor who focuses on healthy  cuisine and a holistic approach to food, has revisited the classics of Catalan cooking for people of the region who would like to shift to a more plant-based diet but still want to enjoy the traditional flavors they know and love.

During my time in Barcelona I also dined at the renowned vegetarian restaurant Teresa Carles. I asked the server to point out only the (vegan) Catalan dishes among the wide variety of items on the menu, and soon settled on a dish called rossejat de fideus.

img_5400b
Fideus dish at Teresa Carles

A pasta dish prepared risotto-style and served in a rustic paella pan, it included mushrooms, seaweed and the chef’s own “cocosepia” blend made with coconut and black garlic (giving the dish a darker color). It was topped with a few spoonfuls of allioli, a garlic sauce (similar to the French aïoli). It was fantastic. I was naturally quite pleased, when I returned to my copy of Vegana i Catalana, to find a very similar dish called fideuada in its pages. There was even a recipe for the garlic sauce.

Back home in Paris, I translated and tried my hand at a few of Castells’s recipes, including the fideuada. At the same time, in a quest to continue learning about traditional dishes, I ordered a used copy of Catalan Cuisine by Colman Andrews, which has recipes but is more like a treatise on the history and food culture of Catalonia. It’s a great resource offering a wealth of information, and although it contains some recipes that call for animal products, others are (accidentally) vegan and, with some creativity, most can be veganized (another challenge that I love).

Andrews informs us that the Moors were the ones who brought pasta to Catalonia, by way of Greece, back in the eighth or ninth century. Called alatria at the time by the Spaniards (from the Greek itria), pasta is mentioned in the Libre de Sent Soví (c. 1324), the first known Catalan cookbook. Today, Catalonia’s most popular native pasta is fideus (the name is thought to derive from the Arabic fada, meaning to overflow): a short, very thin noodle similar to Italian vermicelli but developed independently and prepared in a different way. Rather than being boiled in water and then mixed with a sauce, it is cooked slowly in a broth, like risotto, absorbing flavor along the way.

Marta Castells and her publisher have kindly allowed me to share my English translation of her fideuada recipe, to which I have also made a few small adapations based on what worked best for me. First, not having easy access to real fideus pasta here, I bought Italian vermicelli and needed slightly less broth than the amount in the recipe (in the book it’s 1 cup pasta to 3.5 cups of broth, and in my adaptation it’s 1.5 cups pasta to 3 cups broth—feel free to try the first set of proportions if you’re making this with actual fideus.). I also opted to brown the pasta in a dry pan instead of with oil, and finally added some black olives that were not called for in the original recipe. In the original allioli recipe, the silken tofu is marinated in the garlic, which is later removed, but I opted to incorporate the garlic and skip the marination step.

This dish has already become a new favorite for me, one I expect to make again and again. The pasta is very flavorful, having absorbed the garlicky, paprika-seasoned vegetable broth, and finishing it off under the broiler gives it a nice crispy top. Pan-roasted smoked tofu and olives give the dish robustness and aromatic depth. The garlic sauce, a revisited version of allioli with eggs (allioli amb ous), is simply divine and provides a nice textural contrast to the crispy noodles. While allioli is often described as a mayonnaise, I didn’t want to do that here because this allioli, made with silken tofu, garlic, olive oil, turmeric for color and kala namak salt (another addition of mine), is so creamy and smooth that to call it a mayonnaise, triggering associations with the store-bought kind, would be to do it an injustice.

So here, at last, is the fideuada or, as it can also be called, Catalan pasta paella!

dsc_0012

Creamy garlic sauce (allioli)

Makes 1/3 cup sauce, enough to top two servings of Catalan pasta paella

Ingredients

  • 4.2 oz (120 g) silken tofu (about 1/3 cup)
  • 1 clove garlic
  • 1 tablespoon olive oil
  • pinch kala namak (Indian “black” salt), or regular salt
  • dash ground turmeric

Equipment needed: small food processor or blender

Finely mince the clove of garlic, or crush using a garlic press. Place the silken tofu, garlic and olive oil in  a mini food processor. Add a dash of turmeric (for color—only a tiny amount is needed), and pinch of kala namak (its sulfurous flavor recreates an egg-like taste but if you cannot find this salt, regular salt is fine). Process, scraping down the inside of the bowl occasionally, until you have a homogeneous, creamy sauce. Taste and add more salt if desired. Transfer to a small bowl and chill until needed.

This sauce can also be used as a base for a creamy salad dressing or tartar sauce.

dsc_0102

dsc_0107

dsc_0023

Catalan pasta paella (fideuada)

Serves 2

Ingredients

  • 1.5 cups (125 g) egg-free vermicelli pasta
  • 4.2 oz. (120 g) firm tofu, preferably smoked
  • 3 cups (700 ml) vegetable broth
  • half a fresh tomato or 1/4 cup canned stewed tomato
  • 2 cloves garlic
  • 1/2 teaspoon ground paprika
  • 1 tablespoon tamari or soy sauce
  • 2 teaspoons olive oil
  • 1/3 cup salty black olives (optional)
  • 1/3 cup creamy garlic sauce (recipe above)
  • fresh basil leaves or other herbs, for garnish

Equipment needed: large skillet or paella-type pan, small skillet, mortar and pestle (optional), oven (optional).

Begin by chopping the tofu into bite-sized cubes. Place 1 teaspoon olive oil and 1 teaspoon tamari or soy sauce in a small skillet over medium heat.

dsc_0092dsc_0094

Once the pan is hot, add the tofu and sauté, stirring occasionally, until browned on both sides. Transfer to a plate covered with paper towel and set aside.

dsc_0058dsc_0066

Next, prepare the garlic, paprika and tomato mixture, which you will incorporate into the vegetable broth. Finely mince the garlic and place in a mortar with the 1/2 teaspoon ground paprika and crush. If you don’t have a mortar, you can skip this step, but in that case be especially sure that the garlic is finely minced. Finely dice the half-tomato.

dsc_0082

Add 1 teaspoon olive oil to a non-stick pan over medium heat. Once the pan is hot, transfer the garlic-paprika mixture to it and add the diced tomatoes. Sauté, stirring frequently. When the tomato has broken down and the garlic is smelling nice (7 or 8 minutes), remove from heat. It will resemble the mixture in the photo above.

dsc_0084

Scrape this mixture into a bowl containing the 3 cups of (warm) broth  and whisk to combine. If making your broth from bouillon cubes, err on the side of less bouillon since the black olives (if using) are quite salty. You can always adjust the saltiness later with more tamari or soy sauce.

dsc_0111

Then, place a large non-stick or seasoned skillet or paella pan over medium heat. When the pan is hot, add the vermicelli (no oil is needed, but if you want to use it, add 2 teaspoons). You will soon see the color of the pasta on the bottom begin to turn golden pretty soon. Pay close attention and stir frequently to ensure even browning.

dsc_0113

Continue browning the vermicelli, stirring frequently, until it reaches the shade you’re aiming for. If you do a Google images search for fideus, you’ll see that the pasta is sometimes a lighter color (with a milder taste), and sometimes darker. The level of darkness is up to you.

dsc_0121

Not long after the pasta reached this color (about 13 minutes), I stopped the browning by beginning to add the broth.

dsc_0124

Add the broth in stages, about a half-cup (120 ml) at a time, stirring as you go. Wait until the pasta absorbs the broth before adding more. When you have added about half of the broth, incorporate the tofu and optional olives. Continue all the broth has been added to the pasta. Taste occasionally and check for doneness; if the pasta is completely cooked but you still have a bit of broth left over, you don’t have to add it. Adjust the seasonings if desired, adding a splash or two of tamari if you want it to be saltier.

This step took me about 20 minutes (after the browning), so this dish definitely counts as slow food! But it’s well worth it.

dsc_0147

Preheat your oven, on broiler mode, to 450°F (about 230°C) and place the skillet under the broiler for 5 minutes to finish the dish. This will make the top crispy, but is not an essential step so can be skipped if you are ovenless.

dsc_0199

The dish is now ready to be served! Transfer the pasta to two shallow bowls or plates, distributing the tofu and olives evenly, and top with a generous dollop of the garlic sauce. Garnish with fresh basil, parsley or other herbs. Serve with the remaining sauce on the side so people can add more.

fideuada_2

Variations:

  • Instead of tofu, use lightly pre-cooked (still firm) slices of sweet potato, pumpkin, zucchini, artichoke, broccoli florets or any other vegetables that strike your fancy.
  • Consider mixing in some additional large chunks of fresh tomato at the middle of the broth-absorption step (so they’re warm and softened but not broken down into sauce).
  • Create a “seafood” version using vegan shrimp, or a mix-and-match paella by also adding slices of vegan chorizo (a Spanish sausage).

Barcelona’s best and brightest

vegnews-december-2016-450x600bA few months ago, I had the chance to spend three weeks in sunny, veg-friendly Barcelona. I owe this good fortune in part to my choice of career, since in the freelance life there isn’t all that much to stop you from packing your bag and heading somewhere new—like a turtle with its shell, you really only need your laptop with you (although mine feels about as heavy and cumbersome as a person-sized turtleshell).

The most tangible result of my stay in Barcelona is the VegVacations feature I wrote for the December 2016 issue of VegNews, which has just come out. In it I describe Barcelona’s main attractions and neighborhoods and recommend some things to do and nice veg eateries to visit.

Barcelona certainly has some beautiful architecture, fascinating museums and great restaurants. But what I’ll remember most fondly, what made my stay truly meaningful, are the great people I met there. Some were locals, some expats. All were warm and welcoming individuals, each using his or her own talents to make the world a better place for people, animals or both. I’d like to introduce a few of them to you.

Petronila — organic coffee from a women’s cooperative in Guatemala 

12196263_1662468663994708_3128329899023612902_nPetronila is a lovely person in many ways, but one of her best qualities has to be her great patience. As she was my host in Barcelona, we had many opportunities for small conversations between our various comings and goings, and she handled the many gaps in my rusty Spanish with good humor. She even managed to make sense of what I said when I accidentally inserted Spanish-accented French words into my sparkling conversation. Hats off!

As we shared our backgrounds, Petronila, who comes from a coffee-growing region of Guatemala, told me about the coffee import business she was in the middle of launching: El Café de Petronila. All organic and fair-trade, her coffee is sourced from a cooperative of women coffee farmers in Guatemala, helping ensure a decent income for these rural workers. The company name Petronila chose has special significance, for it not only refers to herself but is also an homage to the grandmother for whom she was named. Below are a few photos she sent me of the coffee farmers at work. The coffee, in case you were wondering, is smooth and delectable!

Roberto — messages of hope for animals on T-shirts and billboards

dsc_0219bIt was at the Feria Vegana, Barcelona’s twice-monthly vegan fair, that I first met Roberto. It took some time before I could approach the table where he sold his screen-printed T-shirts, since quite a few people were already crowded around it when I arrived, rummaging through the stacks in search of the perfect message, color and size. When I finally pushed my way through, I understood better—these were some cool designs!

Roberto began his screen-printing business, Serigrafia Vegana, about two years ago, first selling his merchandise only at fairs and then branching out into online sales as well. Most of his designs center around the idea of animal liberation, with elegant illustrations of birds flying free and messages reappropriating traditional sayings involving animals. One such phrase is Fueron felices y comieron perdices, which literally means “They were happy and ate partridges”. Often appearing as the last line in a happy ending to a fairy tale, it is equivalent to our “And they lived happily ever after”. The updated, kinder version on Roberto’s shirts is Fueron felices y liberaron perdices (“They were happy and FREED partridges”). That’s more like it!

A native of Uruguay, Roberto has been living in Spain for 10 years but doesn’t believe in artificial borders and prefers to consider himself a citizen of the world. Fair treatment for immigrants and refugees is another cause that’s dear to his heart: one of his bestselling T-shirt designs reads Ninguna persona es ilegal (“No one is illegal”).

In spring 2016, together with three other local activists, Roberto launched the Liberación Animal Ahora project to raise awareness of animal suffering by placing billboards in the Barcelona metro. Similar display campaigns in other countries, including France this past summer and right now, have proven effective at reaching large numbers of people. Funds to rent the advertising space were raised in just 13 days through donations from people in the animal-rights community, and Canadian photojournalist and activist Jo-Anne McArthur granted the campaign the right to use a poignant image of a veal calf from her We Animals project. The billboards went up in May and the campaign was a success, bringing the plight of animals to the awareness of thousands of metro users every day.

Side note: The Feria Vegana is a fun event to visit if you happen to be in town when one’s taking place. People from the city’s vegan community bring home-made food, clothing, jewelry, soaps and other items to sell, and there’s often live music too. For those of you wanting to practice your Spanish, it’s also a nice chance to meet locals (many people also know English, and I even happened upon a French speaker there). Check their Facebook page to find out when the next one will be. In the meantime, a few photos:

Àlex — a sanctuary for abandoned and homeless cats

a_salvadorI learned about El Jardinet dels Gats, a cat sanctuary in Barcelona’s old town, on Facebook while planning my trip and immediately contacted them to arrange a day to stop by. I met with co-founder Àlex (pictured here) and Venezuelan-born volunteer Johanna, who showed me around the sanctuary and explained its history and how it operates.

El Jardinet dels Gats (Catalan for “the cats’ little garden”) is a non-profit organization founded in 2008, when the sanctuary was set up in the yard of a former kindergarten. The El Jardinet team rescues stray and abandoned cats from the street and gives them a temporary home in the garden, where they are fed and cared for by sanctuary volunteers and staff from a local veterinary clinic. At first, incoming cats can be quite wary of humans (with good reason!) and shy away or hide, but most eventually warm up to their caregivers and end up becoming socialized. After some time in the garden, cats move on to foster homes, where they continue to be socialized until they are adopted. The non-profit occasionally holds special events to raise funds and adoption fairs to help find new families for its cats.

Since its founding, El Jardinet dels Gats has rescued and saved over 1,000 cats. If you’d like to make a donation to help them help more cats, please visit this page. The cats thank you!

Tim and Julien — eco-friendly business reviews and sustainable massage services

15032838_1114068485336895_6601207520169929573_nI met Tim online prior to my trip as I searched for interesting veggie-type people to hang out with, and got together with him and his partner Julien one evening for dinner at the amazing Rasoterra. As we chatted and sampled each other’s dishes, they told me their story. They moved to Barcelona two years ago (Tim from Belgium and Julien from France) and have been loving it there, thanks in large part to the city’s relaxed pace. Soon after their relocation, Tim founded Good Goal, an independent site offering unbiased reviews of eco-friendly, sustainable and community-oriented places in major cities around Europe. These include craft beer makers, vegan and slow food restaurants, hidden green spots, specialty coffee bars, slow fashion shops and green hotels. The site also features a blog, and Tim has recently launched a series of pocket guides to sustainable options in various cities.

Julien runs a massage institute, Under Pressure Massage, with a sustainable, eco-friendly approach, using only organic massage oils and creating a relaxing ambiance with candles he makes himself from recycled oils. He offers various types of massage (Californian, Ayurvedic, Thai and more).

Ales and Laura — healthful living-foods cuisine prepared with love

Ales&Laura-PetitBrot.JPGAmong the many restaurants on my itinerary, one of the ones with the highest recommendations from local friends was Petit Brot (Catalan for “little sprout”), a living-foods eatery and cold-pressed juice bar with a focus on optimum nutrition but also a definite flair for flavor and creativity. After my very tasty and colorful lunch (a beet soup, curry over cauliflower rice and a raw version of crema catalana), I chatted a bit with the owners. Ales, who hails from the Czech Republic, and Laura, a native Catalan, first took an interest in a different way of eating after seeing a video featuring Gary Yourofsky. As they were especially intrigued by the health benefits of juicing and a vegan diet, they soon began investigating raw foods. This led to their opening a restaurant of their own in Barcelona. Now, more than one year on, their business is flourishing and the lines at the juice bar are getting longer and longer as locals and tourists alike flock to Petit Brot to experience this type of cuisine for themselves.

Slowly Veggie

This last item isn’t about anyone I met, just a cool find that I wanted to mention. During my stay in Barcelona, I learned about a Spanish version of Slowly Veggie, a newish vegetarian/vegan food magazine we already had in France in a French version. I soon found a copy at a newsstand in the Gràcia district and of course could not resist adding it to my collection of food magazines from around the world. The concept is great for people who are just discovering plant-based eating, since the first half of the magazine features vegetarian recipes and the second half vegan ones—allowing people to get an idea of both. The photography is beautiful and quite a bit of creativity seems to go into the dishes. Slowly Veggie is also available in German, Italian, Romanian and Polish. If you speak any of these languages, check out the sites as there are some free recipes there. Here are a few of the dishes that caught my eye. Perhaps they appealed to Sésame, too… in any case, he was kind enough to help me with this photo shoot back home in Paris.

Barcelona is a truly beautiful and very veg-friendly city with a dynamic community of people working toward a more eco-conscious and compassionate. Perhaps you have read my VegNews article, or even feel inspired just by this little post. Either way, I highly recommend putting Barcelona on your list!

Sri Lankan purple yam porridge

On a recent trip to my favorite cash & carry in the South Asian neighborhood, inspired purely by the photo on the shelf, I picked up a new (to me) vegetable to experiment with. It looked like some kind of great-grandfather root with rhinoscerosy skin, halfway between sweet potato and celeriac. A Google search later on informed me that it’s a purple yam, and that its Latin name is Dioscorea alata. It’s native to Southeast Asia but now also grows in other parts of the world including South America, Australia, China, Africa and the southeast US. Its Tamil name, used on the label in this Sri Lankan shop, is rasa valli kilangu, while in Yoruba, a language of southwestern Nigeria, it’s called isu ewura and in the Philippines it’s ube. The purple yam has apparently gained some fame among Western foodies under this name.

In folk medicine, Dioscorea alata is thought to be effective at treating ailments such as fever, leprosy and hemorrhoids. Some even believe that consuming it increases the likelihood of bearing twins!

rasavalli-on-shelf

In Sri Lanka, the purple yam is often cooked and mashed to make a sweet dish. As it contains a lot of starch, it can also be formed in a mold rather like polenta, and then cut it into slices or other shapes.

For my first experiment with this tuber, I decided to try the basic mashed form. As it doesn’t have much flavor on its own, this yam benefits from a bit of vanilla and/or cardamom (the latter being a traditional ingredient in the Sri Lankan dish). The end result is a slightly sweet mash that seems ideal for breakfast, so I am calling it a porridge. Warm and filling, it could become your new favorite comfort food.

Incidentally, I was disappointed at first that my rasa valli, once peeled, turned out not to be the bright magenta promised by the label photo, but rather a light lavender color. Maybe some are just more purple than others. But lavender is nice too—one of my favorite colors actually. So it’s okay. It’s still sort of (vaguely) in the red-violet range, and therefore acceptable enough for the first recipe to appear on this blog.

dsc_0195b

Sri Lankan purple yam porridge

Serves 2 (as a fairly filling breakfast)

Ingredients

  • 3 cups (350 g) peeled and cubed purple yam (one large yam)
  • 1/2 cup (118 ml) coconut milk from a can, some cream from top of can reserved
  • 2 tablespoons maple syrup
  • 2 teaspoons vanilla extract
  • pinch of salt
  • 1/2 teaspoon ground cardamom (optional)
  • optional garnishes: cardamom, powdered açaí, dried coconut, edible lavender flowers

Begin by peeling the yam. Caution: these yams are quite slippery characters once peeled, and will want to suddenly fly out of your grasp and across the kitchen!

dsc_0204b

Chop the yam into evenly sized cubes.

dsc_0208b

Next, place the cubed yam in a medium-sized saucepan and fill it with enough water to cover it. Bring to a boil, then lower the heat to maintain a gentle simmer. After about 20-25 minutes, test the yam for doneness with a fork. When the cubes seem mashable, turn off the heat and drain most of the water from the pan. With a hand-held potato masher (or large fork), mash the cubes until you have something that resembles mashed potatoes. Alternatively, you could process them with an immersion blender or in a food processor, but they will be so soft that this isn’t really necessary, and the partially chunky texture is kind of nice.

dsc_0225b

Open up a can of regular (not reduced-fat) coconut milk. Remove a couple tablespoons of the thick cream from the top, transfer to a small bowl, mix with a bit of maple syrup and set aside. This will be the topping.

Stir the rest of the coconut milk in the can so that the watery part at the bottom combines with the thicker part toward the top. Add about 1/2 cup (118 ml) of the mixed coconut milk to the saucepan and turn on the heat again to medium-low. Use a bit more if you want the porridge to be more liquidy.

dsc_0227b

Continue mashing the yam together with the coconut milk until you achieve a uniform consistency. Now add the maple syrup, vanilla, salt and optional cardamom and combine well. Taste and add more maple syrup and cardamom if you prefer it sweeter or with a stronger cardamom flavor. Alternatively, you can drizzle extra maple syrup on top of the porridge once it has been transferred to the bowls.

dsc_0230c

Transfer the porridge to two medium-sized bowls (or one larger bowl to share, for romantic types!) and top with the reserved sweetened coconut cream, which will melt a bit. Garnish with added ground cardamom, ground açaí (shown here), dried coconut or edible lavender flowers. Enjoy!

Variations: use regular yams or sweet potatoes, vary the spices (cinnamon, nutmeg, etc.), add golden raisins or chunks of fruit.

Little South Asia

Some years ago, I lived in San Francisco—still one of my favorite cities. One of the things I loved about it was its neighborhoods populated by minority ethnic groups, including Chinatown, North Beach (Italian), the Mission (Latin American), Japantown and even a tiny French area (a few restaurants, a French church and the French consulate between Union Square and Chinatown). I loved the cultural and linguistic plurality these areas brought to the city, in the form of distinct architecture, street signs and advertisements in languages other than English, restaurants and grocery stores selling foods from other lands. In some of these districts, especially Chinatown and the Mission, I sometimes felt as though I had stumbled through a portal to another land.

310637_10150294025005690_1012248_n

Like any self-respecting major city, Paris has its minority ethnic neighborhoods too. My favorite one is the area roughly between and around La Chapelle, Gare du Nord and Gare de l’Est, home to large numbers of people whose families hail from Sri Lanka, India, Bangladesh and Pakistan as well as countries farther afield such as Madagascar and Mauritius. There isn’t really an official name for this neighborhood, although I very often hear it referred to as the quartier sri lankais. For the sake of full inclusion I will refer to it here as Little South Asia.

img_1097_c

img_1096

All along rue du Faubourg Saint Denis and the various side streets are shops selling colorful saris and jewelry, sweets and Bollywood DVDs, as well as restaurants and cash & carry stores. Garlands and fluttering mobiles can sometimes be seen decorating the streets for various holidays.

The most festive time of year in this neighborhood is definitely La Fête de Ganesh in late August or early September, when an elaborate and spectacular parade honoring the elephant god winds through the streets from the Temple Sri Manika Vinayakar Alayam (17 rue Pajol) around the La Chapelle area and back again. The participants include women wearing pots of burning camphor on their heads, shirtless men pulling the Ganesh statue down the street with ropes, flutists and drummers, mustachioed dancers with papier-mâché horses and larger-than-life ambulant statues. The festivities are accompanied by energetic smashing of coconuts on the streets and free distribution of cold drinks.

292856_10150294022210690_1999533_n

301692_10150294025505690_5467556_n

296266_10150294024470690_4218445_n

312512_10150294024635690_3348294_n

309759_10150294023630690_873708_n

The rest of the year, this neighborhood’s main draw for me is VT Cash & Carry (11-15 rue Cail), a wonderland of spices, lentils, nuts, teas and exotic fruits and vegetables hidden behind a nondescript storefront on a side street. When you enter, the shop at first appears to be fairly small and cramped, as many of the cash & carrys (carries?) in the neighborhood are. But as you proceed further through the coats at the back of the wardrobe, it opens up, revealing a much larger space full of aisles packed to the ceiling with wares and edibles of all kinds.

It is of course a great place for spices, both common and rare, at better prices than at mainstream grocery stores. And it’s also where you can stock up on staples like lentils, rice, flours and grains.

img_1108

Lentils of every description and color!

img_1111

If you’ve got the muscles to carry it, and room at home to store it, a 20 kg (44 lb.) bag of rice is really your best buy. Or, of course, if you run a restaurant…

img_1106

Every time I go here, I plan to get a can of ramboutans to see what they taste like, but then I invariably end up with too many other heavy things and decide to leave it for the next trip.

img_1103b

img_2556b

Some interesting jams and chutneys (ginger, chow chow, candied citrus peel, pineapple, lime, ambarella, passionfruit, tamarind, soursop, baobab and more) and a mysterious English thing called golden syrup that I have not tried yet. My favorite jam ever, which I discovered here, is made with physalis fruit, also known as aguaymanto in Peru and pok-pok in Madagascar, where this particular brand comes from. It is simply heavenly, with a tanginess reminiscent of kiwi and a sweeter side that brings to mind raisins or dried cherries.

img_1122

These metal bowls, usually seen only at restaurants, are an elegant way to serve dal or curries at home.

img_1124

Here, you can get many imported European items that are hard to find elsewhere, such as Marmite (if you enjoy it, or like me are trying to acquire a taste for it), psyllium powder (good for thickening raw desserts), date syrup, the aforementioned golden syrup and (not shown) Heinz baked beans, cream crackers, Scottish and Irish oatmeals and baking ingredients. VT Cash & Carry is also the place to head when you’re looking for your favorite brands of English tea.

img_2563b

Other often-tricky-to-find items include fonio, an African semolina, and peanut butter. Yep, in France peanut butter is a somewhat exotic item. You can still usually find it at regular grocery stores, but at really high prices. My favorite place to get PB is actually at Franprix, in their growing organic & fair-trade section, both because of these characteristics and because the taste is just nice.

img_1123_b

Some ready-made sauces in foil packets that you immerse in hot water to heat up. Some of them are vegan (just check the ingredients carefully).

img_1125

The produce section always contains a few items I’m unfamiliar with, so I sometimes buy things to find out for myself what they are and how they taste (trying to remember to note down the name before leaving the store!). Here, among other things I was already able to identify, we have fresh and dried turmeric root.

img_1127

I did once buy a wood apple in spite of an Indian fellow shopper’s warning that they aren’t very good. Turns out she was right!

Also available toward the front of the store is sugarcane, young coconut (good for raw dishes) and fresh aloe leaves.

img_2565b

If after your lengthy shopping experience you need to rest a bit before facing the crush of people on the metro ride home, pop into one of the three Krishna Bhavan restaurants on the same street (at 15, 21 or 24 rue Cail) for a tasty bite. At the one shown above you can also get take-out veggie samosas at the front counter for €1 a piece.

Enjoy your explorations!