Deviled avocados

If you can devil an egg, why not an avocado? This is one of those recipes that are quite easy to make but seem more complicated, and are thus perfect for impressing dinner guests. 😉

As a starter, one avocado half can be served per person, or for a light lunch (perhaps with a larger salad), serve two.

Traditional deviled eggs are made by mixing the cooked yolk with mayonnaise and mustard. This healthier vegan version just subs cooked chickpeas for the yolk and adds kala namak Indian salt (also known as black salt—comes in packages like these), which provides the sulfury flavor reminiscent of egg. It can of course be made with regular salt, but the effect would not be the same. A bit of turmeric makes the mixture more yellow, which also helps recreate the look of the traditional dish. Black pepper is added to boost the turmeric’s bioavailability.

The most challenging part of this recipe is probably having the luck to land upon perfectly ripe avocados. Once you’ve managed that, the rest is a breeze! If serving at a party, the filling can be made ahead of time.

Deviled avocados

Makes 4 filled avocado halves

Ingredients

  • 2 avocados, ripe but still firm
  • a few handfuls of baby greens

Chickpea mixture:

  • 1 cup (165 g) cooked chickpeas
  • 1 tablespoon vegan mayonnaise
  • 1 teaspoon dijon mustard
  • 1/4 teaspoon turmeric
  • 1/8 teaspoon kala namak Indian salt
  • pinch ground black pepper
  • several pinches ground paprika

Equipment needed: food processor or blender

img_6400img_6411b

The first thing you will want to do, before making the chickpea mixture, is to cut open your avocado to make sure it really is ripe and also hasn’t gotten overripe and formed black spots inside. If the avocado isn’t useable, you’ll have saved yourself the trouble of making the filling, and you can try again another day. If the avocado is fine, put the two halves back together to keep them fresh while you prepare the rest of the recipe.

img_6415b

Now combine the chickpeas, mayonnaise, mustard, turmeric, Indian salt and black pepper in a food processor or blender. Pulse until you have a hummus-y texture. If it seems too dry, add more mayonnaise or perhaps a tiny bit of water (a little goes a long way, so start with a teaspoonful). Add more turmeric if the mixture does not seem yellow enough. Taste and adjust the other ingredients to your liking.

img_6498b

At this point, you can open up the avocado again and place the halves on a bed of greens (here, I have used spinach dressed with a bit of tamari sauce and olive oil and garnished with pink peppercorns). You can opt to serve the avocados in their peels, or to be a bit fancier, remove the peel as I have done here. If you choose to remove it, proceed slowly to prevent large chunks of avocado from coming away with the peel. If this nevertheless does happen, you can to a certain extent gently press and mold the avocado flesh back onto the side or bottom of the avocado without it being very noticeable.

Fill the avocado halves with the chickpea mixture. If you have a pastry piping bag with a wide nozzle, you could try forming a swirl shape. Otherwise, just fill them with a spoon, taking care not to press down too hard on the avocado as this could cause it to break. Sprinkle with the paprika and a dusting of additional Indian salt.

img_6502b

Enjoy!

Variations: If you’re in the mood to be creative, you could try adding fresh chopped herbs or spices like curry powder or Ethiopian berbere to the chickpea mixture.

Creamy miso ramen soup

Have you ever met a new friend and immediately felt as if you’d always known them? I experienced this not long ago when Yukiko, an online contact of mine (we first met in a group for volunteers of an international vegan organization) visited Paris from her native Japan and we got together for a smoothie in the Marais. It turned out she was planning to move to France very soon to be with her French boyfriend. As we shared impressions of Paris and discussed expat life in France, and of course the usual favorite topic of vegans from anywhere in the world—food and cooking!—the time ran short and we still had more to say. Another meetup was thus in order, and we decided to make it a culinary one so she could introduce me to one of her favorite Japanese dishes.

One chilly day not long after, she appeared at my door with a smile, bearing a cloth shopping bag full of goodies—fresh organic oranges, carrots, green onion, ginger root, vegetable bouillon and, best of all, some homemade miso that she’d brought with her from Japan! On my end, I’d stocked up on ramen noodles, sesame paste and toasted sesame oil, shiitake mushrooms and soymilk. We put on aprons, rolled up our sleeves, and set to work making the dish she had chosen: tantanmen (担々麺), a Taiwanese-Japanese fusion dish featuring Chinese ramen noodles and a Japanese-style creamy miso broth, served with a crisp carrot salad for a balance of textures in line with the traditional Japanese approach.

As we worked, Yukiko and I chatted about this and that and all kinds of things and Sésame padded in and out of the kitchen, the tip of his tail curled into a question mark, checking on our doings and trying to detract our guest’s attention to himself. We kept discovering more and more things we had in common, from similar past (mis)adventures in the romance department to literary interests and even our age—we were born the same year, exactly one month apart! In spite of all our chatter, we eventually managed to finish the dish, and sitting down to this fragrant soup at the end of the afternoon was just heavenly.

Tantanmen has since become one of my new favorite dishes. It’s the perfect comfort food for a chilly winter day, especially around this time of year when sunshine and fresh warm breezes are but a distant memory and there’s at least another month of cold ahead. The creamy miso broth with earthy garlic notes and a touch of spicy cayenne warms your tummy while the noodles fill it, the tender shiitake mushrooms and toasted sesame add an extra dimension of texture and flavor, and the tangy ginger and citrus of the carrot salad provides a burst of freshness that reminds you of the spring season that is surely coming back around sooner or later.

Since we can all benefit from a warming winter pick-me-up right about now, I decided (with Yukiko’s blessing) to share her recipe with you!

There’s some room for variation in this dish, for example substituting seitan or tofu for the mushrooms or using a different crisp vegetable (cucumber, radish or a crunchy lettuce such as romaine) in place of the carrot, according to what you have on hand.

The soup and salad may be served separately, as shown in the main photo above, but they’re best enjoyed together for the contrast of textures, so for the presentation you may opt to place the salad directly on top of the noodles, either to one side as shown in the last photo below, or all around the edges of the dish, leaving the noodles and mushrooms visible at the center.

Carrot salad with tangy sesame-ginger dressing

Serves 2 (about 3/4 cup dressing; some will be left over)

  • 14 oz. (400 g) raw carrots, julienned or roughly grated
  • small bunch fresh parsley or cilantro
  • 4 tablespoons sesame paste (tahini)
  • juice of 1 orange
  • 1 tablespoon soy sauce
  • 1 teaspoon toasted sesame oil
  • 1 teaspoon grated fresh ginger

Equipment needed: food processor or blender for the dressing, julienne peeler or other device (spiralizer, grater) for the carrot (or just cut julienne style with a regular knife)

Start by making the dressing (can be made even a day ahead). Place the sesame paste, orange juice, soy sauce, sesame oil and grated ginger in your food processor or blender and pulse until you have a creamy consistency. Taste and add more soy sauce, sesame oil or ginger if needed.

img_3791-x

Julienne the carrots, roughly chop the herbs, and toss together in a salad bowl. If you will be serving the noodle soup within the hour, you can go ahead and add the dressing, tossing to coat the carrots evenly. If you’re using a more delicate item such as lettuce or cucumber in place of the carrots, wait to add the dressing just before serving or your salad may wilt. Add the dressing a little bit at a time; you probably won’t need the whole amount, but it’s good to have it on hand in case you do! (If some remains, it makes an excellent dip for crudités, and can also work as a spread in a bánh mì type sandwich.) Transfer to serving bowls and top with an extra sprig of parsley.

Creamy miso ramen soup

Serves 2

  • 10 oz. (280 g) brown rice ramen noodles, or other noodles
  • 6 oz. (175 g) fresh shiitake mushrooms
  • 1 tablespoon miso, preferably red
  • 2 tablespoons blond sesame paste (tahini)
  • 1 cube vegetable bouillon
  • 2 tablespoons sesame oil, divided
  • 1 and 3/4 cup (400 ml) unsweetened soy milk
  • 3/4 cup to 1 cup (200-250 ml) hot water
  • 2 cloves garlic
  • 1 tablespoon soy sauce, or more to taste
  • pinch cayenne pepper
  • 2 green onions/scallions

img_3801-x

Begin by rinsing and slicing the shiitake mushrooms.

img_3805-x

Place them in a nonstick skillet or frying pan over medium heat, without any oil at this stage as the mushrooms will release liquid as they cook. As always with mushrooms, the volume will reduce considerably, so don’t worry too much about overcrowding at the beginning if your skillet is on the smaller size, as is this one in the photo above.

While the mushrooms cook, mince one clove garlic.

img_3812-x

When the mushrooms have become tender and browned, as shown, you can push them to one side and, tipping the skillet slightly, add the toasted sesame oil and minced garlic to the other side. Reduce the heat to low or medium-low, cook the garlic a minute or two, stirring gently, then mix it in with the mushrooms and remove from heat. Note that this is just my own convenience-based approach and not the way my friend did it. You can alternatively remove the mushrooms and return them to the pan again to combine them once the garlic has browned. Set the mushroom-garlic mixture aside. Ideally, keep them in the skillet and cover them so they retain some of their heat (unlike what I have done in the photo below). 😉

img_3815-x

Prepare your ramen (or other) noodles according to the directions on the package, being very careful not to overcook them because they will be heated further once combined with the hot broth at the end. If in doubt, go for al dente. Drain the noodles, return them to the pan they cooked in, cover to maintain the heat and set aside.

img_3798-x

You will now make the creamy miso broth. Combine the sesame paste, the remaining clove of garlic (minced), miso paste, bouillon cube, soy sauce (not shown) and 1 tablespoon of the toasted sesame oil in a small or medium ceramic or glass bowl. Ideally, you should prepare these ahead of time so the mushrooms and noodles don’t lose too much heat while you make this part. Heat 1 cup water in a tea kettle, but not to boiling. If you have a way to check the temperature, it should be around 158°F (70°C). Add about 3/4 cup hot water to the bowl and whisk to combine.

img_3822-x

Heat the 1 and 3/4 cup (400 ml) unsweetened soymilk on the stovetop until close to simmering (do not allow to reach a boil). Turn off the heat and quickly incorporate the miso mixture with a whisk. Important: avoid reheating after this stage, and definitely do not bring it to a boil since the soymilk would most likely separate and the health benefits of the miso (a fermented product) would be neutralized.

Add the pinch of cayenne pepper, taste, and adjust if needed. If you want the broth to be saltier, add a bit more soy sauce. Cover the broth and transfer the drained noodles directly to the serving bowls. At this point, you will want to work somewhat fast since you need to put everything together without losing too much of the heat—this is why it’s useful to have the salad already prepared ahead of time.

img_3824-x

Ladle the broth over the top of the noodles, dividing it evenly between the two bowls, until you have the right quantity of broth for a soup but the noodles can still be seen poking through the top.

img_3826-x

Add the shiitake mushrooms to the top of the noodles and ladle a bit of the broth over the top of them. Top with sliced green onions and you’re ready to serve your dish!

img_3830_d

As I mentioned above, you can serve the soup and salad separately, as shown here, or in the same bowl, as below. Encourage your guests to combine noodles and salad together in each bite. 🙂 You will want to remember to provide a spoon too!

img_3849-xb

I hope you enjoy this soup, a fusion dish that celebrates international encounters and friendship. It tastes best when made with a friend! 🙂

Variations: Instead of mushrooms, use finely sliced tender seitan or diced tofu. Substitute lettuce leaves or sliced cucumber for the carrot.

Rosewater raspberry hearts

I know many people who object to Valentine’s Day on the grounds that it’s mainly a commercial holiday invented to get people to buy things. This may be true, but whether we actually go out and buy things or instead just celebrate love in ways that cost little or nothing is entirely up to us. I guess you can see which way I lean!

My thought is that a day dedicated to love is a pretty good thing. Especially if you don’t make it exclusively about romantic love but expand your focus to include the love you feel for family members, friends and your cat or dog. It can be a reason to think back fondly on times that others have shown you love and that you have shown love to others. The trick, of course, is not to get sidetracked into unpleasant memories of past partners… and that’s why the more general focus is useful.

If you opt to celebrate the day by also giving a gift to someone to show your appreciation for them, consider something handmade. Like heart-shaped cookies flavored with rosewater and raspberry! It’s something you don’t come across every day, and definitely a departure from the usual chocolate.

This recipe combines a basic sugar cookie base (with a slight rose scent) and a fruity, floral and colorful royal icing. Traditionally made with beaten egg whites, royal icing (a hard, dry type of frosting) can now easily be made in a vegan version thanks to the magic of aquafaba.

I decided to color the icing with raspberry juice for the natural color and fruity notes. If you’ve ever bought frozen berries and then forgot the bag on the counter, you know that when they thaw, they release a juice (which invariably manages to leak out of the bag). This juice is fairly concentrated and thick, so is an effective coloring agent when used in a small enough quantity—something like a store-bought cranberry juice would probably be too thin and might water down the icing. If berries are in season where you live, you could try blending and straining fresh ones to obtain a juice. If you attempt this, comment below and let us know how it went! Be sure to choose red-colored berries, unless of course you want the darker, more purple color of blackberries or blueberries.

After coming up with this rose/raspberry combination, I realized it has a lot in common with my new favorite perfume, a truly unique scent featuring notes of Bulgarian rose and crushed blackcurrant leaves. So who knows, this scent may have been working on the back burner unbeknownst to me as I chose the flavors for this icing.

But let us move on to the recipe, at last…

Rosewater cookies

Makes about 2 dozen heart-shaped cookies measuring 2 in. (5 cm) across at widest part

Ingredients

  • 1 and 1/2 cups all-purpose flour
  • 1 tablespoon cornstarch
  • 1/8 teaspoon salt
  • 1/8 teaspoon baking powder
  • 1/2 cup margarine
  • 1/2 cup granulated sugar
  • 1 teaspoon rosewater flavoring

Equipment needed: mixer, plastic wrap, rolling pin, heart-shaped cookie cutter

(For the icing recipe, scroll midway down the page)

img_6003

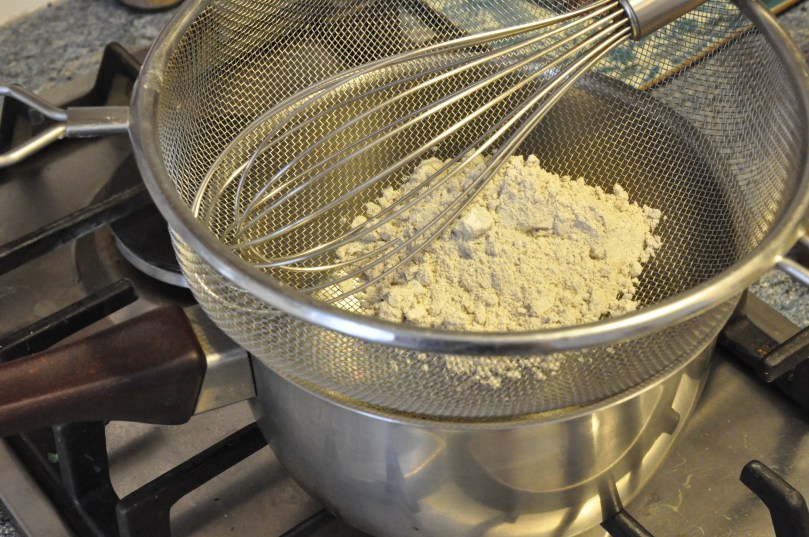
Start by combining all the dry ingredients, except for the sugar, in a medium bowl: flour, cornstarch, salt and baking powder. Set aside.

img_6004

Place the margarine, sugar and rosewater flavoring in a large mixing bowl.

img_6005

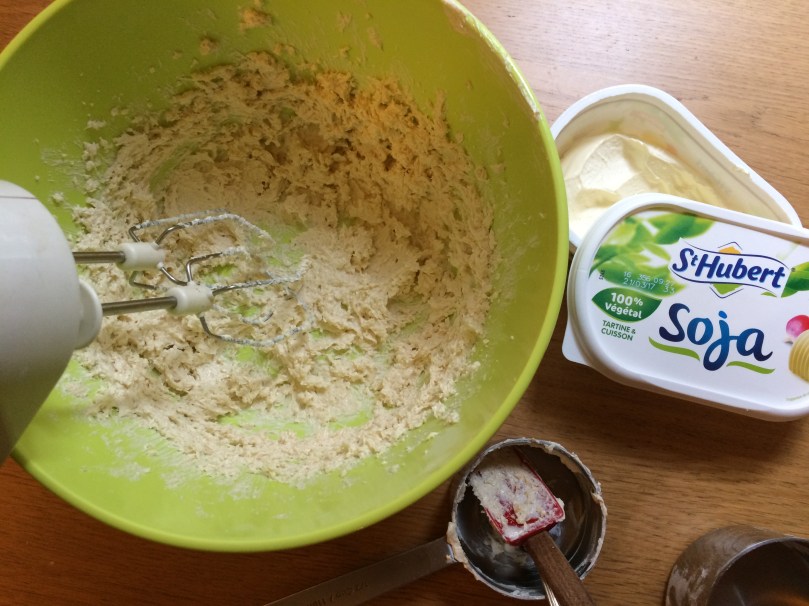
Beat on medium-high for about four minutes, until the sugar and margarine are completely combined.

img_6011

It will look something like this (above).

img_6014

Now add half the flour mixture and beat until just moistened (as shown above). Incorporate the remaining flour mixture, beating only as much as necessary to achieve a uniform texture and form a dough. Add a bit more flour if the dough seems too sticky.

img_6016

With your hands, shape the dough into a flat disk shape and wrap in plastic wrap. Place in the refrigerator for at least three hours or even overnight. Go read a book or watch a documentary about love while you wait!

img_6024

After the chilling time has ended and you’re ready to bake the cookies, preheat your oven to 350°F (180°C). Remove the dough from the refrigerator and, on a floured surface, roll it out flat with your rolling pin. Dust the rolling pin with flour as you go along so the dough doesn’t stick to it. The rolled-out dough should be about 1/4 inch (1/2 cm) thick across the entire surface.

img_6026

Cut the heart shapes with your cookie cutter and transfer them carefully to a baking tray lines with baking paper (or oiled). You may want to use a thin metal spatula to unstick the hearts from the table top so they don’t become misshapen as you pick them up. Continue until you have filled up the tray or used up all the dough.

img_6027

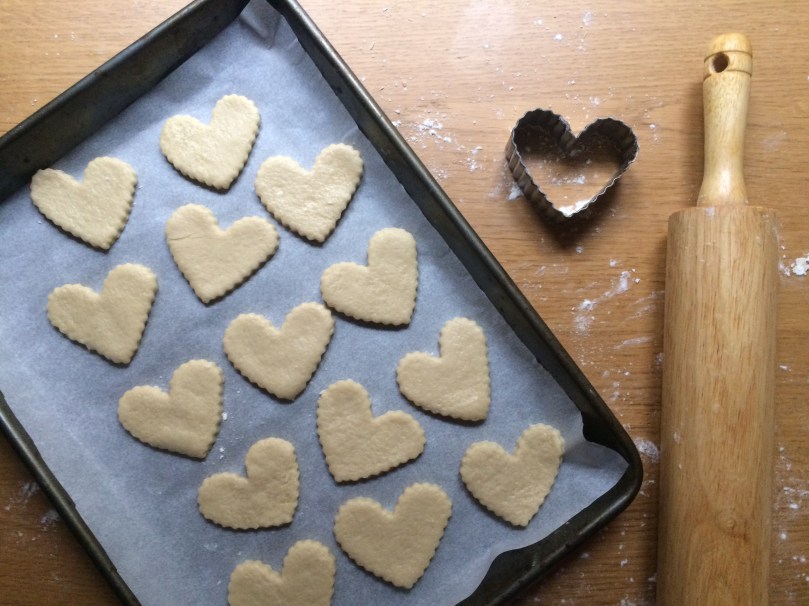
The cookies will not spread as they bake, so you can place them fairly close together on the baking tray. Place on a middle rack of your preheated oven and set a timer for 10 minutes. When the 10 minutes are up, check to see whether the edges have turned a bit golden-brown. If they have not, leave them in the oven another couple of minutes.

img_6038

Remove from oven and leave to cool while you make the icing.

Rosewater raspberry royal icing

Makes about two cups of icing

Ingredients

  • 3 tablespoons aquafaba (liquid from a can or jar of chickpeas)
  • 1 to 2 cups powdered sugar
  • 2-3 teaspoons rosewater flavoring
  • 1/4 cup juice from thawed frozen raspberries or other red berries

Equipment needed: mixer, small strainer

img_6195

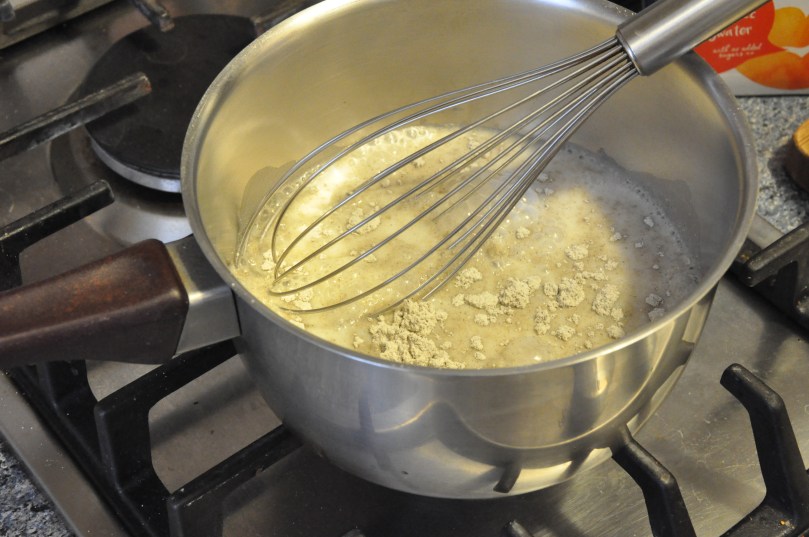
Open a can or jar of cooked chickpeas or other legumes such as navy beans, kidney beans or black beans.

img_6197

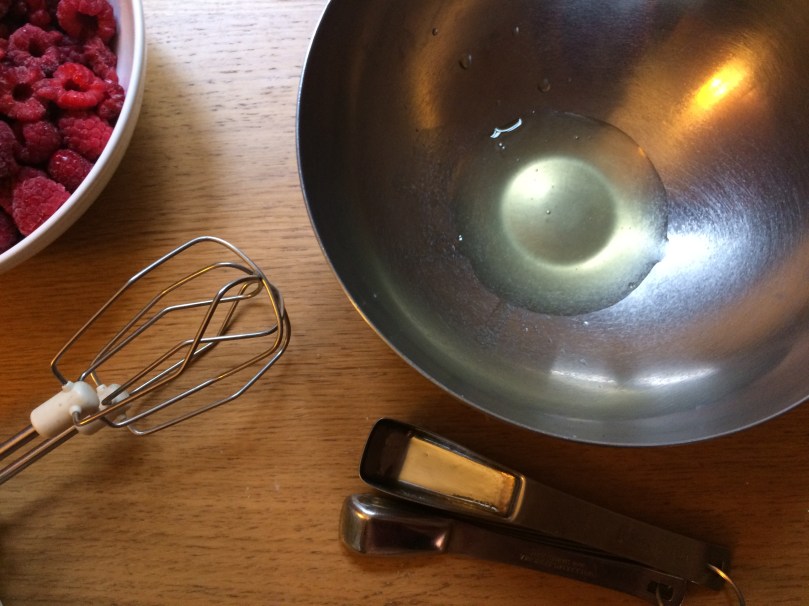
Measure three tablespoons of the liquid from the can or jar into a mixing bowl, ideally with a round bottom (best for working with an electric mixer). Put the can of chickpeas in the fridge to make hummus or chickpea salad with later. If you have not begun thawing your raspberries yet, take them out of the freezer and pour them into a bowl.

img_6199

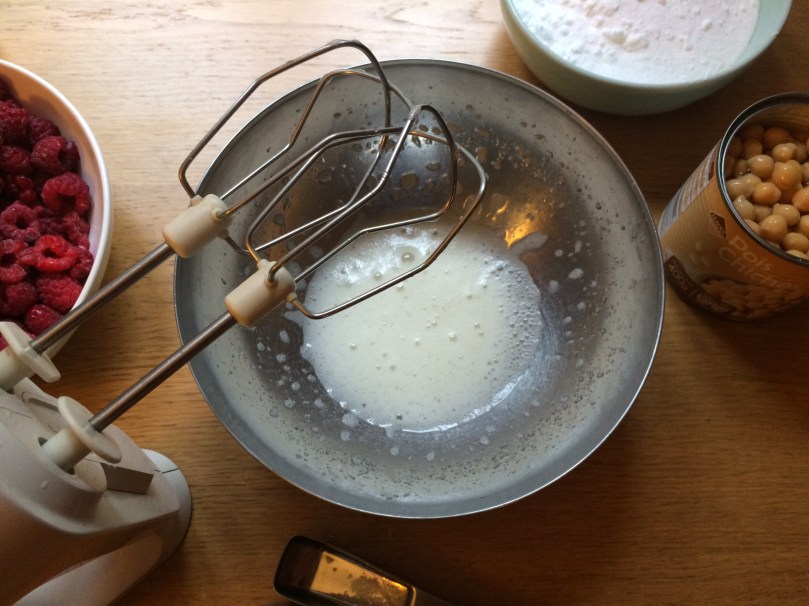
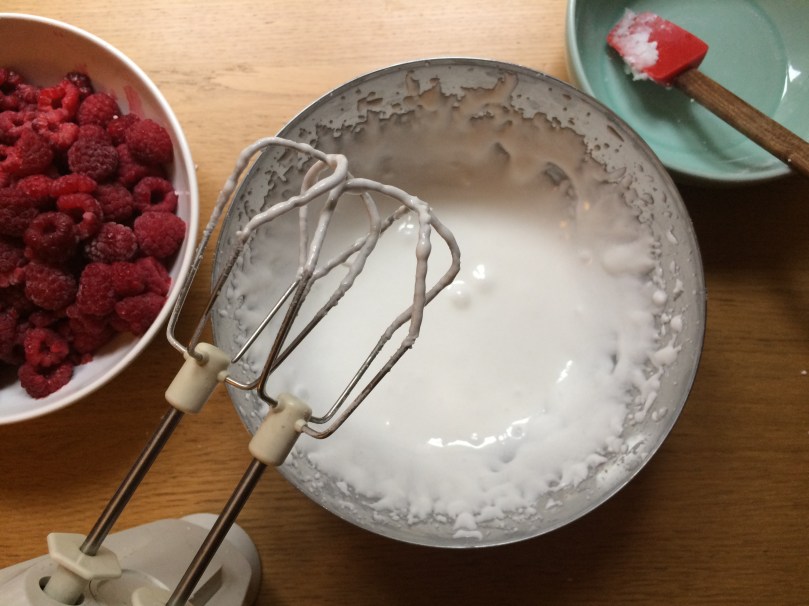
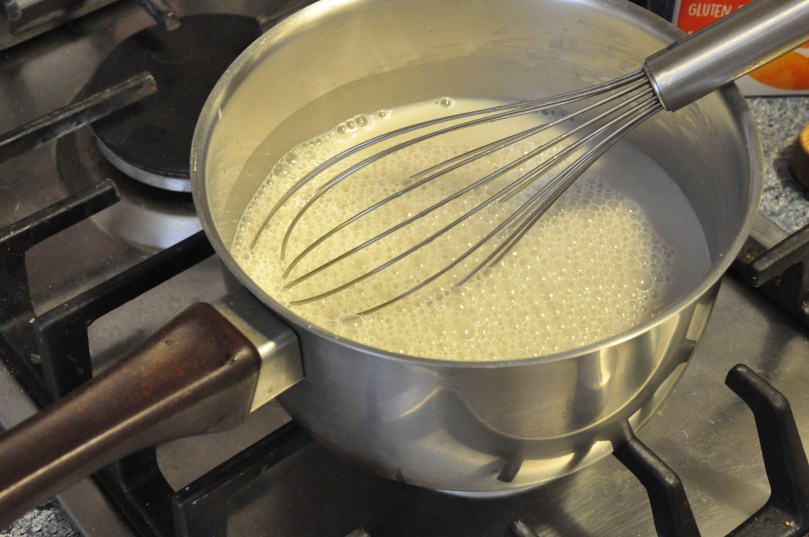
Beat on medium until frothy, about 30 seconds. Do not go beyond this stage, as the mixture will start to turn into marshmallow fluff!

img_6202

Add the powdered sugar (must be powdered—granulated is too grainy for this recipe) and begin beating to incorporate. Start with one cup of the sugar, then add more until you’ve reached the right consistency. To prevent the sugar from flying out of a shallow mixing bowl, combine the aquafaba and sugar briefly with a rubber spatula first.

img_6203

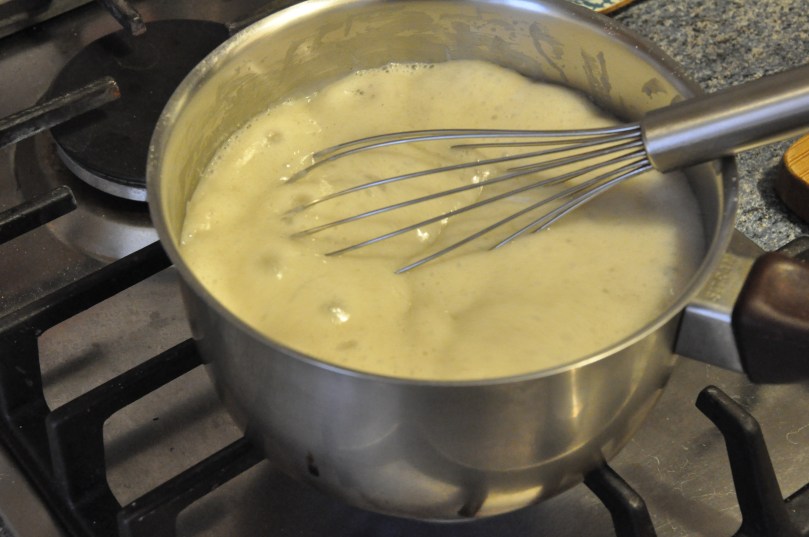
After four or five minutes, the icing will have reached more or less the right consistency (as shown above). Add the rosewater flavoring, one teaspoon at a time, and incorporate briefly with the mixer. Taste the icing after adding each teaspoonful to see if you want to stop there or make it rosier. I personally found that three teaspoons were necessary to really taste the rose, as it’s a somewhat subtle flavor, but your preference may differ. If you want to ice some of your cookies with a white color, as I have done, reserve some of the frosting in a small bowl or cup at this point. If the icing is too thick, add tiny amounts of water (1 teaspoon at a time) until it is thin enough.

img_6214

Your thawing raspberries will be releasing juices as their temperature increases. If they have not yet done this, you can help the process along by placing the bowl into another bowl with a small amount of hot water inside. If you do this, make sure that the bowls are heat-resistant enough to withstand the temperature change without cracking. Skim some juice from the side of the bowl with a spoon.

img_6217

Add a few drops of the raspberry juice to your icing. If there seem to be some seeds mixed in, or if you can’t tell, use a small strainer to ensure that the icing remains seed-free (and thus smooth).

img_6222

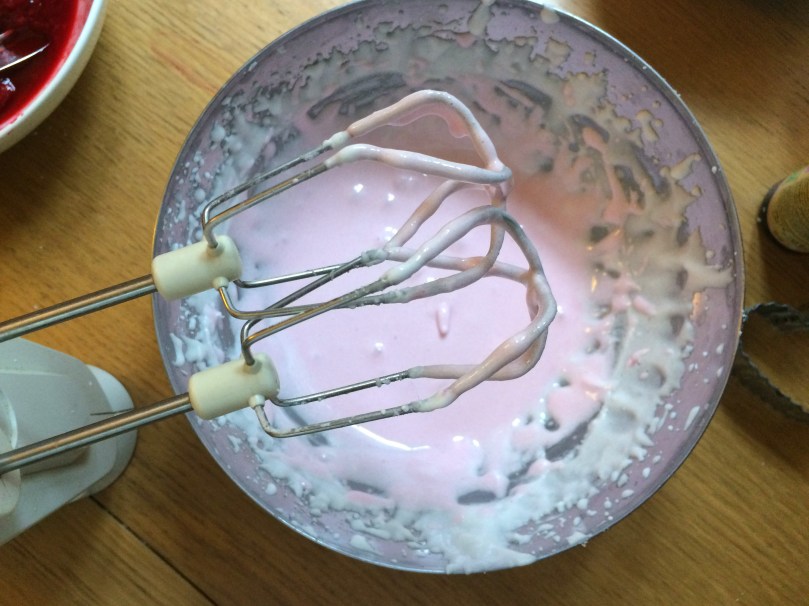
Incorporate the juice with the mixer bit by bit until you have achieved a nice pink. Note that the more juice you add, the more liquid the icing will become and the less uniform the final result may be (and it will also take longer to dry). A lighter pink is thus safer, especially if you’re pressed for time and need to take the cookies somewhere soon after icing them. If you want to use multiple shades of pink, reserve some of your lighter-pink mixture before adding more raspberry juice.

img_6229

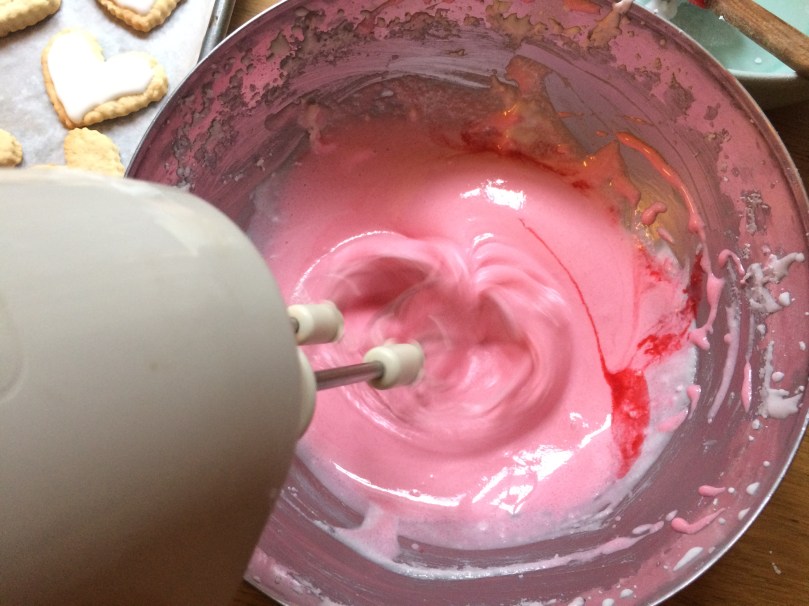
If your icing gets to this color or darker, you may end up needing to add a bit of extra powdered sugar to make it thicker again.

img_6235

Now that you have all your colors ready, you can begin icing the hearts! Use a smallish spoon, like the one above, to place a small amount of icing on the cookie’s surface and kind of push it around to cover the top.

img_6240

Leave the iced cookies somewhere safe (where your cat won’t walk on them, etc.) to dry. Again, the darker pinks will take longer to dry than the white icing and lighter pinks. In the photo above, the white hearts had been iced some time earlier and the pink icing had just been applied.

img_6273

It’s funny how I got such different sizes using the same cookie cutter (must be due to stretching when picking the hearts up from the tabletop), but I guess that gives the collection a true artisanal look. 😉

img_6326c

In the photo above, you can see what each color looks like when completely dry. The darker pink, being thinner, ended up with bubbles and some streaking, so again, I would recommend sticking with the lighter pinks.

Now you can package up your hearts to give to that special someone. They’ll love the handmade touch.

Variations: Use a different flavoring in place of rose (vanilla, almond, coconut, etc.). Create even more colors of icing using matcha, blue spirulina or a combination of these two for purple). Use different shaped cutters (star, moon, Eiffel Tower, etc.).

Tunisian sorghum pudding

Last weekend, I had a visit from a longtime Tunisian friend who is very dear to me, and who was passing through Paris on his way to the US. There was just enough time for a short visit. In between updating me on his family’s doings and his plans for the upcoming months, he fished some interesting things out of his bag and placed them before me.

One was a mtabga, a sort of sandwich his sister had made that same day—harissa and chopped yazoul (a delicate wild garlic) in a folded-over homemade semolina flatbread. We shared this, and it was divine, although harissa always involves some sweating and nose-blowing for me (of all North African cuisines, Tunisia’s is said to be the spiciest). Next, he produced a box of scrumptious chickpea cookies from a local bakery, which you may already have seen if you follow my Instagram. And finally, he plunked a clear plastic bag containing an unfamiliar gray flour on the table. “It’s drah,” he explained, in response to my perplexed look. This did not help me much. But we did a quick search and found that its English name is sorghum!

I don’t know about you, but sorghum is not a grain I could have identified in a line-up. I had heard of it, of course, but could not have guessed at how it is used. Turns out it is native to Africa, although the US is now its largest producer, and it’s used as both human food (in part to make sorghum molasses) and as animal fodder. It is the world’s fifth-leading grain crop. As it doesn’t have an inedible hull, it is usually consumed as a whole grain with all its nutrient-rich outer layers. It also happens to be gluten-free and is apparently a common ingredient in gluten-free baking mixes. And after making this dish, I can understand why—the flour gelled easily into a thick flan consistency without any binder.

And now a brief aside for the linguistics enthusiasts among you. The Tunisian name, درع, is sometimes transliterated dro3 with a number 3 at the end to represent the ayn, a pharyngeal consonant that is notoriously difficult for non-native Arabic speakers to pronounce—having studied the language for two years, I can confirm this! The ayn creates a sound almost like an extra syllable (although it is actually not) and, to my ears, the word comes across as something like drah-ah. Elsewhere in the Arabic-speaking world, sorghum is called سورغم, which sounds very similar to the English word. An etymology search revealed that our English word comes to us from Modern Latin via the Italian sorgo, “a tall cereal grass”.

I now bring you a recipe for an easy Tunisian sorghum dish that my friend’s mother makes. Called simply drah after its main ingredient, it’s most commonly eaten as an energy food for breakfast and so can be considered a sort of porridge. But since the consistency is similar to that of flan, I think it would also make a very nice light dessert.

I made mine with rice milk so it would have some extra natural sweetness, but in Tunisia some make it with water only. Flavorings can also vary, but I chose orange-blossom water for its subtle floral notes (ginger is another popular ingredient). In Tunisia, this dish is most often eaten topped with some crumbled halwa chamia, a dense sesame-based confectionery, but almonds and honey are another common way to enjoy it. For a fully plant-based dish, I used Bee Free vegan apple honey, and I imagine that maple syrup, agave syrup or molasses would also work well. Because the honey is so sweet, I did not put any sugar in the pudding itself, but you could add 1 or 2 teaspoons of sugar to the mixture as it cooks if you prefer a sweeter taste or don’t want to use a syrup on top.

Sorghum pudding can be eaten either shortly after it’s made (allowing some time for it to cool, as it immediately forms a skin underneath which the temperature remains molten for a time) or room temperature/chilled. Wait until just before serving before adding the almonds and syrup to ensure that the almonds remain crisp.

Tunisian sorghum pudding

Makes two servings of one cup each

Ingredients

  • 5 tablespoons sorghum flour
  • 1 cup rice milk (or any plant-based milk)
  • 1 cup water
  • 2 teaspoons orange-blossom water
  • small pinch of salt
  • 2 tablespoons flaked or slivered almonds, toasted (see directions below)
  • 2 tablespoons vegan apple honey, maple syrup, agave syrup or molasses

Equipment needed: strainer, hand whisk

dsc_0062_bdsc_0064

Begin by sifting the sorghum flour through a strainer into a medium saucepan to break up any lumps. The burner should not be turned on yet.

dsc_0065

Add the (cold or room-temperature) rice milk, water and pinch of salt and whisk to thoroughly combine BEFORE turning on the heat. Note that once the liquid heats, any additional sorghum flour added will turn into lumps and it will be next to impossible to break them up.

dsc_0066

Turn on the heat to medium and heat to simmering, stirring constantly or at least very frequently. When the mixture begins to boil, add the orange-blossom water and continue stirring until it thickens. You will want to stand right there and watch it until it’s ready, whisking to prevent the formation of lumps. It takes about five or six minutes for it to reach the desired thickness and could boil over quickly, so stay put! Make sure you have your serving bowls nearby.

dsc_0067

When it’s ready, it will look pretty much like this and be making dramatic glopping sounds as the mixture boils. When it has the consistency of a thick potato soup, it’s done. Pour it into the serving bowls right away because it begins to form a skin as soon as it’s taken off the heat.

dsc_0073

After the pudding has been poured into the serving bowls, and while it cools a bit, toast your flaked or slivered almonds. Place a dry non-stick frying pan over medium-low heat and stir or toss occasionally until lightly browned. You will want to stick around for this step too as lightly-browned can become far-too-browned or even burnt in very short order. Have a small ceramic bowl ready to transfer them to when done.

dsc_0076_b

When they look like this, they’re ready. Transfer them quickly to the bowl or (as I have done) a cutting board or other heat-resistant surface. If you leave them in the hot pan while searching for a bowl, you run the risk of the almonds browning even further.

dsc_0079_b

If the pudding’s surface seems firm (by now it should have cooled enough, but check the top to be sure), drizzle your honey or syrup on it and finish with the almonds.

img_5808_d

And there you have it! Once the honey or syrup and almonds have been added, it should not sit around too long as the almonds will gradually get soggy and the syrup watery (becoming like a flan with caramel sauce, which is not bad but not the intended presentation either). You can see this effect a bit in the photo below because I got distracted by something between the preceding photo and this one. 😉 But the taste is still good, however it looks. Enjoy!

img_5873_c

Variations: top with halwa chamia or any type of chopped nut (pistachios would be great) or even dried fruit such as golden raisins. Sprinkle some gomasio in with the nuts for a salty contrast to the sweet topping.

Basic sweet crêpes

Every year on February 2nd, while people in the US and Canada are worrying about groundhogs, people in France celebrate Candlemas, mainly (these days) by eating crêpes. That sounds like a more worthwhile endeavor to me!

La Chandeleur, or la fête des chandelles is celebrated at church with special services, but in the family home, candles are lit and people determine the luck they will have over the coming year by attempting to flip a crêpe in a frying pan (without a spatula!) while holding a coin in their other hand. If it lands back in the pan correctly, good things will come their way over the next 12 months. I’m not sure, in reality, how many people still engage in this crêpe-flipping tradition, but the crêpe-eating part has been confirmed! Candlemas is also the last feast day of the Christmas cycle, and if you had a manger scene up as part of your decorations, Candlemas is when you’re supposed to finally put it away. I suspect this may also apply to my bouquet of pine branches, which may still (ahem) be in a vase on my table…

And so, in honor of La Chandeleur (coming up in just a few days!), I bring you an easy plant-based crêpe recipe, translated and adapted from this French one.

I happen to own an electric crêpe-maker, which is VERY useful anytime you want to make pancakes of any kind, as it automatically heats to the perfect temperature for that sort of thing, reducing the risk of burning (other electric crêpe-makers may have different settings, however). It came with two essential wooden utensils: a batter-spreader and a spatula or crêpe-flipper. If you’ve ever had a crêpe made at one of those street stands in France, you may have seen these utensils before. My crêpe-maker is second-hand, and judging from the harvest-gold color of its base, may have been made in the 70s or early 80s. If so, planned obsolescence was not factored into its design, as it’s still going strong. You can still get similar devices in France online or at department stores (ask to see the crêpières), and the wooden utensils can be purchased separately too.

My favorite way to eat crêpes is with a little lemon juice and sugar. Right now, bergamots (a citrus fruit similar to a lemon, but darker in color and sweeter) are in season—I picked some up today from my local farmers’ market, the Marché Bio des Batignolles. If you’ve never tried them before, bergamots are quite the experience. They have an indescribable scent that you will recognize immediately if you’re a fan of Earl Grey tea, which is made with essential oil of bergamot. For a touch of sweetness, I added a few sprinkles of coconut sugar, but you can use any sugar you like, or even a liquid sweetener such as maple syrup.

Crêpes are most often served as a dessert but also make for a nice breakfast item if you have servants and own a smoking jacket. Any extras should be packed away in an airtight container (rolled up or folded into fourths) or on a plate covered with plastic wrap.

Basic sweet crêpes

Makes 10-11 crêpes

Ingredients

  • 2 cups (250 g) flour (T65 type in France)
  • 3 tablespoons (30 g) cornstarch
  • 2 tablespoons raw sugar
  • pinch salt
  • 2 cups plus 2 tablespoons (500 ml) non-dairy milk
  • 2 teaspoons vanilla extract or a packet of vanilla sugar
  • 2 tablespoons neutral-tasting oil such as canola

Crêpe garnishes (see also the variations at the end of this post)

  • 1 or 2 lemons (bergamot or regular)
  • several tablespoons of sugar (coconut, raw or other)

Equipment needed: large bowl, whisk, ladle, spatula for flipping crêpes, electric crêpe-maker or wide and shallow frying pan

img_5504bimg_5508b

Combine all the dry ingredients and mix well with the whisk to incorporate.

img_5512b

Add the non-dairy milk, vanilla and oil and incorporate briefly with your whisk, stirring only long enough for it to reach a smooth consistency. Be careful not to overmix. Set the bowl aside and allow the batter to sit for 45-50 minutes, but (IMPORTANT) no longer than that or it will get too thick and you won’t be able to achieve the thin, somewhat elastic result you’re going for.

img_5523b

When the resting time is up and your crêpe-maker or frying pan is hot enough, pour one ladleful of batter onto the surface (if your frying pan doesn’t have a non-stick surface, you may need a splash of oil). Working quickly, spread the batter, either by hand with a wooden spreader on an electric crêpemaker or, if you’re using a frying pan, by rotating the pan evenly until the batter covers most of its bottom. I sadly could not get a photo of this step, since I was making these on my own, but it looks a bit like this, though on a smaller scale. Aim for the same thickness throughout the crêpe (avoid having thinner edges, which will become too brown and crisp).

img_5535b

Once the edges of the crêpe begin to look firm (about 60 seconds with my crêpe maker), gently slide your wooden crêpe turner or spatula underneath it. If the underside is slightly browned, flip it over. Otherwise, give it a bit more time and check again.

img_5536b

Allow the crêpe to cook for around 30 seconds on the other side (it will need less time than the first side). Slide the crêpe off the heating surface with your flipper or spatula and onto a plate, and repeat until the batter is gone. You will have 10 or 11 crêpes, depending on the size. Consider placing a wide saucepan lid on top of the stack to keep them warm as you work.

img_5562b

Squeeze some lemon juice on top of the crêpe (the less browned side) and then sprinkle some sugar over that. In the bottom left corner of this photo, you can see one regular lemon next to two bergamots, for comparison.

img_5586b

Next, either fold the crêpes into fourths as shown above, or roll them up into a long cigar shape. If you are adding ice cream or whipped cream, or other similarly voluminous toppings, you may wish to simply fold the left and right edges of the crêpe together (and eat it with a fork).

img_5590

Other yummy things that are nice on crêpes are chestnut spread (called “cream” on this label, but it is always dairy-free) and chocolate spreads (dark chocolate in the center and a chocolate-hazelnut version on the right). The chestnut and dark chocolate spreads are accidentally-vegan items and come from Franprix, while the Nuté+ is a vegan version of Nutella and can be found at most organic shops in France. Try chestnut and chocolate together on the same crêpe—it’s a great combination!

More variations: The possibilities are endless. Consider banana slices (might as well, if you’re already using chocolate!), applesauce, vegan apple honey, cubed fresh mango or pear, berries, white almond butter, jam, poppyseed paste, fresh fig with toasted walnuts. Top with some coconut whipped cream if you want to be fancy.

Short days in Scandinavia

I usually spend Christmas and New Year’s Eve either in Paris or back home with my parents and sister. But this year, for something different, I went north to Denmark, where my brother is now living. To make things more interesting (and give my trip a much smaller carbon footprint), I decided to travel there and back by train rather than flying. This took me through Germany (with stops in Hamburg and Hannover), which was fun as I hadn’t been there for a few years. And as I also spent an afternoon in Malmö, Sweden (only a half-hour from Copenhagen by train), this trip took me to three countries, two of them new to me. I love this about Europe—with these relatively small nations (compared to the US), it’s so easy to cross borders and experience other cultures and languages.

Another excuse for traveling by rail was the chance to take a train that crosses the Fehmarn Belt strait by ferry! Yes, it drives right into the ferry at Puttgarden, Germany alongside the cars and patiently waits for the boat to reach Rødby, Denmark on the other shore 45 minutes later. During this time, passengers must leave the train and go up the stairs to the upper levels of the boat, where a plethora of duty-free shops and pricey food services can be found.

When you get this far north at the end of December, the days are pretty short—the sun sets at about 3:30 pm. I was hoping that it would still be somewhere in the sky for the beginning of our ferry crossing, but some technical delays meant that we couldn’t get started until around 4 pm. So my photos are a bit dark (click on them for a larger view), but for a better look you can also check out this short video that someone made in the summer.

A good share of the vacation was spent cozily on the couch, indulging in movies with my brother and his wife and kids, with candles and plenty of popcorn (this was where the mysterious Danish hygge was to be found, for me). We watched some Christmas classics, such as A Child’s Christmas in Wales and The Shop Around the Corner, and some of our childhood favorites including Coming to America and The Muppets Take Manhattan. But there was of course also a Denmark outside waiting to be discovered!

Because I was in Copenhagen right in the middle of the holidays (plus a Monday), most museums and restaurants were closed, but I did manage to stroll through the city streets and also explore a bit of Freetown Christiania, a self-proclaimed autonomous neighborhood that happens to lie within the borders of Copenhagen. One restaurant I did get to visit (twice!) is SimpleRAW, which I highly recommend. Despite its name, it does offer a cooked burger plus another cooked dish of the day (dhal, the week I was there), and hot drinks like coffee, tea and matcha latte, of which I was very glad as it really was SO COLD outside. Their raw lime cheesecake was simply divine.

The weather was gray and drizzly most of the time, but I still managed to get some fun and colorful photos. Here’s a selection.

I took one afternoon to go and explore Malmö, Sweden, which as mentioned above is only a short train ride (more trains!) to the east of Copenhagen. Trains leave in both directions several times per hour, and the cost is only around €10. I loved Malmö, a very cute smallish town with lots of old-timey charm. It didn’t hurt that it was also a nice sunny day.

Thanks to some advance planning, I managed to visit two vegan restaurants that were not closed during the holiday period. First, Lotta Love Açaí Bar, where I had—what else?—a huge açaí bowl covered with fruit, nuts and cacao nibs. And later, Vegan Bar, which is more like a restaurant with a bar in it and offers a range of super yummy burgers, including a portobello mushroom one. I also happened upon a thrift shop with lots of cute things (candleholders, clothes and dishes that would have been perfect for my food photos). It was sad, but probably also lucky, that I couldn’t buy anything due to insufficient room in my suitcase (and my apartment!).

If you ever visit Malmö, don’t miss Lilla Torg, a little square with a lamp installation that is lit both at night and during the day, but is most interesting after sunset.

We also took a day trip to Denmark’s second-largest city, Aarhus, to visit the impressive ARoS Aarhus Kunstmuseum. Established in 1859, it is Denmark’s oldest public art museum outside Copenhagen. It has been especially attractive to visitors since 2011, with the addition of the circular skywalk installation Your Rainbow Panorama by Icelandic-Danish artist Ólafur Elíasson. Inside, we enjoyed various exhibits on multiple floors, most of them featuring Scandinavian artists apart from a temporary exhibition devoted to works by Portuguese artist Joana Vasconcelos.

The final excitement of my trip was the New Year’s Eve party with some friends of my brother, for which we made a huge dinner. My contributions included a spinach, red bell pepper and tomato quiche and some almond-apricot cupcakes decorated with toasted slivered almonds and edible gold dust. Everyone in the neighborhood was setting off fireworks the whole evening, but at midnight they multiplied their efforts by 10 and there was no break in the booming, crackling and colorful explosions of lights for a full 35 minutes.

Soon after that, I was back on the road (or rather, rail) again to return to Paris. I stopped for the night in Hannover, where I got to try out the highly acclaimed restaurant Hiller, and the next evening was home and reunited with Sésame, who greeted me with many kitty kisses.

Chocolate mendiants

It’s easy to get overly ambitious around Christmastime and to plan a number of grand meals and complicated desserts, only to wake up one day and realize it’s already the 23rd or 24th and you don’t have the right ingredients or enough time to make everything you wanted. This is especially likely to happen, for some reason, with dishes that you hope to bring to holiday parties, escalating your anxiety levels further. But never fear, your favorite blogger is here to the rescue! Today I bring you a very easy-to-make traditional French confectionery creation that will nevertheless impress just about everyone. And since the toppings can vary greatly, you might already have everything you need in your kitchen cupboards.

These little Yuletide delicacies hail from the south of France and the fruits and nuts traditionally used represent the colors of the robes worn by the friars in four mendicant orders during the Middle Ages. These are gray (raisins) for the Dominicans, brown (hazelnuts) for the Augustinians, white (almonds cut in half) for the Caramelites and purple (fig or cranberry) for the Franciscans. As these friars subsisted on charitable offerings, they were referred to as mendiants (beggars), and the confections took on the same name. These items are also among the 13 desserts served at the end of the traditional Christmas meal in Provence.

Today, many types and combinations of nuts and fruits are used, so feel free to use whatever you have on hand! I used walnuts, peanuts, pistachios, cranberries, physalis and pineapple.

Chocolate mendiants

Makes 12 to 15 mendiants

Ingredients

  • about 6 oz (180 g) dark chocolate in bar form (or chocolate chips)
  • toasted nuts (walnuts, peanuts, almonds, pistachios, macadamia, etc.)
  • dried fruit (cranberries, cherries, raisins, apricot, citrus segments, etc.)
  • other items such as pumpkin seeds, candied ginger, white chocolate chips, toasted coconut chips, colorful Christmas sprinkles, fleur de sel, gold leaf

Equipment needed: double-boiler or metal mixing bowl plus saucepan, parchment or waxed paper

img_4111_ed

Begin by assembling all the fruits and nuts you will use, so that you’re ready once the chocolate has melted.

img_4097_ed

Break or chop your chocolate bar into more or less evenly sized pieces.

img_4103_ed

Next, heat some water in a medium-sized saucepan and place a metal bowl on top of it (or a second, smaller saucepan for a double-boiler). Be sure that the water in the saucepan does not touch the bottom of the bowl or second saucepan. Place the chopped chocolate in it and heat, stirring occasionally with a heat-proof spatula.

img_4106_ed

Once all of the chocolate has melted, turn off the heat but keep the bowl on top of the saucepan full of hot water.

img_4113

Line a tray with parchment paper and, using a teaspoon (the kind you use to stir your coffee, not the measuring kind), form small, round disks. After creating them, go back and add a bit more on the top of each one to ensure that they are thick enough. Make only six at a time so that you have time to add all the toppings before the chocolate firms.

img_4114

Add your toppings. I like to start with the larger items and then add the other ones around them.

img_4115img_4117

Once you’ve finished the first batch, put the tray in the fridge and continue making mendiants until you have used up the rest of your chocolate. The mendiants will be set after an hour or two of chilling (allow two to three hours to be on the safe side).

img_4179_ed

Serve your mendiants on a platter at a party, or box them up as a gift!

img_4193_ed

These mendiants were my Christmas gift to the concierge of my building, who brings our mail to our doors and takes time out of her morning to give Sésame (who is in love with her) a thorough scratching and petting on the days when my mail includes a package. This year, I included some photos of the furry little guy, which she was delighted to receive (they now adorn her refrigerator door, I was told). 🙂

Variations: change things up with this white chocolate version!

Chocolate & peanut butter pies

10159After living in France for almost eight years now, and having traveled a lot before that, my sense of nationality and culture is somewhat fluid. I’m not French, but I also don’t really feel American anymore. Yet I still have a taste for certain American foods that are not always met with enthusiasm by people from other places. One of these is peanut butter. Often relegated to obscure shelves of mainstream French supermarkets, including the “world cuisines” section, peanut butter is not a guaranteed find at the average grocery store. And when you do encounter it, it’s sometimes quite expensive or not very good. But about a year ago I discovered a nice one from the Ethiquable brand in the fairtrade section of my local Franprix. It comes from a woman-inclusive cooperative in Nicaragua and isn’t any more expensive than most of its non-fairtrade (unfairtrade?) counterparts. And so, safe in the knowledge that I have this steady supply available, I have been freely experimenting with peanut-based recipes like Thai satay sauce, peanut-butter cheesecake (yep!) and of course, desserts with the magical peanut butter and chocolate combination, of which we will see an example below!

First, some history, and the answer to a pressing question. Is peanut butter actually from the United States? A widespread legend has it that it was invented by George Washington Carver (1864-1943), an American botanist and inventor who was born into slavery. But in 1884, before Carver had even begun studying botany, pharmacist Marcellus Gilmore Edson of Canada patented a process to make peanut paste. And much, much before that, as far back as the first century of the Common Era, the Aztecs also mashed roasted peanuts into a paste. So, it’s actually a Mexican-Canadian creation.

But Americans are still very fond of it. We are the world’s leading exporter and, according to this source, we eat around 700 million pounds (317 million kg) of peanut butter per year (about 3 pounds/1.4 kg per person). That’s not too hard to believe. When I was growing up, children brought their lunch to school, and very often it was a peanut butter and jelly sandwich. I carried mine proudly in my metal Pigs in Space lunchbox alongside carrot sticks and a Hostess cupcake. Now, peanut butter has apparently been banned from most schools due to the high number of kids with peanut allergies. I don’t understand how this allergy can have become so common, but that’s a matter for the experts to solve.

So the other week, I began experimenting with chocolate-avocado mousse, and the idea came to me to pair it with peanut butter in some way. I looked around my kitchen and spotted my set of mini-pie plates, and was on my way. The crust proved a bit tricky. My first version was made of ground almonds with peanut butter as a binder, but it wasn’t peanut-buttery enough for me. A second attempt with the addition of toasted millet (for crunch) wasn’t quite what I was looking for. Finally, a third try with a combination of ground roasted peanuts and ground almonds was just right. The rich-but-light texture and slight fruitiness of the mousse is nicely complimented by the earthy, salted peanut crunch of the crust.

As desserts go, this easy, no-bake recipe is definitely on the healthy side. It does contain fat (from the peanuts, avocado and coconut), but has no cholesterol or refined sweetener. And it packs a punch as far as protein goes, so the next time someone asks you where you get your protein, you know what to answer!

Chocolate & peanut butter pies

Makes two mini-pies (5 in./12 cm in diameter at widest point) 

Note: several hours before making this recipe, place the coconut cream/milk and your metal mixing bowl plus the beaters of your mixer in the refrigerator to chill. The lower temperature helps ensure a nice firm whip.

Ingredients

For the peanut crust

  • 1/2 cup (75 g) salted peanuts, whole (snack/party kind)
  • 2 tablespoons (12 g) ground almonds
  • 2 tablespoons peanut butter, either creamy or chunky
  • 1 teaspoon maple syrup

For the chocolate mousse filling

  • 1 large avocado (9 oz./250 g weighed when whole)
  • 2 tablespoons unsweetened cocoa powder
  • 2-3 tablespoons maple syrup, or more to taste
  • 1/2 teaspoon vanilla extract
  • small pinch salt

For the whipped coconut cream

  • 3/4 cup (200 ml) coconut milk (full-fat) or coconut cream, chilled
  • 1-2 tablespoons maple syrup
  • 1/4 teaspoon vanilla extract

For the garnish: roughly chopped bar chocolate, cocoa powder, finely chopped peanuts or gomasio

Equipment needed: food processor for the nuts, electric mixer with beaters to whip the cream, plastic wrap, mini-pie plates (or small bowls/ramekins)

img_3192

First, grind the peanuts by pulsing them just a few times. Be careful not to grind them too much, or (depending on the power of your processor) you could end up with something closer to peanut butter and the structure of the crust will not hold up as well. I stopped when my peanut chunks looked about like this (see next photo):

img_3193

Now add the ground almonds, peanut butter and maple syrup. Don’t be tempted to add more maple syrup, as it could make the crust too soggy. It’s okay if the crust is not especially sweet, since the filling and whipped cream will be.

img_3198

Combine the ingredients, mixing and pressing the mixture against the sides of the bowl with a large spoon or spatula (alternatively, knead with your hands) until you have a sort of sticky dough. Taste it at this point and if it seems to be lacking salt, for example if you have used a natural peanut butter that contains no salt, consider adding a small pinch.

Rip off a piece of plastic wrap that is the length of two mini-pie plates. Cover the inside of the pie plate with one end of it and press half of the crust dough into the plate as shown above. Be sure to fill the tops of the ridges well to get a nice result when the crust is unmolded. Then double the plastic wrap back over the top to cover the crust. Repeat with the second pie plate.  If you’re making the crusts well ahead of time, you can place them in the refrigerator to chill at this point, stacked together if space is a problem, but if you will be finishing and serving the dessert right away this step is not necessary.

img_3208

Cut the avocado in half, scoop out its flesh and transfer to your food processor. Add the cocoa powder, maple syrup, vanilla extract and salt. Process until smooth, stopping to scrape down the sides once or twice.

img_3209

Now you have your mousse! Taste it and add more maple syrup if you want it to be sweeter, and more vanilla or cocoa powder if it seems to need it (the results of different cocoa brands can vary). Process further if you have added something, and be sure that no chunks of avocado remain.

img_3226

Fill the crust with the mousse. The crust should still be in the pie plate at this point, as the filling process could make it crack if it were unsupported. Next, holding onto both sides of the plastic wrap, carefully lift the crust out of the pie plate and transfer it to a small dessert plate, removing the plastic.

img_3217

Take the pre-chilled coconut milk or cream, metal bowl and beaters out of the refrigerator. Transfer the milk or cream to the bowl. If using a can of coconut milk, stir the cream and liquid part together before measuring. Add the maple syrup and vanilla extract and beat on high speed until soft peaks appear (this will take a few minutes). Continue until you have reached the desired thickness, but be careful not to overbeat as it can become too thick. If this happens, do not despair as it can be salvaged—just continue beating and it will eventually revert to a more liquid state (unlike overwhipped dairy cream, which turns into butter!).

When ready to serve the dessert, top each pie with a dollop of the cream and decorate the top with a garnish of roughly chopped bar chocolate, a sprinkle of cocoa powder, some finely chopped peanuts or a pinch of gomasio.

img_3241

Note that the avocado will begin to oxidize and darken upon contact with the air, so it is best to fill the crusts not long before they will be served. Alternatively, if the top has already darkened, you could opt to cover the entire top with the whipped cream. The lighter color of the mousse inside would then not be noticeably different from the color of the top, and you would also have an interesting tiramisu effect.

img_3289

Variations:

  • Make the crust with ground almonds and almond butter (no peanuts) for a chocolate & almond version.
  • Add banana to the mousse for a tropical flavor.
  • Serve parfait-style in clear glasses so that the various layers show, alternating with additional layers of whipped cream and chocolate mousse.

Sri Lankan purple yam porridge

On a recent trip to my favorite cash & carry in the South Asian neighborhood, inspired purely by the photo on the shelf, I picked up a new (to me) vegetable to experiment with. It looked like some kind of great-grandfather root with rhinoscerosy skin, halfway between sweet potato and celeriac. A Google search later on informed me that it’s a purple yam, and that its Latin name is Dioscorea alata. It’s native to Southeast Asia but now also grows in other parts of the world including South America, Australia, China, Africa and the southeast US. Its Tamil name, used on the label in this Sri Lankan shop, is rasa valli kilangu, while in Yoruba, a language of southwestern Nigeria, it’s called isu ewura and in the Philippines it’s ube. The purple yam has apparently gained some fame among Western foodies under this name.

In folk medicine, Dioscorea alata is thought to be effective at treating ailments such as fever, leprosy and hemorrhoids. Some even believe that consuming it increases the likelihood of bearing twins!

rasavalli-on-shelf

In Sri Lanka, the purple yam is often cooked and mashed to make a sweet dish. As it contains a lot of starch, it can also be formed in a mold rather like polenta, and then cut it into slices or other shapes.

For my first experiment with this tuber, I decided to try the basic mashed form. As it doesn’t have much flavor on its own, this yam benefits from a bit of vanilla and/or cardamom (the latter being a traditional ingredient in the Sri Lankan dish). The end result is a slightly sweet mash that seems ideal for breakfast, so I am calling it a porridge. Warm and filling, it could become your new favorite comfort food.

Incidentally, I was disappointed at first that my rasa valli, once peeled, turned out not to be the bright magenta promised by the label photo, but rather a light lavender color. Maybe some are just more purple than others. But lavender is nice too—one of my favorite colors actually. So it’s okay. It’s still sort of (vaguely) in the red-violet range, and therefore acceptable enough for the first recipe to appear on this blog.

dsc_0195b

Sri Lankan purple yam porridge

Serves 2 (as a fairly filling breakfast)

Ingredients

  • 3 cups (350 g) peeled and cubed purple yam (one large yam)
  • 1/2 cup (118 ml) coconut milk from a can, some cream from top of can reserved
  • 2 tablespoons maple syrup
  • 2 teaspoons vanilla extract
  • pinch of salt
  • 1/2 teaspoon ground cardamom (optional)
  • optional garnishes: cardamom, powdered açaí, dried coconut, edible lavender flowers

Begin by peeling the yam. Caution: these yams are quite slippery characters once peeled, and will want to suddenly fly out of your grasp and across the kitchen!

dsc_0204b

Chop the yam into evenly sized cubes.

dsc_0208b

Next, place the cubed yam in a medium-sized saucepan and fill it with enough water to cover it. Bring to a boil, then lower the heat to maintain a gentle simmer. After about 20-25 minutes, test the yam for doneness with a fork. When the cubes seem mashable, turn off the heat and drain most of the water from the pan. With a hand-held potato masher (or large fork), mash the cubes until you have something that resembles mashed potatoes. Alternatively, you could process them with an immersion blender or in a food processor, but they will be so soft that this isn’t really necessary, and the partially chunky texture is kind of nice.

dsc_0225b

Open up a can of regular (not reduced-fat) coconut milk. Remove a couple tablespoons of the thick cream from the top, transfer to a small bowl, mix with a bit of maple syrup and set aside. This will be the topping.

Stir the rest of the coconut milk in the can so that the watery part at the bottom combines with the thicker part toward the top. Add about 1/2 cup (118 ml) of the mixed coconut milk to the saucepan and turn on the heat again to medium-low. Use a bit more if you want the porridge to be more liquidy.

dsc_0227b

Continue mashing the yam together with the coconut milk until you achieve a uniform consistency. Now add the maple syrup, vanilla, salt and optional cardamom and combine well. Taste and add more maple syrup and cardamom if you prefer it sweeter or with a stronger cardamom flavor. Alternatively, you can drizzle extra maple syrup on top of the porridge once it has been transferred to the bowls.

dsc_0230c

Transfer the porridge to two medium-sized bowls (or one larger bowl to share, for romantic types!) and top with the reserved sweetened coconut cream, which will melt a bit. Garnish with added ground cardamom, ground açaí (shown here), dried coconut or edible lavender flowers. Enjoy!

Variations: use regular yams or sweet potatoes, vary the spices (cinnamon, nutmeg, etc.), add golden raisins or chunks of fruit.